


LATEST RECIPES


LET'S GET COOKING!
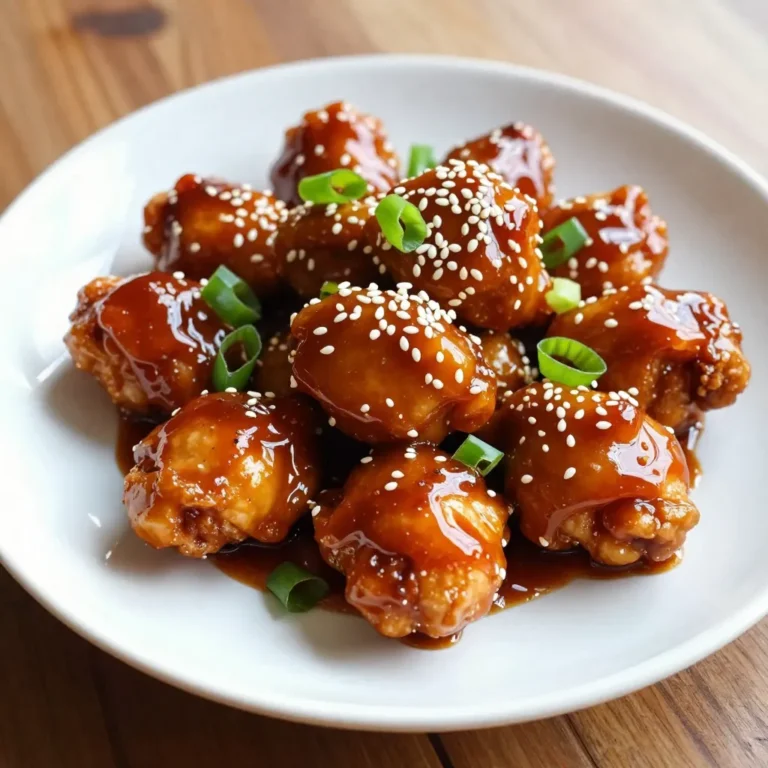
Air Fryer Buffalo Chicken Bites Crispy and Flavorful
If you crave crispy, savory snacks, you need these Air Fryer Buffalo Chicken Bites. They pack a punch of flavor and crunch, perfect for game...
Read Full Recipe →