Raspberry Lemon Yogurt Popsicles Refreshing Summer Treat

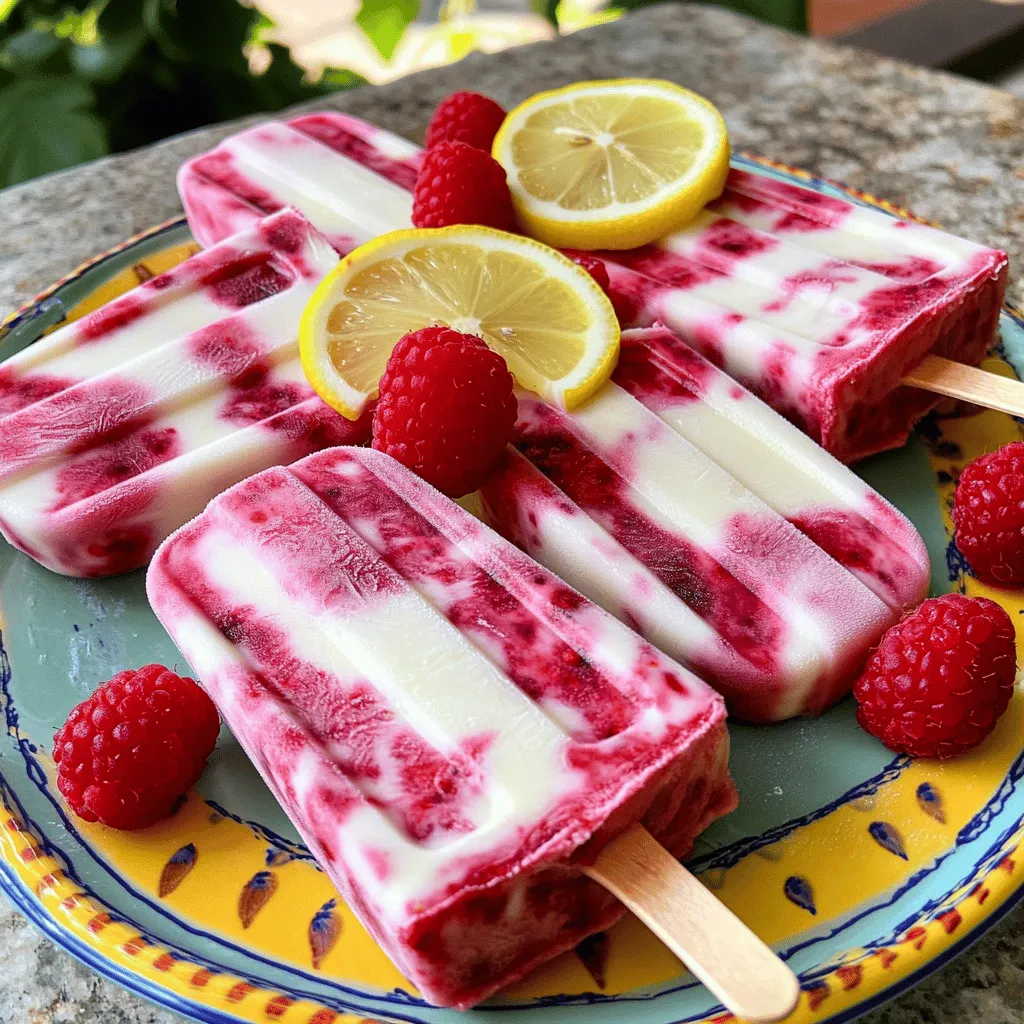
Looking for a cool treat to beat the summer heat? These Raspberry Lemon Yogurt Popsicles are your answer! Packed with fresh flavors, they are simple to make and bursting with tangy goodness. With just a few key ingredients, you can create a refreshing snack that everyone will love. Join me as we dive into this easy recipe that’s perfect for hot days or any time you crave something delicious!

You need 2 cups of fresh raspberries for this recipe. Raspberries are sweet and tart. They add bright flavor and color to the popsicles. Choose ripe ones for the best taste. You can mash them or blend them to make a smooth puree. One cup of plain Greek yogurt gives creaminess to the popsicles. It provides a nice tang that pairs well with the fruit. Greek yogurt is thick and rich. Using it makes your popsicles feel indulgent and satisfying. For sweetness, use 1/2 cup of honey or maple syrup. Honey offers a floral note, while maple syrup gives a deeper flavor. Choose based on your taste. You can also adjust the amount to fit your sweetness level. You need 1/2 cup of freshly squeezed lemon juice. This adds a zesty kick to the mixture. The acidity helps balance the sweetness from the honey or maple syrup. Fresh juice tastes much better than bottled juice. Use 1 teaspoon of lemon zest to enhance the lemon flavor. The zest contains essential oils that give a bright aroma. It also adds visual appeal with tiny flecks of yellow in the popsicles. Add a pinch of salt to the yogurt mixture. Salt helps bring out the flavors in the popsicles. It balances the sweetness and adds depth to each bite. Just a small amount makes a big difference! Start by adding 2 cups of fresh raspberries and 1/2 cup of honey to a blender. Blend until smooth. If you want a seedless puree, pour the mixture through a fine mesh sieve. Press with a spatula to get all the juice. Set the raspberry puree aside. This bright, tart flavor is key to your popsicles. In a medium mixing bowl, whisk together 1 cup of plain Greek yogurt, 1/2 cup of freshly squeezed lemon juice, 1 teaspoon of lemon zest, and a pinch of salt. Mix until it is smooth and creamy. This tangy yogurt base will balance the sweet raspberry puree. Prepare your popsicle mold for layering. Pour a small amount of the yogurt mixture into each mold. Fill them about one-third full. This is your first creamy layer. Then, add a layer of the raspberry puree on top. Use a skewer to gently swirl the two mixtures together for a marbled effect. Continue layering the popsicles. Pour more yogurt mixture to fill each mold two-thirds full. Then, add the last layer of raspberry puree until full. Insert popsicle sticks into the center of each mold. Carefully place the filled molds in the freezer. Let them freeze for at least 4 to 6 hours, or until solid. Once frozen, it’s time to enjoy your popsicles! To remove them, run warm water over the outside of the mold for a few seconds. This will help loosen them for easy removal. Now, you can savor your homemade Raspberry Lemon Yogurt Popsicles! To get the best texture, blend the raspberries smoothly. If you want no seeds, strain the puree. The Greek yogurt gives a creamy feel. Whisk it well with lemon juice and zest. This mix should be smooth and thick. The key is to layer the mixtures well. It creates a nice look and texture when frozen. You can adjust sweetness based on your taste. If you like it sweeter, add more honey. Maple syrup works well if you want a vegan option. For more flavor, try adding vanilla extract or mint. You can also mix in other fruits like strawberries or blueberries. This makes the popsicles even more exciting! You will need a few basic tools. First, get a blender for the raspberry puree. A medium mixing bowl is essential for the yogurt mix. Use a popsicle mold to shape the treats. Popsicle sticks help hold them while freezing. Lastly, have a spatula handy for easy mixing and pouring. These tools will make your process quick and easy! {{image_4}} To make a dairy-free version, you can use coconut yogurt instead of Greek yogurt. This keeps the popsicles creamy and delicious. Coconut yogurt also adds a subtle tropical flavor. You can find this yogurt at most grocery stores. You can mix in other fruits to change the flavor. Strawberries, blueberries, or peaches work well. Simply blend the fruits and follow the same steps. You can layer them with the raspberry and yogurt mixtures for a fun look. Experimenting with different zest can add unique tastes. Orange or lime zest can replace lemon zest. Each option gives a new twist to your popsicles. Try combining different zests for a layered flavor experience. To get the best popsicles, freeze them properly. Use a popsicle mold designed for freezing. Fill each slot carefully, leaving a little space at the top. This allows the mixture to expand while freezing. Place the mold on a flat surface in your freezer. This ensures they freeze evenly. Once your popsicles are frozen solid, you need to store them well. Use airtight containers or freezer bags. Wrap each popsicle in plastic wrap for extra protection. This keeps them safe from freezer burn. Label the containers with the date for easy tracking. Raspberry Lemon Yogurt Popsicles can last about two months in the freezer. After that, they may lose flavor and texture. For the best taste, enjoy them within the first month. Always check for ice crystals or freezer burn before enjoying. If they look or smell off, it’s best to toss them. To stop popsicles from sticking, run warm water over the mold. This warms the outside and helps release the popsicles. You can also lightly grease the molds with a tiny bit of oil before adding the mixture. Just a little will work. Yes, you can use frozen raspberries. They will blend well and still taste great. Just be sure to let them thaw slightly for easier blending. The texture might be a bit different, but the flavor will still shine through. These popsicles can last up to two months in the freezer. Just make sure to store them in an airtight container. This keeps them fresh and prevents freezer burn. Absolutely! You can use strawberries, blueberries, or peaches. Just blend them the same way as the raspberries. Feel free to mix and match for fun flavors! Yes, these popsicles are a healthy treat. They use Greek yogurt, which is rich in protein, and fresh fruit, which adds vitamins. Use honey or maple syrup for natural sweetness, and they are lower in sugar than store-bought pops. In this post, we explored how to make delicious Raspberry Lemon Yogurt Popsicles. We covered key ingredients like fresh raspberries, Greek yogurt, and sweeteners. I shared steps to prepare the puree, mix the yogurt, and freeze the popsicles. Plus, we discussed tips for texture and customizing flavors, along with storage advice. These popsicles are not just tasty; they're also flexible for your dietary needs. Enjoying this treat can be fun and healthy. Give this recipe a try, and let the flavors brighten your day!

Ingredients

Fresh Raspberries

You need 2 cups of fresh raspberries for this recipe. Raspberries are sweet and tart. They add bright flavor and color to the popsicles. Choose ripe ones for the best taste. You can mash them or blend them to make a smooth puree.

Greek Yogurt

One cup of plain Greek yogurt gives creaminess to the popsicles. It provides a nice tang that pairs well with the fruit. Greek yogurt is thick and rich. Using it makes your popsicles feel indulgent and satisfying.

Honey or Maple Syrup

For sweetness, use 1/2 cup of honey or maple syrup. Honey offers a floral note, while maple syrup gives a deeper flavor. Choose based on your taste. You can also adjust the amount to fit your sweetness level.

Freshly Squeezed Lemon Juice

You need 1/2 cup of freshly squeezed lemon juice. This adds a zesty kick to the mixture. The acidity helps balance the sweetness from the honey or maple syrup. Fresh juice tastes much better than bottled juice.

Lemon Zest

Use 1 teaspoon of lemon zest to enhance the lemon flavor. The zest contains essential oils that give a bright aroma. It also adds visual appeal with tiny flecks of yellow in the popsicles.

Pinch of Salt

Add a pinch of salt to the yogurt mixture. Salt helps bring out the flavors in the popsicles. It balances the sweetness and adds depth to each bite. Just a small amount makes a big difference!

Step-by-Step Instructions

Preparing the Raspberry Puree

Start by adding 2 cups of fresh raspberries and 1/2 cup of honey to a blender. Blend until smooth. If you want a seedless puree, pour the mixture through a fine mesh sieve. Press with a spatula to get all the juice. Set the raspberry puree aside. This bright, tart flavor is key to your popsicles.

Making the Yogurt Mixture

In a medium mixing bowl, whisk together 1 cup of plain Greek yogurt, 1/2 cup of freshly squeezed lemon juice, 1 teaspoon of lemon zest, and a pinch of salt. Mix until it is smooth and creamy. This tangy yogurt base will balance the sweet raspberry puree.

Layering in the Popsicle Mold

Prepare your popsicle mold for layering. Pour a small amount of the yogurt mixture into each mold. Fill them about one-third full. This is your first creamy layer. Then, add a layer of the raspberry puree on top. Use a skewer to gently swirl the two mixtures together for a marbled effect.

Freezing the Popsicles

Continue layering the popsicles. Pour more yogurt mixture to fill each mold two-thirds full. Then, add the last layer of raspberry puree until full. Insert popsicle sticks into the center of each mold. Carefully place the filled molds in the freezer. Let them freeze for at least 4 to 6 hours, or until solid.

Removing from the Mold

Once frozen, it’s time to enjoy your popsicles! To remove them, run warm water over the outside of the mold for a few seconds. This will help loosen them for easy removal. Now, you can savor your homemade Raspberry Lemon Yogurt Popsicles!

Tips & Tricks

Achieving the Perfect Texture

To get the best texture, blend the raspberries smoothly. If you want no seeds, strain the puree. The Greek yogurt gives a creamy feel. Whisk it well with lemon juice and zest. This mix should be smooth and thick. The key is to layer the mixtures well. It creates a nice look and texture when frozen.

Customizing Sweetness and Flavors

You can adjust sweetness based on your taste. If you like it sweeter, add more honey. Maple syrup works well if you want a vegan option. For more flavor, try adding vanilla extract or mint. You can also mix in other fruits like strawberries or blueberries. This makes the popsicles even more exciting!

Tools and Equipment Needed

You will need a few basic tools. First, get a blender for the raspberry puree. A medium mixing bowl is essential for the yogurt mix. Use a popsicle mold to shape the treats. Popsicle sticks help hold them while freezing. Lastly, have a spatula handy for easy mixing and pouring. These tools will make your process quick and easy!

Variations

Dairy-Free Version

To make a dairy-free version, you can use coconut yogurt instead of Greek yogurt. This keeps the popsicles creamy and delicious. Coconut yogurt also adds a subtle tropical flavor. You can find this yogurt at most grocery stores.

Additional Fruit Options

You can mix in other fruits to change the flavor. Strawberries, blueberries, or peaches work well. Simply blend the fruits and follow the same steps. You can layer them with the raspberry and yogurt mixtures for a fun look.

Trying Different Zest Flavors

Experimenting with different zest can add unique tastes. Orange or lime zest can replace lemon zest. Each option gives a new twist to your popsicles. Try combining different zests for a layered flavor experience.

Storage Info

Freezing Tips

To get the best popsicles, freeze them properly. Use a popsicle mold designed for freezing. Fill each slot carefully, leaving a little space at the top. This allows the mixture to expand while freezing. Place the mold on a flat surface in your freezer. This ensures they freeze evenly.

Best Storage Containers

Once your popsicles are frozen solid, you need to store them well. Use airtight containers or freezer bags. Wrap each popsicle in plastic wrap for extra protection. This keeps them safe from freezer burn. Label the containers with the date for easy tracking.

Shelf Life of Popsicles

Raspberry Lemon Yogurt Popsicles can last about two months in the freezer. After that, they may lose flavor and texture. For the best taste, enjoy them within the first month. Always check for ice crystals or freezer burn before enjoying. If they look or smell off, it’s best to toss them.

FAQs

How do I prevent popsicles from sticking to the mold?

To stop popsicles from sticking, run warm water over the mold. This warms the outside and helps release the popsicles. You can also lightly grease the molds with a tiny bit of oil before adding the mixture. Just a little will work.

Can I use frozen raspberries instead of fresh?

Yes, you can use frozen raspberries. They will blend well and still taste great. Just be sure to let them thaw slightly for easier blending. The texture might be a bit different, but the flavor will still shine through.

How long do Raspberry Lemon Yogurt Popsicles last in the freezer?

These popsicles can last up to two months in the freezer. Just make sure to store them in an airtight container. This keeps them fresh and prevents freezer burn.

Can I substitute other fruits in this recipe?

Absolutely! You can use strawberries, blueberries, or peaches. Just blend them the same way as the raspberries. Feel free to mix and match for fun flavors!

Are these popsicles healthy?

Yes, these popsicles are a healthy treat. They use Greek yogurt, which is rich in protein, and fresh fruit, which adds vitamins. Use honey or maple syrup for natural sweetness, and they are lower in sugar than store-bought pops.

In this post, we explored how to make delicious Raspberry Lemon Yogurt Popsicles. We covered key ingredients like fresh raspberries, Greek yogurt, and sweeteners. I shared steps to prepare the puree, mix the yogurt, and freeze the popsicles. Plus, we discussed tips for texture and customizing flavors, along with storage advice.

These popsicles are not just tasty; they’re also flexible for your dietary needs. Enjoying this treat can be fun and healthy. Give this recipe a try, and let the flavors brighten your day!

You need 2 cups of fresh raspberries for this recipe. Raspberries are sweet and tart. They add bright flavor and color to the popsicles. Choose ripe ones for the best taste. You can mash them or blend them to make a smooth puree. One cup of plain Greek yogurt gives creaminess to the popsicles. It provides a nice tang that pairs well with the fruit. Greek yogurt is thick and rich. Using it makes your popsicles feel indulgent and satisfying. For sweetness, use 1/2 cup of honey or maple syrup. Honey offers a floral note, while maple syrup gives a deeper flavor. Choose based on your taste. You can also adjust the amount to fit your sweetness level. You need 1/2 cup of freshly squeezed lemon juice. This adds a zesty kick to the mixture. The acidity helps balance the sweetness from the honey or maple syrup. Fresh juice tastes much better than bottled juice. Use 1 teaspoon of lemon zest to enhance the lemon flavor. The zest contains essential oils that give a bright aroma. It also adds visual appeal with tiny flecks of yellow in the popsicles. Add a pinch of salt to the yogurt mixture. Salt helps bring out the flavors in the popsicles. It balances the sweetness and adds depth to each bite. Just a small amount makes a big difference! Start by adding 2 cups of fresh raspberries and 1/2 cup of honey to a blender. Blend until smooth. If you want a seedless puree, pour the mixture through a fine mesh sieve. Press with a spatula to get all the juice. Set the raspberry puree aside. This bright, tart flavor is key to your popsicles. In a medium mixing bowl, whisk together 1 cup of plain Greek yogurt, 1/2 cup of freshly squeezed lemon juice, 1 teaspoon of lemon zest, and a pinch of salt. Mix until it is smooth and creamy. This tangy yogurt base will balance the sweet raspberry puree. Prepare your popsicle mold for layering. Pour a small amount of the yogurt mixture into each mold. Fill them about one-third full. This is your first creamy layer. Then, add a layer of the raspberry puree on top. Use a skewer to gently swirl the two mixtures together for a marbled effect. Continue layering the popsicles. Pour more yogurt mixture to fill each mold two-thirds full. Then, add the last layer of raspberry puree until full. Insert popsicle sticks into the center of each mold. Carefully place the filled molds in the freezer. Let them freeze for at least 4 to 6 hours, or until solid. Once frozen, it’s time to enjoy your popsicles! To remove them, run warm water over the outside of the mold for a few seconds. This will help loosen them for easy removal. Now, you can savor your homemade Raspberry Lemon Yogurt Popsicles! To get the best texture, blend the raspberries smoothly. If you want no seeds, strain the puree. The Greek yogurt gives a creamy feel. Whisk it well with lemon juice and zest. This mix should be smooth and thick. The key is to layer the mixtures well. It creates a nice look and texture when frozen. You can adjust sweetness based on your taste. If you like it sweeter, add more honey. Maple syrup works well if you want a vegan option. For more flavor, try adding vanilla extract or mint. You can also mix in other fruits like strawberries or blueberries. This makes the popsicles even more exciting! You will need a few basic tools. First, get a blender for the raspberry puree. A medium mixing bowl is essential for the yogurt mix. Use a popsicle mold to shape the treats. Popsicle sticks help hold them while freezing. Lastly, have a spatula handy for easy mixing and pouring. These tools will make your process quick and easy! {{image_4}} To make a dairy-free version, you can use coconut yogurt instead of Greek yogurt. This keeps the popsicles creamy and delicious. Coconut yogurt also adds a subtle tropical flavor. You can find this yogurt at most grocery stores. You can mix in other fruits to change the flavor. Strawberries, blueberries, or peaches work well. Simply blend the fruits and follow the same steps. You can layer them with the raspberry and yogurt mixtures for a fun look. Experimenting with different zest can add unique tastes. Orange or lime zest can replace lemon zest. Each option gives a new twist to your popsicles. Try combining different zests for a layered flavor experience. To get the best popsicles, freeze them properly. Use a popsicle mold designed for freezing. Fill each slot carefully, leaving a little space at the top. This allows the mixture to expand while freezing. Place the mold on a flat surface in your freezer. This ensures they freeze evenly. Once your popsicles are frozen solid, you need to store them well. Use airtight containers or freezer bags. Wrap each popsicle in plastic wrap for extra protection. This keeps them safe from freezer burn. Label the containers with the date for easy tracking. Raspberry Lemon Yogurt Popsicles can last about two months in the freezer. After that, they may lose flavor and texture. For the best taste, enjoy them within the first month. Always check for ice crystals or freezer burn before enjoying. If they look or smell off, it’s best to toss them. To stop popsicles from sticking, run warm water over the mold. This warms the outside and helps release the popsicles. You can also lightly grease the molds with a tiny bit of oil before adding the mixture. Just a little will work. Yes, you can use frozen raspberries. They will blend well and still taste great. Just be sure to let them thaw slightly for easier blending. The texture might be a bit different, but the flavor will still shine through. These popsicles can last up to two months in the freezer. Just make sure to store them in an airtight container. This keeps them fresh and prevents freezer burn. Absolutely! You can use strawberries, blueberries, or peaches. Just blend them the same way as the raspberries. Feel free to mix and match for fun flavors! Yes, these popsicles are a healthy treat. They use Greek yogurt, which is rich in protein, and fresh fruit, which adds vitamins. Use honey or maple syrup for natural sweetness, and they are lower in sugar than store-bought pops. In this post, we explored how to make delicious Raspberry Lemon Yogurt Popsicles. We covered key ingredients like fresh raspberries, Greek yogurt, and sweeteners. I shared steps to prepare the puree, mix the yogurt, and freeze the popsicles. Plus, we discussed tips for texture and customizing flavors, along with storage advice. These popsicles are not just tasty; they're also flexible for your dietary needs. Enjoying this treat can be fun and healthy. Give this recipe a try, and let the flavors brighten your day!

Raspberry Lemon Yogurt Popsicles

Cool off this summer with our delicious Raspberry Lemon Yogurt Popsicles! Packed with fresh raspberries and creamy Greek yogurt, these pops are easy to make and the perfect treat. With just a few simple ingredients, you can create a refreshing dessert that will impress your friends and family.

Ingredients
  

2 cups fresh raspberries

1 cup plain Greek yogurt

1/2 cup honey (or maple syrup for a vegan option)

1/2 cup freshly squeezed lemon juice

1 teaspoon lemon zest

A pinch of salt

Instructions
 

Begin by adding the fresh raspberries and honey to a blender. Blend until you achieve a smooth consistency. If you prefer a seedless puree, pour the mixture through a fine mesh sieve and press with a spatula to extract the juice. Set the strained raspberry puree aside.

    In a medium mixing bowl, whisk together the Greek yogurt, freshly squeezed lemon juice, lemon zest, and a pinch of salt until the mixture is smooth and well combined. This creates a tangy and creamy base for your popsicles.

      Prepare your popsicle mold by starting with a layering technique. Pour a small amount of the yogurt mixture into each popsicle slot, filling them about one-third of the way. This will be the first creamy layer.

        Next, add a layer of the reserved raspberry puree on top of the yogurt mixture in each mold. For a beautiful marbled effect, use a skewer or a small spoon to gently swirl the two mixtures together.

          Continue the layering process: pour another layer of the yogurt mixture to fill each mold two-thirds full, followed by a final layer of raspberry puree until the molds are filled to the brim.

            Insert popsicle sticks into the center of each mold, ensuring they stand upright. Carefully transfer the filled molds to the freezer. Allow them to freeze for at least 4 to 6 hours, or until the popsicles are completely solid.

              Once frozen, to release the popsicles, run warm water over the outside of the popsicle mold for a few seconds. This will help to loosen them for easy removal.

                Prep Time: 15 minutes | Total Time: 6 hours | Servings: 6 popsicles

                  - Serving Suggestions: Present the popsicles on vibrant plates or in tall glasses, garnished with extra fresh raspberries and a slice of lemon. This not only enhances the visual appeal but also contributes to a refreshing experience on warm days. Enjoy your delightful treat!