WANT TO SAVE THIS RECIPE?
If you love cozy baking and rich flavors, you’ll adore my Chocolate Hazelnut Thumbprint Cookies. This recipe combines sweet hazelnut chocolate with a soft, buttery cookie that melts in your mouth. You don’t need to be a pro to make these treats. With simple steps and easy-to-find ingredients, you’ll impress friends and family in no time. Ready to create some cookie magic? Let’s dive in!

Why I Love This Recipe
- Decadent Flavor: These cookies combine rich chocolate and nutty hazelnut flavors, creating a delightful treat that’s hard to resist.
- Easy to Make: This recipe is straightforward with simple steps, making it perfect for bakers of all skill levels.
- Perfect for Sharing: With a yield of 24 cookies, they’re great for gatherings, holiday parties, or simply sharing with friends and family.
- Customizable: You can easily adjust the filling or add different toppings to suit your personal taste or occasion.
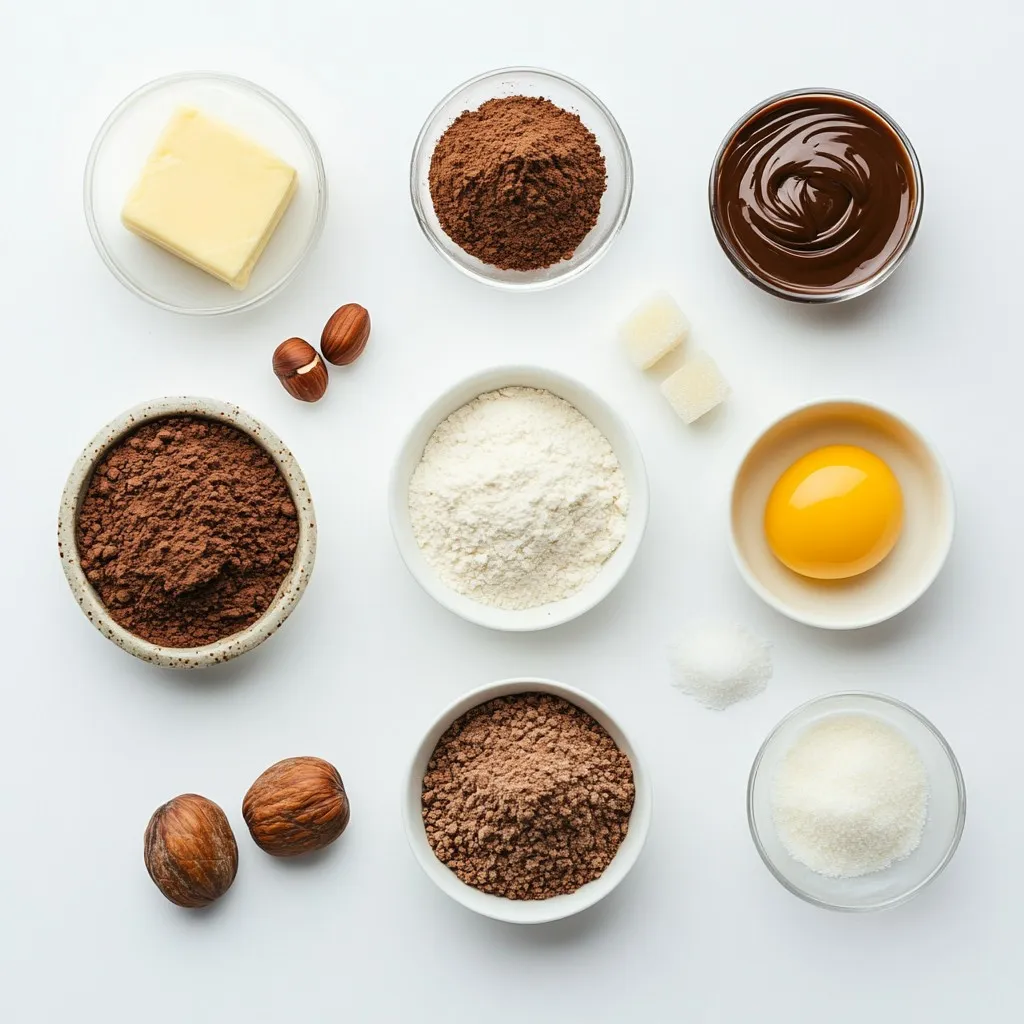
Ingredients
List of Ingredients
– 1 cup all-purpose flour
– 1/2 cup unsweetened cocoa powder
– 1/2 teaspoon baking soda
– 1/4 teaspoon salt
– 1/2 cup unsalted butter, softened
– 1/2 cup granulated sugar
– 1/2 cup packed brown sugar
– 1 large egg
– 1 teaspoon pure vanilla extract
– 1/2 cup hazelnuts, toasted and finely chopped
– 1/2 cup chocolate hazelnut spread
– Additional granulated sugar for rolling
Preparation Notes on Ingredients
Make sure the butter is at room temperature. This helps it mix well with the sugars. If you forget to take it out, you can cut it into small pieces to speed up softening. Toasting the hazelnuts is key for flavor. Just place them in a dry pan over medium heat. Stir them for about 5 minutes until they smell nutty. Let them cool before chopping.
Substitute Options for Ingredients
If you need a gluten-free option, use almond flour instead of all-purpose flour. For cocoa powder, you can use carob powder for a different flavor. If you want a dairy-free version, replace the butter with coconut oil. You can also use sunflower seed butter if you can’t have hazelnuts. Lastly, maple syrup can replace granulated sugar but will change the texture slightly.
Step-by-Step Instructions
Prepping the Oven and Baking Sheet
First, you need to preheat your oven to 350°F (175°C). This step ensures your cookies bake evenly. While the oven warms up, grab a baking sheet. Line it with parchment paper. This keeps the cookies from sticking. It’s simple but very important.
Making the Cookie Dough
Now, let’s make the dough. In a medium bowl, whisk together these dry ingredients:
– 1 cup all-purpose flour
– 1/2 cup unsweetened cocoa powder
– 1/2 teaspoon baking soda
– 1/4 teaspoon salt
Set this bowl aside. In a large bowl, use an electric mixer to cream:
– 1/2 cup unsalted butter, softened
– 1/2 cup granulated sugar
– 1/2 cup packed brown sugar
Mix until it’s light and fluffy. This takes about 2-3 minutes. Next, add in:
– 1 large egg
– 1 teaspoon pure vanilla extract
Beat until smooth. Now, slowly add the dry mixture to the wet. Stir gently until just combined. Be careful not to overmix. The dough should be thick and hold together well. Lastly, fold in:
– 1/2 cup hazelnuts, toasted and finely chopped
This adds a nice crunch.
Forming and Baking the Cookies
Now it’s time to shape the cookies. Scoop out small portions of dough, about 1 inch wide. Roll them into balls. Roll each dough ball in granulated sugar. Place them on the baking sheet, leaving about 2 inches between them.
Next, create a gentle indent in each ball using your thumb or a small spoon. This is where the chocolate hazelnut spread will go. Fill each thumbprint with about 1/2 teaspoon of spread.
Bake the cookies for 10-12 minutes. You’ll know they are done when the edges are set and the tops have small cracks. After baking, let them cool on the sheet for 5 minutes. Then, move them to a wire rack to cool down fully. Enjoy the delightful aroma while they cool!
Tips & Tricks
Achieving the Perfect Cookie Texture
To get the best cookie, focus on these tips. First, soften the butter well. It helps to mix it easily with the sugars. Cream the butter and sugars until they look light and fluffy. This step adds air, making cookies soft. When you mix in the dry ingredients, do not overmix. Stop as soon as it comes together. This helps keep your cookies tender.
Common Mistakes to Avoid
Watch out for these common mistakes. One big mistake is using cold butter. Always make sure it is at room temperature. Another mistake is not measuring ingredients properly. Use a kitchen scale if you have one. This way, you get the right amounts. Finally, do not bake cookies too long. They should look set but still soft in the center.
Decorating and Presenting Your Cookies
Make your cookies shine when serving them. Arrange them on a nice platter to show them off. For a special touch, drizzle a bit of chocolate hazelnut spread on top. You can also dust them with powdered sugar for a snowy look. Serve them with hot cocoa or milk. This makes a cozy treat everyone will love.
Pro Tips
- Use Fresh Ingredients: Ensure your hazelnuts are fresh and toasted just before using them for the best flavor and crunch.
- Chill the Dough: If the dough feels too soft, refrigerate it for 15-20 minutes before rolling to make shaping easier.
- Perfect Indent: Use the back of a measuring spoon for a uniform indent size, ensuring enough space for the chocolate hazelnut spread.
- Storage Tips: Store cookies in an airtight container at room temperature for up to a week; they also freeze well for longer storage.
Variations
Different Fillings for Thumbprints
You can switch up the filling in thumbprint cookies to keep things fun. Try using fruit jams, like raspberry or apricot, for a fruity twist. A creamy peanut butter or almond butter can add a rich flavor. If you love caramel, that works great too! Just remember to keep the filling about 1/2 teaspoon, so it fits nicely.
Flavor Additions and Mix-Ins
Adding new flavors can really change your cookies. Mix in some spices like cinnamon or cardamom for warmth. You can also add a pinch of sea salt on top for a sweet and salty combo. If you want a crunch, toss in some chocolate chips or dried fruit. The options are endless, and you can get creative!
Gluten-Free or Vegan Modifications
Making these cookies gluten-free is easy. Just use gluten-free flour instead of all-purpose flour. For a vegan version, swap the egg for a flax egg made from ground flaxseed and water. Use a vegan butter alternative and a dairy-free chocolate hazelnut spread. Your cookies will still taste amazing, and everyone can enjoy them!
Storage Info
How to Store the Cookies Properly
To keep your chocolate hazelnut thumbprint cookies fresh, store them in an airtight container. This will help them stay soft and tasty. Place a piece of wax paper between layers if you stack them. Keep the container in a cool, dry place, away from sunlight.
Freezing Tips for Cookie Dough and Baked Cookies
You can freeze both the cookie dough and the baked cookies. For the dough, scoop it into balls and flash freeze on a baking sheet. Once firm, transfer the balls into a freezer bag. They can last up to three months in the freezer. For baked cookies, let them cool completely before wrapping them tightly in plastic wrap. Place them in a freezer-safe container. They also last about three months.
Shelf Life of Chocolate Hazelnut Thumbprint Cookies
When stored properly, these cookies stay fresh for about one week at room temperature. If you keep them in the fridge, they can last up to two weeks. Always check for any signs of spoilage before eating. Enjoy these sweet treats while they are at their best!
FAQs
How long do these cookies stay fresh?
These cookies stay fresh for about one week. Keep them in an airtight container. This helps keep them soft and tasty. If you want them to last longer, you can freeze them. They freeze well for up to three months.
Can I use other types of nuts?
Yes, you can use other nuts. Walnuts or pecans work well in this recipe. Just chop them finely like you would with hazelnuts. Each nut will bring its own flavor, making the cookies unique.
What can I use instead of chocolate hazelnut spread?
You can use peanut butter or almond butter. These spreads will change the taste, but they will still be good. Look for a nut butter that is smooth to make filling easier.
Can I make this recipe ahead of time?
Yes, you can make the dough ahead of time. Chill it in the fridge for up to two days. When you’re ready, just scoop and bake! You can even freeze the dough for later use. Just thaw it before baking.
In this post, we covered how to make chocolate hazelnut thumbprint cookies. We shared a detailed list of ingredients, ways to prep, and even smart substitutes. You learned step-by-step how to bake these cookies perfectly and tips to avoid common mistakes. We also discussed fun variations and how to store your tasty treats.
Remember, making these cookies is fun and easy! Enjoy trying new flavors and sharing them with others. Happy bakin
Chocolate Hazelnut Thumbprint Cookies
Delicious chocolate cookies with a hazelnut center, perfect for any occasion.
Prep Time 20 minutes mins
Cook Time 10 minutes mins
Total Time 30 minutes mins
Course Dessert
Cuisine American
Servings 24
Calories 120 kcal
- 1 cup all-purpose flour
- 1/2 cup unsweetened cocoa powder
- 1/2 teaspoon baking soda
- 1/4 teaspoon salt
- 1/2 cup unsalted butter, softened to room temperature
- 1/2 cup granulated sugar
- 1/2 cup packed brown sugar
- 1 large egg
- 1 teaspoon pure vanilla extract
- 1/2 cup hazelnuts, toasted and finely chopped
- 1/2 cup chocolate hazelnut spread
- as needed granulated sugar for rolling the cookie dough
Preheat your oven to 350°F (175°C) and line a baking sheet with parchment paper to prevent sticking.
In a medium mixing bowl, whisk together the all-purpose flour, unsweetened cocoa powder, baking soda, and salt until well combined. Set this mixture aside.
In a large mixing bowl, use an electric mixer to cream together the softened unsalted butter, granulated sugar, and packed brown sugar until the mixture is light and fluffy, approximately 2-3 minutes.
Add in the large egg and the pure vanilla extract, beating until smoothly incorporated.
Gradually add the dry flour mixture to the butter mixture, stirring gently until just combined. Be cautious not to overmix; the dough should be thick and cohesive.
Carefully fold in the finely chopped toasted hazelnuts, ensuring they are evenly distributed throughout the dough.
Using your hands, scoop out small portions of the dough (about 1 inch in diameter) and roll them into balls. Coat each ball in granulated sugar before placing them on the prepared baking sheet, making sure to space them around 2 inches apart.
With your thumb or the back of a small spoon, create a gentle indent in the center of each dough ball.
Fill each thumbprint with approximately 1/2 teaspoon of the chocolate hazelnut spread.
Bake the cookies in the preheated oven for 10-12 minutes, or until the edges appear set and the tops show slight cracks. Once baked, let the cookies cool on the baking sheet for 5 minutes, then carefully transfer them to a wire rack to cool completely.
Arrange the cooled cookies on a decorative platter and drizzle with extra chocolate hazelnut spread for an elegant touch.
Keyword chocolate, cookies, dessert, hazelnut