FREE DINNER EBOOK! Get your copy!
  • Cookie Policy
  • GDPR Policy
  • Disclaimer
  • Terms Of Use
  • Visit my other site: Fun Cookie Recipes
purelyyumrecipes
  • Home
  • Dinner
  • Desserts
  • Drinks
  • Appetizers
  • Contact
  • About
  • Privacy Policy
  • Home
  • Dinner
  • Desserts
  • Drinks
  • Appetizers
  • Contact
  • About
  • Privacy Policy
  • Cookie Policy
  • GDPR Policy
  • Disclaimer
  • Terms Of Use
Visit my other site: Fun Cookie Recipes

HOME / CATEGORIES /

Latest

- 1 cup rolled oats - 1/2 cup almond butter (or substitute with peanut butter) - 1/4 cup honey or maple syrup These main ingredients form the base of your energy bites. Rolled oats give them a hearty texture. Almond butter adds healthy fats and a creamy feel. Honey or maple syrup sweetens the bites naturally, making them a treat. - 1/2 cup dried cranberries, finely chopped - 1/4 cup freshly grated orange zest - 1/4 cup chia seeds Now, let's talk about flavor. Dried cranberries add a sweet and tangy burst. They also give a nice chewiness. Freshly grated orange zest brings a bright citrus note. Chia seeds add crunch and boost nutrition. They are rich in fiber and protein. - 1/2 teaspoon ground cinnamon - A pinch of salt Seasonings can elevate your bites. Ground cinnamon adds warmth and depth. Just a pinch of salt balances the sweetness. These simple additions enhance the overall taste and make each bite delightful. Start by gathering your ingredients. In a medium bowl, combine 1 cup of rolled oats, 1/2 cup of almond butter, and 1/4 cup of honey or maple syrup. Use a spatula to mix them until they blend together well. This step creates a strong base for your energy bites. It should feel sticky and hold together. Next, it's time to add in some fun flavors. Mix in 1/2 cup of finely chopped dried cranberries, 1/4 cup of freshly grated orange zest, 1/4 cup of chia seeds, 1/2 teaspoon of ground cinnamon, and a pinch of salt. Stir well to ensure everything is evenly spread throughout the mix. The orange zest gives a bright taste, while the chia seeds add crunch and nutrition. After mixing, cover the bowl with plastic wrap and place it in the fridge for about 30 minutes. This helps the mixture firm up, making it easier to shape. Once chilled, remove the bowl and get ready to roll. With clean hands, scoop out about 1 tablespoon of the mixture and roll it into a ball. Repeat until you shape all the mix into 12 to 15 bites. If you want, roll each bite in coconut flakes or crushed nuts for added texture. Store your energy bites in an airtight container in the fridge, and enjoy them fresh for up to a week. Chilling the mixture is key to great energy bites. It helps the ingredients bind together. When you chill the mixture for about 30 minutes, it firms up nicely. This makes rolling easier and keeps the bites from falling apart. Trust me, skipping this step can lead to a messy experience. For extra flavor and fun, try rolling your bites in coconut flakes or crushed nuts. Both add great texture. Coconut gives a sweet, tropical twist. Crushed nuts add crunch and healthy fats. Choose what you like best! You can even mix both for a colorful, tasty finish. Use a medium-sized mixing bowl to combine the ingredients. A sturdy spatula or wooden spoon works best for mixing. For storage, opt for airtight containers. This keeps your energy bites fresh. Use small containers for easy grabbing when you’re on the go. {{image_4}} If you need a nut-free option, swap almond butter for sunflower seed butter. This change keeps the texture smooth and creamy, just like almond butter. Sunflower seed butter offers a nutty taste that pairs well with cranberries and orange. It’s also a great choice for those with nut allergies. You can adjust the sweetness of your energy bites easily. Instead of honey, try using agave syrup. Agave syrup is sweeter, so you might need less of it. If you prefer, simply reduce the amount of honey used in the recipe. This way, you control how sweet your snacks are, making them just right for your taste. Feel free to get creative with your energy bites! Dried fruits like apricots or raisins can add new flavors. You can also mix in seeds such as pumpkin or sunflower seeds for extra crunch. These add-ins not only enhance the taste but also boost the nutrition of your bites. Experimenting with different fruits and seeds can lead to your perfect snack! To keep your cranberry orange energy bites fresh, store them in an airtight container. This helps prevent moisture and air from spoiling them. You can use glass or plastic containers with tight seals. Always remember to label your container with the date. This way, you’ll know when you made them. These energy bites stay fresh in the refrigerator for up to a week. After that, they may lose their taste and texture. If you notice any changes in smell or appearance, it’s best to throw them out. Always check before snacking! Freezing is a great option for longer storage. To freeze, place the energy bites in a single layer on a baking sheet. Freeze them for about two hours until firm. Then, transfer them to a freezer-safe bag or container. They can last in the freezer for up to three months. When you’re ready to eat, just thaw them in the fridge overnight. Enjoy your tasty snack anytime! These energy bites stay fresh in the refrigerator for up to one week. I suggest placing them in an airtight container to keep them tasty. They maintain their flavor and texture well during this time. If you find that you cannot eat them all, you can also freeze them for longer storage. Absolutely! You can swap ingredients based on your taste. For almond butter, try peanut butter or sunflower seed butter for a nut-free option. Maple syrup is a great choice instead of honey. You can also use any dried fruit, like raisins or apricots, instead of cranberries. These energy bites are packed with health benefits. Rolled oats provide fiber for digestion. Almond butter adds protein and healthy fats. Chia seeds are full of omega-3 fatty acids. Dried cranberries offer antioxidants, while orange zest brings vitamin C to the mix. Together, they create a balanced snack that fuels your day! These energy bites are easy to make and tasty. We mixed oats, almond butter, and honey for a great base. Then, we added fun flavors like cranberries, orange zest, and chia seeds. Don't forget to chill the mixture for the best texture. Use your favorite nut butters or sweeteners for variety. Store them in an airtight container for freshness. Enjoy these bites as a quick snack anytime. Remember, they are not just delicious; they are healthy too.

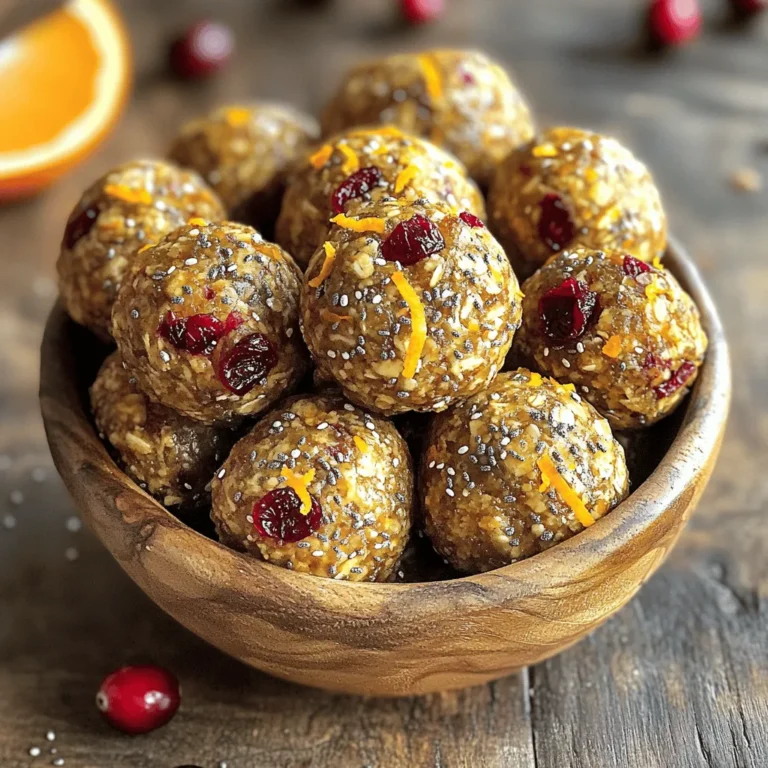
Cranberry Orange Energy Bites Easy and Nourishing Snack

- 1 ½ cups grated zucchini (approximately 1 medium zucchini) - 1 cup all-purpose flour - 1 cup whole wheat flour - ½ cup unsweetened cocoa powder - 1 teaspoon baking soda - ½ teaspoon baking powder - ½ teaspoon salt - 1 teaspoon ground cinnamon - ½ cup vegetable oil - ¾ cup brown sugar, packed - ½ cup granulated sugar - 3 large eggs, at room temperature - 1 teaspoon pure vanilla extract - 1 cup semi-sweet chocolate chips - Optional: ½ cup chopped walnuts or pecans This recipe uses simple ingredients that pack a big flavor punch. The grated zucchini adds moisture, making the bread soft and tender. The all-purpose and whole wheat flours give it a nice texture. Cocoa powder brings in that rich chocolate flavor. Baking soda and baking powder work together to help the bread rise. Salt enhances the other flavors, while ground cinnamon adds warmth and spice. Vegetable oil keeps the bread moist, while brown sugar and granulated sugar provide sweetness. Using eggs helps bind the ingredients together and adds richness. The vanilla extract brightens the flavors and makes it smell great. Semi-sweet chocolate chips melt into the batter, creating gooey pockets of chocolate. You can add nuts like walnuts or pecans for extra crunch and flavor. Adjust the amounts based on your taste. These ingredients come together to create a deliciously decadent treat! - Preheating Temperature First, set your oven to 350°F (175°C). This is the perfect heat to bake your bread. - Greasing Techniques Grease a 9x5 inch loaf pan with cooking spray or butter. You can also line it with parchment paper. This makes removal easy after baking. - Combining Zucchini, Oils, and Sugars In a medium bowl, mix grated zucchini, vegetable oil, brown sugar, granulated sugar, eggs, and vanilla extract. Use a whisk or spatula to blend until smooth. - Importance of Mixing Well Mixing well ensures a nice, even batter. This helps all flavors come together. - Whisking Techniques for Even Distribution In a larger bowl, whisk together all-purpose flour, whole wheat flour, cocoa powder, baking soda, baking powder, salt, and cinnamon. This helps the leavening agents and spices spread out evenly. - Why Accurate Measurements Matter Accurate measurements are key in baking. They affect the texture and rise of your bread. - Techniques for Folding Batter Pour the wet mixture into the dry ingredients. Gently fold them together with a spatula. This keeps the batter light and airy. - Avoiding Overmixing for Texture Be careful not to overmix. This can make your bread tough instead of soft. - Distributing Add-ins Evenly Fold in your chocolate chips and any nuts. Make sure they are spread throughout the batter for a delicious bite. - Baking Time and Temperature Tips Place your loaf pan in the oven. Bake for 50 to 60 minutes. Check with a toothpick; it should come out clean or with a few moist crumbs. - Cooling Techniques for Best Results After baking, let the bread cool in the pan for about 10 minutes. Then, move it to a wire rack to cool completely. This helps keep the bread from getting soggy. Using room temperature ingredients helps create a smooth batter. Cold eggs or oil can make the mix dense. Always take out your eggs and oil before you start. Let them sit for about 30 minutes. This small step makes a big difference. To avoid moisture issues, don’t skip squeezing the zucchini. Grate the zucchini and place it in a clean towel. Squeeze tightly to remove excess water. This helps keep the bread from becoming too soggy. Adding spices can boost the taste of your zucchini bread. Try adding a pinch of nutmeg or a dash of vanilla. Cinnamon brings warmth, but don’t overdo it. You want it to enhance, not overpower. When choosing cocoa powder, unsweetened is your best friend. It gives a rich chocolate flavor. Semi-sweet chocolate chips add sweetness without being too much. Mixing both offers balance. To serve your double chocolate zucchini bread, slice it about an inch thick. Serve it warm for the best taste. A light dusting of powdered sugar looks nice and adds a sweet touch. For extra indulgence, add a dollop of whipped cream or a scoop of vanilla ice cream on the side. This makes the dish feel special and decadent. Enjoy your creation with a hot cup of coffee or tea! {{image_4}} Substituting Ingredients for Lower Sugar You can cut down on sugar easily. Swap out half of the brown sugar for applesauce. This keeps the bread moist and tasty. You can also use coconut sugar for a lower glycemic option. Gluten-Free Options For a gluten-free twist, use almond flour or a store-bought gluten-free blend. Just make sure to add an extra egg to help with binding. This keeps the texture light and fluffy. Adding Fruits or Other Chocolates You can add fruits like mashed bananas or chopped strawberries for extra flavor. Dark chocolate chips can also replace semi-sweet chips for a richer taste. Experimenting with Spices Try adding a dash of nutmeg or cardamom. These spices can give your bread a unique twist. You’ll find that they enhance the chocolate flavor beautifully. Best Nuts to Pair with the Recipe Walnuts or pecans work great in this recipe. They add a nice crunch and flavor. You can even toast them lightly for more depth. Other Additions to Consider Consider folding in shredded coconut or a handful of dried cherries. These add different textures and surprise flavors. Feel free to get creative with what you have in your pantry! Store your double chocolate zucchini bread at room temperature for the best taste. Wrap it in plastic wrap or foil. This keeps it moist. You can also place it in an airtight container. If you want it to last longer, refrigerate it. However, this may change the texture. - How to Properly Freeze Bread Let the bread cool completely. Then, wrap it tightly in plastic wrap. After that, add a layer of foil for extra protection. This prevents freezer burn. Label the bread with the date. - Thawing Tips for Best Quality To thaw, take the bread out and leave it at room temperature. It usually takes a few hours to thaw fully. If you're in a hurry, you can use the microwave. Heat it for 10 to 15 seconds. Just be careful not to overheat. - How Long Does It Last? When stored at room temperature, the bread lasts about 3 to 4 days. If you keep it in the fridge, it may last a week. If frozen, it can remain good for up to 3 months. Always check for changes in smell or texture before eating. Yes, you can use frozen zucchini. Just thaw it out first. Squeeze out the extra water. This helps keep the bread from becoming too wet. Frozen zucchini works great in this recipe. Check the bread near the end of baking. Insert a toothpick into the center. If it comes out clean or with a few moist crumbs, the bread is done. If it has wet batter, bake it a few more minutes. Yes, you can make some swaps. Use coconut oil instead of vegetable oil. You can also use other types of flour, like almond flour. Just keep in mind that this may change the flavor and texture. I love serving this bread warm. You can dust it with powdered sugar. A scoop of vanilla ice cream on the side is a great treat. You can also add whipped cream for an extra touch. Zucchini adds moisture and nutrients. It is low in calories and high in fiber. This bread can be a healthier dessert option. The dark chocolate provides antioxidants as well. Enjoying it in moderation adds to your diet. In this post, we covered how to make delicious double chocolate zucchini bread. We discussed all the ingredients you'll need, from grated zucchini to semi-sweet chocolate chips. You learned step-by-step instructions for mixing and baking. I shared tips for the best texture and flavor. Remember, you can customize this recipe with healthier options or different flavors. Proper storage ensures your bread stays fresh. Enjoy this tasty treat that pairs well with many occasions. Now, get baking and delight in this chocolatey goodness!

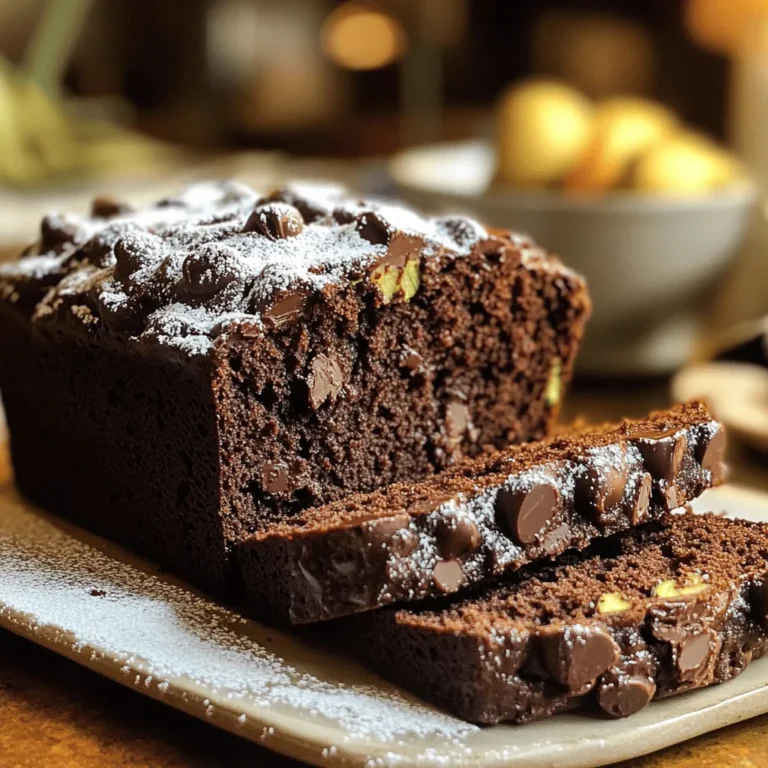
Double Chocolate Zucchini Bread Irresistible Recipe

For this dish, you need a few key items. Start with 1 pound of large shrimp, peeled and deveined. Fresh shrimp gives the best taste. Next, use 2 tablespoons of extra virgin olive oil. This oil adds richness and helps with marinating. You will also need 3 tablespoons of freshly squeezed lime juice. Lime juice gives that bright, zesty flavor. Now, for the marinade. Use 1-2 fresh jalapeños, finely chopped. Adjust the amount based on how spicy you want it. Then, add 2 cloves of garlic, finely minced. Garlic brings depth to the flavor. You will need 1 teaspoon of ground cumin and 1 teaspoon of smoked paprika. Both spices enhance the taste with warmth and smokiness. Lastly, season with salt and freshly ground black pepper to taste. For garnish, use fresh cilantro leaves, roughly chopped. Cilantro adds a fresh pop of color and flavor. Serve with lime wedges on the side. These wedges let you add extra lime juice as needed. This simple addition brightens every bite! Start by gathering all your marinade ingredients. You will need: - 2 tablespoons extra virgin olive oil - 3 tablespoons freshly squeezed lime juice - 1-2 fresh jalapeños, finely chopped - 2 cloves garlic, finely minced - 1 teaspoon ground cumin - 1 teaspoon smoked paprika - Salt and black pepper to taste In a medium bowl, mix the olive oil and lime juice. Add the chopped jalapeños, minced garlic, cumin, and smoked paprika. Sprinkle in salt and pepper. Whisk everything until it blends well. This marinade gives the shrimp a zesty kick. Now, it's time to marinate the shrimp. Take 1 pound of large shrimp, peeled and deveined. Place the shrimp in the bowl with the marinade. Toss gently to coat each shrimp evenly. Cover the bowl with plastic wrap and let it sit in the fridge for at least 30 minutes. This allows the shrimp to soak up all the great flavors. When you are ready to grill, preheat your grill to medium-high heat. If using wooden skewers, soak them in water for 15-20 minutes to avoid burning. Carefully thread the marinated shrimp onto the skewers, starting at the tail. Make sure to pierce through the body to hold them well. Place the skewers on the hot grill. Cook for about 2-3 minutes on each side. Look for that perfect pink color and opaque look. Be careful not to overcook the shrimp. Overcooked shrimp can become tough. Once done, take the skewers off the grill. Let them rest for 1-2 minutes to keep them juicy. Garnish with chopped cilantro and serve with lime wedges for extra flavor. Enjoy your tasty summer treat! Make your marinade shine with fresh ingredients. Use ripe limes for juice. Fresh jalapeños give heat and flavor. Adjust the number to suit your taste. Mince garlic finely to blend well. Add cumin for warmth and smoked paprika for a hint of smoke. Whisk everything together until it looks smooth. This mix is key to great flavor. Watch your shrimp closely while grilling. Cook them for 2-3 minutes per side. They should turn pink and opaque. Overcooked shrimp become tough and chewy. If you see them curling too much, they might be done. Use a timer to help keep track. Remember, shrimp cook quickly, so stay alert! Serve your shrimp on vibrant skewers for a fun look. Lay them on a bright platter. Add a sprinkle of chopped cilantro for color. Lime wedges add a zesty touch. For extra flavor, squeeze lime over the shrimp just before eating. Pair with a fresh salad or rice for a complete meal. Enjoy this flavorful summer treat! {{image_4}} You can easily adjust the spice in this dish. If you want less heat, use only one jalapeño. For more heat, add two or three. Removing the seeds from the jalapeños also helps reduce spice. You can even swap jalapeños for milder peppers like poblano for a different taste. Not a shrimp fan? You can use chicken or fish. Chicken breast works well with the same marinade. Cut it into cubes and grill for about 5-7 minutes. For fish, try salmon or tilapia. Just make sure to adjust cooking times based on the protein you choose. Grilled shrimp makes a great taco filling. After grilling, place the shrimp in corn or flour tortillas. Top with fresh cilantro, diced onions, and avocado. Squeeze lime juice over the top for extra zest. These tacos are a fun way to enjoy the shrimp and share with friends. Store leftover grilled shrimp in an airtight container. Place them in the fridge for up to three days. Make sure to cool them before sealing to keep them fresh. When you want to enjoy them again, simply take them out. If you have extra marinated shrimp, freeze them for later. Place the shrimp in a freezer bag, removing as much air as possible. You can freeze them for about two months. When you're ready to cook, thaw them in the fridge overnight. To reheat, use a skillet over medium heat. Add a little olive oil to the pan. Cook the shrimp for about two minutes on each side. This keeps them juicy and tasty. Avoid the microwave, as it can make the shrimp rubbery. Enjoy your flavorful shrimp again! I recommend marinating the shrimp for at least 30 minutes. This allows the shrimp to soak up all the flavors. If you have more time, you can marinate them for up to 2 hours. Just remember not to exceed that. If you marinate too long, the shrimp can become mushy. Yes, you can use frozen shrimp for this recipe. Just thaw them first. Place the shrimp in the fridge overnight or run cold water over them. Once thawed, make sure to pat them dry before marinating. This helps the marinade stick better and keeps the shrimp flavorful. You can serve Jalapeño Lime Grilled Shrimp with many sides. Here are some great ideas: - Rice: Cilantro lime rice pairs well. - Salad: A fresh green salad adds crunch. - Tacos: Serve in corn tortillas for a fun twist. - Grilled Veggies: Zucchini or bell peppers add color and flavor. - Guacamole: A creamy dip enhances the meal. These options make your meal colorful and tasty! In this article, I broke down the key steps for making Jalapeño Lime Grilled Shrimp. You learned about the main ingredients and marinade, plus grilling techniques. I shared tips to avoid overcooked shrimp and ways to serve your dish. Don’t forget the fun variations, like using different proteins or making shrimp tacos! Enjoy your cooking adventure. Keep experimenting with flavors and techniques. Each grill brings a new chance to impress your friends and family. Happy grilling!

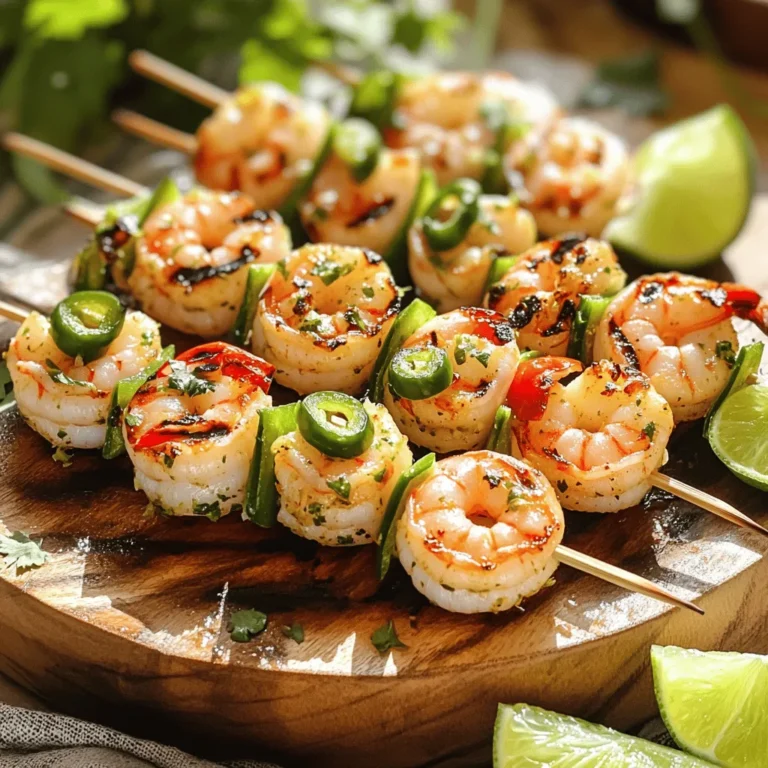
Jalapeño Lime Grilled Shrimp Flavorful Summer Treat

To make delicious zucchini chocolate chip muffins, you will need: - 1 medium zucchini, finely grated - 1 cup all-purpose flour - 1/2 cup whole wheat flour - 1/2 teaspoon baking powder - 1/2 teaspoon baking soda - 1/2 teaspoon salt - 1 teaspoon ground cinnamon - 1/2 cup granulated sugar - 1/4 cup packed brown sugar - 1/3 cup vegetable oil - 2 large eggs - 1 teaspoon pure vanilla extract - 1 cup semi-sweet chocolate chips - Zucchini: Fresh zucchini adds moisture. If you don’t have zucchini, you can use carrot. - Flour: I mix all-purpose and whole wheat for more fiber. You can swap whole wheat for more all-purpose if you prefer. - Sugar: Granulated sugar gives sweetness, while brown sugar adds moisture and flavor. You can use coconut sugar for a healthier option. - Oil: Vegetable oil keeps muffins soft. You can use melted coconut oil or applesauce for a lighter touch. - Eggs: They help bind the muffins. If you want a vegan option, substitute with flaxseed meal or applesauce. - Chocolate chips: Semi-sweet chips bring great taste. Dark chocolate or white chocolate chips can work well, too. Each muffin roughly has: - Calories: 150-180 - Fat: 6-8 grams - Carbohydrates: 22-25 grams - Protein: 3-4 grams - Fiber: 1-2 grams These muffins pack a delightful mix of flavors and nutrients. They are a tasty way to enjoy a vegetable! Start by preheating your oven to 350°F (175°C). This step is key to ensure your muffins bake evenly. Next, grab your muffin tin. You can line it with muffin liners or lightly grease each cup with cooking spray or oil. This helps prevent sticking and makes cleanup easier. In a large mixing bowl, add the finely grated zucchini, granulated sugar, brown sugar, vegetable oil, eggs, and vanilla extract. Use a whisk or spatula to mix these well. Aim for a smooth blend with no clumps. This mixture is the heart of your muffins, adding moisture and flavor. In another bowl, combine the all-purpose flour, whole wheat flour, baking powder, baking soda, salt, and ground cinnamon. Whisk these together until they are well mixed. A good blend here helps your muffins rise and taste great. Make sure there are no lumps left behind. Now, gradually add the dry ingredients to the wet mixture. Use a spatula to fold them together gently. Stir just until you no longer see dry flour. Be careful with mixing; overmixing can make your muffins tough. You want them soft and fluffy. Once your batter is ready, gently fold in the semi-sweet chocolate chips. This step is important for an even distribution of chocolate throughout the batter. Avoid overworking the mixture again; we want those chocolate chips to shine in every bite. Using a spoon or an ice cream scoop, fill each muffin cup with batter. Aim to fill each cup about two-thirds full. This allows space for the muffins to rise while baking. If you fill them too much, they might overflow, and nobody wants that! Place the muffin tin in the preheated oven. Bake for 18-20 minutes. Check for doneness by inserting a toothpick into the center of a muffin. It should come out clean or with a few moist crumbs. Once done, remove the muffin tin from the oven and let it cool for 5 minutes. Then, transfer the muffins to a wire rack to cool completely. Enjoy the lovely smell wafting through your kitchen! To keep your muffins moist, always add a finely grated zucchini. The moisture from the zucchini helps create a soft texture. Use fresh zucchini for the best taste. You can also store them in an airtight container after cooling. This helps trap moisture and keeps them tender. Mixing too much can make your muffins tough. When combining wet and dry ingredients, gently fold them together. Stop mixing once you no longer see dry flour. This keeps the muffins light and fluffy. Remember, a few lumps are okay! Use a box grater or food processor to grate zucchini. Grate it finely for better blending. You can also squeeze out excess moisture with a clean kitchen towel. This prevents the batter from becoming too wet and helps your muffins rise nicely. For a lovely presentation, serve your muffins warm. You can sprinkle powdered sugar on top for a sweet touch. Add a dollop of whipped cream or a few extra chocolate chips on each muffin. These small details make your muffins look appealing and inviting. {{image_4}} You can enhance your muffins by adding nuts or seeds. Chopped walnuts or pecans add a nice crunch. Sunflower seeds or chia seeds can also boost nutrition. Add about 1/2 cup of your choice to the batter. Make sure to fold them in gently to mix well. Switch up the flavor by using different types of chocolate. You can try dark chocolate chips for a richer taste. Milk chocolate chips can make the muffins sweeter. You can even mix in white chocolate for a fun twist. Just keep the amount around 1 cup for balance. To make these muffins gluten-free, swap the all-purpose flour with a gluten-free blend. Make sure it includes xanthan gum for the best texture. You can also use almond flour or coconut flour. Keep in mind that this may alter the moisture level, so adjust liquid as needed. If you prefer mini muffins, this recipe works great! Fill each mini cup with about 1 tablespoon of batter. Bake them for 12-15 minutes instead of the full size. These bite-sized treats are perfect for snacks or lunchboxes. Enjoy them warm from the oven! To keep your zucchini chocolate chip muffins fresh, store them in an airtight container. Place them at room temperature for up to three days. If you want to keep them longer, refrigeration is an option, but it may dry them out a bit. Freezing is a great way to store muffins for later. To freeze, let the muffins cool completely first. Wrap each muffin in plastic wrap and place them in a freezer bag. They can last up to three months in the freezer. Just make sure to label the bag with the date. When you're ready to eat a frozen muffin, take it out of the freezer. Let it thaw in the fridge overnight or at room temperature for a couple of hours. For a warm treat, you can reheat it in the microwave for about 15-20 seconds. Alternatively, pop it in a preheated oven at 350°F (175°C) for about 5-10 minutes. Enjoy the fresh taste! Yes, you can use other veggies. Carrots work great in this recipe. They add moisture and a sweet taste. You might also try yellow squash. Just make sure to grate them finely like zucchini. Check the muffins at 18 minutes. Insert a toothpick into the center. If it comes out clean or with a few moist crumbs, they are done. If not, bake for another 2 minutes. Keep an eye on them to avoid overbaking. For a vegan option, use flax eggs. Mix 1 tablespoon of ground flaxseed with 2.5 tablespoons of water. Let it sit for 5 minutes to thicken. You can also use applesauce, mashed banana, or a store-bought egg replacer. These muffins stay fresh for about 3 days at room temperature. Keep them in an airtight container. If you want them to last longer, refrigerate them for up to a week. Yes, you can prep the batter the night before. Store it in the fridge. Just remember to mix it gently before baking. You can also bake the muffins ahead and freeze them for later. They thaw well and taste great! You learned about making delicious muffins with zucchini. We covered the ingredients, steps, and tips for success. You can add variations or store muffins for later. Remember, moist muffins come from not overmixing. Use my suggestions to boost flavor or change ingredients. Enjoy your baking adventures! With practice, you will make perfect muffins every time.

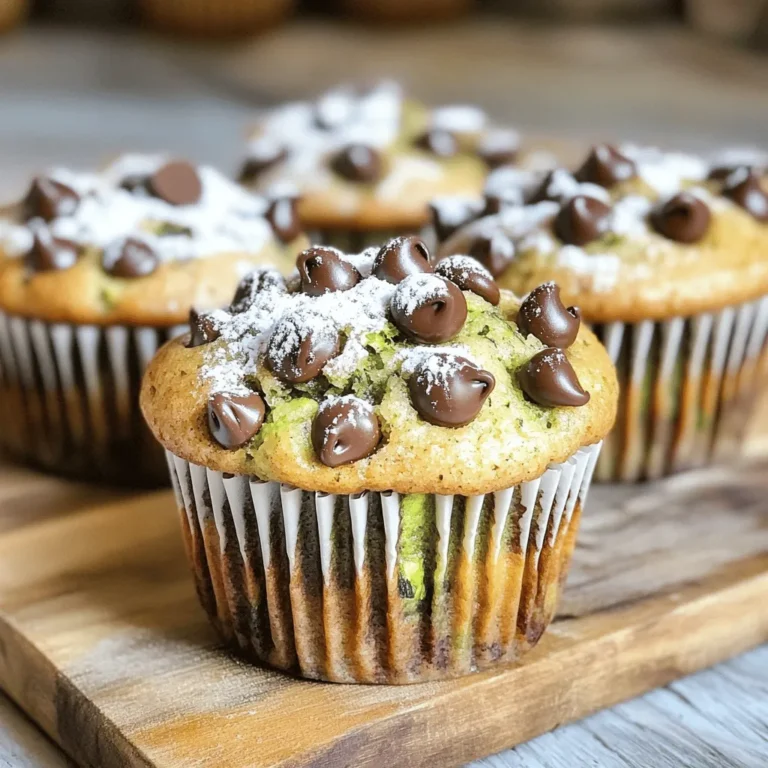
Zucchini Chocolate Chip Muffins Easy and Tasty Recipe

- 1 cup rolled oats - 1 cup whole wheat flour - 1 teaspoon baking powder - 1 teaspoon ground cinnamon - 1/2 teaspoon ground nutmeg - 1/4 teaspoon salt - 1/2 cup packed brown sugar - 1/2 cup finely shredded carrots (about 1 medium carrot) - 1/4 cup unsweetened applesauce - 1/4 cup honey or pure maple syrup - 1 teaspoon vanilla extract These ingredients form the base of your carrot cake breakfast cookies. The oats and whole wheat flour give them a hearty feel. The spices, cinnamon and nutmeg, add warmth and a sweet aroma. The brown sugar and honey or maple syrup provide a delightful sweetness. Shredded carrots not only add flavor but also moisture. - 1/4 cup crushed walnuts - 1/4 cup raisins or dried cranberries - 1 tablespoon freshly grated ginger These optional ingredients enhance the cookies' flavor and texture. Crushed walnuts add crunch and a nutty taste. Raisins or dried cranberries bring a chewy, sweet bite. Freshly grated ginger gives a nice zing that brightens the flavor. - About 100 calories per cookie - Carbs: 15g - Fats: 3g - Proteins: 2g Each cookie has around 100 calories. They provide a good mix of carbs, fats, and proteins. This balance helps keep you full and satisfied, making them a great breakfast option. Enjoy them with a glass of milk or a cup of tea! - Mixing dry ingredients: Start by gathering your dry ingredients. In a big bowl, mix 1 cup of rolled oats, 1 cup of whole wheat flour, 1 teaspoon of baking powder, 1 teaspoon of ground cinnamon, 1/2 teaspoon of ground nutmeg, and 1/4 teaspoon of salt. Make sure to whisk them well. This helps blend all the flavors. - Combining wet ingredients: In another bowl, combine 1/2 cup of packed brown sugar, 1/2 cup of finely shredded carrots, 1/4 cup of unsweetened applesauce, 1/4 cup of honey or pure maple syrup, and 1 teaspoon of vanilla extract. If you enjoy a bit of spice, add 1 tablespoon of freshly grated ginger. Mix until smooth. This will give your cookies a sweet and moist base. - Portioning the cookie dough: Grab a cookie scoop or a tablespoon to drop rounded portions of the dough onto a lined baking sheet. Space them about 2 inches apart. This is key to ensure they have room to spread. Press each ball slightly with a fork for a nice shape. - Baking time and temperature: Preheat your oven to 350°F (175°C). Bake the cookies for 12-15 minutes. You want the edges to be golden brown while the centers stay soft. This balance keeps your cookies chewy and delicious. - Cooling process on wire rack: After baking, let the cookies cool on the baking sheet for about 5 minutes. Then, transfer them to a wire rack to cool completely. This step helps them firm up and keeps them from getting soggy. - Tips for best storage practices: Store your cooled cookies in an airtight container. They will stay fresh for about a week. For longer storage, you can freeze them. Just make sure to wrap them well. Enjoy your tasty and wholesome carrot cake breakfast cookies! - Overmixing the dough: Mixing too much can make cookies tough. Stir just until combined. - Incorrect cooking time: Baking too long makes cookies dry. Watch for golden edges. - Add-ins and substitutions: Try using chocolate chips or coconut for a twist. Swap honey for agave syrup if you like. - Gluten-free variations: Use gluten-free flour instead of whole wheat flour. Check labels to ensure no hidden gluten. - Pairing with beverages: These cookies go great with coffee or tea. The flavors blend well, making breakfast special. - Creative plating ideas: Serve warm on a rustic wooden board. Add a sprinkle of cinnamon and fresh fruit for color. {{image_4}} You can easily switch up the flavor of your carrot cake breakfast cookies. Here are two tasty ideas: - Pumpkin spice carrot cake cookies: Add pumpkin puree and pumpkin pie spice. This gives your cookies a warm, fall flavor. Simply replace half the applesauce with pumpkin puree and add a teaspoon of pumpkin spice. - Chocolate chip carrot cake cookies: Fold in some dark chocolate chips. They add a rich taste that pairs well with the carrot. Use about 1/2 cup of chocolate chips to keep the balance. You can modify these cookies to fit different diets. Here are some options: - Vegan alternatives: Replace honey with maple syrup. Use flax eggs instead of regular eggs. Mix 1 tablespoon of ground flaxseed with 2.5 tablespoons of water for one egg. - Low-sugar options: Use less brown sugar or try coconut sugar. You can also add mashed bananas for natural sweetness, which keeps the cookie moist. Make your cookies fit the season with these fun ideas: - Holiday-themed decorations: Top your cookies with festive sprinkles or a light glaze. This adds a personal touch and makes them great for sharing. - Using seasonal fruits or nuts: In fall, try adding chopped apples or pecans. In summer, use fresh berries or nuts like almonds. This keeps your cookies fresh and exciting all year long. To keep your carrot cake breakfast cookies fresh, store them in an airtight container. Place parchment paper between layers to prevent sticking. Keep them at room temperature for up to five days. For longer storage, place them in the fridge. They can last up to ten days in the fridge. To freeze your cookies, first let them cool completely. Then, place them in a single layer on a baking sheet. Freeze for two hours. Once frozen, transfer them to a freezer bag. They will stay fresh for up to three months. When you’re ready to eat, thaw them in the fridge overnight. To reheat your cookies, preheat your oven to 350°F (175°C). Place the cookies on a baking sheet and heat for five to seven minutes. This warms them up nicely and brings back their soft texture. You can also microwave them for about 10-15 seconds if you're in a hurry. Enjoy them warm for a tasty treat! Yes, you can make these cookies gluten-free! Simply swap the whole wheat flour with a gluten-free blend. Look for a blend that includes xanthan gum. This helps the cookies hold together and stay chewy. Most gluten-free flours work well in this recipe. These cookies last about one week when stored at room temperature. Keep them in an airtight container to stay fresh. You can also store them in the fridge for up to two weeks. If you freeze them, they can last for three months. Just make sure to use a freezer-safe container. Using fresh carrots is possible, but shredded carrots work best. Shredded carrots mix better into the dough. They also help keep the cookies moist. Fresh carrots can make the dough too watery, which might change the texture. If you use fresh carrots, shred them finely and squeeze out any extra juice. Serve these cookies warm for the best taste. Pair them with a glass of milk or a cup of coffee. You can also add fresh fruit on the side for a colorful plate. For a special touch, sprinkle some cinnamon on top. These cookies are delightful any time of day! These cookies are simple to make and full of flavor. We covered essential and optional ingredients, including rolled oats and spices. The steps for prepping, baking, and cooling the dough are clear and easy. You learned tips for avoiding mistakes and ways to customize your cookies. With storage info and fun variations, you'll keep your batch fresh and tasty. Enjoy these healthy treats at breakfast or any time! Now, get baking and treat yourself to a delicious and nutritious snack!

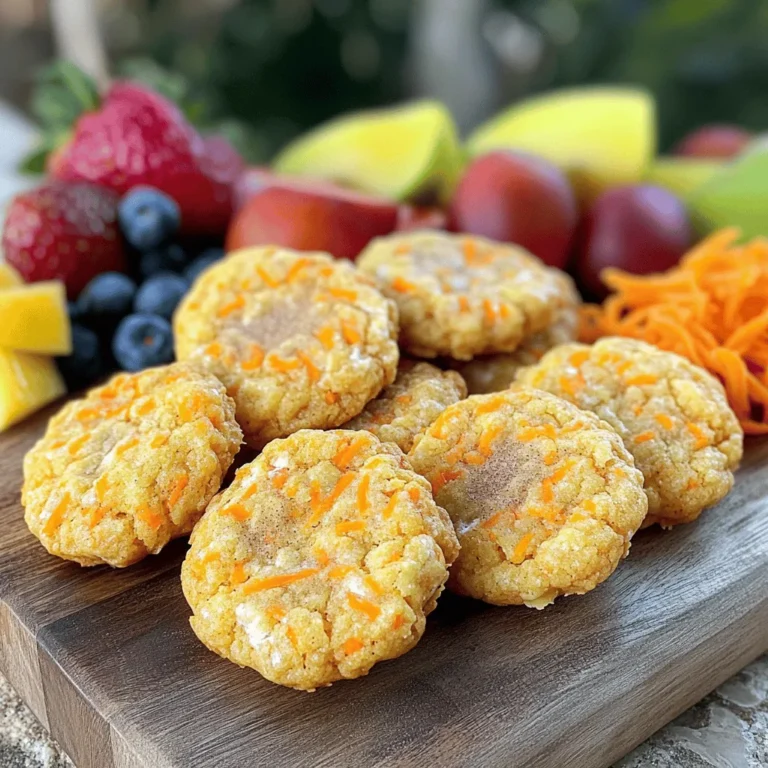
Carrot Cake Breakfast Cookies Tasty and Wholesome Treat

- 1 cup oat flour - 1 scoop vanilla protein powder - 1 tablespoon chai spice blend (mix of cinnamon, cardamom, ginger, and cloves) - 1 teaspoon baking powder - ¼ teaspoon salt - 1 cup almond milk (or any milk of choice) - 2 tablespoons maple syrup (or honey for alternative sweetness) - 1 teaspoon pure vanilla extract - Coconut oil or cooking spray for greasing the pan When I make these pancakes, I love the blend of flavors. Each ingredient plays a vital role. Oat flour gives a soft texture and adds fiber. It also makes the pancakes gluten-free. The vanilla protein powder boosts the protein level, making them great for breakfast. The chai spice blend brings warmth and sweetness from cinnamon, cardamom, ginger, and cloves. Baking powder helps the pancakes rise, giving them a fluffy feel. A pinch of salt enhances all the flavors. Almond milk keeps it creamy and dairy-free, while maple syrup adds natural sweetness. A splash of vanilla extract brings a lovely aroma. Finally, coconut oil or cooking spray prevents sticking on the pan. You can adjust these ingredients to fit your taste. Enjoy the process of mixing and matching! - Protein content per serving: Each serving has about 15 grams of protein. - Caloric breakdown: Each pancake contains around 150 calories. - Benefits of ingredients: Oats provide fiber, which is good for digestion. Protein helps build muscle and keeps you full. Maple syrup gives natural sweetness without refined sugar. This meal is not just tasty; it is also healthy! 1. In a medium bowl, combine the oat flour, vanilla protein powder, chai spice blend, baking powder, and salt. 2. Whisk these dry ingredients until they mix well. 3. In another bowl, whisk the almond milk, maple syrup, and vanilla extract. 4. Stir gently until the maple syrup blends in. 5. Pour the wet mixture into the dry ingredients. 6. Gently stir until just combined. It’s okay if small lumps remain. 1. Preheat a non-stick skillet over medium heat. 2. Lightly grease the skillet with coconut oil or cooking spray. 3. Pour about 1/4 cup of batter onto the skillet for each pancake. 4. Cook for 2-3 minutes until bubbles form and edges look set. 5. Flip the pancakes with a spatula and cook for 1-2 more minutes. 6. Look for a golden brown color to know they are done. 7. Adjust the heat as needed to avoid burning. Grease the skillet lightly between batches. 1. Serve the warm pancakes topped with fresh fruit. 2. Drizzle with maple syrup for extra sweetness. 3. Stack the pancakes high on a plate for a beautiful look. 4. Add a sprinkle of chai spice on top for a finishing touch. To get the best pancakes, do not overmix the batter. Overmixing can make your pancakes tough. It is okay if the batter has some lumps. These lumps help keep the pancakes light and fluffy. If your batter is too thick, you can add a little more milk. This makes it easier to pour and cook. Control the temperature of your skillet. If it is too hot, the pancakes will burn. If it is too cool, they will be soggy. Start with medium heat and adjust as needed. Grease the pan well with coconut oil or cooking spray. This prevents sticking and helps the pancakes cook evenly. One big mistake is undercooking the pancakes. Always make sure they are golden brown on both sides. Use a spatula to check the underside. Another mistake is skipping the resting period. Letting the batter sit for a few minutes allows the ingredients to blend better. This can improve the texture of your pancakes. {{image_4}} You can swap oat flour for other flours. Almond flour or whole wheat flour works well. Both options give a different taste and texture. If you need gluten-free, try using a gluten-free flour blend. For milk, almond milk is great, but you can use soy or oat milk. Coconut milk adds a nice creaminess too. Choose what fits your diet best. Want more flavor? You can add a pinch of nutmeg or a bit of vanilla bean. These spices boost the chai taste even more. You can also mix in chopped nuts or dark chocolate chips. They add crunch and sweetness to your stack. You can stack your pancakes high or serve them as a single layer. Stacking makes for a fun presentation. For a savory twist, try adding toppings like Greek yogurt or avocado. This gives your meal a new flavor and a healthy kick. You can refrigerate leftover pancakes. Place them in an airtight container. They stay fresh for up to three days. When you are ready to eat them, reheat in a skillet or microwave. If using a skillet, add a bit of oil to get them warm. This keeps them fluffy. For long-term storage, freeze your pancakes. Stack them with parchment paper between each pancake. Place the stack in a freezer-safe bag. They can last up to two months in the freezer. To thaw, take them out and let them sit at room temperature. You can also microwave them for a quick reheat. In the fridge, pancakes last about three days. After that, check for signs of spoilage. If you see mold or a strange smell, toss them out. Always trust your senses when it comes to food safety. Yes, you can easily make these pancakes dairy-free. Use almond milk, soy milk, or oat milk instead of regular milk. Each option adds its own flavor, so choose what you like best! To boost protein, add extra protein powder. You can also mix in Greek yogurt or cottage cheese. If you prefer whole food sources, try adding nut butter or chopped nuts for a tasty crunch. Yes, you can use other flours. Almond flour, coconut flour, or gluten-free flour blends work well. Keep in mind that these flours may change the texture. Adjust the liquid in the recipe if needed. Great toppings include fresh fruit like bananas or berries. A drizzle of maple syrup enhances the sweetness. You can also sprinkle nuts or seeds for added texture and flavor. This recipe serves about 2-3 people. You will get around six pancakes. If you need more, you can easily scale the recipe. To make a larger batch, simply double or triple the ingredients. Keep the cooking time the same, but cook in batches. This way, the pancakes stay warm and delicious! These pancakes blend simple, healthy ingredients for a tasty breakfast. We covered everything from combining the base to cooking them perfectly. You now know tips for texture and flavor variations. Storing and reheating methods will help you enjoy these pancakes longer. Experiment with your favorite toppings to elevate each bite. These pancakes aren't just delicious; they support a balanced diet too. Enjoy making and sharing them, as they are sure to impress!

Vanilla Chai Protein Pancakes Healthy and Flavorful Meal

To make Garlic Herb Roasted Baby Potatoes, you will need: - 1.5 lbs baby potatoes, halved - 4 cloves garlic, finely minced - 3 tablespoons extra virgin olive oil - 1 tablespoon fresh rosemary, finely chopped - 1 tablespoon fresh thyme, finely chopped - 1 teaspoon sea salt - 1/2 teaspoon freshly ground black pepper - 1 teaspoon smoked paprika - Fresh parsley, chopped, for garnish These ingredients bring out the best flavor in the potatoes. The garlic adds a nice kick, while the herbs give a fresh taste. If you want to change things up, here are some alternatives: - You can use avocado oil instead of olive oil for a different flavor. - Swap rosemary for oregano or basil if you prefer. - For a spicy twist, try adding red pepper flakes. These substitutions help you customize the dish to fit your taste or dietary needs. Here are the tools you will need: - A large mixing bowl - A spatula for tossing - A baking sheet - Parchment paper - A sharp knife for cutting potatoes - A measuring spoon Having these tools ready makes the cooking process smooth and easy. Start by preheating your oven to 400°F (200°C). This temperature is key for roasting. It helps cook the potatoes evenly and creates a crispy outer layer. A hot oven makes a big difference in how your potatoes turn out. Wash 1.5 lbs of baby potatoes under cold water. This removes dirt and any residue. Next, cut each potato in half. This helps them cook faster and allows the flavors to soak in. After cutting, dry them with a clean towel. Dry potatoes will roast better, giving you that perfect texture. In a large bowl, add the halved baby potatoes. Now, it’s time to add flavor! Toss in 4 cloves of finely minced garlic. Then, drizzle in 3 tablespoons of extra virgin olive oil. Next, add 1 tablespoon each of finely chopped rosemary and thyme. Don’t forget 1 teaspoon of sea salt and 1/2 teaspoon of black pepper. For a warm flavor, add 1 teaspoon of smoked paprika. Mix everything well using your hands or a spatula. Make sure every potato is coated with the herbs and spices for the best taste. When choosing baby potatoes, look for ones that are firm and smooth. Avoid any potatoes with blemishes or green spots. The best choices are those that are small and evenly sized, as they cook more evenly. Varieties like Yukon Gold or red baby potatoes work great. These types have creamy flesh and a lovely flavor that pairs well with herbs. To get that perfect crispy texture, make sure to spread the potatoes in a single layer on the baking sheet. Crowding them can lead to steaming instead of roasting. Use enough olive oil to coat each potato, which helps them brown nicely. Toss them halfway through cooking to ensure all sides get golden. A sprinkle of smoked paprika also adds a nice crispy texture and flavor. Garlic herb roasted baby potatoes pair well with many dishes. They go great with grilled chicken or steak, bringing color and flavor to your plate. You can also serve them alongside a fresh salad or grilled veggies for a lighter meal. For a full feast, add a creamy dip or sauce for extra taste. Don't forget to garnish with fresh parsley for a pop of color and fresh flavor! {{image_4}} You can change up the flavor of your garlic herb roasted baby potatoes by using different herbs and spices. Here are a few ideas to try: - Oregano: Adds a warm, earthy taste. - Basil: Great for a fresh, sweet flavor. - Cilantro: Gives a bright, zesty touch. - Chili Flakes: For a spicy kick. Feel free to mix and match to find your favorite combo! Roasting other veggies with your potatoes can create a colorful and tasty dish. Here are some great options: - Carrots: Sweet and tender when roasted. - Bell Peppers: Add a splash of color and flavor. - Zucchini: Soft and delicious alongside potatoes. - Onions: Sweetens up and adds depth. Just make sure to cut them into similar sizes for even cooking! You can easily adapt this recipe for different diets. Here’s how: - Vegan: Use olive oil and skip any dairy. - Gluten-Free: This recipe is naturally gluten-free! - Low-Carb: Try using cauliflower instead of potatoes. These tweaks help you enjoy this dish no matter your eating style! To keep your garlic herb roasted baby potatoes fresh, store them in an airtight container. Let them cool before sealing. Place the container in the fridge. They will stay good for about 3 to 5 days. If you notice any signs of spoilage like a sour smell or mold, throw them out. To reheat, use an oven or a skillet. Preheat your oven to 350°F (175°C). Spread the potatoes on a baking sheet. Heat for about 10 to 15 minutes. You want them warm and crispy. If using a skillet, add a bit of oil and stir over medium heat until warmed through. This keeps the texture nice. Yes, you can freeze garlic herb roasted baby potatoes. First, let them cool completely. Then, place them in a freezer bag. Squeeze out as much air as possible before sealing. They can last up to 2 months in the freezer. When ready to eat, thaw them in the fridge overnight. Reheat in the oven or skillet for the best texture. Yes, you can prepare Garlic Herb Roasted Baby Potatoes in advance. Cook them as directed, then let them cool. Once cooled, store them in an airtight container in the fridge. They will stay fresh for a few days. Reheat them in the oven for best results. Garlic Herb Roasted Baby Potatoes last about 3 to 5 days in the fridge. Look for signs of spoilage, like an off smell or a slimy texture. If they smell bad or look strange, it’s best to toss them out. If you can't find baby potatoes, try using small red or yellow potatoes. Cut them into similar sizes for even cooking. You can also use fingerling potatoes, which have a lovely shape and flavor. Garlic Herb Roasted Baby Potatoes are simple yet full of flavor. You will start by preheating your oven to 400°F (200°C). While it warms up, wash and halve the baby potatoes. In a bowl, mix the halved potatoes with minced garlic, olive oil, fresh rosemary, fresh thyme, sea salt, black pepper, and smoked paprika. Toss everything well to coat the potatoes. After that, place them on a lined baking sheet in a single layer. Roast in the oven for 25-30 minutes. Halfway through, stir the potatoes to ensure even cooking. Once golden and tender, let them cool for a few minutes. Finally, garnish with fresh parsley before serving. - Prep Time: 10 minutes - Total Time: 40 minutes - Servings: 4 You can find more details in the sections below: - [Ingredients](#ingredients) - [Step-by-Step Instructions](#step-by-step-instructions) - [Tips & Tricks](#tips--tricks) - [Variations](#variations) - [Storage Info](#storage-info) - [FAQs](#faqs) Garlic Herb Roasted Baby Potatoes are simple to make and delicious. We covered all you need, from ingredients to cooking tips. Remember to pick fresh baby potatoes and mix flavors to keep it fun. These potatoes pair well with many meals, making them a great side dish. Keep any leftovers in the fridge for later. You can even freeze them! Now, you can impress family and friends with your cooking skills. Enjoy every crispy bite!

Garlic Herb Roasted Baby Potatoes Delightful Side Dish

You need 2 cups of fresh raspberries for this recipe. Raspberries are sweet and tart. They add bright flavor and color to the popsicles. Choose ripe ones for the best taste. You can mash them or blend them to make a smooth puree. One cup of plain Greek yogurt gives creaminess to the popsicles. It provides a nice tang that pairs well with the fruit. Greek yogurt is thick and rich. Using it makes your popsicles feel indulgent and satisfying. For sweetness, use 1/2 cup of honey or maple syrup. Honey offers a floral note, while maple syrup gives a deeper flavor. Choose based on your taste. You can also adjust the amount to fit your sweetness level. You need 1/2 cup of freshly squeezed lemon juice. This adds a zesty kick to the mixture. The acidity helps balance the sweetness from the honey or maple syrup. Fresh juice tastes much better than bottled juice. Use 1 teaspoon of lemon zest to enhance the lemon flavor. The zest contains essential oils that give a bright aroma. It also adds visual appeal with tiny flecks of yellow in the popsicles. Add a pinch of salt to the yogurt mixture. Salt helps bring out the flavors in the popsicles. It balances the sweetness and adds depth to each bite. Just a small amount makes a big difference! Start by adding 2 cups of fresh raspberries and 1/2 cup of honey to a blender. Blend until smooth. If you want a seedless puree, pour the mixture through a fine mesh sieve. Press with a spatula to get all the juice. Set the raspberry puree aside. This bright, tart flavor is key to your popsicles. In a medium mixing bowl, whisk together 1 cup of plain Greek yogurt, 1/2 cup of freshly squeezed lemon juice, 1 teaspoon of lemon zest, and a pinch of salt. Mix until it is smooth and creamy. This tangy yogurt base will balance the sweet raspberry puree. Prepare your popsicle mold for layering. Pour a small amount of the yogurt mixture into each mold. Fill them about one-third full. This is your first creamy layer. Then, add a layer of the raspberry puree on top. Use a skewer to gently swirl the two mixtures together for a marbled effect. Continue layering the popsicles. Pour more yogurt mixture to fill each mold two-thirds full. Then, add the last layer of raspberry puree until full. Insert popsicle sticks into the center of each mold. Carefully place the filled molds in the freezer. Let them freeze for at least 4 to 6 hours, or until solid. Once frozen, it’s time to enjoy your popsicles! To remove them, run warm water over the outside of the mold for a few seconds. This will help loosen them for easy removal. Now, you can savor your homemade Raspberry Lemon Yogurt Popsicles! To get the best texture, blend the raspberries smoothly. If you want no seeds, strain the puree. The Greek yogurt gives a creamy feel. Whisk it well with lemon juice and zest. This mix should be smooth and thick. The key is to layer the mixtures well. It creates a nice look and texture when frozen. You can adjust sweetness based on your taste. If you like it sweeter, add more honey. Maple syrup works well if you want a vegan option. For more flavor, try adding vanilla extract or mint. You can also mix in other fruits like strawberries or blueberries. This makes the popsicles even more exciting! You will need a few basic tools. First, get a blender for the raspberry puree. A medium mixing bowl is essential for the yogurt mix. Use a popsicle mold to shape the treats. Popsicle sticks help hold them while freezing. Lastly, have a spatula handy for easy mixing and pouring. These tools will make your process quick and easy! {{image_4}} To make a dairy-free version, you can use coconut yogurt instead of Greek yogurt. This keeps the popsicles creamy and delicious. Coconut yogurt also adds a subtle tropical flavor. You can find this yogurt at most grocery stores. You can mix in other fruits to change the flavor. Strawberries, blueberries, or peaches work well. Simply blend the fruits and follow the same steps. You can layer them with the raspberry and yogurt mixtures for a fun look. Experimenting with different zest can add unique tastes. Orange or lime zest can replace lemon zest. Each option gives a new twist to your popsicles. Try combining different zests for a layered flavor experience. To get the best popsicles, freeze them properly. Use a popsicle mold designed for freezing. Fill each slot carefully, leaving a little space at the top. This allows the mixture to expand while freezing. Place the mold on a flat surface in your freezer. This ensures they freeze evenly. Once your popsicles are frozen solid, you need to store them well. Use airtight containers or freezer bags. Wrap each popsicle in plastic wrap for extra protection. This keeps them safe from freezer burn. Label the containers with the date for easy tracking. Raspberry Lemon Yogurt Popsicles can last about two months in the freezer. After that, they may lose flavor and texture. For the best taste, enjoy them within the first month. Always check for ice crystals or freezer burn before enjoying. If they look or smell off, it’s best to toss them. To stop popsicles from sticking, run warm water over the mold. This warms the outside and helps release the popsicles. You can also lightly grease the molds with a tiny bit of oil before adding the mixture. Just a little will work. Yes, you can use frozen raspberries. They will blend well and still taste great. Just be sure to let them thaw slightly for easier blending. The texture might be a bit different, but the flavor will still shine through. These popsicles can last up to two months in the freezer. Just make sure to store them in an airtight container. This keeps them fresh and prevents freezer burn. Absolutely! You can use strawberries, blueberries, or peaches. Just blend them the same way as the raspberries. Feel free to mix and match for fun flavors! Yes, these popsicles are a healthy treat. They use Greek yogurt, which is rich in protein, and fresh fruit, which adds vitamins. Use honey or maple syrup for natural sweetness, and they are lower in sugar than store-bought pops. In this post, we explored how to make delicious Raspberry Lemon Yogurt Popsicles. We covered key ingredients like fresh raspberries, Greek yogurt, and sweeteners. I shared steps to prepare the puree, mix the yogurt, and freeze the popsicles. Plus, we discussed tips for texture and customizing flavors, along with storage advice. These popsicles are not just tasty; they're also flexible for your dietary needs. Enjoying this treat can be fun and healthy. Give this recipe a try, and let the flavors brighten your day!

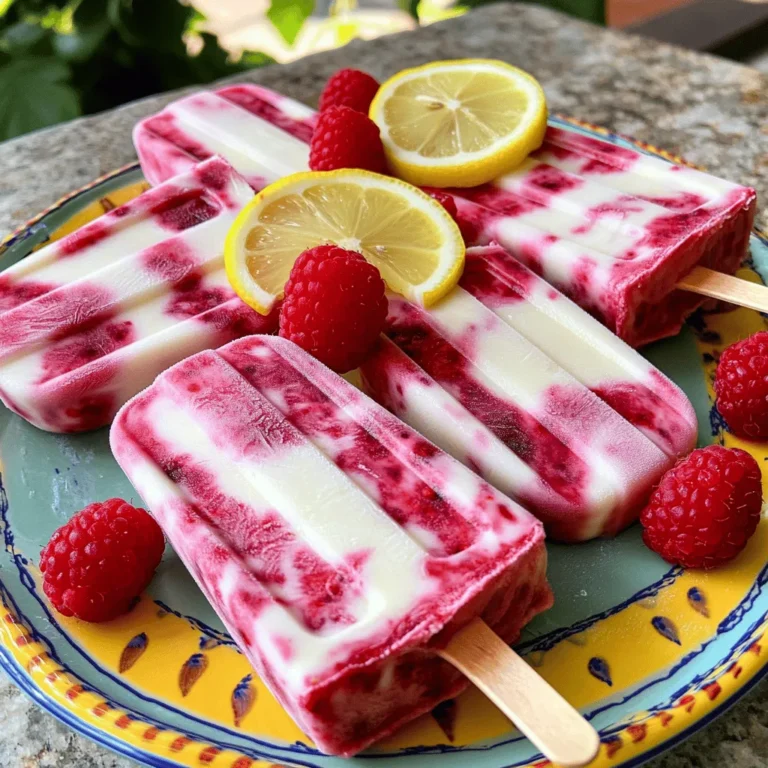
Raspberry Lemon Yogurt Popsicles Refreshing Summer Treat

- 2 cups cooked chicken, shredded - 4 cups mixed salad greens - 1 cup cherry tomatoes, halved - 1 cup corn kernels - 1 cup black beans, rinsed and drained - 1/2 red onion, sliced thinly - 1 cup shredded cheddar cheese - 1/2 cup BBQ sauce - 1/2 cup ranch dressing - Salt and pepper to taste - Optional: Fresh cilantro leaves for garnish The BBQ Ranch Chicken Salad shines with its fresh and vibrant ingredients. I prefer using grilled chicken or rotisserie chicken for a rich flavor. The mix of salad greens adds crunch and color. Cherry tomatoes bring sweetness, while corn adds a nice pop of texture. Black beans are a great source of protein and fiber. I love the thin slices of red onion for a slight bite. For cheese, I recommend sharp cheddar because it enhances the dish. The BBQ sauce and ranch dressing provide a creamy and tangy kick. Don't forget to season with salt and pepper to make the flavors pop. You can even add fresh cilantro leaves for a burst of freshness. This salad is not just tasty; it’s also full of nutrients and good for you! - Best BBQ sauces: Look for sweet and smoky options. - Top ranch dressing options: Choose creamy ones that pack flavor. - Recommended cheese types: Sharp cheddar or a blend adds great taste. - Step 1: Mix shredded chicken with BBQ sauce. In a medium bowl, combine the chicken and BBQ sauce. Stir well until the chicken is fully coated. - Step 2: Layer salad greens in a large bowl. Take your mixed greens and spread them evenly across the bottom of a large salad bowl. - Step 3: Add cherry tomatoes, corn, black beans, and onions. Scatter the halved cherry tomatoes, corn, black beans, and sliced red onion over the greens. This adds color and texture. - Step 4: Top with BBQ chicken mixture. Spoon the BBQ chicken mixture on top of the salad. Make sure it spreads out nicely. - Step 5: Sprinkle with cheddar cheese. Add a generous amount of shredded cheddar cheese on top for a creamy finish. - Step 6: Drizzle ranch dressing and season. Drizzle ranch dressing over the salad. Add salt and pepper to taste. If you want, toss the salad gently to mix all the flavors. - Presentation ideas for BBQ Ranch Chicken Salad: Serve the salad in wide, shallow bowls. This helps showcase the bright ingredients. You can add extra cherry tomatoes or cheddar cheese on top for a nice look. - Combining with side dishes: This salad pairs well with warm bread or a light soup. Try a fresh baguette or some tortilla chips for a crunch. - Ideal beverages to pair: Pair this salad with a cold iced tea or a light beer. A sparkling water with lime also works well to refresh your palate. - Choose the right BBQ sauce Pick a BBQ sauce you love. A sweet or smoky sauce adds great flavor. Test a few brands to find your favorite. - How to shred chicken quickly Use two forks to shred cooked chicken. Hold one fork in each hand and pull apart the meat. This method is fast and easy. - Importance of ingredient quality Fresh ingredients make a big difference. Use crisp greens and ripe tomatoes for the best taste. Quality cheese also enhances flavor. - Best practices for warming chicken Warm chicken in the microwave for a short time. Cover it with a damp paper towel to keep it moist. Avoid overheating, or it may dry out. - Serving salad fresh vs. leftover Serve the salad right after making it for the best crunch. If you have leftovers, store them in the fridge. Keep dressing separate until serving. This keeps the salad fresh and tasty. {{image_4}} - Alternatives to chicken: If you want a change, try using turkey or tofu. Both options work well in this salad. You can also use shredded pork for a smoky twist. - Veggie options for a vegetarian salad: For a meat-free dish, replace the chicken with roasted chickpeas or grilled tempeh. These add protein and taste. You can also add more beans or nuts for crunch. - Creative cheese substitutions: Instead of cheddar, try pepper jack for a spicy kick. Feta cheese gives a tangy flavor, or you can use a dairy-free cheese if needed. - Adding spices for extra flavor: Spice things up by mixing in cumin or smoked paprika. A pinch of cayenne pepper adds heat, while fresh herbs like basil or dill enhance the taste. - Suggestions for homemade dressings: If you want to make your dressing, mix yogurt with some BBQ sauce. This gives a creamy texture with a kick. You can also blend ranch with lime juice for a fresh twist. - Use of different types of beans: Instead of black beans, use pinto or kidney beans. Each type adds a unique taste and texture. White beans are also great for a milder flavor. To keep your BBQ Ranch Chicken Salad fresh, use airtight containers. Glass or plastic containers work well. Make sure to separate the salad components if possible. This helps keep the greens crisp. For best results, eat the salad within three days. Keep any dressing in a separate container until serving. This keeps the salad from getting soggy. Can you freeze BBQ Ranch Chicken Salad? I don’t recommend freezing this salad. The greens lose their texture when thawed. However, you can freeze some ingredients. Cooked chicken and black beans freeze nicely. Store them in freezer bags. Remove as much air as you can. When ready to use, thaw in the fridge overnight. This way, your meal stays fresh and tasty. You can prepare the BBQ Ranch Chicken Salad ahead. Mix the chicken with BBQ sauce. Store it in the fridge. Keep the greens and other veggies separate to stay fresh. Before serving, combine everything in a bowl. Yes, using store-bought rotisserie chicken is a great idea. It saves time and adds flavor. Just shred the chicken and mix it with BBQ sauce. It will taste delicious in your salad. This salad is packed with nutrients. Chicken provides protein for energy. Mixed greens add vitamins A and C. Beans add fiber for digestion. Tomatoes and corn boost antioxidants. The cheddar cheese offers calcium too. To make it gluten-free, use a gluten-free BBQ sauce and ranch dressing. For a dairy-free option, skip the cheese and choose a dairy-free dressing. You can also add more veggies for flavor and nutrition. If you want a dressing alternative, consider using a vinaigrette. A simple mix of olive oil, vinegar, and herbs works well. You can try a yogurt-based dressing for a creamy option without ranch. This blog post covered the tasty BBQ Ranch Chicken Salad. We explored key ingredients like chicken, veggies, and dressings. You learned step-by-step instructions for easy preparation and serving tips. I shared variations and flavor enhancements to make your salad unique. In closing, this dish is versatile and simple. Feel free to adjust ingredients based on your taste. Enjoy making this salad for any occasion!

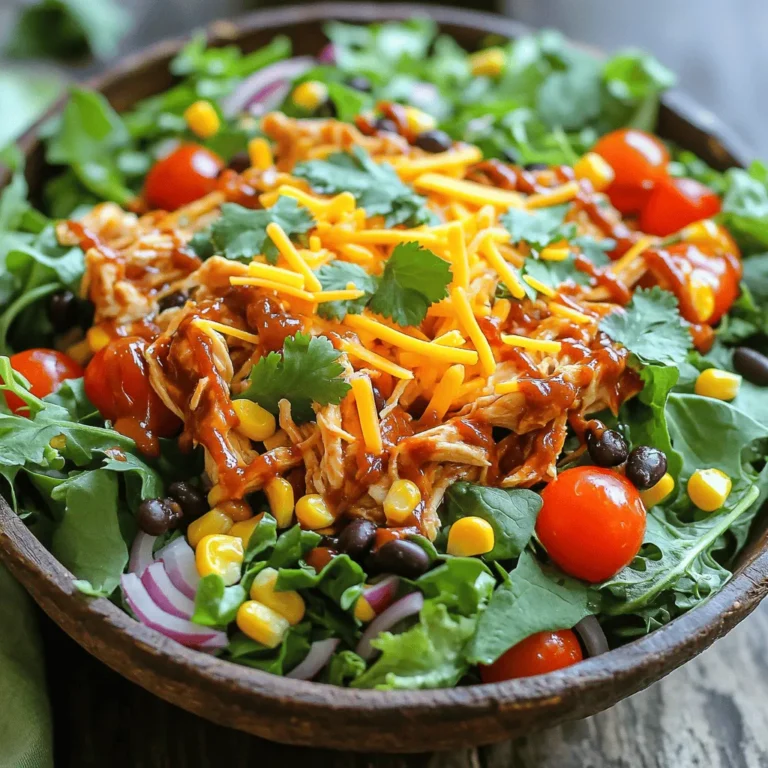
BBQ Ranch Chicken Salad Flavorful and Fresh Option

- 1 cup green or brown lentils, rinsed and drained - 3 cups vegetable broth - 1 medium onion, finely diced - 2 cloves garlic, minced - 2 medium carrots, peeled and diced - 1 celery stalk, diced - 1 cup frozen peas - 1 tablespoon tomato paste - 1 teaspoon dried thyme - 1 teaspoon dried rosemary - Salt and pepper, to taste - 4 medium potatoes, peeled and cubed - 1/4 cup almond milk (or any favorite plant-based milk) - 2 tablespoons vegan butter - Fresh parsley, chopped (for garnish) This dish serves six. Each serving has about: - Calories: 300 - Protein: 12g - Fiber: 8g - Carbohydrates: 50g - Fat: 7g This vegan lentil shepherd's pie is not just tasty; it is also a healthy choice. You get a good amount of protein and fiber from the lentils. The vegetables add vitamins and minerals, making the dish both hearty and nourishing. The mashed potatoes on top provide a comforting texture. To start, we need to cook the lentils and make the broth. In a medium pot, mix the rinsed lentils with three cups of vegetable broth. Bring this to a boil, then lower the heat. Let it simmer for about 25 to 30 minutes. The lentils will soften nicely. Drain any extra liquid and set them aside. Next, let’s prep the vegetables. Chop one medium onion finely. Mince two garlic cloves. Dice two peeled carrots and one celery stalk. This will add great flavor to our filling. Now, let’s sauté the veggies. In a large skillet, pour a splash of water or broth over medium heat. Add the diced onion, minced garlic, carrots, and celery. Cook them for about 5 to 7 minutes. They should become soft and fragrant. Once the veggies are ready, mix in the cooked lentils. Add one cup of frozen peas, one tablespoon of tomato paste, one teaspoon of dried thyme, one teaspoon of dried rosemary, salt, and pepper. Stir everything well. Let this simmer for another 5 minutes. While the filling simmers, we can make the mashed potatoes. Fill a pot with water and bring it to a boil. Add four cubed potatoes and cook until they are fork-tender, which takes about 15 to 20 minutes. When they’re soft, drain the potatoes and return them to the pot. Add one-fourth cup of almond milk and two tablespoons of vegan butter to the potatoes. Mash them until smooth and creamy. Taste and add more salt and pepper if needed. Now it’s time to layer our dish. Preheat your oven to 400°F (200°C). In a baking dish, spread the lentil mixture evenly at the bottom. Then, carefully spread the creamy mashed potatoes on top. Use a fork to create peaks and texture. This helps with browning while it bakes. Transfer your shepherd's pie to the oven. Bake it for 25 to 30 minutes. Keep an eye on it. You want the top to be golden and crispy. Once it looks perfect, remove it from the oven and let it cool for a few minutes before you dig in. Enjoy your hearty vegan lentil shepherd's pie! To boost flavor in your vegan lentil shepherd’s pie, try these tips: - Add spices: A pinch of smoked paprika or cumin can add warmth. - Use fresh herbs: Fresh thyme or rosemary gives a bright taste. - Roasted garlic: Roast garlic before adding it for a deep and rich flavor. Roasting garlic is easy. Just wrap cloves in foil and bake until soft. This can change your dish from good to great. For creamy mashed potatoes, follow these tips: - Perfect consistency: Boil potatoes until fork-tender, then mash well. - Alternative milks: If almond milk isn’t your favorite, try oat or soy milk for creaminess. Make sure to taste your mash. Adjust the seasonings to suit your palate for the best outcome. Make your shepherd’s pie look inviting with these ideas: - Serving style: Serve it in individual ramekins for a personal touch. - Garnish: Sprinkle chopped parsley on top for a pop of color. - Pairing options: A fresh side salad adds crunch and balances the meal. These simple touches can elevate your dish and impress your guests. {{image_4}} You can switch lentils in this recipe. Use red lentils for a quicker cook. Green and brown lentils hold their shape better. They add a nice texture to the pie. You can also mix in other veggies. Try bell peppers or mushrooms for more flavor. They make the filling even heartier. Herbs can change the flavor a lot. Add basil or oregano for a fresh taste. You can also try thyme or rosemary for depth. For an extra kick, consider vegan cheese. Nutritional yeast gives a cheesy flavor without dairy. It also adds a nice golden color when baked. You can make this dish on the stovetop or in the oven. Stovetop cooking is faster and easier. It lets you keep an eye on the filling. Baking gives a crisp top that many love. You can also use a slow cooker for meal prep. Just combine the filling ingredients and let it cook. This method is great for busy days. To keep your vegan lentil shepherd’s pie fresh, place leftovers in the fridge. Use airtight containers to prevent moisture loss. This way, the flavors stay strong. For long-term storage, you can freeze the shepherd’s pie. Let it cool completely before wrapping. Use plastic wrap followed by aluminum foil for best results. When you want to enjoy it, thaw it overnight in the fridge. Reheat it in the oven at 350°F (175°C) until warm, about 20-25 minutes. In the fridge, the shepherd’s pie lasts up to 4 days. If frozen, it stays good for about 3 months. Always check for signs of spoilage before eating. You can try chickpeas or black beans. Both add good protein and taste. If you want a different texture, consider crumbled tempeh or mushrooms. They also provide a hearty feel. Yes, it is great for meal prep! You can make it in advance and store it. Simply assemble the pie and cover it well. When ready to eat, just bake it. It heats up nicely and keeps flavor. Yes, you can! Just check your vegetable broth. Some broths may have gluten. Use a gluten-free broth and ensure your almond milk is also gluten-free. Look for a golden-brown top. It should be firm but not hard. You can also check if it is hot in the center. Use a thermometer to see if it reaches 165°F (74°C). To reheat, cover it with foil. This keeps it moist and prevents drying out. You can bake it at 350°F (175°C) for about 20-25 minutes. Stirring the filling helps warm it evenly. You learned how to make a delicious vegan lentil shepherd’s pie. We covered the key ingredients, step-by-step cooking methods, and handy tips for a perfect dish. You can enjoy this meal while knowing it’s healthy and easy to customize. Whether you’re trying new flavors or storing leftovers, this recipe works for every occasion. Dive in and make this comforting recipe for yourself and your loved ones. Enjoy every bite of your creation!

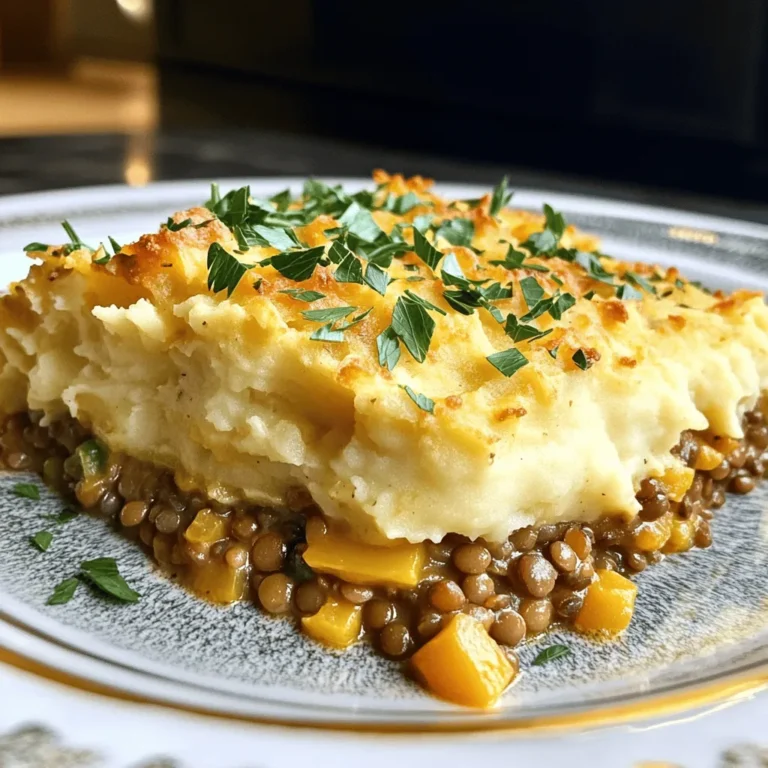
Vegan Lentil Shepherd’s Pie Tasty and Hearty Meal

PREV 1 … 10 11 12 … 20 NEXT
purelyyumrecipes

explore

DessertsDinnerAppetizersDrinks

Our Policies

  • Cookie Policy
  • Copyright Policy
  • Disclaimer
  • GDPR Policy
  • Terms Of Use
Back to Top
  • About
  • Contact Us
  • Privacy Policy
© 2025 purelyyumrecipes