FREE DINNER EBOOK! Get your copy!
  • Cookie Policy
  • GDPR Policy
  • Disclaimer
  • Terms Of Use
  • Visit my other site: Fun Cookie Recipes
purelyyumrecipes
  • Home
  • Dinner
  • Desserts
  • Drinks
  • Appetizers
  • Contact
  • About
  • Privacy Policy
  • Home
  • Dinner
  • Desserts
  • Drinks
  • Appetizers
  • Contact
  • About
  • Privacy Policy
  • Cookie Policy
  • GDPR Policy
  • Disclaimer
  • Terms Of Use
Visit my other site: Fun Cookie Recipes

HOME / CATEGORIES /

Latest

To make delicious lemon ricotta pancakes, you need these main ingredients: - 1 cup fresh ricotta cheese - 1 cup buttermilk - 3 large eggs, at room temperature - 1 cup all-purpose flour - 1 tablespoon baking powder - 1/4 teaspoon baking soda - 1/4 teaspoon fine sea salt - Zest from 2 medium-sized lemons - 1/4 cup granulated sugar - 2 tablespoons unsalted butter, melted - 1 teaspoon pure vanilla extract These ingredients work together to create a fluffy and tasty pancake. The ricotta cheese adds creaminess, while the lemon zest brings a fresh pop of flavor. You can also add some optional ingredients to make the pancakes even better: - Fresh mixed berries (like blueberries, strawberries, and raspberries) for topping - Pure maple syrup for serving - Powdered sugar for a sweet touch These extras can brighten up your meal and make it more fun. If you need to make changes, here are some substitutions: - If you don't have buttermilk, mix 1 cup of milk with 1 tablespoon of vinegar or lemon juice. Let it sit for 5 minutes. - You can use Greek yogurt instead of ricotta cheese for a tangier taste. - If you want gluten-free pancakes, use a gluten-free flour blend. Feel free to get creative with these ingredients. Cooking is all about making it your own! Start by gathering all your ingredients. In a large bowl, mix the ricotta cheese, buttermilk, and eggs. Whisk them until smooth. Make sure there are no lumps. In another bowl, mix the flour, baking powder, baking soda, salt, and sugar. Add the lemon zest to this mix for a fresh flavor. Slowly combine the dry mix with the wet ingredients. Use a spatula to fold them together gently. It's okay if the batter has a few lumps. Next, stir in the melted butter and vanilla extract until everything is just mixed. Now, heat your non-stick skillet over medium heat. Lightly grease it with butter or cooking spray. Pour about 1/4 cup of batter onto the skillet for each pancake. Cook for 2-3 minutes. Look for small bubbles forming on the surface. This shows it’s ready to flip. Carefully turn the pancake and cook for another 2-3 minutes until golden brown. Adjust the heat if needed to avoid burning. Repeat this with the remaining batter. Serve your pancakes warm, stacked high on a plate. Top them with fresh mixed berries for a burst of color and flavor. Drizzle pure maple syrup over the stack for added sweetness. For a beautiful display, dust the pancakes with powdered sugar and add a slice of lemon on the side. Enjoy your delicious meal! To make your pancakes extra fluffy, start with room temperature eggs. Cold eggs can lead to a denser batter. When mixing your batter, be gentle. Over-mixing can make pancakes tough. Leave a few lumps in the batter. This helps keep them light and airy. A common mistake is not measuring ingredients correctly. Use measuring cups for flour, sugar, and buttermilk. Too much flour can make pancakes dry. Another mistake is cooking at too high a heat. Keep your skillet on medium heat. This allows pancakes to cook evenly without burning. Always preheat your skillet or griddle before adding batter. A hot surface creates a nice golden crust. Use a non-stick pan or add a little butter to prevent sticking. Flip pancakes when you see bubbles forming on top. This means they are ready to turn. Serve them warm with fresh berries for a tasty treat. {{image_4}} You can mix things up with some fun flavors. Try adding chocolate chips for a sweet twist. You can also fold in some crushed nuts for a crunchy bite. If you love spices, a hint of cinnamon or nutmeg works well, too. For a fruity kick, try adding mashed bananas or diced apples to the batter. These add-ins can make your pancake breakfast even more exciting! If you need a gluten-free option, simply swap the all-purpose flour for a gluten-free blend. Look for a mix that includes xanthan gum for the best texture. You can also use almond flour or coconut flour, but adjust the liquid in your recipe. Using gluten-free flour may change the texture slightly, but your pancakes will still taste amazing! Want to try a savory take? Skip the sugar and vanilla, and add herbs instead. Fresh thyme or chopped chives give a great flavor. You can also mix in some grated cheese, like Parmesan, for a rich taste. Serve these savory pancakes with a dollop of Greek yogurt or a side of smoked salmon for a delicious brunch option. To store leftover pancakes, allow them to cool first. Place them in an airtight container. You can stack them with parchment paper in between to prevent sticking. Store the container in the fridge for up to three days. This keeps your pancakes fresh and ready to enjoy later. When you're ready to eat your pancakes again, you have a few options. You can use a microwave, a skillet, or an oven. For the microwave, heat them for about 30 seconds. Check if they are warm enough. If not, heat them for another 15 seconds. In a skillet, warm them on low heat, flipping once until hot. For the oven, wrap them in foil and heat at 350°F for about 10 minutes. Each method works well to keep your pancakes soft and tasty. If you want to keep pancakes longer, freezing is a great choice. First, cool the pancakes completely. Then, place them in a single layer on a baking sheet. Freeze them for about one hour. Once frozen, transfer them to a freezer bag or airtight container. Label the bag with the date. You can freeze pancakes for up to two months. When you're ready to eat, just reheat them directly from the freezer. Enjoy your tasty Lemon Ricotta Pancakes anytime! To make pancakes with ricotta cheese, start by mixing the cheese, buttermilk, and eggs in a bowl. Whisk them until smooth. In another bowl, sift together flour, baking powder, baking soda, salt, and sugar. Add lemon zest for flavor. Combine the dry mix with the wet mix using a spatula. Fold gently to keep the batter light. Then, add melted butter and vanilla. Cook the pancakes on a medium skillet until golden. Yes, you can use regular milk instead of buttermilk. Buttermilk gives a nice tang and helps the pancakes rise. If you use regular milk, add a splash of lemon juice or vinegar. This will create a similar acidic effect. Let it sit for a few minutes before mixing it into the batter. This simple trick makes a big difference. You can serve Lemon Ricotta Pancakes with fresh mixed berries. Blueberries, strawberries, and raspberries work well. A drizzle of pure maple syrup adds sweetness. For extra flavor, sprinkle some powdered sugar on top. You can also add a slice of lemon for a citrus touch. Enjoying these pancakes warm makes them even better! Lemon ricotta pancakes are tasty and easy to make. You’ve learned the key ingredients, how to cook them, and the best tips for fluffy pancakes. We explored fun variations and how to store them, too. With these steps, you can whip up a breakfast that wows. Enjoy these delightful pancakes at your next meal and share with family and friends!

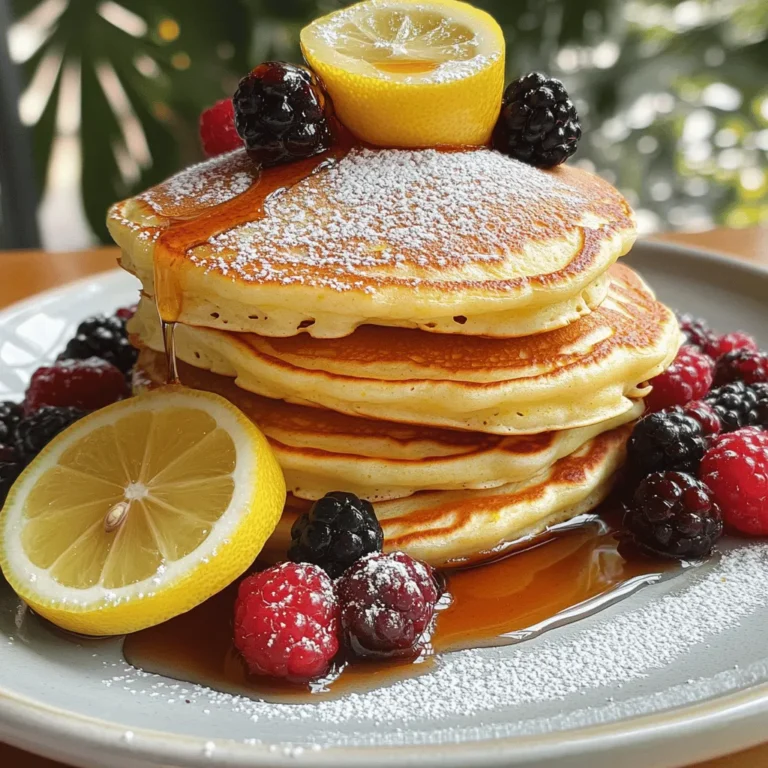
Lemon Ricotta Pancakes Fluffy and Delicious Meal

- 2 cans (15 oz each) chickpeas, thoroughly rinsed and drained - 1 can (14 oz) full-fat coconut milk - 1 medium onion, finely chopped - 3 cloves garlic, minced - 1 tablespoon fresh ginger, minced Chickpeas are the star of this dish. You can use canned or dried ones. Canned are quick and easy, while dried need soaking. Coconut milk adds rich creaminess to the curry. I prefer full-fat for the best flavor. Aromatics like onion, garlic, and ginger give depth to the dish. - 1 tablespoon curry powder - 1 teaspoon ground cumin - 1 teaspoon turmeric - 1 teaspoon chili powder (adjust to your preferred spice level) Spices bring life to your coconut curry. Curry powder is a mix of spices that adds warmth. Ground cumin gives a nutty flavor. Turmeric adds color and has health benefits. Adjust chili powder to suit your taste. More for heat, less for mild. - 2 cups fresh spinach leaves, washed and roughly chopped - 1 tablespoon extra virgin olive oil - Sea salt and freshly ground black pepper, to taste Fresh spinach adds a lovely green color and nutrients. Olive oil is perfect for sautéing the aromatics. Season with salt and pepper to enhance all the flavors. This mix creates a well-rounded dish that’s both tasty and healthy. Start by heating the extra virgin olive oil in a large skillet over medium heat. Once the oil is hot, add the finely chopped onion. Sauté it until it turns translucent, which takes about 5 minutes. This step builds a great base for your curry. Next, add the minced garlic and ginger to the pan. Stir well and cook for an additional minute. You want to cook until the mix becomes fragrant. This aroma is a sign that you are on the right track. Now, sprinkle in the curry powder, ground cumin, turmeric, and chili powder. Stir the mixture well. Toast the spices for about 30 seconds. This step enhances their flavors and brings out their warmth. The smell will be amazing! Pour in the full-fat coconut milk. Bring the mixture to a gentle simmer, stirring occasionally. This creates a creamy coconut sauce. It should look rich and inviting. Next, add the rinsed chickpeas to the sauce. Stir gently to coat them well. Allow the dish to simmer for 10 to 15 minutes. Stir occasionally until the sauce thickens slightly. It should beautifully coat the chickpeas. Fold in the fresh spinach leaves. Cook for an additional 3 to 5 minutes. You want the greens to wilt and brighten in color. This adds both nutrition and color to your dish. Remove the skillet from heat and season generously with sea salt and freshly ground black pepper. Adjust to your taste. Serve the coconut curry chickpeas over warm cooked rice or fluffy quinoa. Garnish with chopped fresh cilantro for a burst of flavor and color. Enjoy your delicious creation! Toasting spices adds depth to your dish. Heat a dry pan over medium heat. Add your spices, like curry powder and cumin. Stir them for about 30 seconds. You want to smell their rich aromas. This step makes the flavors pop! Balancing spice levels is key. Start with less chili powder. You can add more later if needed. Taste as you go! This way, you avoid an overly spicy dish. Use a large skillet or a Dutch oven for this recipe. They provide even heating and plenty of space. Avoid using a small pot; it can make stirring difficult. Simmering is best for this dish. It allows flavors to meld together. Boiling can make the chickpeas mushy. Keep the heat low, and let it simmer gently. For a beautiful dish, serve the curry in shallow bowls. This allows for a nice view of the vibrant colors. Add a sprinkle of fresh cilantro on top for brightness. Pair with lime wedges for a zesty kick. The lime juice will enhance the flavors. You can also serve it with warm rice or fluffy quinoa. This adds texture and makes the meal heartier. {{image_4}} You can change the protein in this dish easily. If you want meat, try chicken or shrimp. Cook them until they are done before adding them to the curry. For a vegetarian option, add tofu. Press and cube the tofu, then brown it before mixing it in. This will give you protein while keeping the dish plant-based. Feel free to swap in other greens too. Kale or Swiss chard work well. Just chop them up and add them in with the spinach. You can also toss in bell peppers or carrots for extra color and crunch. Slice the peppers thin and chop the carrots small so they cook well. You might want to switch up the spices. Use different curry blends for new flavors. Look for Thai curry or garam masala if you like. To change the heat, add less chili powder for mild spice. If you want more heat, add fresh chilies or more chili powder. Adjusting spices can make this dish your own. To store your leftover coconut curry chickpeas, let them cool first. Then, place them in an airtight container. This keeps the dish fresh. In the fridge, it lasts for about 3 to 4 days. Be sure to check for any off smells or changes in texture before serving again. You can also freeze the coconut curry chickpeas. Use freezer-safe containers or bags. Make sure to leave some space for expansion. This dish stays good in the freezer for up to 2 months. When you're ready to eat, move them to the fridge overnight to thaw. You can reheat them in a pot over low heat or the microwave. Stir occasionally to warm them evenly. Batch cooking is a smart way to enjoy this dish. You can prepare a big batch and store it for the week. Just follow the recipe as usual, then divide the curry into portions. Store them in airtight containers. For prepped ingredients, like chopped onion or garlic, keep them in sealed bags in the fridge. This makes it easy to cook on busy days. You can pair Coconut Curry Chickpeas with several tasty sides. Here are some great options: - Cooked rice: White, brown, or jasmine rice works well. - Fluffy quinoa: It adds a nice texture and flavor. - Naan bread: Perfect for scooping up the curry. - Roasted vegetables: Adds color and nutrients to your meal. - Cucumber salad: A cool, fresh side balances the heat. Yes, this recipe is vegan! The main ingredients are chickpeas and coconut milk, both plant-based. You can enjoy this dish without any animal products. It’s a hit for everyone, even non-vegans. You can control the spice level in this dish easily: - For mild curry: Use less chili powder or omit it. - For medium spice: Stick to the recipe as is. - For spicy curry: Add more chili powder or fresh chili peppers. Taste as you go to find your perfect heat! Chickpeas are a powerhouse of nutrition. They are: - High in protein: Great for muscle health. - Rich in fiber: Good for digestion and keeps you full. - Packed with vitamins: They provide iron, magnesium, and folate. - Low in fat: A healthy choice for heart health. Chickpeas also help in managing blood sugar levels. When choosing coconut milk, consider these options: - Full-fat coconut milk: Creamy and rich; perfect for the recipe. - Light coconut milk: Lower in fat but less creamy. - Coconut cream: Thicker and richer, but may need dilution. I recommend using full-fat for the best flavor and texture. This blog post guides you through making delicious Coconut Curry Chickpeas. We covered essential ingredients, from chickpeas to spices. You learned to prepare, season, and serve this dish beautifully. Remember, cooking is all about creativity. Modify the recipe to make it your own. Try different vegetables or proteins. Enjoy exploring new flavors. Cooking can be fun and rewarding!

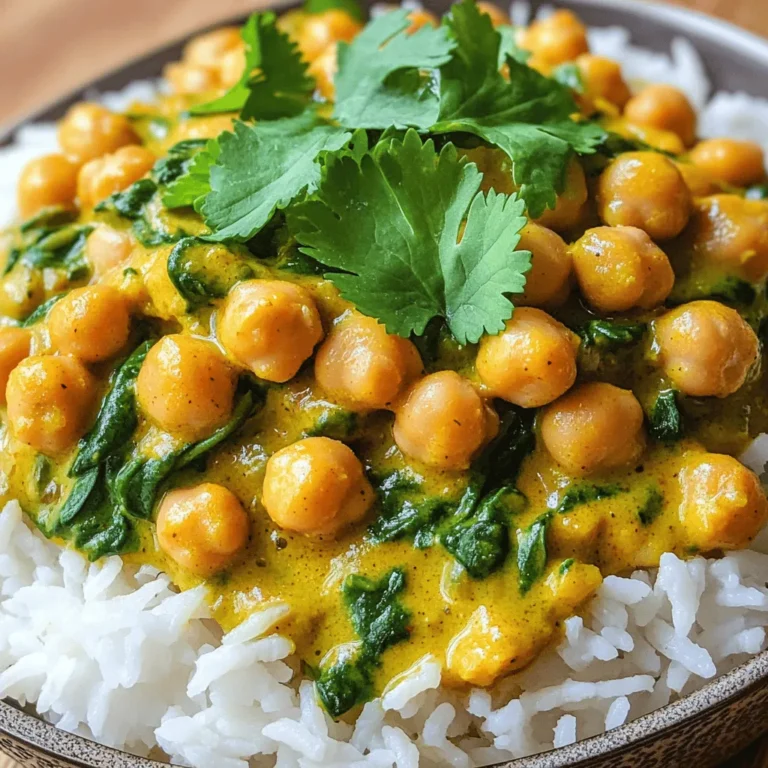
Coconut Curry Chickpeas Flavorful and Easy Recipe

- 4 boneless, skinless chicken breasts - Salt and freshly ground black pepper, to taste - 1 tablespoon extra virgin olive oil - 1 cup cherry tomatoes, halved - 1 cup fresh mozzarella balls (bocconcini) - 1/2 cup fresh basil leaves, torn into pieces - 1/2 cup balsamic glaze - 1 teaspoon garlic powder - 1 teaspoon dried oregano Fresh ingredients are key to this dish. Fresh basil adds a bright, herbal taste. It brings life to the chicken. Without it, the dish feels flat. Using fresh mozzarella is also important. The creamy texture and rich flavor elevate the meal. It melts beautifully, enhancing each bite. Choosing high-quality balsamic glaze matters, too. A good glaze has a perfect balance of sweet and tangy. It sticks well to the chicken and toppings, creating a luscious sauce. Always pick a glaze that you enjoy tasting. It makes a big difference in the final flavor. 1. Preheat your oven to 400°F (200°C). This step is key for even cooking. 2. Season the chicken breasts with salt, black pepper, garlic powder, and oregano. Use a mixing bowl for even coverage. Make sure to coat both sides well. 1. Sear chicken in the skillet. Heat olive oil in a large oven-safe skillet over medium-high heat. Add the chicken and cook for 2-3 minutes on each side. Look for a golden brown crust. 2. Layer toppings on chicken. After searing, remove the skillet from heat. Place halved cherry tomatoes and mozzarella balls on top of the chicken. Drizzle balsamic glaze over everything. Let those flavors combine as it cooks. 1. Transfer to oven. Carefully move the skillet into your preheated oven. Bake for about 25-30 minutes. Check that the chicken reaches 165°F (75°C) for safety. 2. Add basil in the final minutes. In the last 5 minutes, sprinkle torn basil leaves on top. This adds freshness and color to your dish. This method brings out the best flavors in your Balsamic Glazed Caprese Chicken. Enjoy each bite! How do I make homemade balsamic glaze? To make a simple balsamic glaze, simmer balsamic vinegar in a pan over low heat. Stir often until it reduces to a thick syrup. This takes about 15 to 20 minutes. You can add a bit of honey or brown sugar to sweeten it. How do I adjust sweetness and flavor? If you want a sweeter glaze, add more honey while it cooks. For a tangy kick, mix in a little lemon juice. Taste as you go, so you get the balance just right. How can I ensure chicken is juicy and tender? To keep the chicken juicy, don't overcook it. Sear it until golden, then bake it. The internal temperature should reach 165°F (75°C). Letting it rest after baking helps keep the juices inside. What are tips for preventing overcooking? Use a meat thermometer to check the chicken’s temperature. Start checking it a few minutes before the end of baking time. If you see it’s close, pull it out right away. What are the best sides to pair with Balsamic Glazed Caprese Chicken? Serve it with a light salad, crusty bread, or roasted vegetables. A fresh green salad adds a nice crunch. What are some presentation ideas for serving? Serve the chicken right in the skillet. Garnish with extra basil leaves for color. A drizzle of extra balsamic glaze on top makes it look fancy and appetizing. {{image_4}} You can easily change this dish to fit your taste. Instead of chicken, try turkey or tofu. Turkey gives a slightly different flavor but stays moist. Tofu adds a nice texture and is great for plant-based eaters. You can also add vegetables like spinach or zucchini. Sauté the spinach in the skillet before adding the chicken. For zucchini, slice it thin and layer it on the chicken. This adds color and nutrients to your meal. To change up the flavor, consider trying different cheeses. Instead of fresh mozzarella, use goat cheese or feta. Both will give a tangy twist to the dish. Incorporating additional herbs can also enhance the taste. Fresh thyme or rosemary can add depth to the flavors. Just sprinkle them over the chicken before baking. This simple change can make your meal even more delicious. To store leftovers, let the chicken cool down first. Place it in an airtight container. This keeps the flavors fresh and tasty. You can store it in the fridge for up to three days. After that, it may lose its taste and texture. When reheating, I recommend using the oven. Preheat it to 350°F (175°C). Place the chicken in a baking dish and cover it with foil. This helps keep moisture in. Heat for about 15 to 20 minutes. Check that it is warm throughout. You can also use the microwave, but be careful not to dry it out. If you want to freeze it, wrap the chicken tightly in plastic wrap or foil. Place it in a freezer-safe bag. It can last up to three months in the freezer. To reheat from frozen, let it thaw in the fridge overnight. Then, follow the reheating instructions above. Can I make this recipe ahead of time? Yes, you can prepare this dish in advance. Season the chicken and layer the toppings. Cover and store in the fridge for up to 24 hours. When ready, bake as instructed. This saves time and keeps the flavors fresh. What can I substitute if I don’t have balsamic glaze? If you lack balsamic glaze, you can use balsamic vinegar. Mix it with a bit of honey or brown sugar to mimic the glaze's sweetness. Simmer the mix until it thickens slightly. This will give you a similar flavor. How do I know when the chicken is fully cooked? Check the chicken's internal temperature with a meat thermometer. It should reach 165°F (75°C). If you don't have one, cut into the thickest part. The juice should run clear without any pink meat. Can I cook this recipe on the grill? Absolutely! You can grill the chicken for a smoky flavor. Start by searing the chicken on the grill for 2-3 minutes per side. Then, add the toppings and cover the grill. Cook until the chicken reaches 165°F (75°C). What is the calorie count per serving? This recipe has about 350 calories per serving. This count includes chicken, cheese, and glaze. The precise number may change based on the brand of ingredients you use. Is this recipe suitable for certain dietary restrictions? Yes, this dish can fit various diets. It's gluten-free and can be made dairy-free. Just swap out the mozzarella for a dairy-free cheese. Always check labels to ensure all ingredients meet dietary needs. This blog post showed you how to make Balsamic Glazed Caprese Chicken. We talked about fresh ingredients like basil and mozzarella and why they matter. I gave you step-by-step cooking instructions and helpful tips to keep your chicken juicy. You also learned about tasty variations and how to store leftovers. Remember, cooking can be fun and simple. Try this recipe with your favorite sides. Enjoy your tasty dish and impress your friends!

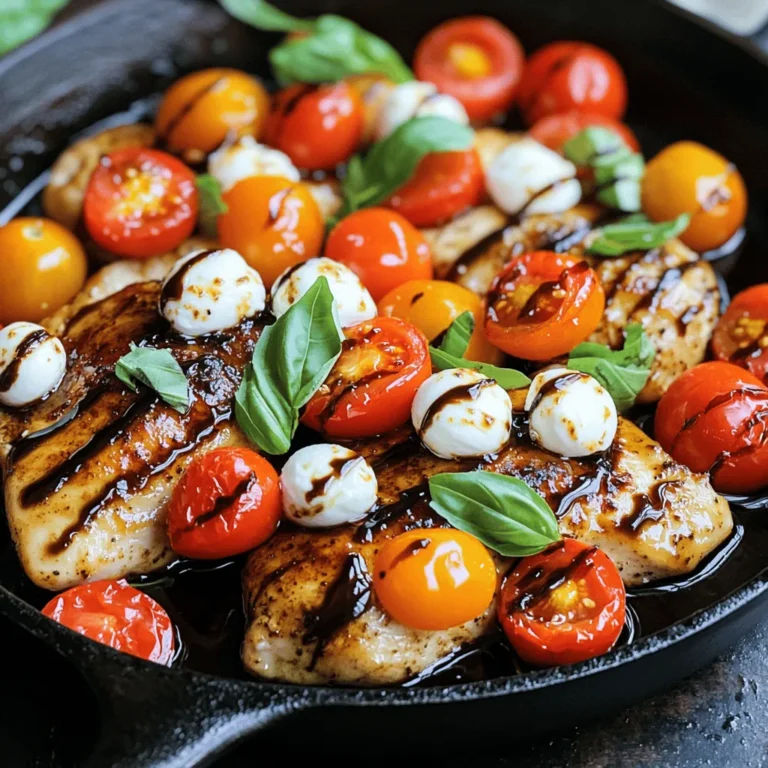
Balsamic Glazed Caprese Chicken Delightful Flavor Burst

- 8 oz whole wheat pasta - 1 can (15 oz) chickpeas, drained and rinsed - 4 cloves garlic, minced - 1 large lemon (juice and zest) - 3 tablespoons extra virgin olive oil - 1/4 teaspoon red pepper flakes (optional for heat) - 1 cup fresh spinach, roughly chopped - Salt and freshly ground pepper to taste - Fresh parsley, finely chopped (for garnish) For this dish, I love using whole wheat pasta. It adds fiber and a nutty taste. Chickpeas bring protein and a creamy texture. Garlic adds depth and warmth to the dish. A large lemon gives brightness with its juice and zest. Extra virgin olive oil creates a rich base. Red pepper flakes can spice things up, but they are optional. Fresh spinach adds color and nutrients. Don’t forget salt and pepper to enhance flavors. Finally, parsley adds a fresh touch on top. - Parmesan cheese or nutritional yeast - Additional herbs for garnish For added creaminess, I suggest grated Parmesan cheese. Nutritional yeast is a great vegan option. Fresh herbs like basil or oregano can elevate the dish further. They add a fresh, fragrant note that complements the lemon and garlic. {{ingredient_image_2}} Start by filling a large pot with water. Bring it to a boil. Add your whole wheat pasta and cook it until it is al dente. This usually takes about 8-10 minutes. While the pasta cooks, save 1/2 cup of the pasta water. This will help your sauce later. After saving the water, drain the pasta and set it aside. In a large skillet, pour in the extra virgin olive oil. Turn the heat to medium. Once the oil is hot, add the minced garlic. Cook it for about 1 minute. You want it to smell great, but not brown. If garlic turns brown, it can taste bitter. Now, add the drained chickpeas to the skillet. Stir them often for about 3-4 minutes until they warm up. They should start to soften. Next, squeeze the juice from your lemon into the skillet. Add the lemon zest, too. If you like spice, sprinkle in red pepper flakes. Mix everything well so the chickpeas are coated. Now it’s time to bring it all together! Add the cooked pasta to the skillet. Pour in the reserved pasta water. Gently toss everything together. You want the pasta to soak up the sauce. After this, fold in the chopped spinach. Cook for another 2-3 minutes. The spinach will wilt and turn a bright green. Finally, taste your dish. Add salt and freshly ground black pepper to make it perfect. Enjoy the lovely flavors! To get the best garlic flavor, use fresh garlic. Mince the garlic right before cooking. This way, it stays fragrant and strong. Sauté it in olive oil until it smells amazing but don’t let it brown. Burnt garlic tastes bitter. Reserving pasta water is key! Before you drain the pasta, save about half a cup. This starchy water helps bind the sauce to the pasta. It makes everything creamy and delicious. You can add it slowly until you reach the perfect texture. For the best taste, sauté the garlic for just one minute. This way, it gets fragrant without burning. Add the chickpeas next and cook for three to four minutes. You want them heated but still firm. When you add spinach, cook it for just two to three minutes. You want it to wilt but remain bright green. If you overcook it, the color fades, and the taste dulls. For a nice presentation, use shallow bowls. This makes the dish look fancy. You can add a lemon wedge on the side for extra zest. A sprinkle of fresh parsley on top adds color and freshness. Pair your pasta with a simple side salad. A mix of greens, tomatoes, and a light vinaigrette works well. This adds crunch and balances the meal. Enjoy your Lemon Garlic Chickpea Pasta! Pro Tips Perfect Pasta Texture: Always cook pasta al dente to maintain its texture and prevent it from becoming mushy when mixed with the sauce. Garlic Sautéing: Keep a close eye on the garlic while sautéing; it should be fragrant without browning, as burnt garlic can add bitterness to your dish. Chickpea Variations: For added flavor, consider roasting the chickpeas before adding them to the dish for a delightful crunch. Season Gradually: Always taste and adjust seasoning gradually—start with a little salt and pepper, and increase as needed to suit your preferences. {{image_4}} You can switch up the protein in this dish. Consider using lentils or black beans. Both add great flavor and nutrition. If you want a creamy taste, try using silken tofu. It blends well and is a great vegan option. For cheese lovers, nutritional yeast works well as a cheese substitute. It gives a savory flavor without dairy. To boost the taste, add spices like cumin or paprika. Fresh herbs like basil or thyme can brighten the dish. You can also toss in seasonal vegetables like zucchini or bell peppers. They add color and nutrients. Be creative and adjust flavors to your liking! If you need a gluten-free meal, swap the whole wheat pasta for gluten-free pasta. Options like brown rice or chickpea pasta work well. Keep an eye on cooking times, as they may differ from regular pasta. You want the pasta to be tender but not mushy. Adjust the cooking time based on the type of gluten-free pasta you choose. To store leftover Lemon Garlic Chickpea Pasta, place it in an airtight container. It stays fresh in the fridge for about 3 to 5 days. Make sure to cool it down to room temperature before sealing. This helps to keep it from getting soggy. When you’re ready to eat, reheat the pasta in a skillet over medium-low heat. Add a splash of water or olive oil to help it warm evenly. Stir gently until heated through. You can freeze this pasta dish if you want to save it for later. Just make sure it’s completely cool before you freeze it. Place it in a freezer-safe container or a freezer bag. Remove as much air as you can to avoid freezer burn. It will keep well for about 2 to 3 months. To thaw, move the pasta to the fridge overnight. Reheat it on the stove with a little water or olive oil to bring back the creamy texture. Yes, you can use dried chickpeas. To convert, soak them overnight. Then, cook them in boiling water until tender, about 1 to 2 hours. Drain and rinse them before adding to your dish. Using dried chickpeas may add a richer taste. Just make sure to adjust the cooking time and plan ahead. Whole wheat pasta works best for this recipe. It adds fiber and a nutty flavor. You can also choose gluten-free pasta if needed. Other good options include penne, fusilli, or spaghetti. Each type will hold the sauce well, so pick what you enjoy! To add heat, you can increase the red pepper flakes. Start with 1/2 teaspoon and adjust to your taste. You can also add crushed red pepper or diced jalapeños for extra spice. For a unique twist, try a dash of hot sauce or a sprinkle of cayenne pepper. Enjoy exploring these flavors! This blog post covered a simple, tasty pasta dish with healthy ingredients. We discussed the main items, like whole wheat pasta and chickpeas, along with tips for cooking. I shared how to perfect flavors and gave ideas for variations. Remember, you can mix and match ingredients to suit your taste. Enjoy exploring options and making this dish your own. With the right steps, you'll create a meal that is both satisfying and good for you. Happy cooking!

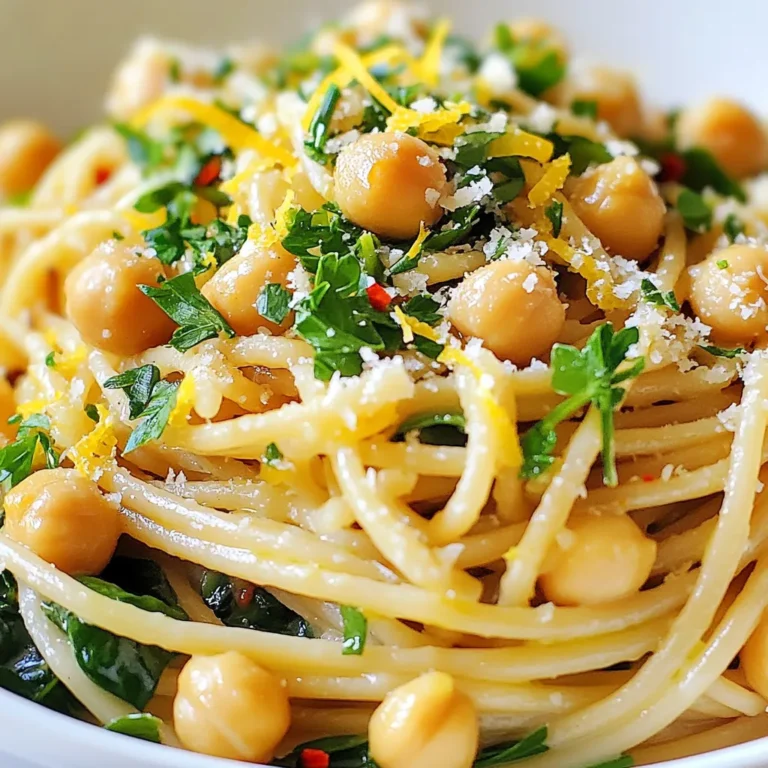
Lemon Garlic Chickpea Pasta Flavorful and Easy Meal

- 1 lb baby carrots (or regular carrots cut into uniform sticks) - 3 tablespoons extra virgin olive oil - 4 cloves garlic, finely minced - 1/4 cup freshly grated Parmesan cheese - 1 teaspoon dried thyme - 1 teaspoon smoked paprika - Salt and freshly cracked black pepper to taste - Fresh parsley, finely chopped (for garnish) Garlic Parmesan Roasted Carrots need simple, fresh ingredients. Start with baby carrots. They are sweet and tender. If you can’t find them, cut regular carrots into sticks. Next, grab extra virgin olive oil. This adds richness and helps the seasonings stick. For flavor, use garlic. Mince four cloves. This will give your carrots a nice, bold taste. You’ll also need dried thyme and smoked paprika. The thyme adds earthiness, while smoked paprika gives a lovely warmth. Don’t forget salt and black pepper for balance! Finally, use freshly grated Parmesan cheese. It melts beautifully and forms a cheesy topping. A touch of finely chopped parsley at the end adds color and freshness. With these ingredients, you set the stage for a delicious side dish! 1. Preheat your oven to 425°F (220°C). This high heat helps the carrots roast well. 2. Line a baking sheet with parchment paper. This makes cleanup easy and helps prevent sticking. 3. In a large bowl, mix the baby carrots with 3 tablespoons of olive oil. 4. Add 4 cloves of minced garlic, 1 teaspoon of dried thyme, and 1 teaspoon of smoked paprika. 5. Season with salt and freshly cracked black pepper. Toss everything well. Make sure the carrots are fully coated in the mix. 6. Spread the seasoned carrots on the baking sheet in a single layer. This helps them roast evenly. 7. Place the baking sheet in the hot oven. Roast for 20-25 minutes. 8. Halfway through, use a spatula to toss the carrots. This ensures they cook evenly and get that nice golden-brown look. 1. When the carrots are soft and caramelized, take them out of the oven. 2. Sprinkle 1/4 cup of freshly grated Parmesan cheese over the hot carrots. 3. Return the baking sheet to the oven for another 5 minutes. This melts the cheese and creates a yummy crust. 4. Once done, let the carrots cool for a moment. 5. Just before serving, sprinkle finely chopped fresh parsley on top. This adds color and a fresh taste. To ensure even roasting, spread the carrots out on the baking sheet. This helps them cook uniformly. If the carrots are too close together, they will steam instead of roast. Toss them halfway through cooking for a nice, golden color. Adjusting the cooking time is important for different carrot sizes. Baby carrots usually take 20-25 minutes. If you use regular carrots, cut them into even sticks. Thicker pieces may need an extra 5-10 minutes. Always check for tenderness with a fork. You can add more herbs for extra flavor. Fresh rosemary or dill pairs well with carrots. Try adding a pinch of oregano for a different taste. Spices can also enhance the dish. A dash of cayenne pepper adds heat. You can also try adding cumin for a warm, earthy flavor. Experiment with what you like best! {{image_4}} You can swap out baby carrots for other veggies. Try using bell peppers, zucchini, or Brussels sprouts. These vegetables roast well too. Just cut them into similar sizes for even cooking. If you want a dairy-free or vegan option, skip the Parmesan cheese. You can use nutritional yeast instead. It gives a cheesy flavor without dairy. Another great choice is to sprinkle some crushed nuts on top for added crunch. To give your carrots a zesty twist, add some citrus. Squeeze fresh lemon juice over them before serving. The bright flavor pairs well with garlic and cheese. You can also try different cheeses. Instead of Parmesan, use feta or goat cheese for a new taste. Each cheese adds its own unique flavor, making this dish even more exciting. To keep your Garlic Parmesan Roasted Carrots fresh, place them in a container. Use an airtight container for best results. Store them in the fridge. They will last for about 3 to 5 days. If you want to save them longer, consider freezing. For freezing, let the carrots cool down first. Then, place them in a freezer-safe bag. Remove as much air as you can before sealing the bag. They can stay in the freezer for up to 3 months. When you’re ready to enjoy your leftovers, reheating is key. The best method is to use the oven. Preheat your oven to 350°F (175°C). Spread the carrots on a baking sheet. Heat for about 10-15 minutes or until warm. You can also use a microwave. Place the carrots in a microwave-safe dish. Cover them with a damp paper towel. Heat in short bursts of 30 seconds until they are warm. This helps keep them moist. Enjoy your tasty side dish! How to choose the best carrots? Look for firm, smooth carrots. They should be bright in color. Avoid carrots with soft spots or wrinkles. Fresh baby carrots often taste sweeter. If using regular carrots, cut them into even sticks for uniform cooking. Can I make this dish ahead of time? Yes, you can prep the carrots a few hours in advance. Toss them in olive oil and seasonings. Store them in the fridge. When ready to cook, simply roast them as directed. What to serve with Garlic Parmesan Roasted Carrots? These carrots pair well with many dishes. Serve them alongside roasted chicken or grilled fish. They also complement rice or quinoa nicely. Add a fresh salad for a complete meal. Calories and nutritional benefits One serving of Garlic Parmesan Roasted Carrots has about 120 calories. They are rich in vitamins A and C. Carrots are also a good source of fiber, which aids digestion. Health considerations and dietary restrictions This dish is gluten-free and suitable for most diets. If you are lactose intolerant, use a dairy-free cheese. Always check for allergies, especially to garlic or parsley. Other recipes using Parmesan cheese Try making a creamy Parmesan risotto or cheesy garlic bread. You can also use it in salads or on pasta dishes. Parmesan adds great flavor to many meals. Similar roasted vegetable recipes Consider roasted Brussels sprouts or cauliflower. Both vegetables roast well and can take on flavor. You can use similar seasonings to create a cohesive meal. In this blog post, we explored how to make delicious Garlic Parmesan Roasted Carrots. We began with the key ingredients like carrots, olive oil, and spices. Then, I provided easy steps for preparing and roasting the carrots. I shared helpful tips for even cooking and flavor upgrades, highlighting different variations to try. Finally, we discussed storage options and answered common questions. Enjoy this simple, healthy dish that can easily fit your taste and needs. Try it today and see how good it can be!

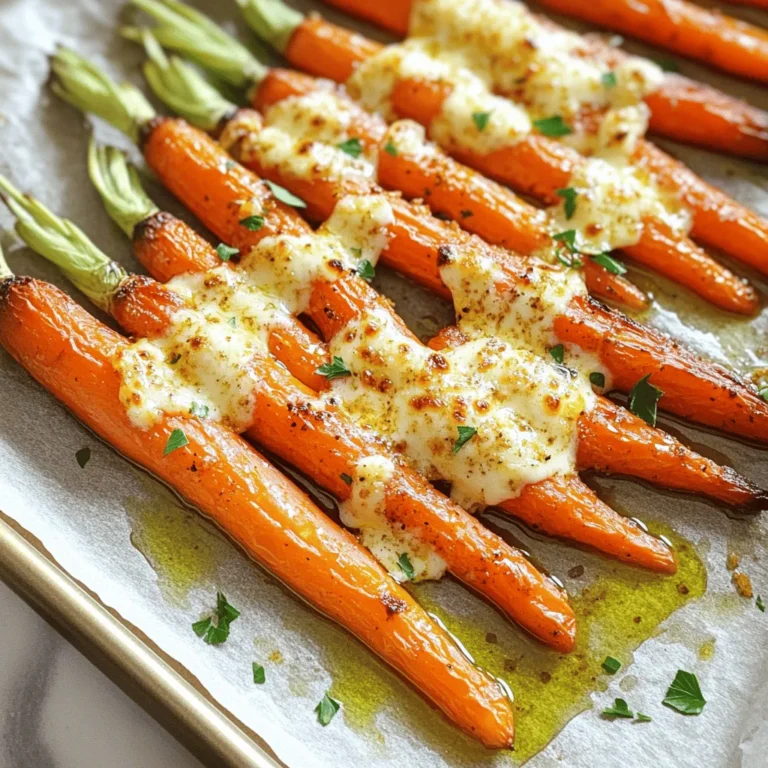
Garlic Parmesan Roasted Carrots Flavorful Side Dish

- 1 loaf of challah or brioche bread, cut into 1-inch cubes - 6 large eggs - 2 cups whole milk - 1 cup heavy cream - 1/2 cup pure maple syrup - 1 teaspoon vanilla extract - 1 teaspoon ground cinnamon - 1/2 teaspoon ground nutmeg - 1 cup pecans, coarsely chopped - 1/4 cup packed brown sugar - A pinch of salt Using challah or brioche gives this dish a soft texture. If you can't find these, any soft bread will work. You can also swap heavy cream for half-and-half for a lighter option. For a dairy-free version, try almond milk or coconut milk. Maple syrup is key for that sweet flavor, but honey can be an alternative if needed. Quality ingredients make a big difference in this casserole. Fresh eggs and real maple syrup enhance the taste. Whole milk and heavy cream add creaminess. When you use good pecans, you get a nice crunch that completes the dish. Always choose the best you can find. It helps create a truly delightful meal for everyone. Start with your loaf of challah or brioche bread. Cut it into 1-inch cubes. This size is key. It helps the bread soak up the egg mix. Spread the cubes evenly in a large casserole dish. Make sure they are not too crowded. This way, each piece gets a good soak. In a big mixing bowl, crack six large eggs. Add two cups of whole milk and one cup of heavy cream. Pour in half a cup of pure maple syrup. Then, add one teaspoon of vanilla extract. Sprinkle in one teaspoon of ground cinnamon and half a teaspoon of ground nutmeg. Finally, add a pinch of salt. Whisk everything together until it looks frothy and well mixed. This mix is what makes the casserole rich and creamy. Now it’s time to put everything together. Pour the egg mixture over the bread cubes. Do this slowly so every piece gets coated. Gently press down on the bread cubes with your hands. This helps them soak up the egg mix. Next, sprinkle one cup of coarsely chopped pecans and a quarter cup of packed brown sugar on top. This creates a crunchy layer. Cover the dish with plastic wrap and chill it in the fridge for at least four hours, or overnight if you can. This step is very important! It lets the bread soak up all that yummy flavor. To make your Maple Pecan French Toast Casserole really shine, use fresh ingredients. Choose a high-quality maple syrup. It adds a deep, rich flavor. I also recommend using challah or brioche bread. Their soft, airy texture absorbs the egg mixture well. For a boost of flavor, use fresh ground spices. Ground nutmeg and cinnamon make a big difference. Let the casserole chill overnight. This step allows the bread to soak up the egg mixture fully. The longer it sits, the richer the taste becomes. Before baking, sprinkle a little extra brown sugar on top. This creates a sweet, crunchy crust that everyone loves. Serving this casserole can be fun and creative! Cut it into squares for easy serving. I love to drizzle extra maple syrup over each slice. It adds a nice touch of sweetness. You can also garnish with chopped pecans. They add a lovely crunch. Fresh berries, like strawberries or blueberries, bring color and freshness. Serve with whipped cream for a decadent treat. For a cozy vibe, pair it with hot coffee or tea. It makes a perfect weekend brunch dish. Feel free to share it with family and friends. One common mistake is not letting the casserole chill long enough. If you skip this step, the bread won't soak up enough egg mixture. It can turn out dry. Another mistake is not using enough egg mixture. Every bread cube should be well-coated. This ensures a custardy texture. Also, avoid opening the oven too soon. This can cause the casserole to sink. Check it near the end of baking. Look for a golden-brown top and a firm center. Lastly, ensure your oven is preheated. If it’s not hot enough, the casserole can bake unevenly. Following these tips will help you make a perfect Maple Pecan French Toast Casserole every time! {{image_4}} You can make this casserole nut-free easily. Just skip the pecans in the recipe. Instead, you can use crushed graham crackers or a mix of seeds for crunch. Sunflower seeds or pumpkin seeds add a nice texture. You still get a great taste without the nuts. Adding fresh fruits or berries can make your casserole even better. You can mix in sliced bananas, apples, or berries like blueberries and strawberries. Just layer them between the bread cubes. This adds sweetness and some color to the dish. It also gives you more vitamins and minerals. The type of bread you choose matters a lot. While challah and brioche are great, you can try other options too. French bread or sourdough works well too. Each type of bread gives a unique flavor and texture. Just make sure it is sturdy enough to soak up the egg mixture. This way, your casserole turns out delicious and fluffy. After enjoying your Maple Pecan French Toast Casserole, you may have leftovers. To store them, let the casserole cool down completely. Then, cover it tightly with plastic wrap or aluminum foil. You can also use an airtight container. This will keep it fresh for up to three days in the fridge. To reheat the casserole, preheat your oven to 350°F (175°C). Place the casserole in the oven for about 20 to 25 minutes. Make sure it is heated all the way through. You can also use the microwave for quicker reheating. Heat individual portions for about one to two minutes. Just make sure it is warm before serving. Yes, you can freeze the casserole! After it cools, cut it into portions. Wrap each piece tightly in plastic wrap and then in foil. Store them in a freezer-safe bag or container. This way, they can last for up to three months. When you want to enjoy it again, thaw it overnight in the fridge and reheat as directed. Yes, you can! Making this casserole ahead is a great idea. You can prep it the night before. After you mix the bread and egg mixture, cover it tightly. Let it chill in the fridge overnight. This allows the bread to soak up all the flavors. When you are ready, just bake it the next day. It saves time and makes breakfast easier! The casserole is done when the top is golden brown. You can also check the center. It should feel set and firm. A toothpick inserted in the middle should come out mostly clean. If it is still wet, give it a few more minutes. Keep an eye on it to avoid over-baking. Yes, you can use other syrups if you like. Honey or agave syrup are good options. They will change the flavor a bit but still taste great. You can also try flavored syrups, like maple-pecan or vanilla. Just know that the taste will vary. Use what you enjoy most! This blog post covered how to make a tasty Maple Pecan French Toast Casserole. We discussed the ingredients, their quality, and smart substitutions. I shared steps for preparation, mixing, and assembly. Tips for flavor and common baking mistakes were also included. We explored fun variations and how to store your leftovers. In short, take these ideas to create your own version. Enjoy your cooking!

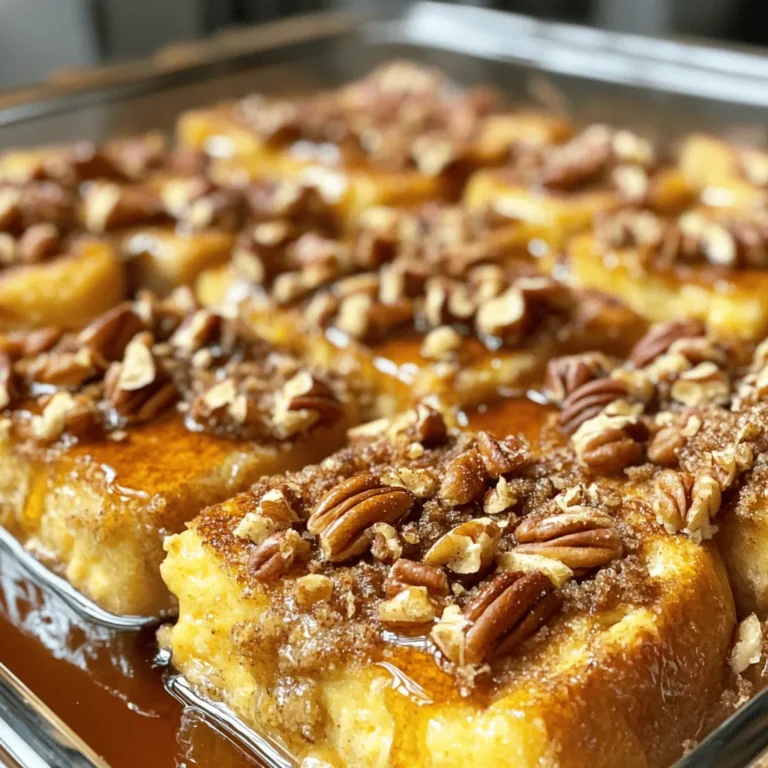
Maple Pecan French Toast Casserole Simple Delight

- 1 lb sirloin steak - 4 tablespoons unsalted butter - 4 cloves garlic - Fresh herbs: rosemary and thyme - Salt and pepper - Olive oil - Fresh parsley for garnish The main ingredient for this dish is sirloin steak. It’s tender and full of flavor. For the best taste, I recommend using fresh herbs like rosemary and thyme. These herbs add a lovely aroma to the garlic butter sauce. Next, we need unsalted butter. It helps create that rich garlic sauce we all crave. You’ll also want fresh garlic, as it gives the dish its name and a bold taste. Don't forget salt and pepper; they are key for seasoning the steak. Olive oil plays a big role in cooking the steak. It helps to sear the meat nicely. Lastly, fresh parsley adds a bright touch when we garnish the dish. These simple ingredients come together to create a mouthwatering meal. Each one contributes to the rich, savory flavor of garlic butter steak bites. {{ingredient_image_2}} To start, take your sirloin steak and cut it into bite-sized cubes. This makes cooking easy and fun. In a large bowl, add the steak cubes. Generously season with salt and pepper. Make sure all pieces get a good coating. This step is key for flavor. Searing is the cooking method we will use. It gives the steak a tasty crust. Searing also seals in juices, keeping the meat tender. You will want a hot skillet for this to work well. Next, heat a large skillet over medium-high heat. Add olive oil and let it shimmer. This means it's hot enough. Carefully place the seasoned steak cubes in a single layer. Let them cook without moving for about 2-3 minutes. This helps form a nice crust. Once you see that brown crust, flip the steak bites using tongs. Cook for another 2-3 minutes for medium-rare. Adjust the time if you prefer a different doneness. After cooking, lower the heat to medium-low. Push the steak bites to one side of the skillet to make room. On the empty side, add the unsalted butter, minced garlic, and chopped herbs. Let the butter melt and the garlic cook for about one minute. It should smell amazing! Now it's time to bring it all together! Stir the garlic butter and toss the steak bites in it. Make sure they are all coated and glistening. This is where the magic happens. Before serving, carefully take the skillet off the heat. For a great finish, garnish with freshly chopped parsley. This not only adds color but also freshness. Serve the steak bites on a warm platter. Drizzle any leftover garlic butter from the skillet over the top for extra flavor. Enjoy your delicious garlic butter steak bites! For garlic butter steak bites, I recommend using sirloin steak. This cut is tender and full of flavor. You can also try ribeye or tenderloin for a richer taste. Each of these cuts works well with the garlic butter sauce. To check if your steak is cooked just right, use a meat thermometer. For medium-rare, aim for 130°F to 135°F. For medium, look for 140°F to 145°F. If you don’t have a thermometer, press the steak with your finger. It should feel soft for medium-rare and firmer for medium. While garlic and butter are the stars, you can add more depth. Try using smoked paprika for a smoky twist. A pinch of cayenne can bring heat. Fresh herbs like basil or oregano also add nice notes. Experiment to find your favorite combination! Pro Tips Let It Rest: After cooking, allow the steak bites to rest for a few minutes. This helps the juices redistribute, ensuring a tender and juicy bite. High Heat for Searing: Make sure your skillet is hot enough before adding the steak cubes. A high temperature creates a beautiful sear, locking in flavors. Customize Herbs: Feel free to experiment with different herbs like oregano or basil, depending on your taste preferences and what you have on hand. Perfect Pairing: Serve these steak bites with a side of crusty bread or over a bed of mashed potatoes to soak up the delicious garlic butter sauce. {{image_4}} You can use various cuts of meat for garlic butter steak bites. Ribeye offers great flavor and marbling. Tenderloin gives you a soft, buttery bite. Filet mignon is tender and fancy. Each cut brings a unique taste and texture, so feel free to explore! If you want a meat-free meal, try using tofu or mushrooms. Tofu absorbs the garlic butter well. Simply cube firm tofu and sauté it just like steak. For mushrooms, use hearty varieties like portobello or shiitake. Sauté them until golden for a rich flavor. Both options make a satisfying dish. To add more flavor, think about different sauces or marinades. A splash of soy sauce gives a savory kick. You can also try Worcestershire sauce for depth. For a spicy twist, add a dash of hot sauce or chili flakes. These enhancements will take your steak bites to the next level! You can store leftover garlic butter steak bites easily. First, let them cool down to room temperature. Then, place them in an airtight container. You can refrigerate them for up to three days. If you want to keep them longer, freeze the steak bites. Use a freezer-safe bag or container. They can last up to three months in the freezer. Just remember to label the bag with the date. Reheating steak bites is simple. For the best flavor and texture, use the skillet. Heat a little olive oil over medium heat. Add the steak bites and cook for about 2-3 minutes. This warms them up and keeps them juicy. You can also use the microwave if you're short on time. Just place them in a microwave-safe dish and cover it. Heat in short bursts of 30 seconds. Check often to avoid overcooking. Enjoy your delicious bites just like they were fresh! You can prepare garlic butter steak bites ahead by seasoning the steak and cutting it into cubes. Store the seasoned steak in an airtight container in the fridge for up to 24 hours. When ready to cook, heat your skillet and follow the cooking steps. You can also make the garlic butter in advance. Simply melt the butter, add garlic and herbs, then store it in the fridge. Reheat the butter in the skillet when you cook the steak. Garlic butter steak bites pair well with many sides. Here are some tasty options: - Mashed potatoes: Creamy and smooth, they soak up the garlic butter. - Steamed veggies: Broccoli or asparagus add color and balance. - Rice: Fluffy rice helps to soak up the rich sauce. - Salad: A fresh salad adds a crisp contrast to the warm bites. - Crusty bread: Perfect for mopping up any extra garlic butter. Yes, you can use frozen steak. Just remember to thaw it first. The best way is to leave it in the fridge overnight. If you’re in a hurry, you can use the defrost setting on your microwave. Once thawed, season and cut it as directed in the recipe. Be aware that cooking times may vary slightly due to moisture in the thawed meat. In this post, I shared how to make delicious garlic butter steak bites. We covered the key ingredients, cooking steps, and tips for perfect doneness. You can choose different meats or even create a vegetarian version. Don't forget about storing leftovers properly, and I answered some common questions. With these tips, you can serve a tasty dish that impresses everyone. Enjoy your cooking and all the tasty flavors that come with it!

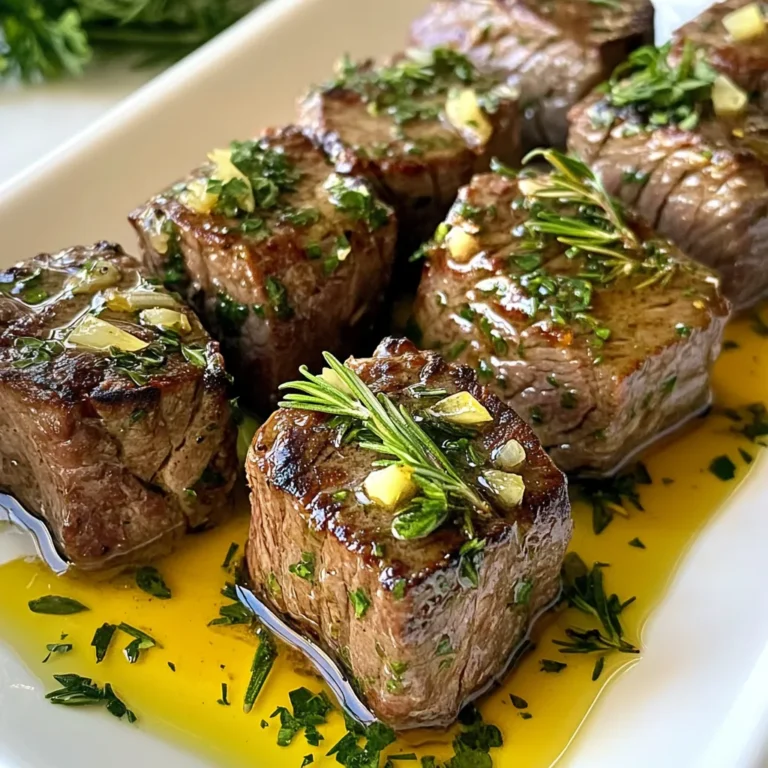
Garlic Butter Steak Bites Delicious and Easy Recipe

- 2 cups all-purpose flour - 1 tablespoon baking powder - ½ teaspoon baking soda - ½ teaspoon salt - ¾ cup granulated sugar - 1 large egg - 1 cup buttermilk - ½ cup vegetable oil - Zest of 1 orange - 1 cup fresh cranberries, chopped - ½ cup chopped walnuts (optional) - 1 teaspoon vanilla extract - 2 tablespoons orange juice (freshly squeezed) For this recipe, I recommend using fresh cranberries when they are in season. Their tartness brightens the muffins. If fresh cranberries are not available, frozen cranberries work well too. Just chop them while still frozen. This keeps them from turning mushy in the batter. When it comes to flour, you can use all-purpose flour, but if you need a gluten-free option, try a gluten-free all-purpose blend. The key is to ensure it contains xanthan gum for proper texture. If you want to make these muffins vegan, replace the egg with a flax egg (1 tablespoon flaxseed meal mixed with 2.5 tablespoons water). Use plant-based milk instead of buttermilk and a neutral oil like coconut or canola. Make sure to choose high-quality ingredients. Fresh oranges for zest and juice add a vibrant flavor. The zest brings a bright note, so don’t skip it! If you like a nutty crunch, the walnuts are a great add-in, but you can leave them out if you prefer. These simple choices create delicious cranberry orange muffins. 1. Preheat your oven to 375°F (190°C). 2. Prepare a 12-cup muffin tin. You can use paper liners or spray it with non-stick spray. 3. In a medium bowl, whisk together: - 2 cups all-purpose flour - 1 tablespoon baking powder - ½ teaspoon baking soda - ½ teaspoon salt 4. Set this dry mixture aside for later. 5. In a large bowl, beat together: - ¾ cup granulated sugar - 1 large egg 6. Mix until fluffy and well combined. 7. Add to the egg mixture: - 1 cup buttermilk - ½ cup vegetable oil - Zest of 1 orange - 1 teaspoon vanilla extract - 2 tablespoons orange juice 8. Stir until smooth. 9. Gradually fold in the dry ingredients. Stop mixing once combined, even if lumps remain. 10. Gently fold in: - 1 cup chopped fresh cranberries - ½ cup chopped walnuts (optional) 11. Use a spoon or cookie scoop to fill each muffin cup about two-thirds full. 1. Place the muffin tin in the preheated oven. 2. Bake for 18-20 minutes. 3. To check if they are done, insert a toothpick into the center of a muffin. It should come out clean. 1. Let the muffins cool in the tin for about 5 minutes. 2. Transfer them to a wire rack for complete cooling. This helps keep them moist. 3. Serve warm on a decorative plate. 4. Garnish with extra orange zest for a pop of color. 5. For a sweet touch, drizzle a light icing made from powdered sugar and orange juice. - Overmixing the batter: This leads to tough muffins. Mix until just combined. - Not measuring ingredients accurately: Use measuring cups and spoons. This ensures perfect results. - Suggestions for adding spices: Try adding a dash of cinnamon or nutmeg. These spices boost the flavor. - Tips for keeping muffins moist: Use buttermilk and oil. They help create a tender texture. - Importance of ingredient temperature: Use room temperature eggs and buttermilk. This helps the batter blend better. - Using the correct muffin tin size: A standard 12-cup tin works best. This helps muffins rise evenly. {{image_4}} You can mix it up with different fruits. Try using blueberries or diced apples. Both add a nice twist to your muffins. If you enjoy nuts, consider adding chopped pecans or almonds. These nuts add a satisfying crunch to each bite. For a vegan version, replace the egg with a flax egg. Mix one tablespoon of flaxseed meal with three tablespoons of water. Let it sit for a few minutes to thicken. Use non-dairy milk instead of buttermilk. For a low-sugar version, swap granulated sugar with a sugar substitute. You can also use mashed bananas for sweetness. Make holiday-themed muffins by adding cinnamon or nutmeg. These spices bring warmth and comfort to your treats. You can also fold in some chopped dried fruit, like apricots or figs, for a festive touch. For spring, consider adding lemon zest along with the orange for a fresh flavor profile. Store your cranberry orange muffins in an airtight container. This keeps them fresh. Use a cool, dry place to maintain their taste. If you have leftover muffins, place parchment paper between layers. This helps prevent sticking. You can also use a zip-top bag for easy storage. To freeze muffins, let them cool completely. Wrap each muffin tightly in plastic wrap. Then, place them in a freezer-safe bag or container. This helps avoid freezer burn. You can freeze muffins for up to three months. When ready to eat, thaw them in the fridge overnight. To reheat muffins, use an oven or microwave. For the oven, preheat to 350°F (175°C). Wrap muffins in foil to keep them moist. Heat for about 10 minutes. In the microwave, place a muffin on a plate. Heat for about 15-20 seconds. Enjoy warm and fresh! You can tell your muffins are done by looking for a few signs. First, the tops should be golden brown. Second, they should spring back when lightly pressed. Lastly, you can use the toothpick test. Insert a toothpick into the center of a muffin. If it comes out clean, the muffins are done. If it has wet batter, bake them a bit longer. Keep an eye on them after 18 minutes. Yes, you can use frozen cranberries in your muffins. Just make sure to rinse them well under cold water. This helps reduce extra moisture in the batter. You might need to bake them a bit longer. Check for doneness a few minutes after the suggested bake time. Frozen cranberries will still give you that tart taste. Cranberry orange muffins last for about 3 to 5 days at room temperature. Keep them in an airtight container to stay fresh. If you want to keep them longer, store them in the fridge for up to a week. For best quality, freeze them. They can last for about 3 months in the freezer. Just wrap them tightly in plastic wrap and place them in a freezer bag. In this article, we covered essential ingredients for muffin making and shared step-by-step instructions. You learned common mistakes to avoid and how to enhance flavor. Variations help you customize muffins for any taste or diet. Storing and reheating tips keep your muffins fresh longer. Muffins are fun to bake and share. With these tips, you’ll bake delicious treats every time. Enjoy creating new flavors and sharing them with friends and family!

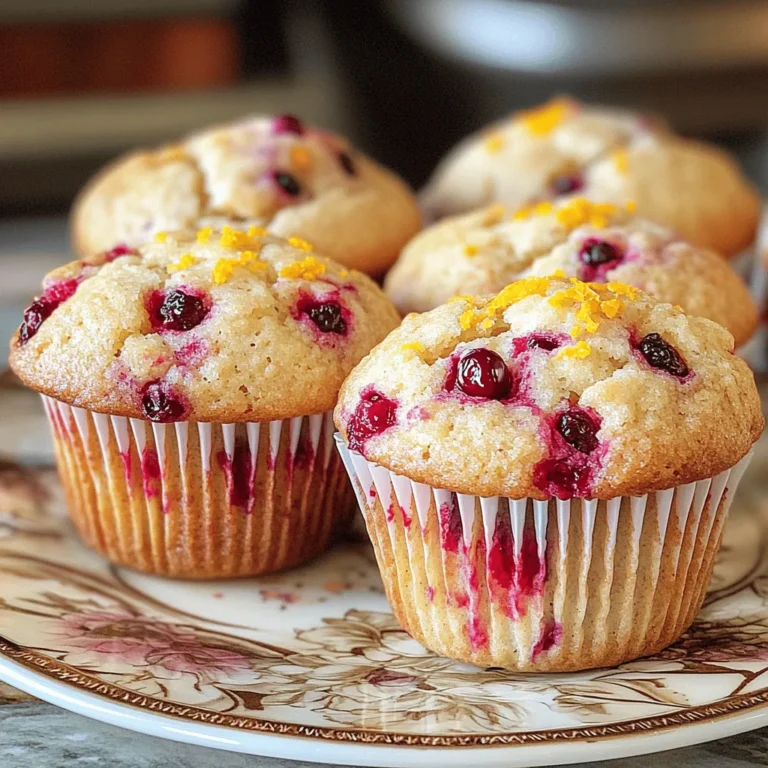
Cranberry Orange Muffins Flavorful and Simple Recipe

- 1 lb white fish fillets (cod or tilapia) - 1 cup panko breadcrumbs - 1/2 cup all-purpose flour - 2 large eggs - 1 teaspoon garlic powder - 1 teaspoon paprika - 1 teaspoon cumin - Salt and pepper, to taste - Shredded cabbage, avocado, cilantro, lime wedges - Spicy mayo (1/4 cup mayonnaise mixed with 1 tablespoon sriracha) - Additional garnishes To make crispy panko crusted fish tacos, you need some simple ingredients. Let’s break it down. Main Ingredients: For the main part of our dish, choose fresh fish fillets. Cod and tilapia are excellent options. You will also need panko breadcrumbs for that delightful crunch. All-purpose flour helps the fish stick to the panko. You will need two large eggs to create a tasty coating. Seasonings and Toppings: Add flavor with garlic powder, paprika, and cumin. These spices make the fish pop. Don’t forget salt and pepper to taste. For toppings, use shredded cabbage for crunch, creamy avocado slices, and fresh cilantro. Lime wedges add a zesty touch. Optional Ingredients: If you want some heat, mix mayonnaise with sriracha for spicy mayo. This can elevate your tacos even more. Feel free to add extra garnishes to your liking. Using these ingredients, you will create a meal that is both easy and flavorful. Each component works together to bring taste and texture to your tacos. - Preheat the oven to 400°F (200°C). - Prepare fish by patting dry and seasoning. Start by preheating your oven. This helps the fish to cook evenly. While the oven heats, take your fish fillets and pat them dry with paper towels. This step is key. If the fish has moisture, the breading won’t stick well. Season both sides with salt, pepper, garlic powder, paprika, and cumin. This gives the fish a lot of flavor. - Set up a breading station with flour, eggs, and panko. - Dredge fish in flour, dip in eggs, and coat with panko. Now, let’s set up a breading station. You will need three shallow bowls. Put flour in the first bowl. In the second bowl, whisk two eggs until they are mixed well. Finally, fill the third bowl with panko breadcrumbs. Take a seasoned fish fillet and dredge it in the flour. Make sure to shake off any extra flour. Next, dip the fish into the eggs, coating it well. Lastly, press the fish into the panko. This gives it that crispy texture we love. - Arrange fillets on a baking sheet and bake for 12-15 minutes. - Warm tortillas and assemble the tacos with toppings. Place the breaded fish fillets on a lined baking sheet. For extra crispiness, lightly spray them with cooking spray. Put the baking sheet in the oven and bake for 12 to 15 minutes. You want the fish to be fully cooked and golden brown. While the fish bakes, warm your corn tortillas in a skillet for about 30 seconds on each side. This step helps them become soft and easy to fold. Once the fish is done, take it out and start putting together your tacos. Place a few pieces of the crispy fish on each tortilla. Top with shredded cabbage, avocado slices, and fresh cilantro. If you want a kick, drizzle on some spicy mayo and squeeze fresh lime juice over the top. To get that perfect crunch, drying the fish is key. Moisture makes the breading soggy. Use paper towels to pat the fish dry before seasoning. This simple step helps the spices stick and enhances the crispiness. Next, consider using cooking spray. A light spray on the breaded fish before baking adds an extra layer of crunch. The oil helps the panko brown up nicely, giving you a golden crust that is hard to resist. These tacos shine when served with sides. I love pairing them with rice or beans for a hearty meal. They add texture and flavor that complement the fish perfectly. Don't forget the lime wedges! A squeeze of fresh lime juice brightens the dish. If you like heat, drizzle spicy mayo on top. Mix mayonnaise with sriracha for an easy and tasty kick. Plating can make your tacos look extra special. Use a colorful platter to serve them. This adds visual appeal and makes the meal feel festive. Garnishing is also important. Fresh cilantro not only adds flavor but also brightens the dish. You can sprinkle some on top for a nice finish. A few lime wedges on the side create a vibrant look that invites everyone to dig in. {{image_4}} You can use many types of fish for your tacos. Cod and tilapia are popular choices. You can also try haddock or shrimp for a new twist. When choosing fish, look for fresh fillets. Fresh fish should have a mild smell and firm texture. Ask your fishmonger for the best options available that day. If you need a gluten-free option, use crushed cornflakes instead of panko. They give a nice crunch, too. You can also mix seasonings into your breadcrumbs. Try adding some garlic powder or paprika for extra flavor. This way, you can personalize your breading to match your taste. Customizing your tacos is fun! You can add salsa, pickled veggies, or even fresh herbs. For a fruity twist, try making a mango or pineapple salsa. Just chop the fruit and mix it with lime juice, salt, and chopped cilantro. This adds a fresh, zesty kick that pairs well with the crispy fish. To keep your leftover fish tacos fresh, place them in an airtight container. This helps prevent moisture loss and keeps flavors intact. You can store them in the fridge for up to three days. After that, the fish may lose its texture and taste. If you want to save some tacos for later, freeze them unassembled. Wrap the fish and tortillas separately in plastic wrap, then place them in freezer bags. This way, you can enjoy them in up to three months. When ready to eat, thaw the fish in the fridge overnight. To reheat your fish without losing its crispiness, use an oven. Preheat it to 350°F (175°C) and warm the fish for about 10 minutes. This keeps the coating crunchy. If you use a microwave, the fish may become soggy. So, always choose the oven for best results. For crispy fish tacos, I recommend white fish like cod or tilapia. These types of fish have a mild flavor and flaky texture. They cook evenly and hold up well when breaded. You can also use haddock or snapper if you want something different. Always choose fresh fish for the best taste. Frozen fish works too, but make sure it’s fully thawed. To add heat to your fish tacos, you can use spices or salsas. A pinch of cayenne or chili powder can spice up the fish before breading. You can also mix sriracha into your mayo for a spicy kick. If you like fresh flavors, try adding jalapeños or a spicy salsa on top. Lime juice can also enhance the heat while balancing the flavors. Yes! If you want to switch up the breading, you can use crushed cornflakes or regular breadcrumbs. These options will give you a different crunch. For a gluten-free choice, try almond flour or gluten-free breadcrumbs. Each type of breading will change the flavor and texture a bit, so feel free to experiment. You can prep the fish and breading ahead of time. Just season the fish and coat it in flour and panko. Store the breaded fish in the fridge until you are ready to bake. You can also warm the tortillas and prep toppings like cabbage and avocado in advance. Just assemble the tacos right before serving to keep them crispy and fresh. In this blog post, we covered how to make delicious crispy fish tacos. You learned about the key ingredients, the step-by-step process, and helpful tips for the best results. You can mix things up with different fish or toppings. Remember to store any leftovers correctly and reheat them to keep their crunch. Making tacos at home can be fun and easy. Try these recipes and enjoy your tasty creations!

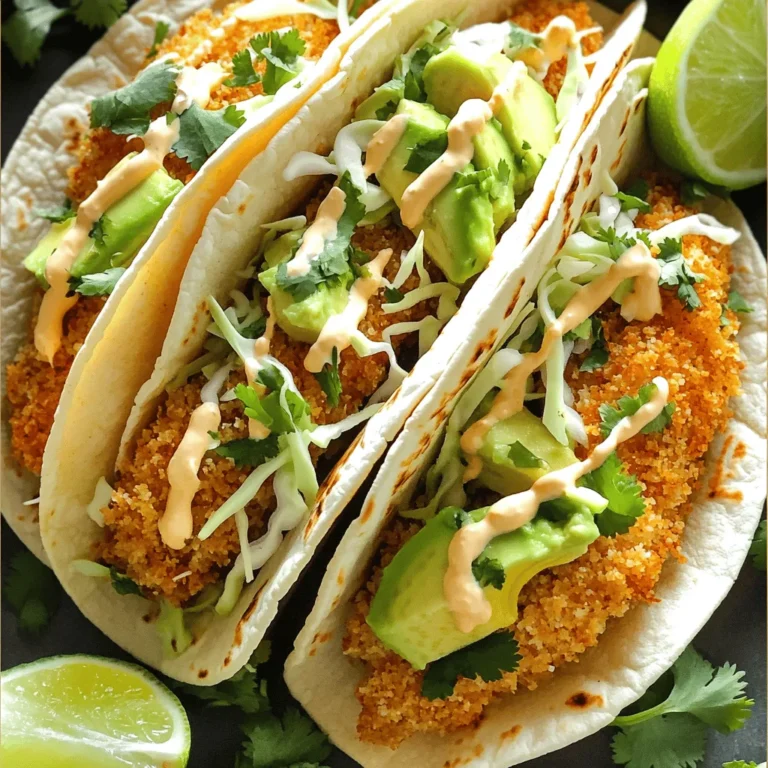
Crispy Panko Crusted Fish Tacos Easy and Flavorful Meal

Here is a list of the ingredients you will need for Greek Lemon Chicken Soup: - 1 lb boneless chicken breast - 1 medium yellow onion - 2 cloves garlic - 2 medium carrots - 2 celery stalks - 1 cup orzo pasta - 6 cups low-sodium chicken broth - 3 tbsp freshly squeezed lemon juice - Zest of 1 large lemon - 2 tbsp extra virgin olive oil - 1 tsp dried oregano - Salt and pepper to taste - Fresh parsley for garnish Each ingredient plays a key role in making this soup flavorful and comforting. The chicken breast gives protein. The onion, garlic, carrots, and celery add a sweet base. Orzo pasta gives heartiness, while lemon juice and zest bring a bright kick. Olive oil adds richness and depth. Dried oregano brings that classic Greek touch. Lastly, parsley adds freshness. Enjoy gathering these ingredients; they will work together to create a delightful dish! {{ingredient_image_2}} Start by heating the olive oil in a large pot over medium heat. Add the chopped onion, diced carrots, and diced celery. Sauté them for about 5 minutes. Stir occasionally until the vegetables soften and the onion turns translucent. This step builds the soup's flavor base. Next, add the minced garlic to the pot. Cook for one more minute, stirring often. This keeps the garlic from burning and adds a nice aroma. Now, it's time to add the diced chicken breast to the pot. Season the chicken with salt, pepper, and dried oregano. Stir the mixture well. Cook the chicken for about 5 to 7 minutes. You want to ensure it turns white and is no longer pink in the center. This step is crucial for flavor and food safety. Pour the low-sodium chicken broth into the pot. Increase the heat to bring it to a rolling boil. Once boiling, reduce the heat and let it simmer. Add the orzo pasta to the pot and stir well. Cook the orzo according to the package instructions, usually about 8 to 10 minutes. You want it al dente, which means firm but cooked through. This gives the soup a nice texture. Stir in the fresh lemon juice and lemon zest. This adds a bright flavor to the soup. Taste the soup and adjust the seasoning with more salt and pepper, if needed. Allow it to simmer for another minute to blend the flavors. Finally, remove the pot from the heat. Ladle the soup into bowls and garnish with fresh parsley. Serve hot and enjoy this comforting dish! To cook orzo just right, start timing when you add it to the soup. Check the package for cooking times, usually about 8-10 minutes. Stir the orzo often to keep it from sticking. To check for doneness, taste a piece. It should be firm but not hard. To boost the flavor, add fresh herbs like thyme or dill. A pinch of red pepper flakes adds a nice kick. For extra zing, squeeze more lemon juice to taste. The balance of flavors makes the soup bright and fresh. For crunchy toppings, try adding toasted bread or croutons. They add a nice contrast to the soup. If you want a creamier texture, stir in a splash of heavy cream or yogurt. This makes every bite rich and smooth. Pro Tips Use Fresh Ingredients: Fresh vegetables and herbs can significantly enhance the flavor of your soup. Opt for organic and in-season produce whenever possible for the best taste. Perfectly Cooked Orzo: To prevent the orzo from becoming mushy, cook it separately in salted water and then add it to the soup just before serving. This keeps the pasta al dente and maintains a pleasant texture. Adjusting Acidity: If you prefer a more pronounced lemon flavor, feel free to add more lemon juice or zest to taste. Start with a small amount and adjust gradually to avoid overpowering the soup. Make it a Meal: To turn this soup into a heartier meal, consider adding a handful of spinach or kale just before serving. This not only adds nutrition but also a vibrant pop of color. {{image_4}} To make a vegetarian version of Greek Lemon Chicken Soup, swap chicken for chickpeas or tofu. Chickpeas lend a hearty texture and protein. Tofu absorbs the soup's flavors well. Use vegetable broth instead of chicken broth. This change keeps the soup rich and tasty. You can add spinach or kale for extra nutrition. Both greens pack vitamins and minerals. Toss in other veggies, like zucchini or peas, for more flavor and color. These additions make the soup even more vibrant and healthy. Try using different small pasta shapes, like small shells or ditalini. They add unique texture to the soup. For those needing gluten-free options, choose gluten-free pasta. These swaps keep the dish enjoyable for everyone. To keep your Greek Lemon Chicken Soup fresh, place it in the fridge soon after serving. Use airtight containers to avoid air exposure. This helps maintain both flavor and texture. Open storage can dry out the soup, so it’s not a good choice. For freezing, let the soup cool completely before transferring it to freezer-safe containers. Leave some space at the top for expansion. When you’re ready to eat, thaw it in the fridge overnight. Reheat gently on the stove over low heat. Stir well to ensure even heating. In the refrigerator, your soup lasts about 3 to 4 days. If you freeze it, expect it to last for about 2 to 3 months. Always check for off smells or changes in texture before eating. Yes, you can make Greek Lemon Chicken Soup in advance. It tastes great when reheated. To prep ahead, cook the soup, let it cool, and store it in the fridge. Use an airtight container for best results. This soup keeps well for about three days. If you want to freeze it, wait until the soup cools. Freeze it for up to three months. You can serve Greek Lemon Chicken Soup with some tasty sides. Here are a few great options: - Crusty bread: A fresh loaf pairs well with the soup. - Greek salad: Crisp greens and feta add a nice touch. - Pita chips: For a crunchy side, pita chips work well. - Olive tapenade: Spread it on bread for extra flavor. These sides complement the soup's bright flavors. Yes, rotisserie chicken is a great shortcut for this soup. To use it, shred about 2 cups of chicken. Add it to the pot after cooking the veggies and before adding the broth. This saves time and adds flavor. Be sure to adjust the seasoning. Rotisserie chicken may be saltier than raw chicken. Taste the soup before adding more salt. You might need less than the recipe suggests. This way, you keep the flavors balanced. This blog covers the key steps to making Greek Lemon Chicken Soup. You learned about essential ingredients, cooking techniques, and variations. I shared tips for perfect orzo and ideas for enhancing flavor and texture. Remember, you can modify this recipe to fit your tastes, whether by adding veggies, switching to a vegetarian recipe, or using different pasta. Store leftovers properly for future meals. This soup is not just delicious; it can be a great meal prep option for busy days. Enjoy your cooking!

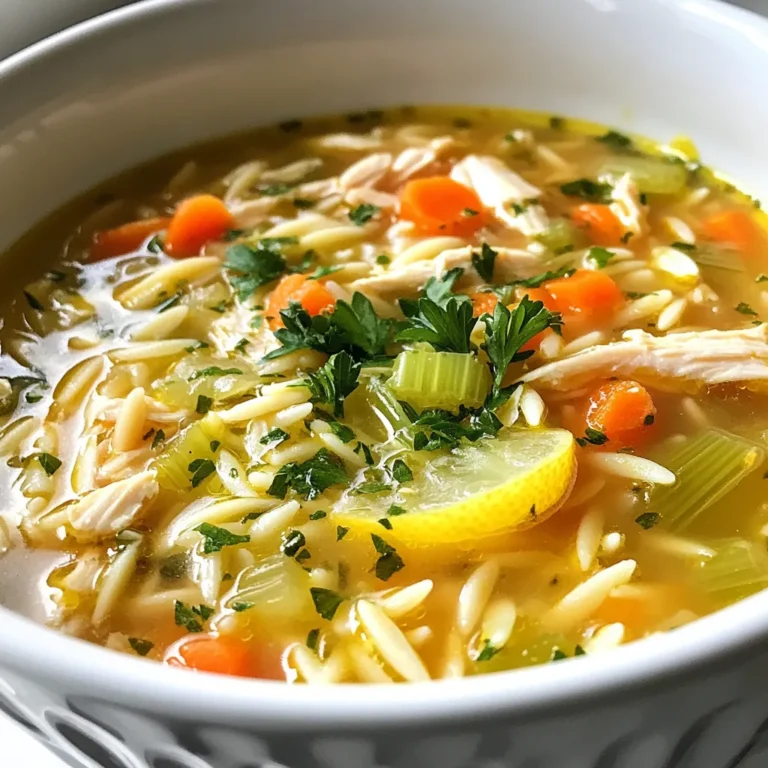
Greek Lemon Chicken Soup Flavorful Comforting Meal

PREV 1 … 11 12 13 … 20 NEXT
purelyyumrecipes

explore

DessertsDinnerAppetizersDrinks

Our Policies

  • Cookie Policy
  • Copyright Policy
  • Disclaimer
  • GDPR Policy
  • Terms Of Use
Back to Top
  • About
  • Contact Us
  • Privacy Policy
© 2025 purelyyumrecipes