FREE DINNER EBOOK! Get your copy!
  • Cookie Policy
  • GDPR Policy
  • Disclaimer
  • Terms Of Use
  • Visit my other site: Fun Cookie Recipes
purelyyumrecipes
  • Home
  • Dinner
  • Desserts
  • Drinks
  • Appetizers
  • Contact
  • About
  • Privacy Policy
  • Home
  • Dinner
  • Desserts
  • Drinks
  • Appetizers
  • Contact
  • About
  • Privacy Policy
  • Cookie Policy
  • GDPR Policy
  • Disclaimer
  • Terms Of Use
Visit my other site: Fun Cookie Recipes

HOME / CATEGORIES /

Latest

- 1 pound skinless salmon fillet - 4 tablespoons unsalted butter - 4 cloves garlic - 1 tablespoon fresh lemon juice - 1 tablespoon fresh parsley - Sea salt and black pepper - Lemon wedges The garlic butter salmon bites need fresh and quality ingredients. Start with a pound of skinless salmon fillet. Cut it into bite-sized cubes. This size helps the salmon cook evenly and allows every bite to soak up the flavor. Use four tablespoons of unsalted butter. This butter adds richness and helps the garlic infuse its flavor into the salmon. Next, take four cloves of garlic. Mince them finely. Fresh garlic gives a strong taste that pairs well with salmon. For a bright touch, add one tablespoon of fresh lemon juice. It lifts the dish and balances the richness of the butter. Chopping one tablespoon of fresh parsley adds color and freshness. This herb brightens the overall flavor. Don't forget sea salt and black pepper. These simple seasonings enhance the taste of the salmon. Finally, use lemon wedges for garnishing. They add a nice touch and let guests add more lemon if they wish. This combination of ingredients makes a delightful, flavorful meal that is sure to impress. {{ingredient_image_2}} Start by cutting the salmon fillet into bite-sized cubes. Use a paper towel to gently pat the salmon dry. This step is key. Drying the salmon helps achieve a nice sear. A good sear adds flavor and texture. It also helps the salmon cook evenly. Make sure to remove any excess moisture. Next, melt the butter. In a large skillet, heat 2 tablespoons of unsalted butter over medium heat. Let it melt completely, but do not let it brown. Brown butter can taste bitter, and we want a rich, creamy flavor. Now, sauté the garlic. Add the minced garlic to the melted butter. Stir it often for about 1-2 minutes. You want the garlic to become fragrant and just golden. Watch it closely to avoid burning. Burnt garlic can ruin your dish. After that, cook the salmon bites. Gently place the salmon cubes in the skillet. Arrange them in a single layer for even cooking. Season with sea salt and freshly ground black pepper. Cook for 3-4 minutes on one side until golden brown. Flip the cubes and cook for another 3-4 minutes. They are done when the salmon flakes easily with a fork. Once the salmon is cooked, it's time for the finishing touches. Drizzle fresh lemon juice over the salmon bites. Then, add the chopped parsley. Gently toss everything in the skillet. This helps distribute flavors without breaking the salmon pieces. For serving, remove the skillet from heat. Serve the garlic butter salmon bites hot on a plate. Garnish with lemon wedges for a refreshing touch. This adds brightness to the dish and enhances its appeal. To get a nice sear on your salmon, dry it well. Use a paper towel to pat the salmon cubes. This step removes moisture, which helps the salmon brown better. If you skip this, the salmon may steam instead of sear. Cook the salmon bites in a single layer. This allows each piece to cook evenly. If the pieces touch, they trap steam, which affects cooking. Each bite should have that perfect golden crust. Want to add more flavor? Try different herbs and spices. Fresh dill, thyme, or even chili flakes can give a unique twist. Just remember to add them at the right time. When cooking, be careful with the garlic. Sauté it for just 1-2 minutes. Stir it often to keep it from burning. If garlic burns, it turns bitter, ruining the dish. For serving, arrange the salmon bites neatly on a plate. A white platter makes the salmon stand out. It’s all about color and contrast. Use garnishes to make the dish pop. Add lemon wedges around the salmon. A sprinkle of fresh parsley on top adds a nice touch. It makes the dish feel fresh and inviting. Pro Tips Pat Dry for Perfect Sear: Always pat the salmon cubes dry with a paper towel before cooking. This step is crucial for achieving a beautiful golden sear and enhancing the overall flavor. Control Garlic's Flavor: Keep a close eye on the garlic while sautéing. It should be fragrant and lightly golden, but not burnt, as burnt garlic can impart a bitter taste to your dish. Even Cooking: Make sure the salmon cubes are arranged in a single layer in the skillet. This ensures even cooking and helps each piece develop a nice crust. Fresh Ingredients Matter: Use fresh lemon juice and parsley for the best flavor. Fresh ingredients can elevate the dish and make a noticeable difference in taste. {{image_4}} You can cook garlic butter salmon bites in different ways. Pan-seared salmon gives a nice crust. It’s quick and easy. Just heat butter and cook the salmon in a skillet. Aim for a golden brown color. Baking is another great choice. Preheat your oven to 400°F. Place the salmon bites on a baking sheet. Bake for around 10-12 minutes. This method keeps the fish moist while allowing the flavors to blend. Grilling is also fun. Use a grill pan or outdoor grill. Just make sure to oil the grill to prevent sticking. The smoky flavor enhances the dish, adding a unique twist. To change the flavor, try adding chili flakes. This gives a spicy kick that pairs well with the buttery salmon. Start with a pinch and adjust to your taste. You can also experiment with different herbs. Basil, dill, or thyme can add new layers of flavor. Fresh herbs brighten the dish and make it more vibrant. Mix and match to find your favorite combination. Pair garlic butter salmon bites with side dishes for a full meal. Roasted vegetables, rice, or a fresh salad work well. They balance the rich flavor of the salmon. Another fun idea is to turn the bites into salmon tacos. Use soft tortillas, add some avocado, and drizzle with lime juice. This makes a tasty and unique meal that everyone will love. To store garlic butter salmon bites, use an airtight container. This keeps moisture in and prevents the salmon from drying out. Aim to refrigerate within two hours of cooking. Your salmon will stay fresh for up to three days. To maintain flavor, consume it sooner rather than later. If you notice any off smell or change in texture, it’s best to toss it. For reheating, the stovetop is your best friend. Place the leftover salmon in a skillet over low heat. This method helps keep the salmon moist and flavorful. Cover the skillet for even heating. If you prefer the microwave, use a microwave-safe dish. Heat in short intervals, around 30 seconds at a time. Check for doneness to prevent overcooking. If you want to save some for later, freezing works well. Portion out the salmon bites into freezer-safe bags. Remove as much air as possible to avoid freezer burn. They can last up to three months in the freezer. When ready to eat, thaw in the fridge overnight for best results. For quicker thawing, place the sealed bag in cold water. This method keeps the salmon from losing its texture. It takes 10 minutes to prep and 10 minutes to cook. The total time is 20 minutes. This quick cooking time makes it perfect for a busy weeknight meal. Yes, you can use frozen salmon. Thaw it in the fridge overnight for the best results. If you need to defrost quickly, place the salmon in a sealed bag and submerge it in cold water for about an hour. Make sure to pat it dry before cooking to achieve a nice sear. Garlic butter salmon bites go well with many sides. Here are a few tasty options: - Steamed asparagus - Garlic mashed potatoes - Quinoa salad - Mixed greens with lemon vinaigrette - Roasted vegetables These sides complement the rich flavors of the salmon well. In this post, we covered how to make garlic butter salmon bites. We discussed key ingredients like salmon, butter, and garlic. I shared simple steps for prep, cooking, and finishing touches to enhance flavor. You learned useful tips for a perfect sear and variations for cooking and presentation. Remember to store leftovers properly to maintain freshness. With this knowledge, you can create a tasty meal that impresses. Enjoy making your salmon bites and experimenting to find your favorite flavors!

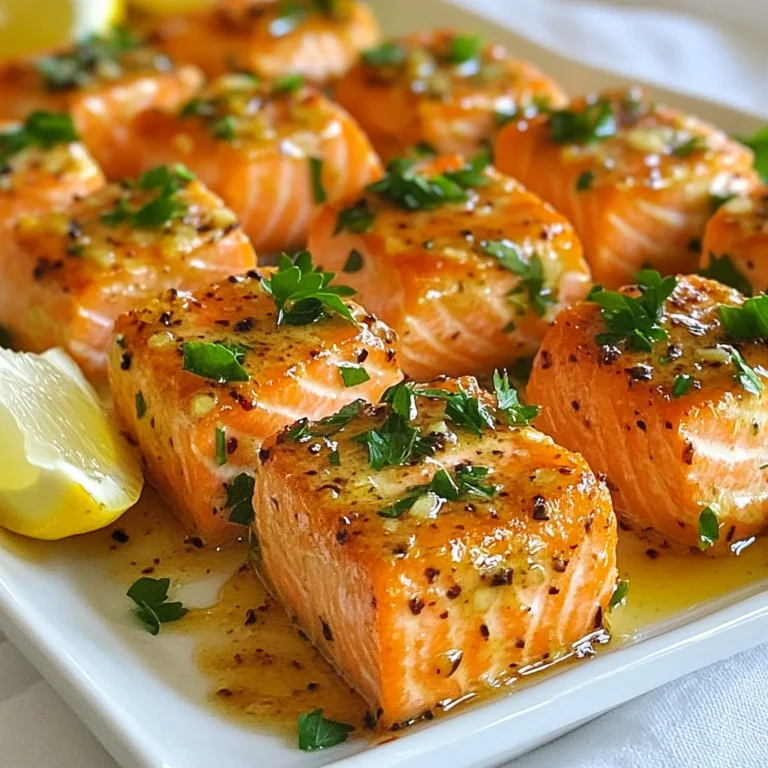
Garlic Butter Salmon Bites Flavorful Dinner Delight

To make One Pan Cajun Shrimp and Sausage, you’ll need these main ingredients: - 1 pound shrimp, peeled and deveined - 1 pound smoked sausage, sliced into rounds - 1 red bell pepper, diced - 1 green bell pepper, diced - 1 medium onion, chopped - 3 cloves garlic, minced - 2 cups cooked rice (or quinoa for a healthier option) - 2 tablespoons Cajun seasoning - 1 tablespoon olive oil - 1 cup chicken broth - Salt and black pepper to taste These ingredients work together to create a tasty dish bursting with flavor. You can change things up with these optional ingredients: - 1 cup corn, fresh or frozen - 1 teaspoon paprika for extra color - 1 jalapeño, diced for heat - 1 cup diced tomatoes for a juicy touch These options let you customize the recipe to fit your taste. Garnishing makes the dish even more inviting. Use these simple garnishes: - Fresh parsley, chopped - Lemon wedges for serving These small touches add freshness and brightness to your plate. Enjoy making this dish your own! {{ingredient_image_2}} To make this dish, you need to gather all your ingredients first. This saves time and keeps your kitchen organized. You will need: - 1 pound shrimp, peeled and deveined - 1 pound smoked sausage, sliced into rounds - 1 red bell pepper, diced - 1 green bell pepper, diced - 1 medium onion, chopped - 3 cloves garlic, minced - 2 cups cooked rice (or quinoa for a healthier option) - 2 tablespoons Cajun seasoning - 1 tablespoon olive oil - 1 cup chicken broth - Salt and black pepper to taste - Fresh parsley, chopped (for garnish) - Lemon wedges (for serving) Start by heating the olive oil in a large skillet over medium heat. Make sure the oil is hot but not smoking. Add the sliced smoked sausage and cook it for about 5-7 minutes. You want it to be browned and crispy on the edges. Next, add the chopped onion, red bell pepper, and green bell pepper to the skillet. Stir this mixture for about 3-4 minutes. The veggies should soften, and the onion will turn translucent. Then, add the minced garlic. Cook it for another minute while stirring. This will make the garlic smell great! After that, sprinkle the Cajun seasoning over the sausage and veggies. Stir well to coat everything in those bold flavors. Pour in the cooked rice or quinoa along with the chicken broth. Mix everything together and let it cook for about 3-5 minutes. This helps all the flavors blend nicely. Finally, fold in the shrimp and season with salt and black pepper. Cook for 3-4 minutes or until the shrimp turn pink and firm. Once done, take the skillet off the heat and let it sit for a minute to let the flavors meld. Timing is key in this dish. Cook the sausage until crispy for the best flavor. When adding the shrimp, watch closely. Overcooking can make it tough. The shrimp should only take a few minutes to cook through. If you use frozen shrimp, thaw it first to ensure even cooking. Enjoy the process and trust your instincts! To make this dish pop, use fresh ingredients. Fresh bell peppers and herbs boost taste. Cajun seasoning is key; it brings heat and depth. You can mix it into the sausage and veggies early. Adding a splash of lemon juice before serving brightens the dish. Fresh parsley adds a nice touch, too. A large skillet is best for this recipe. Choose one that heats evenly. Non-stick pans help prevent sticking and make cleanup easy. A good spatula helps stir the ingredients well. Use a sharp knife for chopping veggies. Lastly, a sturdy cutting board is a must for safety. You can swap shrimp for chicken or tofu if you prefer. Turkey sausage works well as a lighter option. If you don’t have chicken broth, use vegetable broth instead. Quinoa is a great swap for rice if you want more health benefits. For spice lovers, add diced jalapeños for that extra kick. Pro Tips Use Fresh Shrimp: For the best flavor and texture, opt for fresh shrimp over frozen. If using frozen, make sure to properly thaw them before cooking. Customize Your Veggies: Feel free to add or substitute other colorful vegetables like zucchini, corn, or snap peas to enhance the dish's nutritional value and visual appeal. Adjust Spiciness: If you prefer a milder dish, reduce the amount of Cajun seasoning or add it gradually to achieve your desired level of heat. Rest Before Serving: Allowing the dish to rest for a few minutes after cooking helps the flavors to meld together, resulting in a more harmonious taste. {{image_4}} You can swap rice for quinoa in this dish. Quinoa is rich in protein and fiber. This change makes the meal lighter while still filling. To use quinoa, cook it first. Use two cups of cooked quinoa instead of rice. It adds a nutty flavor that pairs well with Cajun spices. If you want a vegetarian dish, you can leave out the shrimp and sausage. Replace them with hearty veggies like eggplant, zucchini, and mushrooms. These veggies soak up the spices well. Use vegetable broth instead of chicken broth for richness. This keeps the flavors strong and satisfying. For more heat, you can add extra Cajun seasoning. You might also try adding diced jalapeños or hot sauce. This gives the dish a fiery kick. Adjust the spices to your taste. If you love a bold flavor, don’t be shy to experiment! To keep your One Pan Cajun Shrimp and Sausage fresh, store leftovers in an airtight container. Place the container in the fridge. This dish stays good for up to three days. Always let it cool before sealing to avoid extra moisture. If you want to save some for later, freezing works well. Allow the dish to cool completely. Then, portion it into freezer-safe bags or containers. Squeeze out excess air to prevent freezer burn. It will last up to three months in the freezer. Label the bags with the date for easy tracking. When you’re ready to enjoy your dish again, reheating is simple. For the best results, use the stovetop. Heat a skillet over medium heat and add a splash of water or broth. Stir occasionally until warmed through, about 5-7 minutes. You can also use a microwave. Place the portion in a microwave-safe dish, cover it, and heat for 2-3 minutes. Stir halfway for even heating. Enjoy your flavorful meal! It takes about 3 to 4 minutes to cook shrimp in the skillet. You will know they are done when they turn pink and firm. Make sure not to overcook them. Overcooked shrimp can become rubbery. Keep an eye on them as they cook. Yes, you can use frozen shrimp for this recipe. Just remember to thaw them first. Place them in cold water for about 15 minutes. Once thawed, peel and devein if needed. Frozen shrimp can be just as tasty as fresh ones. They save time and still work well in this dish. For a side dish, consider a fresh green salad or some crusty bread. Both options complement the flavors well. You can also serve the meal with corn on the cob or a side of steamed veggies. These sides balance the rich taste of the Cajun shrimp and sausage. This recipe for One Pan Cajun Shrimp and Sausage is simple and tasty. You learned about essential ingredients and how to cook them step by step. I shared tips on enhancing flavor and the best ways to store leftovers. You can also make variations like healthier options or vegetarian dishes. Experiment with these ideas to suit your taste. Enjoy cooking and make this dish your own!

One Pan Cajun Shrimp and Sausage Flavorful Delight

To make the Thai Peanut Noodle Salad, gather these fresh ingredients: - 8 oz rice noodles - 1 cup shredded carrots - 1 red bell pepper, thinly sliced - 1 cucumber, julienned - 1 cup shredded red cabbage - 1/2 cup chopped green onions - 1/4 cup chopped fresh cilantro - 1/3 cup crunchy peanut butter - 2 tablespoons soy sauce - 2 tablespoons freshly squeezed lime juice - 1 tablespoon honey or agave syrup - 1 tablespoon toasted sesame oil - 1 teaspoon freshly grated ginger - 1/2 teaspoon red pepper flakes (optional for a kick) - Crushed peanuts for garnish Using fresh ingredients makes a big difference. Look for bright, crunchy veggies. They add color and taste. Choose high-quality peanut butter for a rich flavor. Fresh lime juice gives the best zest. If you can, find organic ingredients. This ensures you get the best nutrition. You can easily customize this salad. Here are some swaps: - For gluten-free, use gluten-free soy sauce or tamari. - For vegan, replace honey with agave syrup. - If you need a nut-free option, use sun butter instead of peanut butter. - Add cooked chicken, tofu, or shrimp for extra protein. These swaps keep the salad delicious while catering to different diets. Enjoy your cooking! {{ingredient_image_2}} To start, cook the rice noodles according to the package instructions. I find that boiling them for about 6 to 8 minutes works best. You want them tender, but not too soft. When done, drain the noodles and rinse them under cold water. This stops the cooking and keeps them nice and firm. Set them aside to cool. Next, grab a big bowl. Add in your shredded carrots, sliced red bell pepper, julienned cucumber, shredded red cabbage, chopped green onions, and fresh cilantro. Toss these colorful veggies gently. Mixing them well makes sure each bite bursts with flavor. Now, let’s make the dressing. In a medium bowl, whisk together the crunchy peanut butter, soy sauce, lime juice, honey, toasted sesame oil, grated ginger, and red pepper flakes if you want some heat. Keep whisking until it’s all smooth and creamy. This dressing is what makes the salad special. Drizzle the peanut dressing over the mixed veggies. Use tongs or a big spoon to toss everything together. You want all the veggies to be coated in that tasty dressing. This step brings the salad to life. Take a quick taste of your salad. If it needs more flavor, you can add a splash more soy sauce or lime juice. Adjust it to your liking. You can enjoy the salad right away for a fresh crunch, or chill it in the fridge for about 30 minutes. Chilling lets the flavors mix even better. Presentation is key! Serve this salad in a big bowl or on individual plates. Top with crushed peanuts and some sprigs of cilantro for a beautiful touch. Enjoy your vibrant, Thai peanut noodle salad! When you cook rice noodles, follow these steps for the best results: - Boil water in a pot. - Add the rice noodles. - Stir gently to prevent sticking. - Cook until tender but still firm (al dente). - Drain and rinse under cold water to stop cooking. This helps keep the noodles from getting mushy. Garnishes make your Thai Peanut Noodle Salad even better. Here are some ideas: - Crushed Peanuts: Add crunch and a nutty flavor. - Fresh Cilantro: Brightens the dish with fresh taste. - Lime Wedges: Serve on the side for extra zing. - Red Pepper Flakes: Sprinkle more for extra heat. These toppings will make your salad pop with color and flavor! If you have leftovers, store them properly: - Place the salad in an airtight container. - Keep it in the fridge for up to three days. - Avoid adding dressing until you are ready to eat. This keeps your salad fresh and crispy. Enjoy it later without losing taste or texture! Pro Tips Choose the Right Noodles: For this salad, rice noodles are best as they absorb the dressing well and provide a nice texture. Make sure to rinse them in cold water to prevent sticking. Mind the Crunch: To maintain the crunchiness of the vegetables, add them just before serving if you plan to chill the salad. This keeps them fresh and vibrant. Adjusting Flavor: The balance of flavors is key in this dish. Taste the dressing before adding it to the salad and adjust the sweetness or acidity to suit your preference. Garnish Creatively: For a beautiful presentation, consider garnishing with additional fresh cilantro, lime wedges, or even a sprinkle of sesame seeds for added flavor and texture. {{image_4}} Want to make your Thai Peanut Noodle Salad heartier? Adding protein is a great way! You can use cooked chicken, shrimp, or tofu. - For chicken, grill or bake it first. Slice it into thin pieces. - For tofu, press it to remove extra water. Then, pan-fry or grill it until golden. Toss the protein into the salad when mixing everything together. It adds flavor and makes the dish more filling. If you love heat, you can spice up your salad! Start with red pepper flakes in the dressing. You can also add sliced jalapeños or sriracha for a kick. - Use fresh chili peppers for a bold taste. - Adjust the amount to fit your spice level. Just remember to taste as you go. You want to enjoy the heat, not overpower the salad. This salad is perfect for vegetarians and vegans. Use agave syrup instead of honey to keep it plant-based. - For added protein, consider chickpeas or edamame. - You can also replace peanut butter with almond butter if desired. These simple swaps keep the salad fresh and flavorful while meeting dietary needs. Enjoy your creative cooking! To keep your Thai Peanut Noodle Salad fresh, store it in an airtight container. Place any leftovers in the fridge right after serving. This salad tastes best when chilled, but it can lose crunch over time. For best results, try to eat it within three days. You may not need to reheat this dish. It is perfect served cold. If you prefer a warm salad, gently heat it in a pan on low. Add a splash of water or lime juice to help bring back moisture. Stir carefully to avoid mushy noodles. The shelf life of your salad depends on the ingredients. Here’s a quick guide: - Rice Noodles: Store cooked noodles in the fridge for 3-5 days. - Vegetables: Fresh veggies last 3-5 days when stored properly. - Peanut Dressing: Homemade dressing stays fresh for about a week in the fridge. Always check for signs of spoilage before eating. Enjoy your delicious salad while it’s fresh! The best type of noodles for this salad is rice noodles. They are light, chewy, and soak up the peanut dressing well. You can find them in most grocery stores. Look for thin rice noodles or vermicelli. They cook quickly and add a nice texture to your salad. Yes, you can prepare this salad in advance. Make the salad a few hours before serving. This time allows the flavors to mix well. If you want to keep it fresh, add the dressing right before serving. This helps the veggies stay crunchy. Thai Peanut Noodle Salad comes from Thailand. It showcases the country’s love for bold flavors and fresh ingredients. The dish combines traditional Thai elements, like peanut sauce and fresh vegetables. It reflects the bright, colorful nature of Thai cuisine. Yes, this recipe can be gluten-free. Use gluten-free soy sauce in place of regular soy sauce. The rice noodles are naturally gluten-free, making this dish safe for those with gluten sensitivities. Just double-check all your ingredients to ensure they meet your needs. This blog post shared the key ingredients and instructions for making Thai Peanut Noodle Salad. I covered ingredient quality and options for dietary needs. You learned how to cook rice noodles, combine veggies, and make a tasty peanut dressing. I offered tips for flavor and storage. Remember, you can customize the salad with proteins or spice for new flavors. Enjoy exploring this fun dish and make it your own!

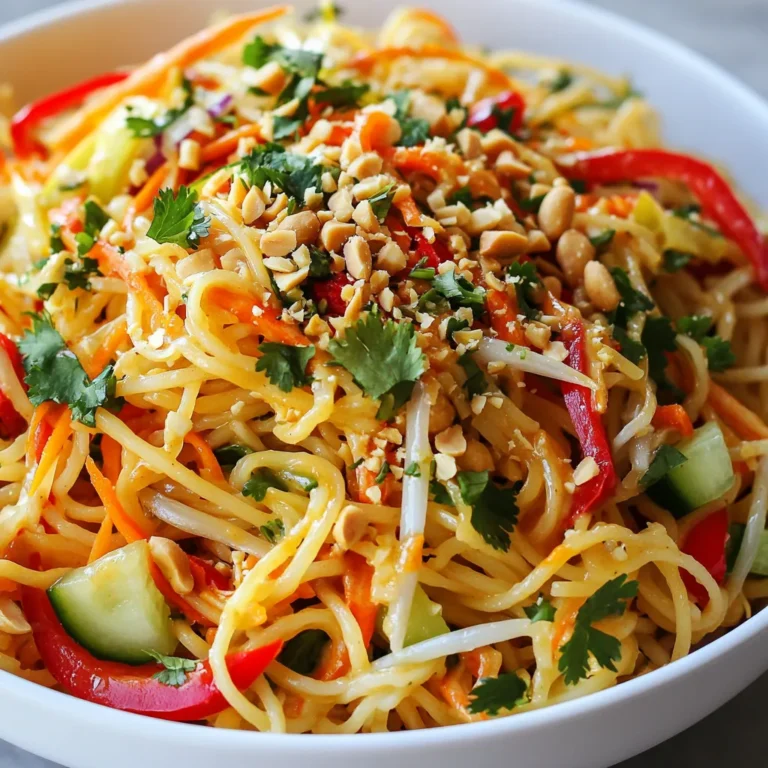
Thai Peanut Noodle Salad Fresh and Flavorful Dish

To make this dish, you'll need the following main ingredients: - 4 boneless, skinless chicken breasts - 1 cup fresh spinach, finely chopped - 1 cup canned artichoke hearts, drained and finely chopped - ½ cup cream cheese, softened to room temperature - ½ cup grated Parmesan cheese - ½ teaspoon garlic powder - ½ teaspoon onion powder - Salt and pepper to taste These ingredients work together to create a rich and flavorful filling. The cream cheese binds the mixture, while the spinach and artichokes provide freshness. You can enhance the dish with these optional ingredients: - 1 tablespoon olive oil, plus more for drizzling - 1 teaspoon paprika (for seasoning the chicken) - Fresh parsley, finely chopped (for garnishing) The olive oil helps keep the chicken moist. Paprika adds a pop of color and taste. Fresh parsley makes for a beautiful garnish, adding a touch of brightness. To prepare your artichoke spinach stuffed chicken, gather these tools: - Mixing bowl - Sharp knife - Cutting board - Oven-safe skillet - Toothpicks Having the right tools makes the process smooth and enjoyable. The knife ensures you cut the chicken evenly, while the skillet allows for perfect searing and baking. {{ingredient_image_2}} First, you need to get your oven ready. Preheat it to 375°F (190°C). This step is key. A hot oven helps cook the chicken evenly. It also helps the filling stay warm and creamy. Next, grab a mixing bowl. In it, combine the following ingredients: - 1 cup fresh spinach, finely chopped - 1 cup canned artichoke hearts, drained and finely chopped - ½ cup cream cheese, softened to room temperature - ½ cup grated Parmesan cheese - ½ teaspoon garlic powder - ½ teaspoon onion powder - Salt and pepper to taste Stir these ingredients well. You want them to mix into a creamy filling. Make sure the spinach and artichokes are evenly spread throughout. Now, take the chicken breasts. Carefully slice each one horizontally. You want to create a pocket. Be careful not to cut all the way through. This pocket will hold your filling. Once you have the pockets, fill each one generously with the spinach and artichoke mixture. Make sure to pack the filling in well. If needed, use toothpicks to close the opening of each chicken breast. This keeps the filling from spilling out while cooking. It’s time to cook! Start by seasoning the chicken. Drizzle a little olive oil on top. Sprinkle paprika, salt, and pepper for extra flavor. Heat a large, oven-safe skillet over medium-high heat. Once it’s hot, add the stuffed chicken breasts. Sear each side for about 3-4 minutes. You want them to be golden brown. After searing, transfer the skillet to your preheated oven. Bake for 20-25 minutes. The chicken should be fully cooked when a meat thermometer reads 165°F (74°C). After baking, let the chicken rest for a few minutes. This keeps it juicy. Before serving, garnish with fresh parsley for color and flavor. Enjoy your savory delight! - Use fresh chicken breasts. They hold the filling better. - Make sure the filling is creamy. This helps it stick to the chicken. - Cut a deep pocket in the chicken, but do not slice all the way through. - Stuff generously. Don’t be shy; fill it well! - Add some lemon zest to the filling for a fresh taste. - Mix in some red pepper flakes for a bit of heat. - Try using feta cheese instead of Parmesan for a different flavor. - Season the outside of the chicken with herbs like thyme or rosemary. - Don’t overcook the chicken. Use a meat thermometer for best results. - If the filling spills out, use toothpicks to secure the chicken. - Avoid thick chunks of artichoke. Finely chop them for even cooking. - Forgetting to season the chicken can make it bland, so don’t skip this step! Pro Tips Choose Fresh Ingredients: Opt for fresh spinach and high-quality artichoke hearts for the best flavor and texture in your stuffing. Don’t Overstuff: While it's tempting to pack the filling tightly, overstuffing can cause the chicken to burst during cooking. Aim for a generous but manageable amount. Use a Meat Thermometer: To ensure perfectly cooked chicken, use a meat thermometer to check that the internal temperature reaches 165°F (74°C). Let it Rest: Allow the stuffed chicken to rest for a few minutes after baking. This helps the juices redistribute, making each bite tender and juicy. {{image_4}} You can switch up the spinach and artichokes for other greens and veggies. Try using kale or Swiss chard instead of spinach. They add a nice twist in taste and texture. If you want, replace artichokes with mushrooms or bell peppers. These swaps will change the flavor but keep the dish fun and fresh. Variety in cheese can bring new life to this dish. Instead of cream cheese, you can use ricotta or goat cheese. Both give a creamy texture. For a sharper bite, try using feta or blue cheese. Each cheese will add its own unique taste, making your stuffed chicken special every time. Baking is great, but you can try other cooking methods too. Grilling the stuffed chicken gives it a smoky flavor. You can also cook it in a slow cooker for a tender, juicy meal. Just make sure the filling stays inside. Each method can change the taste and texture, so feel free to experiment! To keep your leftover stuffed chicken fresh, place it in an airtight container. Make sure the chicken cools down first. Store it in the fridge for up to three days. This way, you can enjoy the tasty flavors later without losing quality. When reheating your stuffed chicken, use the oven for best results. Preheat the oven to 350°F (175°C). Place the chicken on a baking sheet. Cover it with foil to keep it moist. Heat for about 15-20 minutes. Check that it reaches 165°F (74°C) inside before eating. If you want to save your stuffed chicken for later, freezing is a great option. Wrap each chicken breast tightly in plastic wrap. Then, place them in a freezer-safe bag. Remove as much air as possible. They can last up to three months in the freezer. When ready to eat, thaw overnight in the fridge before reheating. Yes, you can prepare the chicken ahead of time. Stuff the chicken breasts and store them in the fridge. Cover them tightly with plastic wrap or place them in an airtight container. This way, you can enjoy a quick and easy meal later. Just remember to bake them within 24 hours for the best taste. You can serve this dish with various tasty sides. Here are some great options: - Roasted vegetables for a warm touch - A light salad for freshness - Garlic bread for extra flavor - Quinoa or rice for a filling option These sides will complement the chicken's rich flavor and make your meal more balanced. To check if the chicken is ready, use a meat thermometer. Insert it into the thickest part of the breast. The chicken should reach an internal temperature of 165°F (74°C). If you don’t have a thermometer, cut into the chicken. The meat should be white, and the juices should run clear. Avoid any pink inside, as this means it's not done yet. Yes, you can use frozen spinach. Just make sure to thaw it first. Squeeze out any excess water to prevent the filling from being too wet. Frozen spinach can be a great time-saver and still taste delicious in your stuffed chicken. Artichoke spinach stuffed chicken breast is a tasty dish you can make at home. We covered all parts, from choosing the right ingredients to cooking techniques. Don't forget the tips for perfect results, and explore variations for fun twists. Proper storage will keep your leftovers fresh for later meals. In the end, making this dish can impress your family and friends. Enjoy your cooking adventure!

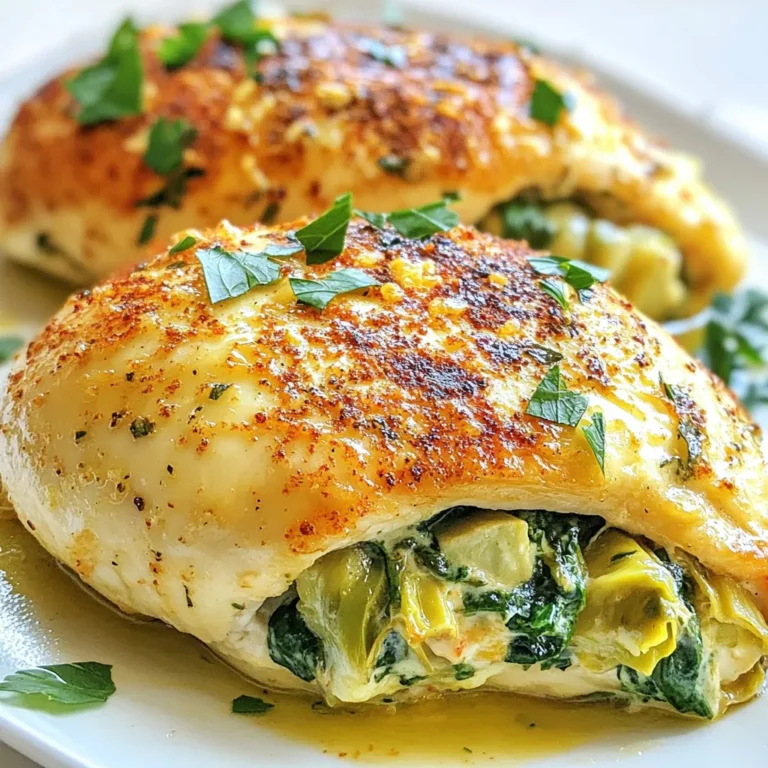
Artichoke Spinach Stuffed Chicken Breast Savory Delight

- 4 salmon fillets - 2 tablespoons olive oil - 3 cloves garlic, minced - 1 cup heavy cream - 1 cup fresh spinach, chopped - 1/2 cup sun-dried tomatoes, chopped - 1/2 cup grated Parmesan cheese - Salt and pepper to taste - 1 teaspoon Italian seasoning - Fresh basil leaves for garnish For the best results, I recommend using: - Wild-caught salmon for flavor and health. - Extra virgin olive oil like California Olive Ranch for quality. - Fresh spinach from local farms for taste and freshness. - San Marzano sun-dried tomatoes for rich flavor. - Grana Padano or Parmigiano-Reggiano for an authentic cheese taste. If you need to swap ingredients, here are some ideas: - Use chicken breast instead of salmon for a different protein. - Coconut cream can replace heavy cream for a dairy-free option. - Fresh kale or arugula can be used instead of spinach. - Any cheese like feta or cream cheese can work in place of Parmesan. - Use fresh tomatoes if you can't find sun-dried ones, just adjust cooking time. {{ingredient_image_2}} Start by heating 2 tablespoons of olive oil in a large pan over medium heat. While the oil warms, season 4 salmon fillets on both sides with salt, pepper, and 1 teaspoon of Italian seasoning. When the oil is hot, add the salmon to the pan. Cook each fillet for 4-5 minutes on both sides until they turn golden brown and are fully cooked. Once done, place the salmon on a plate and keep it warm. In the same pan, add 3 minced garlic cloves. Sauté for about 30 seconds until fragrant. Carefully stir in 1 cup of heavy cream and bring it to a gentle simmer. Make sure to stir occasionally to prevent burning. Next, add 1/2 cup of chopped sun-dried tomatoes and 1 cup of chopped fresh spinach. Stir the mixture and cook for another 3-4 minutes until the spinach wilts. Then, mix in 1/2 cup of grated Parmesan cheese, stirring until it melts and the sauce thickens slightly. Taste and adjust with salt and pepper if needed. Gently place the cooked salmon back into the pan. Let it warm in the creamy sauce for about one minute. Serve each fillet on a plate, generously topping it with the sauce. For a fresh touch, garnish with a few basil leaves. This dish pairs well with garlic bread or a fresh garden salad for a complete meal. Enjoy! To boost the taste of your creamy Tuscan salmon, consider these tips: - Add a squeeze of lemon juice for brightness. It cuts through the creaminess and adds zing. - Mix in red pepper flakes for a spicy kick. Just a pinch can make a big difference. - Use fresh herbs like thyme or parsley. They add layers of flavor and freshness. Cooking salmon can be simple if you follow these steps: - Use medium heat for cooking. This helps the salmon cook evenly without burning. - Let the salmon rest for a few minutes after cooking. This keeps it juicy and flavorful. - Check for doneness by gently flaking the fish with a fork. It should be opaque and flake easily. Making your dish look great can make it taste even better! - Plate each salmon fillet with a generous amount of creamy sauce on top. - Garnish with fresh basil leaves for color and aroma. - Serve with garlic bread or a fresh salad to complete the meal. This adds texture and balance. Pro Tips Use Fresh Ingredients: Always opt for fresh spinach and high-quality sun-dried tomatoes for the best flavor and nutrition in your dish. Perfect Salmon Cooking: Ensure your salmon is at room temperature before cooking to achieve even doneness and a nice sear. Customize the Creaminess: Adjust the amount of heavy cream based on your preference for a lighter or richer sauce. Garnish with Herbs: Fresh basil not only adds color but also enhances the flavor profile of the dish, so don’t skip the garnish! {{image_4}} You can swap salmon for other tasty proteins. Try chicken breast or shrimp. Both options work well and keep the dish juicy. Just adjust cooking times. Chicken takes longer to cook. Shrimp cooks fast. Aim for a nice golden crust for both. Want a vegan twist? Use tofu or tempeh instead of salmon. For the creamy sauce, substitute heavy cream with coconut milk or cashew cream. This keeps it rich and smooth. Use nutritional yeast for a cheesy flavor without dairy. You can still use spinach and sun-dried tomatoes for taste. You can change the flavors easily. Add lemon zest for a fresh kick. Want some heat? Toss in red pepper flakes. For a Mediterranean touch, add olives or capers. You can also mix in artichoke hearts for extra texture. These simple changes keep the dish exciting with every bite. To keep your Creamy Tuscan Salmon fresh, store it in an airtight container. Make sure to let the salmon cool down first. Place it in the fridge within two hours of cooking. It will stay good for up to three days. If you want to keep it longer, consider freezing it. When you’re ready to eat your leftovers, reheat the salmon gently. You can use a microwave or a skillet. If using a microwave, heat on low for about two minutes. If using a skillet, add a little olive oil and warm over low heat. This helps keep the cream sauce smooth and tasty. To freeze Creamy Tuscan Salmon, wrap each piece tightly in plastic wrap. Then, place the wrapped salmon in a freezer bag. Make sure to remove as much air as possible. Label the bag with the date. The salmon can stay frozen for up to three months. When you’re ready to eat it, thaw in the fridge overnight before reheating. Yes, you can use frozen salmon. Just remember to thaw it first. Place it in the fridge overnight. If you’re short on time, you can run it under cold water. Once thawed, season it as you would fresh salmon. It will still taste great in the Creamy Tuscan dish. You can serve this dish with many sides. Here are some tasty options: - Garlic bread - Fresh garden salad - Steamed vegetables - Mashed potatoes - Rice or quinoa These sides will complement the creamy sauce and enhance the meal. To check if the salmon is cooked, look for a few signs. It should be opaque and flake easily with a fork. The internal temperature should reach 145°F. If you see a nice golden crust, it’s usually a good sign too. Always use a meat thermometer for the best results. This blog post covered key ingredients, clear steps, and helpful tips for making Creamy Tuscan Salmon. You learned about tasty substitutes, perfect cooking methods, and fresh presentation ideas. Remember to explore variations and storage techniques for leftovers, too. By following these guidelines, you can create a delicious dish that delights your taste buds. Enjoy your cooking adventure and feel confident in trying new flavors and options. Great meals await you!

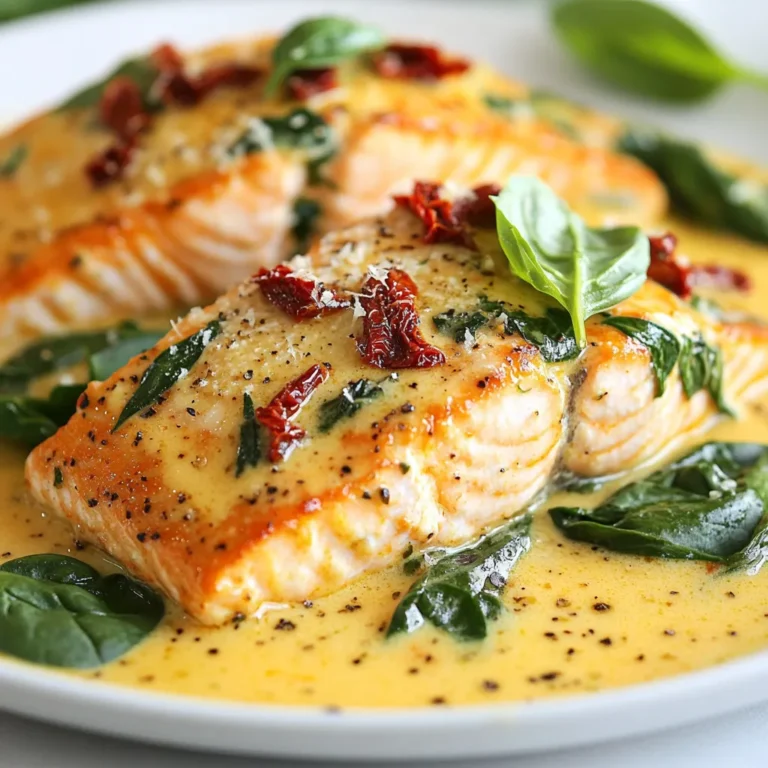
Creamy Tuscan Salmon Delightful and Simple Recipe

To make these tasty Lemon Blueberry Cheesecake Bars, you need a few key ingredients: - 1 ½ cups graham cracker crumbs - ⅓ cup unsalted butter, melted - 2 cups cream cheese, softened to room temperature - 1 cup granulated sugar - 2 large eggs, at room temperature - ½ cup sour cream - 2 tablespoons freshly squeezed lemon juice - 1 teaspoon lemon zest (from about 1 lemon) - 1 teaspoon pure vanilla extract - 1 cup fresh blueberries, rinsed and drained - Pinch of salt Each ingredient plays a big role in flavor and texture. The cream cheese gives the bars their creamy base. The sugar adds sweetness, while the eggs help bind everything together. The sour cream adds richness and a slight tang. Fresh blueberries burst with flavor, and the lemon zest and juice brighten the dish. For a lovely finish, consider these optional garnishes: - Powdered sugar - Fresh blueberries - Mint sprigs These toppings not only look pretty but also enhance the taste. A sprinkle of powdered sugar adds a sweet touch. Fresh blueberries give a pop of color and flavor. Mint sprigs bring a fresh aroma that pairs well with the cheesecake. Enjoy playing with these options to make your bars truly shine! {{ingredient_image_2}} First, preheat your oven to 350°F (175°C). Grab an 8x8-inch baking pan. Line it with parchment paper, leaving some overhang. This helps with easy lifting later. Next, in a medium bowl, mix 1 ½ cups of graham cracker crumbs with ⅓ cup of melted unsalted butter. Use a fork or your fingers to combine the crumbs and butter well. Now, transfer the crumb mix to the pan. Press it firmly and evenly across the bottom. This forms a solid base. Bake this crust for 10 minutes. Once done, remove it and let it cool slightly while you make the cheesecake filling. In a large bowl, beat together 2 cups of softened cream cheese and 1 cup of granulated sugar. Use an electric mixer on medium speed. Keep mixing until the mixture is smooth and creamy, with no lumps. Next, add 2 large eggs, one at a time, mixing well after each one. Then, add ½ cup of sour cream, 2 tablespoons of lemon juice, 1 teaspoon of lemon zest, 1 teaspoon of pure vanilla extract, and a pinch of salt. Mix on low speed until everything blends smoothly. Now, gently fold in 1 cup of fresh blueberries using a spatula. Be careful not to break the berries as you mix. Pour the cheesecake filling over the cooled graham cracker crust. Spread it evenly to cover the crust completely. Bake the cheesecake bars for 30 to 35 minutes. The edges should be set, but the center can still jiggle a little. The top should be light golden when it's done. After baking, remove the pan from the oven. Let it cool at room temperature for about 1 hour. Then, move it to the refrigerator to chill for at least 3 hours, or better yet, overnight. This helps the bars set nicely. To serve, lift the cheesecake out of the pan using the parchment overhang. Place it on a cutting board and slice it into bars of your preferred size. Enjoy your tasty lemon blueberry cheesecake bars! Using room temperature ingredients is key for creamy cheesecake bars. When you mix cold cream cheese, it can stay lumpy. Let your cream cheese, eggs, and sour cream sit out for about 30 minutes. This small step makes a big difference in texture. Overmixing the batter can create air bubbles. This can lead to cracks as the cheesecake cools. Mix just until smooth and combined. Use low speed when adding ingredients after the eggs. This preserves the creamy texture we all love. To prevent cracks in your cheesecake, avoid sudden temperature changes. Let your cheesecake cool slowly. After baking, turn off the oven and crack the door for about 30 minutes. This helps the cheesecake cool gently. For even baking, make sure your oven is preheated. Bake in the center of the oven for the best results. The cheesecake should jiggle slightly in the middle when done. Allow it to cool at room temperature before chilling. This ensures a lovely, smooth finish. Pro Tips Use Room Temperature Ingredients: Ensure your cream cheese, eggs, and sour cream are at room temperature for a smoother filling and better incorporation. Don’t Overmix: When adding the eggs and other ingredients, mix just until combined to prevent the cheesecake from cracking during baking. Cool Gradually: Allow the cheesecake to cool slowly at room temperature before refrigerating to minimize the risk of cracks on the surface. Chill Overnight: For the best texture and flavor, let the cheesecake bars chill overnight in the refrigerator before slicing and serving. {{image_4}} You can make these bars even tastier. Try adding other berries like raspberries or strawberries. Mixing in these fruits gives new flavors to your bars. You can also use different extracts. Almond or coconut extracts can add a fun twist to the taste. Just a little goes a long way, so start with a teaspoon. If you need a gluten-free version, switch to gluten-free graham cracker crumbs. Many brands offer this option. You can still enjoy a great crust that way. For a vegan cheesecake filling, use a mix of silken tofu and dairy-free cream cheese. Blend until smooth and creamy. This way, everyone can enjoy these delicious bars! To keep your leftover cheesecake bars fresh, follow these steps: - Allow the bars to cool completely at room temperature. - Use a sharp knife to slice them into bars. - Place the bars in an airtight container. - Layer parchment paper between bars to avoid sticking. - Store them in the refrigerator for up to 5 days. For best results, use glass or plastic containers with tight seals. They help keep moisture in and air out, preserving flavor and texture. If you want to save some bars for later, freezing is easy: 1. Follow the cooling and slicing steps mentioned above. 2. Wrap each bar tightly in plastic wrap. 3. Place the wrapped bars in a freezer-safe bag or container. 4. Label with the date and type of treat. 5. Freeze for up to 3 months. To thaw, simply move the bars to the fridge for several hours or overnight. Enjoy them chilled or at room temperature! Lemon Blueberry Cheesecake Bars last about 5 days in the fridge. Store them in an airtight container. If you freeze them, they can last up to 3 months. To thaw, place them in the fridge overnight before serving. This keeps them fresh and tasty. Yes, you can use frozen blueberries. They work well in this recipe. Just remember to let them thaw and drain them before adding to the batter. This helps avoid excess moisture. Fresh blueberries give a firmer texture, while frozen might be softer but still delicious. You can use several substitutes for cream cheese. For a dairy-free option, try silken tofu blended until smooth. Another choice is cashew cream made from soaked cashews. For a lower-fat option, use Greek yogurt. Both will give you a creamy texture with great taste. To make delicious lemon blueberry cheesecake bars, start with key ingredients like cream cheese, sugar, and fresh blueberries. Follow the step-by-step instructions to create a smooth filling and a tasty crust. Remember to keep your ingredients at room temperature and avoid overmixing for the best texture. You can even explore variations with other fruits or dietary options. In the end, these bars offer a sweet treat that's easy to store or freeze. Enjoy experimenting with flavors and share this dessert with friends. Trust your skills, and you’ll create something special every time!

Lemon Blueberry Cheesecake Bars Tasty and Easy Treat

To make Air Fryer Garlic Parm Brussels, you'll need a few simple items. Here’s the list: - 1 lb Brussels sprouts, trimmed and halved - 3 tablespoons extra virgin olive oil - 4 cloves garlic, finely minced - 1/2 teaspoon sea salt - 1/4 teaspoon freshly cracked black pepper - 1/4 teaspoon red pepper flakes (optional) - 1/3 cup freshly grated Parmesan cheese - 2 tablespoons fresh parsley, finely chopped These ingredients come together to create a dish that is both crispy and full of flavor. The Brussels sprouts get their crunch from the air fryer, while the garlic and Parmesan add a rich taste. The olive oil helps the sprouts brown nicely. If you like some heat, the red pepper flakes give a nice kick. I love using fresh parsley as a garnish; it adds a pop of color and a fresh taste. Make sure to measure everything before you start cooking. This way, you will have a smooth process and enjoy your time in the kitchen! {{ingredient_image_2}} First, set your air fryer to 375°F (190°C). This step is key. It ensures your Brussels sprouts cook evenly and get crispy. In a large bowl, add 1 pound of trimmed and halved Brussels sprouts. Drizzle in 3 tablespoons of extra virgin olive oil. Next, add 4 cloves of finely minced garlic, 1/2 teaspoon of sea salt, and 1/4 teaspoon of freshly cracked black pepper. If you like heat, toss in 1/4 teaspoon of red pepper flakes. Mix everything well. Make sure each Brussels sprout is coated fully. Carefully place the coated Brussels sprouts in the air fryer basket. Lay them out in a single layer. This helps with air flow. Avoid overcrowding the basket. Set the timer for 15 minutes. Halfway through, shake the basket gently. This helps them cook evenly and become nice and crispy. After 15 minutes, take the basket out. Sprinkle 1/3 cup of freshly grated Parmesan cheese over the Brussels sprouts. Return the basket to the air fryer. Cook for another 2 to 3 minutes. You want the cheese to melt and turn slightly golden. Once done, carefully transfer the Brussels sprouts to a serving dish. They will be hot, so be careful. For a nice touch, sprinkle 2 tablespoons of finely chopped fresh parsley on top. This adds color and flavor. For an extra pop, you can serve them on a rustic wooden board or a bright plate, maybe even with a lemon wedge on the side! To get those perfect crispy Brussels sprouts, don't overcrowd your air fryer basket. When sprouts are packed too tightly, they can steam instead of fry. This keeps them soft and soggy. Instead, try to arrange them in a single layer. If you need to cook more, do it in batches. This way, each sprout gets ample hot air, leading to a crunchy, golden finish. You can easily customize the flavor of your Brussels sprouts. Add your favorite spices to the mix. For a smoky flavor, try adding smoked paprika. For a zesty kick, squeeze some lemon juice before serving. You can adjust the heat by changing the amount of red pepper flakes. Don't be afraid to experiment! The key is to find the balance that you love. Sometimes, your Brussels sprouts may come out undercooked or overcooked. If they are undercooked, simply add a few more minutes to the cooking time. Shake the basket halfway through to ensure even cooking. If they are overcooked, check your air fryer’s temperature. It might be running hot. Reducing the temperature slightly can help achieve that perfect texture. Remember, every air fryer is a little different, so adjust as needed! Pro Tips Choose Fresh Brussels Sprouts: Opt for bright green, firm Brussels sprouts without any yellowing or blemishes for the best flavor and texture. Don't Skip the Preheating: Preheating the air fryer ensures even cooking and helps achieve that desired crispy exterior. Experiment with Seasonings: Feel free to customize the seasoning by adding your favorite herbs or spices to elevate the flavor profile. Serve Immediately: For the best taste and texture, serve the Brussels sprouts hot and fresh from the air fryer. {{image_4}} You can easily make this dish heartier by adding protein. For a smoky flavor, try incorporating crispy bacon. Simply cook the bacon until crispy, chop it, and mix it with the Brussels sprouts before air frying. If you prefer chicken, cube some cooked chicken and toss it in with the Brussels sprouts. This adds protein and makes the dish more filling. If you want a plant-based version, you can skip the cheese. Instead of Parmesan, try nutritional yeast for a cheesy flavor without dairy. You can also use vegan cheese if you like. Both options keep the dish rich in taste while making it vegan-friendly. Want to switch up the flavors? Experiment with different herbs and spices. Try adding thyme or rosemary for a fresh taste. You can also use smoked paprika for a warm, smoky flavor. A squeeze of lemon before serving brightens everything up. These small tweaks can create a new experience with every meal. To store your leftover Brussels sprouts, let them cool first. Place them in an airtight container. This will keep them fresh for up to four days in the fridge. If you want to keep them longer, consider freezing. To reheat Brussels sprouts and keep them crispy, I recommend using the air fryer. Set it to 350°F (175°C) and cook for about five minutes. This method helps retain their crunch. You can also use an oven at the same temperature, but the air fryer works best. If you want to freeze Brussels sprouts, first blanch them in boiling water for two minutes. Then, cool them in ice water. Drain well and place them in a freezer-safe bag. They can last for up to three months. When you're ready to use them, thaw overnight in the fridge before reheating. Yes, you can use frozen Brussels sprouts. However, frozen sprouts have more water. This can cause them to steam instead of crisping up. To fix this, thaw and drain them first. Pat them dry with a towel. Then, follow the same steps in the recipe. You may need to adjust the cooking time by a few minutes. Keep a close eye on them to get that perfect crisp. Garlic Parmesan Brussels sprouts pair well with many dishes. Here are some ideas: - Grilled chicken for a hearty meal - Salmon for a fresh, rich flavor - Quinoa or rice for a healthy base - A simple salad for a light side - Pasta for a filling option These sides balance the rich flavor of the Brussels sprouts. If you want more heat, add extra red pepper flakes. You can also try these options: - Use hot sauce for a quick kick - Add diced jalapeños for fresh heat - Mix in a pinch of cayenne pepper for warmth - Drizzle with sriracha before serving These suggestions will help you adjust the spice level to your taste. You learned to make tasty garlic Parmesan Brussels sprouts step by step. We covered ingredients, cooking techniques, and tips for the best results. Remember to not crowd the air fryer for that perfect crisp. You can also customize flavors or add protein for a new twist. Store leftovers well and reheat them for great taste later. Enjoy serving these dishes with your favorite sides. Try different herbs or spices for new flavors. Your cooking can be fun and delicious with this recipe.

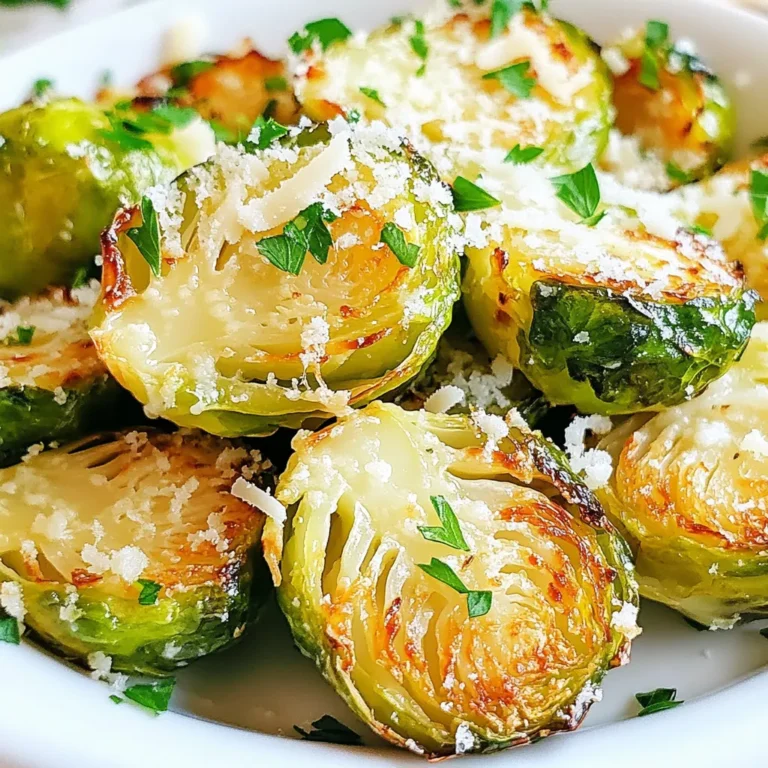
Air Fryer Garlic Parm Brussels Crispy and Flavorful Dish

- 8 ounces of pasta (suggested types: rotini, farfalle) - 1 cup cherry tomatoes, halved - 1 cup fresh mozzarella balls (bocconcini), halved - 1 cup fresh basil leaves, roughly chopped The heart of Caprese Pasta Salad is fresh and simple. You need good pasta for a nice base. Rotini and farfalle are my top picks. They hold the dressing well. Cherry tomatoes add a sweet burst. Cutting them in half helps release their juice. Fresh mozzarella brings creaminess. It melts in your mouth. Basil gives a fresh, aromatic touch. Roughly chop it to get more flavor out. - 3 tablespoons balsamic glaze - 2 tablespoons extra virgin olive oil - Salt and freshly cracked black pepper, to taste - 1 teaspoon garlic powder The dressing makes this salad shine. Balsamic glaze adds sweetness and tang. A drizzle of extra virgin olive oil gives richness. Salt and pepper balance all the flavors. Garlic powder adds a nice kick without being overpowering. - Crushed red pepper flakes (for heat) - Additional toppings or garnishes If you like some heat, add crushed red pepper flakes. They give a nice spice. You can also get creative with garnishes. Try pine nuts or olives for an extra touch. {{ingredient_image_2}} To make the best Caprese Pasta Salad, start by boiling the pasta. Fill a large pot with water and add a good pinch of salt. Bring the water to a rolling boil. Add 8 ounces of your chosen pasta, like rotini or farfalle. Cook according to the package instructions until the pasta is al dente. This usually takes about 8-10 minutes. Once done, drain the pasta in a colander. Rinse it under cold water to stop the cooking process and cool it down. This step keeps the pasta from getting mushy. While the pasta cooks, prepare your salad ingredients. Take 1 cup of cherry tomatoes and slice them in half. If you have whole mozzarella balls, cut 1 cup of them in half as well. This makes them easy to eat. Next, take 1 cup of fresh basil leaves. Roughly chop them to release their lovely aroma. This will add a nice flavor to your salad. Now, it's time to bring everything together. In a large mixing bowl, combine the cooled pasta, halved cherry tomatoes, mozzarella, and chopped basil leaves. These fresh ingredients create bright flavors. Drizzle 3 tablespoons of balsamic glaze and 2 tablespoons of extra virgin olive oil over the mixture. Add 1 teaspoon of garlic powder, salt, and freshly cracked black pepper to taste. If you like a little heat, sprinkle in some crushed red pepper flakes. Gently toss all the ingredients together. Make sure everything gets coated with the dressing. Chill your salad in the refrigerator for at least 15-30 minutes. This cool time allows the flavors to mix well. When you're ready to serve, give the salad a gentle toss. Taste it and adjust the seasoning with more salt or pepper if needed. For a beautiful presentation, serve in a large bowl. You can drizzle extra balsamic glaze on top and add whole basil leaves for a pop of color. Enjoy your fresh Caprese Pasta Salad! To get pasta just right, cook it until it is al dente. This means it should be firm but not hard. Bring a large pot of salted water to a boil. Add the pasta and stir it well. Follow the package instructions for cooking time. When it's ready, drain it and rinse it under cold water. This stops the cooking and cools down the pasta. Add depth to your Caprese pasta salad with simple seasonings. Use salt and freshly cracked black pepper to taste. A teaspoon of garlic powder can add a nice flavor. For a little heat, throw in crushed red pepper flakes. Fresh herbs like parsley or oregano can also brighten the dish. How you serve your pasta salad can make a big difference. Use a large, colorful bowl to show off the vibrant ingredients. Drizzle some balsamic glaze on top for flair. Garnish with whole basil leaves for a pop of green. For fun, serve individual portions in mason jars. It makes for a cute and portable option! Pro Tips Fresh Ingredients Matter: Use the freshest tomatoes and basil you can find for the best flavor. Fresh ingredients will elevate the overall taste of your pasta salad. Perfect Pasta Texture: Make sure to cook your pasta al dente. This will ensure it holds its shape and texture in the salad, preventing it from becoming mushy. Chill for Flavor: Allow the salad to chill in the refrigerator for at least 30 minutes. This resting time helps the flavors meld together, creating a more delicious dish. Customize Your Salad: Feel free to add other ingredients like olives, bell peppers, or grilled chicken for added flavor and protein. This recipe is versatile, so make it your own! {{image_4}} If you want to make this dish gluten-free, use gluten-free pasta. Many brands offer great options like chickpea or brown rice pasta. For those who avoid dairy, choose plant-based mozzarella. Many stores sell dairy-free cheese that melts well. These swaps keep the spirit of the dish alive while catering to your needs. Adding seasonal veggies can boost flavor and nutrition. In spring, toss in asparagus or peas for a fresh crunch. Summer is perfect for zucchini or bell peppers. In fall, consider roasted butternut squash or kale for warmth. Winter calls for hearty greens like spinach or arugula. These veggies enhance the dish and make it colorful and bright. You can change the flavor with different dressings. Try using lemon vinaigrette for a zesty twist. If you love spice, add a dash of smoked paprika or cayenne pepper. For a creamy touch, mix in some pesto or avocado. Each change gives the salad a new taste while keeping it fresh and fun. To keep your Caprese Pasta Salad fresh, store it in an airtight container. This will help prevent it from drying out. Make sure the salad is cool before sealing it. If you have leftovers, eat them within three days for the best taste. I always suggest stirring the salad again before serving. This helps the flavors mix well. Freezing Caprese Pasta Salad is not the best idea. The fresh ingredients, like tomatoes and basil, do not freeze well. They can become mushy and lose their fresh taste. If you want to save some, consider freezing just the pasta. You can mix it with fresh ingredients later for a tasty meal. In the fridge, Caprese Pasta Salad lasts about three days. After that, the quality goes down. If you see any signs of spoilage, like a bad smell or discoloration, it’s best to throw it away. Keeping it stored well helps maintain its fresh flavor. Enjoy it while it’s still at its best! Yes, you can make Caprese Pasta Salad ahead of time. To do this, follow these tips: - Cook the pasta: Make it al dente so it holds up well. - Dress it lightly: Add less dressing if preparing early. This prevents sogginess. - Store properly: Use an airtight container in the fridge. - Add fresh ingredients later: Wait to add basil and tomatoes until serving. This way, your salad stays fresh and tasty! If you need a substitute for mozzarella, here are some dairy-free options and alternatives: - Vegan cheese: Look for brands that mimic mozzarella. - Tofu: Soft tofu can work well, giving a creamy texture. - Avocado: It adds a rich flavor and creaminess. - Nutritional yeast: This adds a cheesy taste without dairy. These options keep your salad delicious! Yes, Caprese Pasta Salad is great for potlucks. Here are best practices for serving at gatherings: - Make it in advance: This allows flavors to blend. - Serve cold: Chill the salad before serving. - Use a large bowl: It’s easier for guests to scoop. - Bring extra dressing: Guests may want more on their servings. With these tips, your dish will be a hit! This blog post guides you through making a delicious Caprese Pasta Salad. You learned about key ingredients, like pasta, tomatoes, and mozzarella, along with tips for cooking and assembling. I also shared ways to customize your salad with optional additions and variations. In the end, this salad is not just tasty; it's easy to make. Enjoy creating your unique version for any occasion. It’s perfect for a meal or gathering. With these tips, your Caprese Pasta Salad will impress everyone.

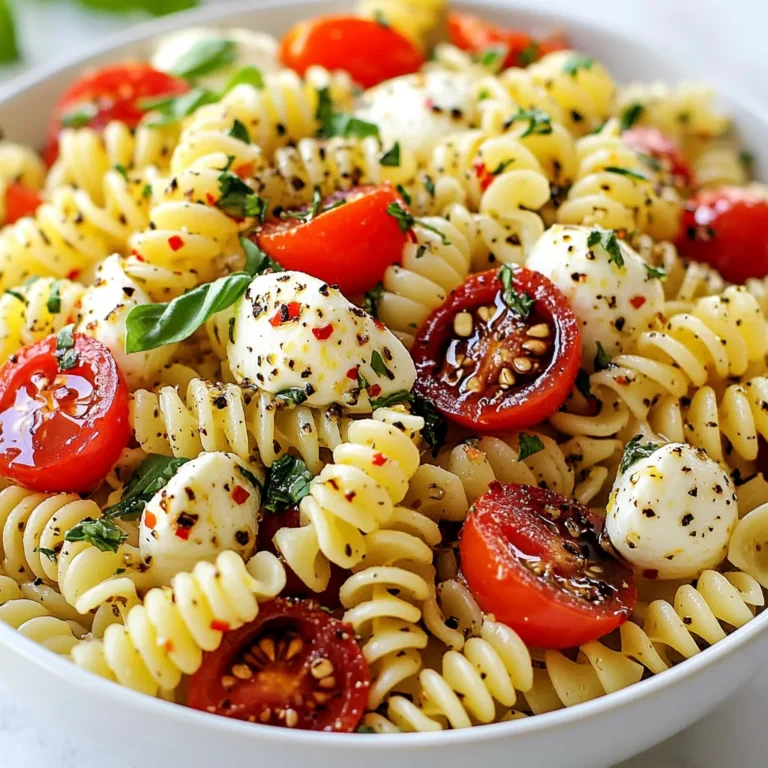
Caprese Pasta Salad Flavorful and Fresh Recipe Guide

To make Boursin Chicken Pasta, you will need: - 2 boneless, skinless chicken breasts - 8 ounces pasta (fettuccine or penne) - 1 package (5.2 oz) Boursin cheese, garlic and herb flavor - 2 tablespoons extra virgin olive oil - 2 cloves garlic, finely minced - 1 cup cherry tomatoes, halved - 1 cup fresh spinach leaves - 1/2 cup heavy cream (or plant-based cream) - Salt and pepper to taste - Fresh basil leaves for garnish For this dish, I recommend using Boursin cheese. The garlic and herb flavor works best. You can find this brand at most grocery stores. Other brands may not give the same creamy and rich taste. Feel free to add your favorite touches to make this dish your own. Here are some ideas: - Grated Parmesan cheese for extra flavor - Crushed red pepper for a spicy kick - Mushrooms for added texture and taste - Broccoli or bell peppers for more veggies {{ingredient_image_2}} Start by boiling water in a large pot. Add a good amount of salt. When the water bubbles, toss in 8 ounces of pasta. Fettuccine or penne works best. Cook it until it is al dente, about 8 to 10 minutes. Remember to save 1/2 cup of the starchy water before you drain the pasta. Set the pasta aside for now. While the pasta cooks, take 2 boneless, skinless chicken breasts. Season them well with salt and pepper. Heat 2 tablespoons of olive oil in a large skillet over medium-high heat. When the oil shimmers, add the chicken. Cook each side for 6-7 minutes until they are golden. Make sure they are fully cooked. Remove the chicken and let it rest for a few minutes. Then slice it into thin strips. In the same skillet, lower the heat to medium. Add 2 minced garlic cloves and sauté for about 30 seconds. You want the garlic to smell great, but don’t burn it. Now add 1 cup of halved cherry tomatoes. Cook them for 3-4 minutes until they start to soften. Next, add the Boursin cheese and 1/2 cup of heavy cream. Stir until the cheese melts and the sauce becomes smooth. If it’s too thick, add a bit of the reserved pasta water to thin it out. Add the cooked pasta and 1 cup of fresh spinach to the skillet. Toss everything together until the pasta is well coated with the sauce. Gently fold in the sliced chicken and heat it through for one more minute. Taste the dish and add more salt or pepper if you think it needs it. To get juicy chicken, start with even thickness. You can pound the chicken breasts gently. This helps them cook evenly. Season both sides with salt and pepper. Use a hot skillet with olive oil. Cook for 6-7 minutes per side. Look for a golden brown color. Let the chicken rest before slicing. This keeps the juices inside. For the pasta, use a large pot of salted water. Bring it to a boil before adding the pasta. Cook it until al dente. This means it should still have a slight bite. Reserve some pasta water before draining. This starchy water helps make the sauce creamy. Use the same skillet for sautéing. This adds extra flavor from the chicken. Start with minced garlic. Sauté it for about 30 seconds until fragrant. Don’t let it burn! Then, add cherry tomatoes and cook until they soften. This makes your dish taste fresher and brighter. Pro Tips Perfectly Cooked Pasta: Always cook your pasta to al dente for the best texture. This ensures it remains firm and complements the creamy sauce perfectly. Rest the Chicken: Allow the cooked chicken to rest for a few minutes before slicing. This helps retain the juices, resulting in more tender and flavorful pieces. Fresh Spinach Addition: Add the spinach at the end of cooking to keep it vibrant and slightly wilted without losing its nutrients and bright color. Adjusting Sauce Consistency: If the sauce is too thick, gradually add reserved pasta water until you reach your desired creaminess. This will also help the sauce cling to the pasta better. {{image_4}} You can make Boursin chicken pasta vegetarian by skipping the chicken. Instead, add more vegetables. Try bell peppers, zucchini, or mushrooms. These add great texture and taste. You can also use plant-based protein like tofu or tempeh. Just sauté them until golden brown. This keeps the dish hearty and satisfying. While fettuccine or penne works well, feel free to switch it up. You can use spaghetti, farfalle, or even whole wheat pasta. Each type brings a unique texture. For a fun twist, try some spiralized zucchini or sweet potato noodles. This keeps the dish fresh and exciting. For a gluten-free version, choose gluten-free pasta. Many brands now offer tasty options. You can use rice or quinoa pasta as well. These are great substitutes. Just cook them according to package directions. This way, everyone can enjoy this creamy delight without worry. To store leftovers, place the chicken pasta in an airtight container. Make sure it cools down first. This helps keep the dish fresh. You can keep it in the fridge for up to three days. If you want to enjoy it later, use a portion of the creamy sauce to keep it moist. To reheat, you can use a microwave or a stovetop. If using a microwave, place the pasta in a bowl. Cover it with a damp paper towel to trap steam. Heat in short bursts, stirring in between. If using the stovetop, add a splash of water or extra cream. Heat gently over low heat, stirring often, until warmed through. You can freeze this dish, but the sauce might change a bit. For best results, freeze the chicken pasta without the sauce. Store it in a freezer-safe container for up to three months. When ready to eat, thaw it in the fridge overnight. Then, heat the pasta and mix in fresh sauce made with Boursin cheese. This keeps the flavors fresh and delicious. Boursin cheese is a soft, spreadable cheese. It often has garlic and herbs for flavor. This cheese adds a rich, creamy taste to dishes. In Boursin Chicken Pasta, it creates a smooth sauce. You can find it in most grocery stores, usually in the cheese section. Yes, you can use various pasta types. Fettuccine and penne work well, but so do shells, farfalle, or even whole wheat pasta. Choose what you like best. Just make sure to cook it al dente for the best texture. Yes, you can make this dish dairy-free. Use a plant-based cream and a dairy-free cheese spread. Brands like Kite Hill or Tofutti offer good options. This way, you can still enjoy a creamy sauce without dairy. Adding vegetables is a great idea! You can include bell peppers, zucchini, or broccoli. These veggies add flavor and nutrients. Sauté them with garlic and tomatoes for a tasty mix. Spinach is already in the recipe, which is great for color and health. This recipe offers a delicious Boursin cheese pasta that’s easy to make. You learned about the key ingredients and tasted suggested brands. The steps to cook the pasta and chicken are simple and clear. I shared tips for perfecting texture and flavor. There are also tasty variations for different diets. Whether you store leftovers or reheat, I’ve got you covered. Now, it's time to enjoy your creamy creation. Happy cooking!

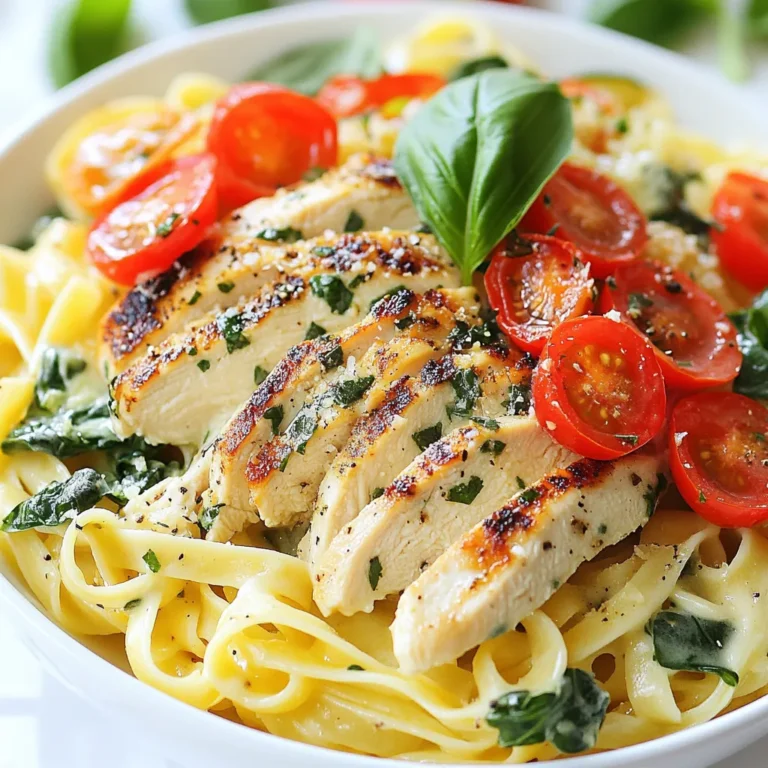
Boursin Chicken Pasta Creamy and Flavorful Delight

- Pasta choices: You can use 8 oz of fusilli or penne. Both shapes hold the sauce well. - Chicken preparation: Take 2 boneless, skinless chicken breasts. Dice them into bite-sized cubes for even cooking. - Pesto options: Use 1 cup of homemade pesto for freshness or a quality store-bought pesto for convenience. - Heavy cream and its role: One cup of heavy cream makes the sauce rich and creamy. It blends well with pesto to create a smooth texture. - Olive oil usage: Use 2 tablespoons of extra virgin olive oil for cooking the chicken. It adds flavor and helps prevent sticking. - Parmesan cheese and seasoning: Stir in 1/2 cup of freshly grated Parmesan cheese. It adds depth and a savory note. Season with salt and cracked black pepper to taste. {{ingredient_image_2}} Bring a large pot of salted water to a boil. Use enough salt to make the water taste like the sea. Once boiling, add 8 ounces of pasta. Fusilli or penne works best. Cook according to the package instructions. Stir the pasta occasionally. You want it to be al dente, which means it should still have a little bite. This usually takes about 8-10 minutes. When done, drain the pasta but save a small cup of the pasta water for later. Heat 2 tablespoons of extra virgin olive oil in a large skillet over medium heat. This step is key. If the oil is not hot enough, the chicken will not sear well. Add 2 diced chicken breasts and season with salt and pepper. Cook for 5-7 minutes. Stir occasionally until the chicken turns golden brown and is fully cooked. Remove the chicken and place it on a plate to keep warm. In the same skillet, lower the heat a bit. Pour in 1 cup of heavy cream and let it simmer gently. Stir often to avoid burning. After a minute, mix in 1 cup of pesto. Stir well until the sauce is creamy and bright green. This is where the magic happens! Now, return the cooked chicken to the skillet. Add 1 cup of halved cherry tomatoes and 1 cup of fresh baby spinach. Stir everything together. Cook for another 2-3 minutes. You want the spinach to wilt and the tomatoes to soften a bit. Add the drained pasta to the skillet with the chicken and sauce. Toss it all together. This ensures every piece of pasta gets coated in that creamy sauce. If it feels too thick, drizzle in a bit of the reserved pasta water. Finally, stir in 1/2 cup of freshly grated Parmesan cheese. Let it melt into the sauce. Taste and adjust the seasoning with more salt and pepper if you need to. To cook pasta just right, pay attention to your timing. Start by boiling a large pot of salted water. The salt helps the pasta gain flavor. Once the water is boiling, add your pasta. Check the package for the time needed to reach al dente. This means the pasta should be firm but not hard. Keep a cup of pasta water before you drain it. This water has starch, which helps thicken and flavor the sauce later. If your sauce is too thick, just add a bit of this pasta water for a creamy texture. To make your dish shine, consider adding more spices or herbs. A pinch of red pepper flakes can add a nice kick. Fresh herbs like oregano or thyme can also brighten up the flavor. Choosing between homemade or store-bought pesto can change your dish. Homemade pesto often tastes fresher. However, a good quality store-bought pesto can save time and still taste great. Serving matters as much as taste. Use deep pasta bowls for a nice look. This way, the sauce stays pooled at the bottom, making it inviting. Add color by topping your dish with fresh basil leaves. A drizzle of olive oil can also add shine and depth. Finish with more grated Parmesan cheese for a gourmet touch. These small touches turn your meal into a feast for the eyes. Pro Tips Use Quality Pesto: A good-quality pesto elevates the dish significantly. If time allows, try making your own for the freshest flavor! Perfect Pasta Cook Time: Cook the pasta just until al dente. It will continue to cook slightly when tossed with the hot sauce, ensuring it stays firm. Customize with Veggies: Feel free to add other vegetables like bell peppers or zucchini for extra color and nutrition! Save Pasta Water: Always reserve a cup of pasta water. It’s perfect for adjusting the sauce consistency and helps it cling better to the pasta. {{image_4}} You can switch up the protein in your creamy pesto chicken pasta. Shrimp adds a sweet, tender bite. Just sauté shrimp for 2-3 minutes until pink. Tofu is a great choice too. For a veggie option, use chickpeas or mixed vegetables. Both options keep the dish hearty and delicious. If you need a gluten-free meal, don’t worry! You can swap traditional pasta for gluten-free pasta. Many brands offer great options that taste good and cook well. Just follow the package instructions for the best results. This way, everyone can enjoy this creamy pasta dish. Want to take your dish to the next level? Add sun-dried tomatoes or artichokes for extra flavor. They give a nice tang that pairs well with the creamy sauce. You can also mix in different cheeses. Try mozzarella for a gooey texture or goat cheese for a tangy kick. These simple changes make your creamy pesto chicken pasta even more exciting! You can store leftovers of creamy pesto chicken pasta in the fridge for up to three days. Make sure to place the pasta in an airtight container. This helps keep it fresh and tasty. If you want to keep it longer, consider freezing it instead. To freeze creamy pasta, let it cool first. Once cool, place it in a freezer-safe container. Use plastic wrap or foil to cover it tightly. This prevents freezer burn. When you're ready to eat, thaw it in the fridge overnight. Reheat it on the stove over low heat for the best texture. Add a splash of cream or pasta water to keep it creamy. Leftover creamy pesto chicken pasta is great for quick meals. You can turn it into a pasta bake. Just add some cheese on top and bake until bubbly. Another idea is to mix it into a salad for a fresh twist. You can also stir in some veggies or beans for extra flavor and nutrition. If you lack pesto, you can try other sauces. A mix of basil, garlic, and olive oil makes a great substitute. You can also blend spinach, nuts, and cheese to create your own version. Alfredo sauce or a simple garlic butter sauce can work too. Each will give a unique flavor but still taste great with chicken and pasta. Yes, you can prepare parts of this dish in advance. Cook the chicken and pasta earlier in the day. Store them separately in the fridge. Mix the sauce just before serving to keep it fresh. Reheat the chicken and pasta together and then add the sauce. This way, you save time when ready to eat. If your sauce turns out dry or thick, don’t worry. Add a splash of reserved pasta water to loosen it. Stir well to combine. You can also add a bit more cream for extra richness. If you need, a drizzle of olive oil can help smooth it out. Adjust until you reach the creamy consistency you want. For this creamy pesto chicken pasta, fusilli or penne works best. Their shapes hold the sauce well, making each bite flavorful. You can also try bowtie or rotini for fun shapes. Just remember to cook them al dente for the best texture. Enjoy experimenting with different types to find your favorite! This dish offers a simple way to enjoy creamy pasta with chicken and pesto. You learned about the needed ingredients, cooking steps, tips for perfect flavor, and storage ideas. Whether you choose shrimp or tofu for protein, variations abound to fit your taste. Don’t forget, leftovers can be transformed into new meals. With these steps in mind, feel confident in creating your perfect creamy pasta dish. Enjoy the cooking journey and the delicious results!

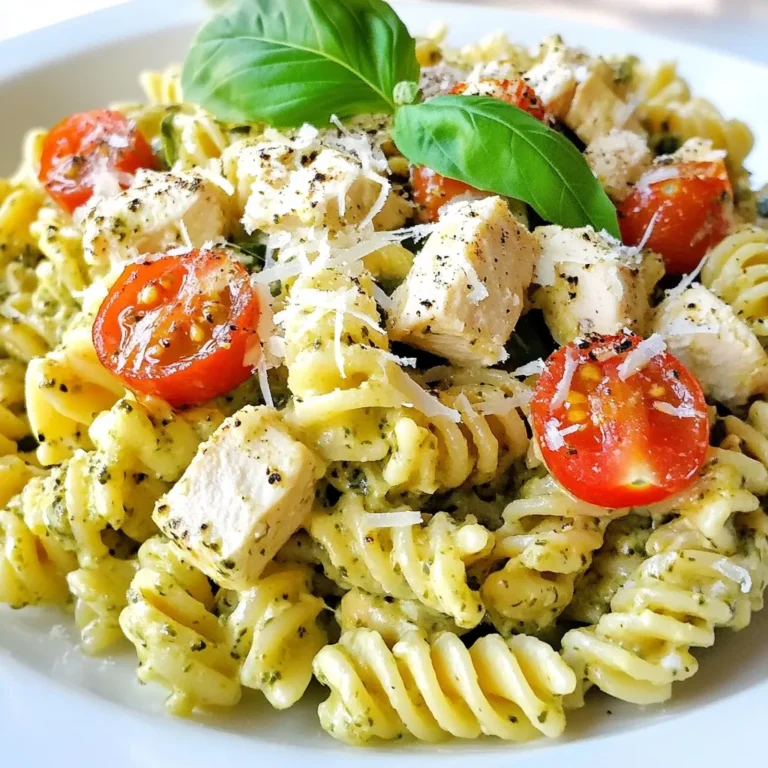
Creamy Pesto Chicken Pasta Delightful Comfort Dish

PREV 1 … 15 16 17 … 20 NEXT
purelyyumrecipes

explore

DessertsDinnerAppetizersDrinks

Our Policies

  • Cookie Policy
  • Copyright Policy
  • Disclaimer
  • GDPR Policy
  • Terms Of Use
Back to Top
  • About
  • Contact Us
  • Privacy Policy
© 2025 purelyyumrecipes