FREE DINNER EBOOK! Get your copy!
  • Cookie Policy
  • GDPR Policy
  • Disclaimer
  • Terms Of Use
  • Visit my other site: Fun Cookie Recipes
purelyyumrecipes
  • Home
  • Dinner
  • Desserts
  • Drinks
  • Appetizers
  • Contact
  • About
  • Privacy Policy
  • Home
  • Dinner
  • Desserts
  • Drinks
  • Appetizers
  • Contact
  • About
  • Privacy Policy
  • Cookie Policy
  • GDPR Policy
  • Disclaimer
  • Terms Of Use
Visit my other site: Fun Cookie Recipes

HOME / CATEGORIES /

Latest

- 4 salmon fillets (6 oz each) - 1/4 cup pure maple syrup - 2 tablespoons soy sauce (or tamari for a gluten-free option) - 1 tablespoon Dijon mustard - 2 cloves garlic, finely minced - 1 tablespoon fresh ginger, finely grated - 1/2 teaspoon freshly ground black pepper - 1/4 teaspoon cayenne pepper (optional, for a hint of heat) - Sea salt, to taste - Fresh parsley or green onions, finely chopped, for garnish These ingredients create a sweet and savory glaze for the salmon. The maple syrup adds a rich flavor. The soy sauce gives depth, while the Dijon mustard adds a nice tang. Garlic and ginger provide warmth and brightness. Black pepper and cayenne add a gentle kick, making every bite exciting. For garnishing, sea salt enhances the taste, while fresh parsley or green onions add color and freshness. Together, these ingredients help you create a dish that looks as good as it tastes. {{ingredient_image_2}} First, grab a medium mixing bowl. In this bowl, combine the following ingredients: - 1/4 cup pure maple syrup - 2 tablespoons soy sauce - 1 tablespoon Dijon mustard - 2 cloves garlic, minced - 1 tablespoon fresh ginger, grated - 1 tablespoon extra virgin olive oil - 1/2 teaspoon black pepper - 1/4 teaspoon cayenne pepper (optional) Whisk all these ingredients together until smooth. This mix will give the salmon a sweet and savory flavor. Next, take the salmon fillets and place them in a shallow dish or plastic bag. Pour the marinade over them, making sure each piece is well-coated. Seal the dish or bag and refrigerate it. Let the salmon marinate for at least 30 minutes. If you want more flavor, you can marinate it for up to 2 hours. While the salmon marinates, preheat your oven to 400°F (200°C). This step is key to cooking the salmon evenly. Now, line a baking sheet with parchment paper or aluminum foil. This will help with easy cleanup later. Once the oven is ready, take the baking sheet out. Lay the salmon fillets skin-side down on the sheet. Don't forget to save some marinade in a small bowl for later! Bake the salmon for 12-15 minutes. It should flake easily with a fork when done. In the last 5 minutes of baking, brush the tops of the fillets with the reserved marinade for extra glaze. When the salmon is done, carefully get it out of the oven. Sprinkle a bit of sea salt on top. For a beautiful presentation, garnish with fresh parsley or sliced green onions. Serve the salmon on a platter with veggies for a pop of color. Drizzle any leftover glaze over the vegetables for added flavor. How to check for doneness To check if your salmon is done, use a fork. Gently press the fish; it should flake easily. If it does not, give it a few more minutes. Salmon should reach an internal temperature of 145°F (63°C). Avoiding overcooking Overcooked salmon turns dry and tough. To avoid this, set a timer. Bake for 12-15 minutes, checking for flakiness. The fish will continue to cook a bit after you take it out. Tips for flavor pairing Maple glazed salmon pairs well with bright flavors. Try serving it with lemon wedges or a fresh salad. Asparagus or broccoli adds a nice crunch. Recommendations for spice adjustments If you love heat, add more cayenne pepper. For a milder taste, skip it altogether. You can also try adding herbs like thyme or rosemary for a fresh twist. Necessary utensils and equipment You will need a mixing bowl, whisk, and baking sheet. Use parchment paper or foil for easy cleanup. A fork is handy for checking doneness. Cleaning and maintenance tips Clean your utensils right after use. Soak any sticky items in warm, soapy water. This makes scrubbing easier later. Always dry your tools to keep them in good shape. Pro Tips Marinating Time: For the most flavorful salmon, marinate for at least 1 hour, but no more than 2 hours to prevent the fish from becoming overly soft. Skin-On Benefit: Keeping the skin on during baking helps retain moisture and enhances flavor, making the salmon more succulent. Check for Doneness: Salmon is perfectly cooked when it flakes easily with a fork and has an internal temperature of 145°F (63°C). Use a meat thermometer for accuracy. Garnishing Tips: Fresh herbs like parsley or dill not only add color but also enhance the overall flavor. Add them right before serving for the best presentation. {{image_4}} You can switch up the glaze for some fun flavors. Try teriyaki sauce for a sweet and salty twist. Orange glaze brings a bright, citrusy touch that works well too. If you want a spicy kick, go for sriracha mixed with honey. You can also make your own sauce by mixing honey, soy sauce, and garlic. If you need to avoid soy, tamari is a great choice. You can substitute maple syrup with agave nectar for a different sweet note. You can cook the salmon in many ways. Baking is easy and keeps the fish moist. Grilling adds a lovely smoky taste. If you grill, brush the salmon with oil to avoid sticking. For pan-searing, heat oil in a skillet first. Place the salmon skin-side down. Cook for about 4-5 minutes before flipping. This gives you a crispy skin and juicy meat inside. If you want to try a different fish, trout or tilapia works well. They both have a mild taste and cook similarly to salmon. For a vegan option, consider using tofu or tempeh. You can marinate them just like salmon. If you need a gluten-free option, use tamari instead of soy sauce. These swaps let everyone enjoy this tasty dish! To keep your maple glazed salmon fresh, store leftovers right. Place the salmon in an airtight container. This helps prevent it from drying out. You can use glass or plastic containers. I recommend glass for better taste. It keeps the flavor locked in. If you want to save salmon for later, freezing works great. Wrap each fillet in plastic wrap first. Then, put them in a freezer-safe bag. Make sure to remove as much air as possible. This keeps the salmon fresh for up to three months. When you’re ready to eat, thaw it overnight in the fridge. This helps it stay juicy and tender. To reheat your salmon, you can use the oven or microwave. For the oven, set it to 350°F (175°C). Place the salmon on a baking sheet and cover it with foil. This keeps the moisture in. Heat for about 10 minutes or until warm. If using the microwave, place the salmon on a microwave-safe dish. Heat in short bursts of 30 seconds. Check after each burst to avoid overcooking. Enjoy your moist and tasty meal! You can pair maple glazed salmon with many tasty sides. Here are some great options: - Steamed asparagus - Roasted broccoli - Quinoa salad - Garlic mashed potatoes - Rice pilaf These sides not only taste good but also look nice on the plate. They add colors and textures that enhance your meal. Marinating salmon is key for flavor. I suggest marinating it for at least 30 minutes. If you have time, try to marinate for up to 2 hours. This lets the flavors soak in better. Use a shallow dish or a resealable bag to coat the fish well. Yes, you can use other fish. Some good options include: - Trout - Tilapia - Mahi-mahi These fish have a similar texture and taste. Adjust cooking time based on the thickness of the fish. Maple syrup has some health benefits. It contains antioxidants that help fight free radicals. It also has minerals like manganese and zinc. However, it is still sugar, so use it in moderation. Balancing it with other healthy foods makes it a good choice for your meals. This guide has shown you how to make maple glazed salmon step by step. We covered key ingredients like salmon, maple syrup, and spices. You learned how to marinate, bake, and serve your dish. Don't forget tips for cooking and storing leftovers. Experiment with different sauces or cooking methods to find what you love best. Enjoy crafting this delightful meal, and remember to share it with friends and family!

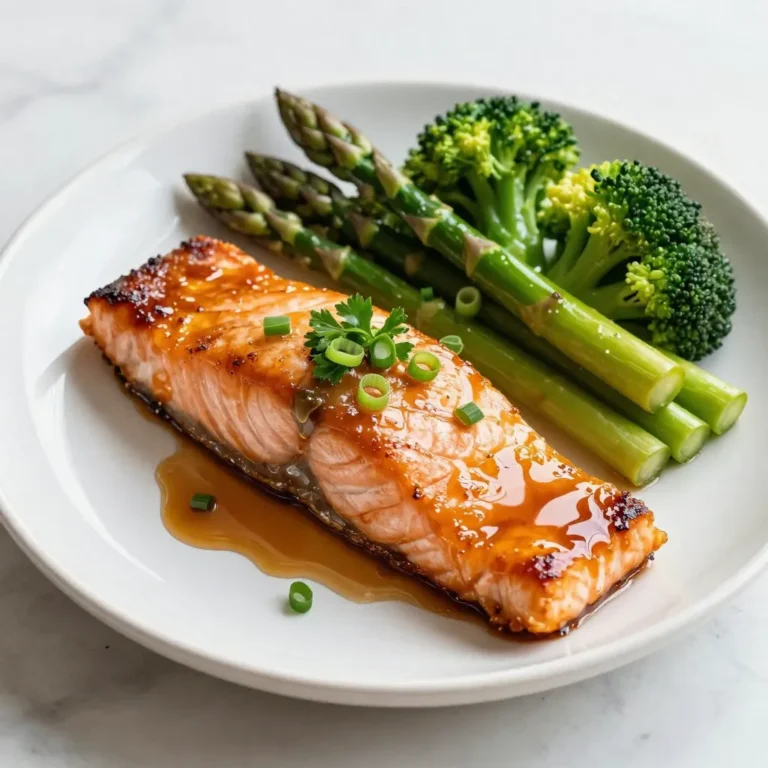
Maple Glazed Salmon Tasty and Simple Dinner Recipe

- 1 cup long-grain white rice - 2 cups vegetable broth - 1 tablespoon extra virgin olive oil - 1/2 teaspoon sea salt - Zest of 1 juicy lime - 2 tablespoons freshly squeezed lime juice - 1/4 cup fresh cilantro, finely chopped - 1/2 teaspoon garlic powder - 1/2 teaspoon onion powder - Freshly ground black pepper to taste - Alternatives for rice: You can use brown rice for a nutty flavor. Quinoa is another great option for a gluten-free choice. - Choosing the right broth: Vegetable broth is best for a fresh taste. Chicken broth works well if you want a richer flavor. - Options for fresh herbs: If cilantro isn't your favorite, try parsley or basil for a different twist. Fresh herbs add a bright note that enhances the taste. Each ingredient plays a vital role in creating the perfect zesty cilantro lime rice. The rice provides a base. The vegetable broth adds depth. Lime zest and juice give it that tangy kick, while cilantro brings freshness. Each bite bursts with flavor and is sure to please. Experiment with substitutions to make this dish your own. {{ingredient_image_2}} First, rinse the long-grain white rice under cold water. Rinse until the water runs clear. This step helps remove extra starch. Clean rice will be fluffy and light. Next, heat a medium saucepan over medium heat. Add the extra virgin olive oil. Once hot, add the rinsed rice. Sauté the rice for about 2-3 minutes. Stir often until the rice looks slightly clear. The aroma will be toasty and inviting. Now, pour in the vegetable broth and sprinkle the sea salt. Stir the mixture for a quick blend. Raise the heat until it boils. Once boiling, reduce the heat to low. Cover the saucepan with a lid. Let it simmer undisturbed for 15 minutes. This ensures the rice cooks evenly and absorbs all the liquid. After 15 minutes, take the pot off the heat. Keep it covered for another 5 minutes. This resting time helps the rice steam and stay fluffy. Fluff the rice gently with a fork. Fold in the lime zest and lime juice. Add the chopped cilantro, garlic powder, onion powder, and a dash of black pepper. Mix until everything is well combined. Taste your zesty rice. Adjust the seasonings if needed. Add more lime juice or salt for your liking. Serve the cilantro lime rice warm. Enjoy it as a side dish or a base for your favorite meals. Using fresh lime juice makes a big difference. It adds bright flavor and freshness to the rice. Fresh lime juice has a zing that bottled juice cannot match. Always squeeze your limes right before using them. This keeps the taste strong and vibrant. Garlic and onion powder can enhance the flavor too. They add depth without being overpowering. Use them in measured amounts. A little goes a long way. Mix them in with the rice after cooking. This lets their flavors shine without burning. When cooking rice, the method is key. Rinsing the rice helps remove extra starch. This step is crucial for fluffy rice. After rinsing, sauté the rice for a few minutes. This gives it a nutty flavor and a nice texture. Let the rice rest after cooking. This step is important. It allows the grains to steam and become fluffy. Cover the pot and wait for five minutes. This small step makes your rice much better. For serving, use a large bowl. It makes the dish inviting and easy to share. Garnish with extra cilantro leaves on top. This adds color and a fresh touch. You can also serve lime wedges on the side. They look great and let people add more lime if they want. Try using a colorful bowl that matches your meal. This makes the dish pop on the table. A vibrant presentation makes your meal more fun and exciting. Pro Tips Rinse the Rice: Thoroughly rinsing your rice removes excess starch, leading to a fluffier final dish. Adjusting Flavor: Feel free to tweak the lime juice and salt based on your taste preferences for a more personalized flavor. Resting Time: Letting the rice rest after cooking allows it to steam and enhances its fluffiness. Garnish for Presentation: Adding fresh cilantro and lime wedges not only makes the dish look appealing but also boosts its freshness. {{image_4}} You can make this rice even tastier by adding spices. Try mixing in 1/2 teaspoon of cumin or chili powder. These spices add warmth and depth to the dish. If you want a colorful twist, add vegetables! Corn or diced bell peppers work great. Just stir them in when you mix the rice with lime and cilantro. This recipe is already gluten-free. You can enjoy it without worry if you are avoiding gluten. For those who follow a vegan diet, this rice is perfect. It contains no animal products. You can also add some black beans for protein. This makes the dish heartier and keeps it vegan-friendly. Zesty cilantro lime rice pairs well with many proteins. Serve it alongside grilled chicken, shrimp, or tofu. You can also use it as a base for burrito bowls. Pile on beans, salsa, and your favorite toppings. This rice adds a fresh kick to any meal, making it versatile and delicious. To store leftover rice, let it cool first. Place the rice in an airtight container. Keep it in the fridge for up to four days. This helps maintain its freshness. I recommend using glass or plastic containers. They seal well and are easy to stack. The best way to reheat rice is in the microwave. Place the rice in a bowl. Add a splash of water for moisture. Cover the bowl with a damp paper towel. Heat it for about one to two minutes. Stir halfway to ensure even heating. This keeps the rice fluffy. You can also reheat it in a pan. Just add a little broth or water, cover it, and heat over low heat. This method can help keep the flavors intact. To freeze cilantro lime rice, let it cool completely first. Then, divide it into portions. Use freezer-safe bags or containers for storage. Squeeze out as much air as you can. This helps prevent freezer burn. You can freeze the rice for up to three months. When you’re ready to eat it, move the rice to the fridge. Let it thaw overnight. You can also microwave it from frozen, but make sure to add some water. This will help it regain its fluffiness as it warms up. To make your cilantro lime rice less sticky, you should rinse the rice before cooking. Rinsing removes excess starch, which can cause stickiness. Use cold water and rinse until it runs clear. This step is key for fluffy rice. You can also avoid overcooking the rice. Follow the recommended cooking times closely. If you let the rice sit too long after cooking, it may become sticky. Yes, you can use brown rice. However, it requires a longer cooking time. Brown rice usually takes about 40-45 minutes to cook. You will need to adjust the liquid too. Use about 2 1/2 cups of vegetable broth for 1 cup of brown rice. The flavor will differ slightly. Brown rice has a nuttier taste and chewier texture. These changes can add a nice twist to your dish. To boost lime flavor, use both lime zest and juice. Lime zest adds a bright, fresh taste. It gives your rice an extra zing that juice alone cannot. When adding lime juice, start with a little. Taste and adjust as needed. Balancing acidity is key. You can add more cilantro or a pinch of sugar to mellow out strong tartness. This blog covered how to make flavorful cilantro lime rice. We discussed key ingredients and offered swaps for dietary needs. I also explained step-by-step cooking directions and shared tips for best results. For perfect rice, focus on techniques like rinsing and resting. Feel free to experiment with flavors and store leftovers well. Enjoy crafting this dish as a tasty base or side.

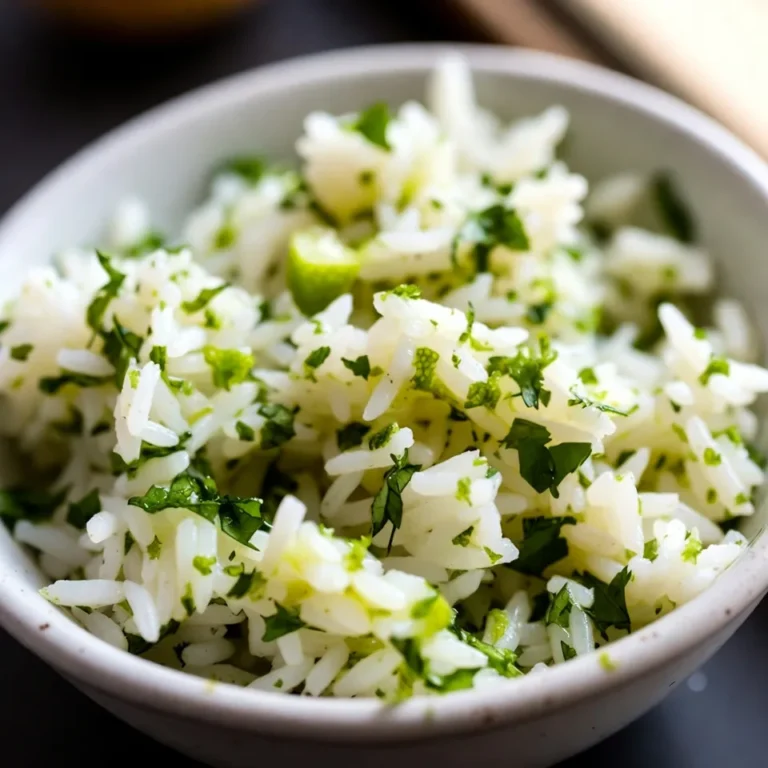
Zesty Cilantro Lime Rice Flavorful and Easy Recipe

To make a delicious mango avocado salsa, you need fresh and ripe ingredients. Here is what you will need: - 1 ripe mango, carefully peeled and diced - 2 ripe avocados, delicately diced - 1 small red onion, finely chopped for sweetness - 1 jalapeño pepper, finely minced (seeds removed for a milder flavor) - 1 red bell pepper, vibrantly diced - 1/4 cup fresh cilantro, coarsely chopped - 2 tablespoons freshly squeezed lime juice - 1 tablespoon extra virgin olive oil - Salt and freshly ground black pepper, to taste These ingredients bring bright colors and fresh flavors to your salsa. The mango and avocado provide creaminess, while the peppers add a nice crunch. The lime juice brightens everything up with a zesty kick. Enjoy the journey of combining these wonderful flavors as you create this delightful dish! {{ingredient_image_2}} 1. Start with a ripe mango. Peel it carefully and dice it into small cubes. 2. Take two ripe avocados. Peel and dice them just like the mango. 3. Next, chop one small red onion finely. This adds sweetness to the salsa. 4. Mince one jalapeño pepper. Be sure to remove the seeds for less heat. 5. Dice one red bell pepper and add it to the bowl. 6. Now, take fresh cilantro. Roughly chop 1/4 cup and sprinkle it into the bowl. 7. Mix all these fresh, colorful ingredients in a large bowl. 1. In a small bowl, whisk together two tablespoons of freshly squeezed lime juice. 2. Add one tablespoon of extra virgin olive oil to the lime juice. 3. Blend these together until they look smooth and well combined. 1. Pour the dressing over the salsa mixture in the large bowl. 2. Gently fold all the ingredients together with a spatula. 3. Be careful not to mash the avocado pieces. 4. Season your salsa with salt and freshly ground black pepper to taste. 5. Cover the bowl with plastic wrap and chill it in the fridge for 15 minutes. 6. Chilling helps the flavors meld together nicely. To make the best mango avocado salsa, avoid mashing the avocado. Use a gentle touch when mixing. Fold the ingredients together slowly. This keeps the avocado pieces intact and creamy. If you mash them, the texture becomes mushy. Adjust the seasoning to taste. Start with a little salt and pepper. After mixing, taste the salsa. If it needs more flavor, add more seasoning. Lime juice can also brighten the taste. Keep tasting until it’s just right. For a stunning presentation, serve the salsa in a colorful bowl. Garnish it with fresh cilantro leaves on top. This adds a lovely touch. Mango avocado salsa pairs well with many dishes. It’s perfect with tortilla chips for a crunchy snack. You can also serve it over grilled meats. It adds a fresh, zesty flair to chicken or fish. Enjoy it at your next gathering or as a tasty side! Pro Tips Choose Ripe Fruits: Ensure your mango and avocados are ripe for the best flavor and texture. A ripe mango should yield slightly to pressure, while avocados should feel soft but not mushy. Fresh Lime Juice: Always use freshly squeezed lime juice for the brightest flavor. Bottled lime juice can lack the vibrant acidity and freshness that enhances the salsa. Customize Heat Level: Adjust the amount of jalapeño to suit your taste. For less heat, remove all the seeds and membranes, or substitute with a milder pepper. Chill for Flavor: Let your salsa sit in the refrigerator for at least 15 minutes before serving. This resting time allows the flavors to meld and intensify, making every bite more delicious. {{image_4}} You can change up the flavors of your mango avocado salsa easily. Here are some fun swaps: - Tomatoes: Use diced tomatoes for a juicy twist. - Corn: Add sweet corn for a crunchy bite. - Peppers: Try different peppers, like green or yellow, for new flavors. Adjust the spice level to suit your taste. If you want it mild, remove the seeds from the jalapeño. For more heat, keep the seeds in or add a pinch of cayenne pepper. This recipe fits many diets. If you want a vegan option, you’re in luck! All the ingredients are plant-based. For gluten-free eating, this salsa is perfect too. Just serve it with corn chips instead of regular chips. Enjoy it with grilled meats or on tacos for a fresh, healthy meal! To keep mango avocado salsa fresh, store it in an airtight container. This helps to lock in flavors and keep it from browning. Make sure to press plastic wrap directly onto the salsa's surface before sealing the container. This extra layer helps reduce air exposure. In the refrigerator, the salsa lasts about 2 to 3 days. After that, the avocado may start to brown, and the flavors can fade. If you notice any discoloration, you can gently mix the salsa to blend it back together. You can freeze mango avocado salsa, but the texture may change. To freeze, place it in a freezer-safe container. Leave some space at the top for expansion. This way, your salsa stays safe in the freezer. To thaw, move the salsa to the fridge for several hours or overnight. Once thawed, stir it gently to mix any separated juices. Use it within a week for the best flavor. What can I serve with Mango Avocado Salsa? You can serve this salsa with many dishes. It pairs well with tortilla chips for a crunchy snack. You can also use it as a fresh topping on grilled chicken or fish. For a light meal, spoon it over tacos or burritos. The bright flavors enhance any dish. Can I make this salsa in advance? Yes, you can make this salsa a few hours ahead. Just prepare it and chill in the fridge. However, I suggest adding the avocado just before serving. This keeps the salsa fresh and prevents browning. If it sits too long, the avocados may turn mushy. How do I ensure my avocados are ripe? To check if your avocado is ripe, gently squeeze it in your palm. It should yield slightly to pressure but not feel mushy. You can also look for dark green skin. If the skin is bright green, it may need more time to ripen. Leave it at room temperature until it's ready. Is this salsa spicy? How can I reduce the heat? This salsa can be spicy due to the jalapeño. If you want less heat, remove the seeds and ribs from the pepper. You can also use less jalapeño or swap it for a milder pepper, like a bell pepper. This way, you still get flavor without too much spice. Mango avocado salsa is a fresh and vibrant dish made with simple ingredients. You learned about the main ingredients, preparation steps, and how to pack in flavor. I shared tips for perfecting the salsa and suggested fun serving ideas. You also discovered variations and smart storage options. This salsa is not just tasty—it's versatile too. Try making it your own with different flavors. Enjoy the freshness and make it often!

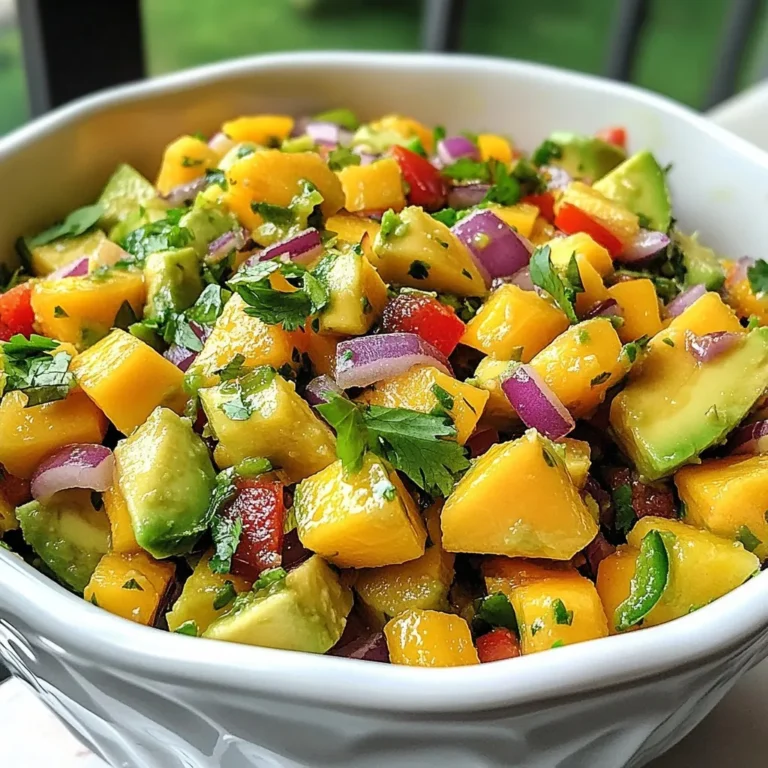
Mango Avocado Salsa Flavorful and Fresh Recipe

To make delicious cherry pie cookies, you will need the following items: - 1 cup unsalted butter, softened to room temperature - 1 cup granulated sugar - 1 teaspoon pure vanilla extract - 2 cups all-purpose flour - 1/2 teaspoon baking powder - 1/4 teaspoon fine sea salt - 1 cup cherry filling (you can use canned or homemade) - 1/2 teaspoon almond extract (it adds a nice touch) - 1 egg (for the egg wash) - Powdered sugar, for dusting These ingredients come together to create a sweet and tasty treat. The butter gives richness, while sugar adds sweetness. Vanilla extract enhances flavor, and flour forms the base. Baking powder makes the cookies rise, and sea salt balances the sweetness. The cherry filling is the star of the show. It brings a burst of flavor that reminds you of classic cherry pie. Almond extract is a secret weapon, giving the cookies a unique twist. Finally, the egg wash ensures a lovely golden color when baked, and the powdered sugar adds a final touch of sweetness. Gather these ingredients, and you are ready to create a delightful snack that everyone will love! {{ingredient_image_2}} 1. Start by preheating your oven to 350°F (175°C). This helps the cookies bake evenly. Line a baking sheet with parchment paper. This step keeps cookies from sticking. 2. In a large bowl, cream together 1 cup of softened unsalted butter and 1 cup of granulated sugar. Use an electric mixer for about 3-4 minutes. The mixture should be light and fluffy. 3. Add 1 teaspoon of pure vanilla extract. Mix on low speed until it’s well blended. This gives the cookies a nice flavor. 1. In a separate bowl, whisk together 2 cups of all-purpose flour, 1/2 teaspoon of baking powder, and 1/4 teaspoon of fine sea salt. This mix gives the cookies their structure. 2. Gradually add the dry mix to the butter-sugar mixture. Stir until just combined. Be careful not to overmix, as this can make your cookies tough. 1. Divide the dough into two equal halves. Shape each half into a disc. Wrap each disc in plastic wrap. Chill in the fridge for at least 30 minutes. This helps the dough firm up and makes it easier to roll. 2. After chilling, take one disc out of the fridge. On a floured surface, roll it out to about 1/4 inch thick. This thickness is perfect for cutting cookies. 1. Use a round cookie cutter to cut out circles from the rolled dough. Aim for about 3 inches in diameter. Place half of these circles on your lined baking sheet. 2. In a small bowl, mix 1 cup of cherry filling with 1/2 teaspoon of almond extract. This adds depth to the cherry flavor. Place about 1 teaspoon of this mix in the center of each dough circle. 3. Roll out the second disc of dough and cut out the same number of circles. Place these on top of the filled cookies. Press the edges gently to seal them. You can press down with a fork for a pretty edge. 4. Crack 1 egg into a bowl and beat it lightly. Brush the tops of the cookies with the egg wash. This makes them golden during baking. 1. Bake the cookies in your preheated oven for 12-15 minutes. Look for a golden brown color and a nice aroma. 2. Once baked, let the cookies cool on the baking sheet for about 5 minutes. Then, move them to wire racks to cool completely. 3. After cooling, dust the cookies with powdered sugar for a sweet finish. This adds a lovely touch and enhances their look. How to avoid overmixing Mixing your dough too much makes it tough. After you add the dry mix, stir just until you see no flour. The dough should look a bit crumbly, but that’s okay! It will come together as you roll it out. Best chilling practices Chilling the dough is key for good cookies. I recommend wrapping each disc tightly in plastic wrap. Chill it for at least 30 minutes. This helps the dough hold its shape when you bake it. Importance of almond extract Almond extract adds a nice twist to the cherry flavor. Just half a teaspoon is enough! It makes each bite taste richer. Don’t skip this step; it really makes a difference. Using homemade vs. canned cherry filling You can use canned or homemade cherry filling. Homemade gives a fresher taste and is easy to make. If you’re short on time, canned works great too. Just mix it with almond extract for added flavor. Arranging cookies for serving When serving your cookies, place them on a nice platter. You can stack them or arrange them in a circle. This makes them look fancy and inviting. Optional garnishes For a fun touch, add fresh cherries around the cookies. A light dusting of powdered sugar also makes them look pretty. These little extras can impress your guests! Pro Tips Chill Your Dough: Properly chilling the dough helps to prevent it from spreading too much during baking, ensuring your cookies maintain their shape. Use Quality Cherry Filling: For the best flavor, opt for high-quality cherry filling—homemade or premium jarred options can elevate your cookies significantly. Experiment with Extracts: While almond extract adds depth, don't hesitate to experiment with other flavors like lemon or orange zest for a unique twist. Store Properly: To keep your cookies fresh, store them in an airtight container at room temperature. You can also freeze them for longer shelf life. {{image_4}} You can switch up the filling in these cookies. Instead of cherry, try other fruits. Blueberries, raspberries, or even apple filling work great. Each fruit adds its own unique flavor. You can also add spices to enhance the taste. A pinch of cinnamon gives warmth. Nutmeg can add a cozy touch. These small changes can make a big difference. If you need a gluten-free option, swap the all-purpose flour. Use a gluten-free flour blend instead. Make sure it’s a good one that can handle cookies. For vegan adaptations, replace the butter with a plant-based option. Use a flax egg instead of a regular egg. Mix one tablespoon of ground flaxseed with three tablespoons of water. Let it sit for a few minutes to thicken. These swaps keep the cookies tasty for everyone. Want bigger cookies? Simply use a larger cookie cutter. This creates a more filling snack. You can also make fun shapes for special days. Heart shapes work for Valentine’s Day, while stars shine for holidays. Use your creativity to make each batch special. These small changes can make your cookies stand out at any event. To keep your Cherry Pie Cookies fresh, store them in an airtight container. This helps lock in moisture and flavor. You can place parchment paper between layers to avoid sticking. Keep them at room temperature away from direct sunlight. If you want to freeze your cookies, follow these steps: - Let the cookies cool completely. - Place them in a single layer on a baking sheet. - Freeze for about 1 hour until solid. - Transfer the cookies to a freezer-safe bag or container. - Label it with the date for easy tracking. For thawing, take the cookies out of the freezer. Let them sit at room temperature for about 30 minutes before enjoying. Cherry Pie Cookies last about 5 days at room temperature. If stored correctly, they maintain their taste and texture. For longer storage, consider freezing them as mentioned above. You can tell when the cookies are done by looking for a golden brown color. They should feel firm to the touch. If you gently press on the edge, it should spring back. The smell will also be sweet and inviting. Yes, you can use frozen cherries for the filling. Just make sure to thaw them first. Drain any excess juice to avoid a soggy cookie. This way, you'll keep the right texture in your cookies. If you need a substitute for almond extract, try using vanilla extract instead. You can also use hazelnut extract for a nutty flavor. These options will keep your cookies delicious and flavorful. Absolutely! Cherry Pie Cookies are a great treat for parties. They are easy to grab and eat. You can serve them on a decorative platter. Add fresh cherries for color and fun! You now have a clear path to make delicious Cherry Pie Cookies. We covered all the essential ingredients and detailed step-by-step instructions. You also learned tips for perfecting the dough and ideas for fun variations. Remember to store your cookies properly to keep them fresh. These cookies are perfect for sharing at parties or enjoying at home. I hope this guide inspires you to bake and enjoy these tasty treats with your friends and family!

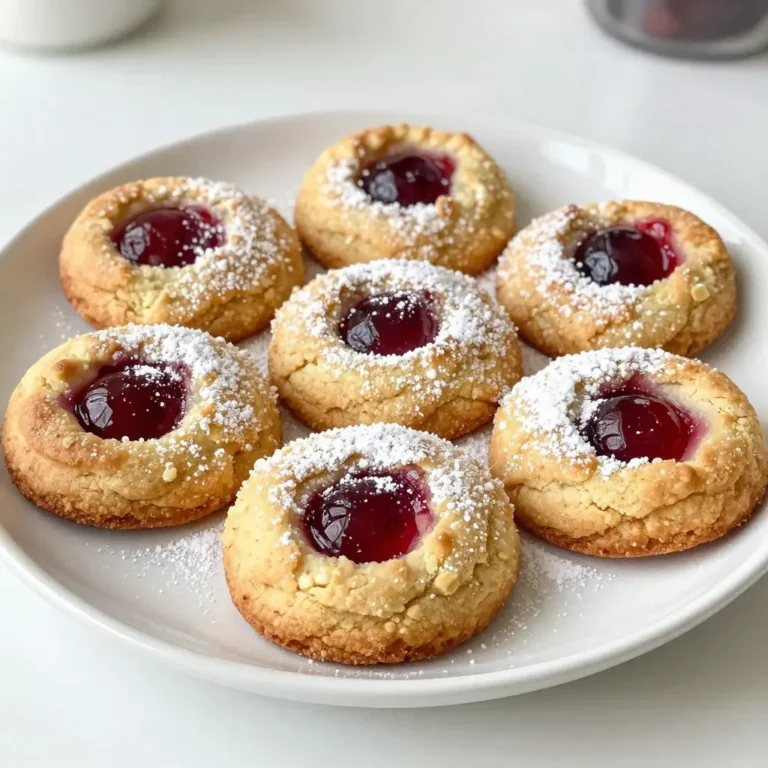
Cherry Pie Cookies Irresistible Sweet Snack Delight

To make a tasty Caprese Pasta Salad, you need: - 8 ounces of fusilli pasta - 1 cup cherry tomatoes, halved - 1 cup fresh mozzarella balls, halved - 1 cup fresh basil leaves, torn if large - 1/2 cup sun-dried tomatoes in oil, chopped - 1/4 cup extra virgin olive oil - 2 tablespoons balsamic glaze - Salt and freshly ground black pepper to taste - 1/4 cup toasted pine nuts Fresh ingredients make this dish shine. They add bright flavors and vibrant colors. Fresh basil brings an aromatic touch. Juicy cherry tomatoes provide sweetness and acidity. Creamy mozzarella adds a rich texture. When you use fresh items, your salad tastes better. Plus, it looks more appealing on the plate. You can easily adjust this recipe to meet dietary needs. If you want a gluten-free option, try gluten-free pasta. For a vegan version, skip the mozzarella or use a dairy-free cheese. If you dislike pine nuts, swap them for walnuts or skip them entirely. Adjusting ingredients makes the dish work for everyone. {{ingredient_image_2}} Start with a large pot and fill it with water. Add a pinch of salt to the water. Bring the water to a boil. Once boiling, add the fusilli pasta. Cook the pasta for about 8 to 10 minutes. You want it firm but not hard, known as al dente. After cooking, drain the pasta in a colander. Rinse it under cold running water. This stops the cooking and cools it down. Set the pasta aside for later use. In a big mixing bowl, add the halved cherry tomatoes. Then, add the fresh mozzarella balls that are also halved. Toss in the torn basil leaves next. Chop the sun-dried tomatoes and add them too. Stir the ingredients gently with a spoon. You want to mix them well but be careful. You do not want to break the mozzarella. Now it's time to add the cooled fusilli pasta to the bowl. Toss everything together gently. Then, drizzle the extra virgin olive oil over the salad. Next, add the balsamic glaze on top. Toss the salad again to coat all the ingredients. Finally, sprinkle salt and black pepper to taste. Adjust the seasoning based on your preference. Just before serving, add the toasted pine nuts for crunch. Enjoy this fresh and flavorful dish! Cook the fusilli in boiling, salted water. Follow the package instructions, usually 8-10 minutes. Check the pasta a minute or two before the time ends. It should be firm yet tender when you bite into it. This is al dente. Drain the pasta and rinse it with cold water. This stops the cooking and keeps the pasta from getting mushy. For mozzarella, use a sharp knife. Cut it into bite-sized pieces. You can also use kitchen scissors for smaller balls. For cherry tomatoes, slice them in half. A gentle press helps keep the juice inside. This method makes the salad look nice and keeps flavors fresh. You can boost the flavor of your Caprese Pasta Salad by adding more ingredients. Consider fresh arugula for a peppery taste. You can also mix in olives for a briny kick. A sprinkle of lemon zest adds brightness, too. Experiment with these additions to find your favorite flavor combination. Pro Tips Use Fresh Ingredients: For the best flavor, choose ripe cherry tomatoes and fresh mozzarella. The quality of these ingredients will elevate the entire salad. Customize Your Pasta: Feel free to substitute fusilli with other pasta shapes like penne or farfalle for a different texture and presentation. Add Some Zing: Incorporate a squeeze of fresh lemon juice for a bright, zesty flavor that pairs beautifully with the balsamic glaze. Make it a Meal: To turn this salad into a main course, add grilled chicken or shrimp for added protein and a satisfying dish. {{image_4}} You can use many pasta types for Caprese Pasta Salad. Fusilli is fun because it holds sauce well. However, you can try: - Penne - Farfalle - Rotini - Orzo Each pasta adds a unique touch. Choose one that you love. Want to make your salad stand out? You can add different ingredients. Some great options include: - Avocado slices for creaminess - Arugula for a peppery bite - Grilled chicken for protein - Olives for a salty kick These additions can change the flavor profile. Mix and match to find your favorite combination. If you need gluten-free pasta, look for options made from rice or quinoa. These work well in this dish. For vegan options, skip the mozzarella. Instead, try using: - Vegan cheese - Tofu cubes - Chickpeas for extra protein These choices keep the dish delicious and friendly for everyone. Enjoy exploring these variations! To keep your Caprese Pasta Salad fresh, store it in an airtight container. This helps prevent the salad from drying out. Make sure to remove any extra air before sealing. If you separate the dressing, it will last longer. Store the dressing in a small jar. This keeps the salad from getting soggy. When stored properly, Caprese Pasta Salad can last in the fridge for up to three days. After that, the texture and taste may change. Always check for any signs of spoilage before eating. If it smells off or looks strange, it’s best to discard it. You can enjoy Caprese Pasta Salad cold or at room temperature. If you prefer it warm, gently heat it in a pan over low heat. Be careful not to overcook the cheese. If you choose to eat it cold, simply take it out of the fridge and give it a gentle toss. Add a bit more olive oil or balsamic glaze for extra flavor if needed. Yes, you can make Caprese Pasta Salad ahead of time. It tastes great after chilling in the fridge. I suggest making it a few hours before serving. This lets the flavors mix well. Just remember to add the pine nuts right before you serve. They keep their crunch this way. Caprese Pasta Salad pairs well with many dishes. You can serve it with grilled chicken or shrimp for protein. A slice of crusty bread is also nice. If you want a light meal, serve it with a green salad. It will add more color and texture to your meal. Yes, Caprese Pasta Salad can be a healthy choice. It has fresh vegetables like tomatoes and basil. The mozzarella offers protein and calcium. Olive oil adds healthy fats. Just watch the amount of balsamic glaze and salt you use. This helps keep it balanced and nutritious. In this article, we explored the key ingredients for a great Caprese Pasta Salad. Fresh ingredients are vital for taste, and substitutions can fit your diet. We shared step-by-step instructions, tips for perfect pasta texture, and how to combine flavors. You can also try different pasta types and flavors for fun twists. Proper storage helps keep leftovers fresh. Remember, Caprese Pasta Salad is easy to prep ahead of time and pairs well with many dishes. Enjoy making this dish your own while keeping it tasty and healthy!

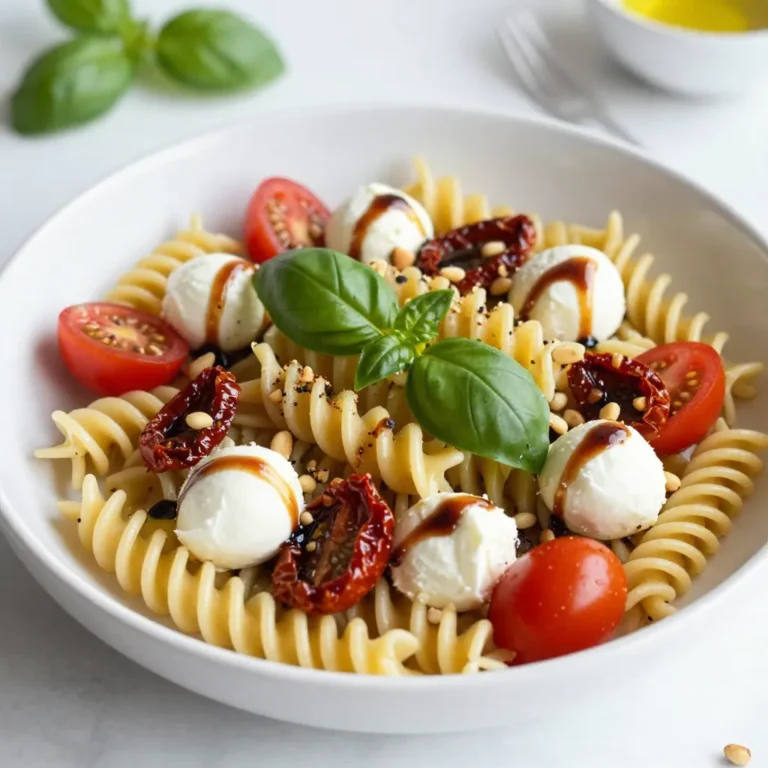
Caprese Pasta Salad Fresh and Flavorful Dish

- 2 cups all-purpose flour - 1/4 cup granulated sugar - 1 tablespoon baking powder - 1/2 teaspoon salt - 1/2 cup unsalted butter, cold and cubed - 1/2 cup heavy cream - 1 large egg - 1 teaspoon vanilla extract - 1 cup fresh cherries, pitted and roughly chopped - 1/2 cup dark chocolate chunks - 1 egg wash (1 egg whisked with 1 tablespoon water) - Coarse sugar for sprinkling The ingredients for cherry chocolate chunk scones are simple but key to great taste. Start with all-purpose flour, which gives the scones a sturdy base. Granulated sugar sweetens them just right, while baking powder helps them rise. A pinch of salt adds balance to the flavors. Use unsalted butter, and make sure it's cold. This keeps the scones flaky. Heavy cream adds richness, and a large egg binds everything together. Vanilla extract brings warmth and depth to the flavor. Fresh cherries are a must. They burst with juice and flavor. Dark chocolate chunks add a lovely sweetness and richness. Don't forget the egg wash. It gives a shiny finish, and coarse sugar adds a nice crunch. Gather these ingredients, and you’re ready to make a delightful treat! Each bite will offer a mix of sweet cherries and rich chocolate, making your breakfast special. {{ingredient_image_2}} First, set your oven to 400°F (200°C). This step is key for getting the scones to rise nicely. While the oven heats, line a baking sheet with parchment paper. This keeps the scones from sticking and makes cleanup easy. In a large bowl, combine 2 cups of all-purpose flour, 1/4 cup of granulated sugar, 1 tablespoon of baking powder, and 1/2 teaspoon of salt. Whisk these ingredients together well. Make sure there are no lumps. This mix forms the base of our scones. Next, add 1/2 cup of cold, cubed unsalted butter to the dry mix. Use a pastry cutter or your fingers. Work the butter into the flour until it looks like coarse crumbs. Some pieces should stay the size of peas. This gives the scones a lovely, flaky texture. In a separate bowl, whisk together 1/2 cup of heavy cream, 1 large egg, and 1 teaspoon of vanilla extract. Keep whisking until the mixture is smooth. This will add moisture and flavor to your scones. Now, slowly pour the wet mixture into the dry mix. Use a spatula to stir gently. Stop mixing when the dough comes together, even if there are some flour streaks. Overmixing can make the scones tough. Fold in 1 cup of chopped fresh cherries and 1/2 cup of dark chocolate chunks. Be gentle to keep the fruit intact. Lightly flour your work surface, then turn the dough out onto it. Knead the dough very lightly, just 3 to 4 times, to form a ball. Flatten the dough to about 1-inch thick. You can cut it into 8 wedges with a sharp knife or use a biscuit cutter for round scones. Make sure to leave space between them on the baking sheet. Brush the tops of the scones with the egg wash made from 1 whisked egg and 1 tablespoon of water. This gives them a shiny, golden finish. Sprinkle coarse sugar on top for extra texture. Place the baking sheet in the oven and bake for 15 to 20 minutes. The scones should be golden brown and a toothpick should come out clean when inserted. Let them cool for a few minutes before moving them to a wire rack. Enjoy these warm or at room temperature! To get that ideal flaky texture in your scones, keep the butter cold. Cold butter helps create layers. Cut the butter into small cubes before mixing it into the flour. Use your fingertips or a pastry cutter to incorporate the butter. Stop when the mix looks like coarse crumbs with pea-sized butter pieces. This step is key to light and flaky scones. You can easily change the flavors in your scones. Try adding different fruits like blueberries or raspberries. For a twist, use white chocolate chunks instead of dark chocolate. You can also mix in nuts, like walnuts or pecans, for added crunch. Feel free to experiment with spices too, like cinnamon or nutmeg, to create unique flavor profiles. Baking scones requires a few simple tips. Always preheat your oven to ensure even baking. Line your baking sheet with parchment paper to prevent sticking. When you shape the dough, don’t overwork it. This keeps the scones tender. Bake until golden brown and a toothpick comes out clean. Let them cool slightly before serving for the best texture. Pro Tips Use Cold Ingredients: Ensure your butter and cream are cold. This helps create a flaky texture in your scones. Don’t Overmix: Mix just until combined to keep the scones tender. A few flour streaks are perfectly fine. Customize Your Add-ins: Feel free to substitute cherries with other fruits like blueberries or raspberries, and swap dark chocolate for white chocolate if desired. Check for Doneness: Insert a toothpick into the center of a scone; it should come out clean when they are properly baked. {{image_4}} You can swap cherries for other fruits. Try blueberries, raspberries, or diced peaches. Each fruit adds a unique taste. Blueberries give a sweet burst, while raspberries add a tart kick. Peaches offer a juicy flavor. Mix and match to find your favorite. While dark chocolate chunks shine in this recipe, feel free to explore. Milk chocolate adds sweetness, while white chocolate brings creaminess. You can even use a mix of chocolates for a layered taste. Each option changes the scone’s flavor profile, making it fun to experiment. Want to make these scones gluten-free? Substitute all-purpose flour with a gluten-free blend. Look for one that includes xanthan gum for better texture. You might need to adjust the liquid slightly. Keep an eye on the dough; it should still feel somewhat sticky. Enjoy your scones without the gluten! You can store your cherry chocolate chunk scones in an airtight container. Keep them at room temperature for up to two days. For longer freshness, place them in the fridge. They will last about a week in the fridge. Just make sure to seal them well to avoid drying out. To freeze your scones, first let them cool completely. Then, wrap each scone in plastic wrap. Place the wrapped scones in a freezer-safe bag. They will stay fresh for up to three months. When you're ready to enjoy them, just take out how many you need. To reheat your scones, preheat the oven to 350°F (175°C). Place them on a baking sheet. Heat for about 5-10 minutes or until warm. You can also use the microwave for a quick reheat. Just microwave for about 15-20 seconds. Enjoy your warm scones with a cup of tea! You can use whole milk mixed with butter. For each cup of cream, use 3/4 cup milk and 1/4 cup melted butter. This mix gives a similar fat content. Coconut milk is also a great option for a dairy-free choice. It adds creaminess and flavor. Scones are done when they turn golden brown on top. Insert a toothpick into the center; it should come out clean. If it has wet dough on it, bake for a few more minutes. Trust your nose too; they should smell amazing! Yes, you can use frozen cherries. Just thaw and drain them first. This helps avoid extra moisture in the dough. Slice them into smaller pieces if they are large. They will still taste great in your scones! You can use baking soda instead. Combine it with an acid, like buttermilk or yogurt. For every teaspoon of baking powder, use 1/4 teaspoon of baking soda and 1/2 cup of buttermilk. This will help your scones rise nicely! This blog post shared a simple recipe for making cherry chocolate scones. You learned about key ingredients, step-by-step instructions, and tips to perfect your scones. Remember, the right mix of flour, butter, and cream creates a great texture. You can also customize with different fruits or chocolates to suit your taste. Store your scones properly for fresh flavor later. Now, you’re ready to enjoy warm scones that impress everyone. Happy baking!

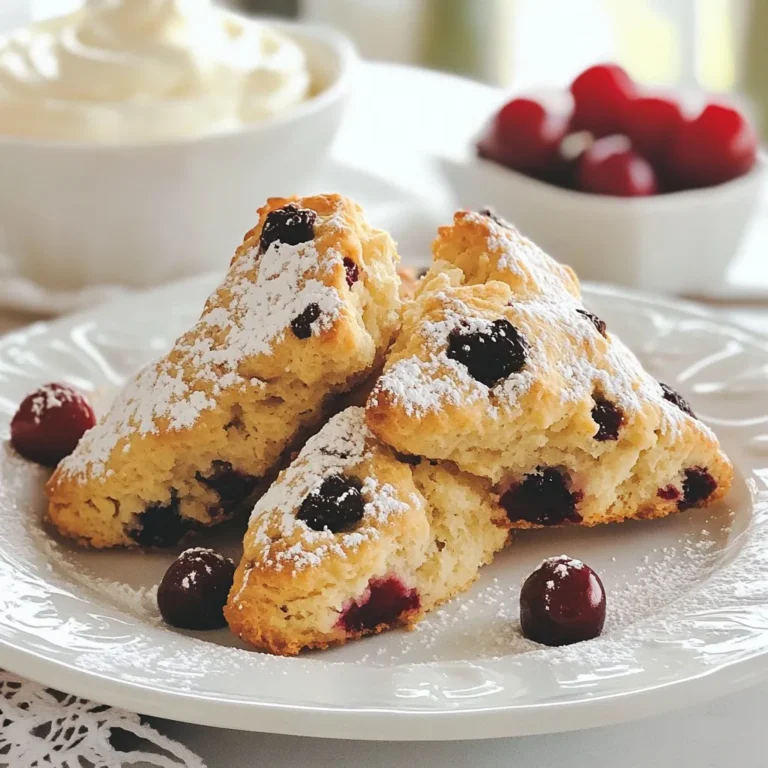
Cherry Chocolate Chunk Scones Delightful Breakfast Treat

- 1 pound pizza dough - 4 tablespoons unsalted butter - 4 cloves garlic - 1 teaspoon dried oregano - 1 teaspoon dried parsley - ½ teaspoon salt - ¼ teaspoon black pepper - Grated Parmesan cheese (for topping, optional) - Fresh parsley, chopped (for garnish, optional) To make buttery garlic knots, you need just a few simple items. First, you’ll want one pound of pizza dough. You can use store-bought dough or make your own for extra flavor. Next, grab four tablespoons of unsalted butter. This will give your knots that rich, buttery taste. You also need four cloves of garlic. Garlic adds a robust flavor that makes these knots special. Don't forget about dried herbs. You will need one teaspoon each of oregano and parsley for extra depth. Salt and black pepper will help enhance the overall flavor. For an optional touch, consider grated Parmesan cheese. It adds a nice savory layer on top of the knots. You can also use fresh parsley, chopped, for a pop of color and freshness when serving. Having these ingredients ready will help you create a delicious comfort food that everyone will love. {{ingredient_image_2}} 1. Preheat your oven to 400°F (200°C). This helps the knots bake evenly. 2. Prepare a baking sheet by lining it with parchment paper. This keeps the knots from sticking. 3. Cut the pizza dough into 12 equal pieces. Each piece should be about the same size. 4. Roll each piece into a long rope. Aim for a length of about 6-8 inches. 5. Tie each rope into a knot, making sure to tuck the ends underneath. This keeps them nice and neat. 6. Arrange the knots on the baking sheet. Leave some space between each one for rising. 1. In a small bowl, mix 4 tablespoons of melted butter with 4 minced garlic cloves. 2. Add 1 teaspoon of dried oregano, 1 teaspoon of dried parsley, ½ teaspoon of salt, and ¼ teaspoon of black pepper. 3. Whisk the mixture until it is smooth and fragrant. This will coat the knots. 1. Use a pastry brush to coat each knot with the garlic butter mixture. Make sure to spread some garlic on each knot. 2. Place the baking sheet in the oven and bake for 12-15 minutes. Watch for a golden brown color. 3. When baked, remove the knots from the oven. Brush them again with any leftover garlic butter. 4. Optional: Sprinkle grated Parmesan cheese on top while warm. 5. Let the knots cool for a few minutes. Garnish with freshly chopped parsley for a touch of color. Getting the dough right is key. Use good quality pizza dough. If making it at home, knead it well until smooth. The dough should feel soft but not sticky. If it sticks, add a bit of flour. Let it rest for a bit before shaping. This helps the gluten relax, making it easier to tie knots. For baking, preheat your oven to 400°F (200°C). A hot oven helps the knots rise well. If your oven runs cool, they may bake unevenly. Keep an eye on the knots while baking. Look for a nice golden brown color and a puffed-up shape. Want more garlic? Feel free to add extra minced garlic. It boosts the flavor a lot. You can also mix in fresh herbs like rosemary or thyme for a twist. To achieve that perfect golden color, brush the knots with the garlic butter before baking. For an extra touch, brush them again right after they come out. This keeps them moist and boosts flavor. If you like cheese, sprinkle some grated Parmesan on top while they are hot. It melts beautifully and adds a rich taste. Pro Tips Use Fresh Garlic: Freshly minced garlic will enhance the flavor of the knots significantly compared to pre-minced varieties. Don’t Overbake: Keep an eye on the knots towards the end of the baking time to avoid them becoming too hard or dry; they should be golden and fluffy. Experiment with Herbs: Feel free to add other herbs such as thyme or rosemary to the garlic butter for a unique flavor profile. Serve Immediately: These knots are best enjoyed warm, so serve them right out of the oven for the ultimate experience! {{image_4}} You can elevate your buttery garlic knots with fun twists. Here are a couple of ideas: - Cheese-stuffed garlic knots: To make these, take your pizza dough and flatten it a bit. Place a small piece of cheese, like mozzarella or cheddar, in the center. Fold the dough over the cheese and then tie it into a knot. As it bakes, the cheese melts inside, making each bite a gooey delight. - Spinach and feta variations: Mix fresh spinach with crumbled feta cheese. Place a spoonful of this mix inside the dough before tying it into knots. This adds a healthy spin and a burst of flavor that pairs well with garlic. Dipping sauces make these knots even better. Here are some great options: - Best dips to pair with garlic knots: Marinara sauce is a classic choice. But you can also try garlic butter, ranch dressing, or even a spicy aioli. Each dip adds a new layer of taste that complements the knots. - Homemade marinara sauce recipe: To make a simple marinara, use these ingredients: - 1 can (28 ounces) crushed tomatoes - 2 cloves garlic, minced - 1 tablespoon olive oil - 1 teaspoon dried oregano - Salt and pepper to taste In a pan, heat olive oil over medium heat. Add garlic and cook until fragrant. Then, add crushed tomatoes and oregano. Simmer for about 15 minutes. Season with salt and pepper. This sauce is fresh, tasty, and perfect for dipping! To keep your garlic knots fresh, store them in an airtight container. This helps prevent them from drying out. Place the container in the fridge, and they will stay good for up to three days. If you want to enjoy them later, follow these steps for reheating. 1. Preheat your oven to 350°F (175°C). 2. Spread the knots on a baking sheet. 3. Bake for about 5-7 minutes. This warms them up and keeps them soft. You can brush a little melted butter on top for extra flavor. Freezing is a great way to save extra garlic knots. To do this, let them cool completely first. Then, wrap each knot tightly in plastic wrap. Place them in a freezer-safe bag, and they will last for up to three months. When you’re ready to eat them, pull out the number you want. Thaw the knots in the fridge overnight. For reheating, use the same method as above. You can also microwave them for about 30 seconds if you’re in a hurry, but baking gives better results. How can I make garlic knots without pizza dough? You can use bread dough instead. Roll it out and cut it into pieces. Twist each piece into a knot. You can also make a simple dough with flour, water, yeast, and salt. Can I use frozen dough for this recipe? Yes, frozen dough works great! Just thaw it in the fridge overnight. When ready, roll it out and shape it into knots as you would with fresh dough. What can I serve with garlic knots besides marinara? Garlic knots pair well with many dips. Try ranch dressing, garlic aioli, or pesto. They also taste great alongside soups or salads. Buttery garlic knots are simple to make and taste great. You learned the key ingredients, preparation steps, and baking tips to perfect them. Exploring variations and how to store leftovers keeps these knots fresh and tasty. Remember, you can get creative with flavors and dips. Enjoy making these delicious treats for yourself and others. Happy cooking!

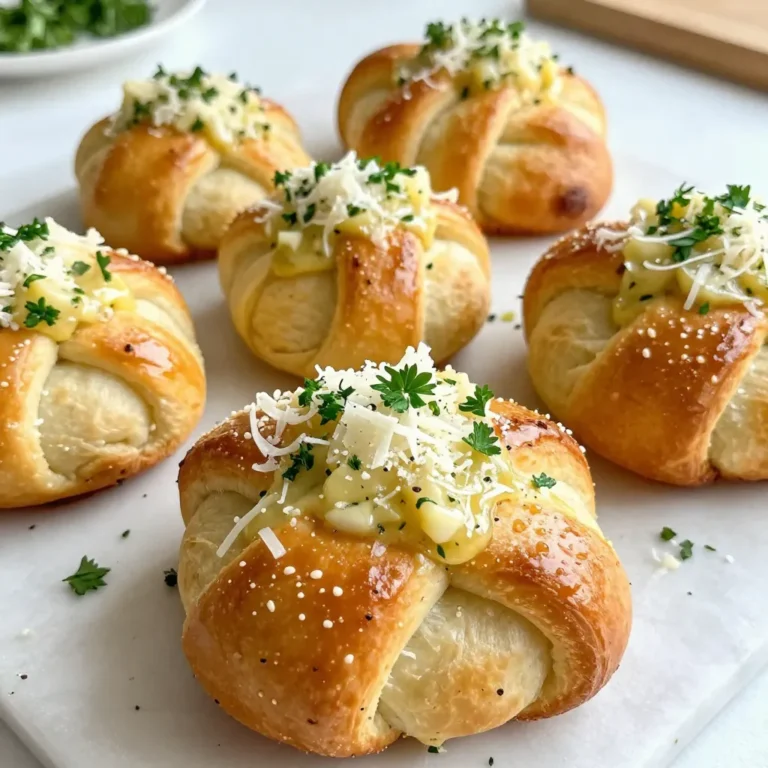
Buttery Garlic Knots Irresistible Comfort Food Recipe

You need these simple items to make almond maple granola clusters: - 2 cups rolled oats - 1 cup raw almonds, coarsely chopped - 1/2 cup pumpkin seeds - 1/2 cup unsweetened shredded coconut - 1/2 cup pure maple syrup - 1/4 cup coconut oil, melted - 1 teaspoon pure vanilla extract - 1/2 teaspoon ground cinnamon - 1/4 teaspoon sea salt - 1/2 cup dried cranberries or raisins (optional) Each ingredient packs a punch of nutrition. - Rolled oats provide fiber, which helps digestion. They keep you full longer. - Almonds offer healthy fats and protein, boosting heart health. - Pumpkin seeds are rich in zinc and magnesium, supporting your immune system. - Coconut adds healthy fats and may help improve cholesterol levels. - Maple syrup is a natural sweetener with antioxidants, better than refined sugar. - Coconut oil can boost brain function and provide energy. - Vanilla extract adds flavor and may help reduce stress. - Cinnamon can lower blood sugar levels and has anti-inflammatory properties. - Sea salt balances electrolytes, important for hydration. - Dried cranberries or raisins add natural sweetness and vitamins. Choosing good ingredients makes a big difference. - Look for rolled oats that are whole grain for more fiber. - Choose raw almonds over roasted for better health benefits. - For pumpkin seeds, buy unsalted and raw for pure nutrition. - Select unsweetened coconut to avoid added sugars. - Use pure maple syrup instead of imitation for better flavor and nutrients. - Make sure to buy virgin coconut oil for its health properties. - Always pick fresh spices like cinnamon, as they lose flavor over time. - If using dried fruit, look for unsweetened options to keep it healthy. These tips help you create tasty, healthy almond maple granola clusters. Enjoy making this delicious snack! {{ingredient_image_2}} First, preheat your oven to 325°F (160°C). This step is key to getting the right crunch. Next, line a baking sheet with parchment paper. This makes it easy to lift the granola off later. In a large bowl, mix together the rolled oats, coarsely chopped almonds, pumpkin seeds, shredded coconut, ground cinnamon, and sea salt. Stir well so everything is evenly combined. This helps each bite taste great. In another bowl, whisk the melted coconut oil, pure maple syrup, and pure vanilla extract. Make sure there are no lumps. A smooth mixture blends better with the dry ingredients. Pour the wet mixture over the dry ingredients. Use a spatula to mix until every piece is coated. Next, spoon the mixture onto your baking sheet. Spread it out evenly and press down firmly. This helps form those tasty clusters. Bake the granola for 25-30 minutes. Stir it halfway through to prevent burning. Keep an eye on it so it gets golden brown but not too dark. Once it’s done, let it cool completely on the baking sheet. This cooling helps it cluster together nicely. After cooling, you can mix in dried cranberries or raisins if you want a fruity touch. This step adds extra flavor and fun to your snack. To make great granola clusters, follow these steps: - Use fresh ingredients. Fresh oats and nuts add flavor. - Mix dry and wet well. Ensure all dry ingredients coat evenly with the wet mix. - Press firmly. When spreading on the baking sheet, press down to form tight clusters. - Watch the timer. Bake until golden brown, but don’t let it burn. Here are some common pitfalls and how to avoid them: - Skipping the oil. Coconut oil helps bind and adds crispness. - Not stirring. Stir halfway through baking for even coloring. - Overbaking. Check often to prevent burning. Granola continues to cook after removing from the oven. For crunchy granola clusters, try these tips: - Use rolled oats. They create a better texture than quick oats. - Add seeds. Pumpkin seeds add crunch and nutrition. - Cool completely. Let the granola cool on the baking sheet to harden. - Store properly. Keep in an airtight container to maintain crunchiness. Pro Tips Use Fresh Ingredients: Always opt for fresh and high-quality ingredients, especially the nuts and seeds, to enhance the flavor and nutritional value of your granola. Customize Your Clusters: Feel free to add other nuts, seeds, or dried fruits according to your taste preferences. Just make sure the total volume remains consistent. Store Properly: Keep your granola clusters in an airtight container to maintain freshness. They can last for up to two weeks when stored correctly. Experiment with Sweetness: Adjust the amount of maple syrup to suit your sweetness preference. You can also try adding a touch of honey or agave syrup for variety. {{image_4}} You can swap some ingredients in this recipe to fit your taste. If you don’t have almonds, use walnuts or pecans instead. For pumpkin seeds, sunflower seeds work well too. Don't have coconut oil? Try olive oil or melted butter. If you need a gluten-free option, choose gluten-free oats. You can play with flavors to create your perfect granola. Add a pinch of nutmeg for a warm spice. If you love chocolate, toss in some cocoa powder or dark chocolate chips. For a tropical twist, add dried pineapple or mango. The combinations are endless! Feel free to mix in your favorite add-ins. Consider adding chia seeds or flaxseeds for extra nutrition. You can also fold in some mini chocolate chips or nut butter after baking for a richer flavor. Don’t forget to mix in your favorite dried fruits too. To keep your almond maple granola clusters fresh, use an airtight container. Glass jars work well. Store it in a cool, dry place, away from direct sunlight. This helps maintain crunchiness and flavor. When stored properly, your granola clusters can last up to two weeks. They may lose some crunch over time, but they will still taste great. If you want them to last longer, you can freeze them. In the freezer, they can last for about three months. If your granola clusters get soft, you can refresh them. Preheat your oven to 300°F (150°C). Spread the clusters on a baking sheet. Bake for about five to ten minutes. This will help restore their crunch. Let them cool before enjoying again. Yes, you can make this recipe nut-free. Simply replace the almonds with more pumpkin seeds or sunflower seeds. This keeps the crunch while making it safe for those with nut allergies. To make this granola vegan, ensure you use only plant-based ingredients. The maple syrup and coconut oil are already vegan. Just skip any optional honey or dairy ingredients. This way, you get a tasty vegan snack! You can enjoy these granola clusters with yogurt, milk, or even as a topping for smoothie bowls. They also taste great on their own as a snack. Feel free to get creative! Yes, you can use other sweeteners. Honey or agave syrup are good swaps. Just remember that the flavor may change a bit. Each sweetener adds its unique taste to the granola. Homemade granola is often healthier. You control the ingredients, so you can avoid added sugars and preservatives. Plus, you can add ingredients that suit your taste and dietary needs. Making granola at home is a great way to eat better! In summary, we explored the key ingredients for granola clusters and their health benefits. You learned how to select quality ingredients and followed detailed steps to create delicious clusters. I shared tips to perfect your granola, avoid common mistakes, and customize flavors to your liking. Remember, proper storage keeps your granola fresh longer. Homemade granola offers healthier options compared to store-bought. Enjoy making your granola clusters and sharing them with friends and family!

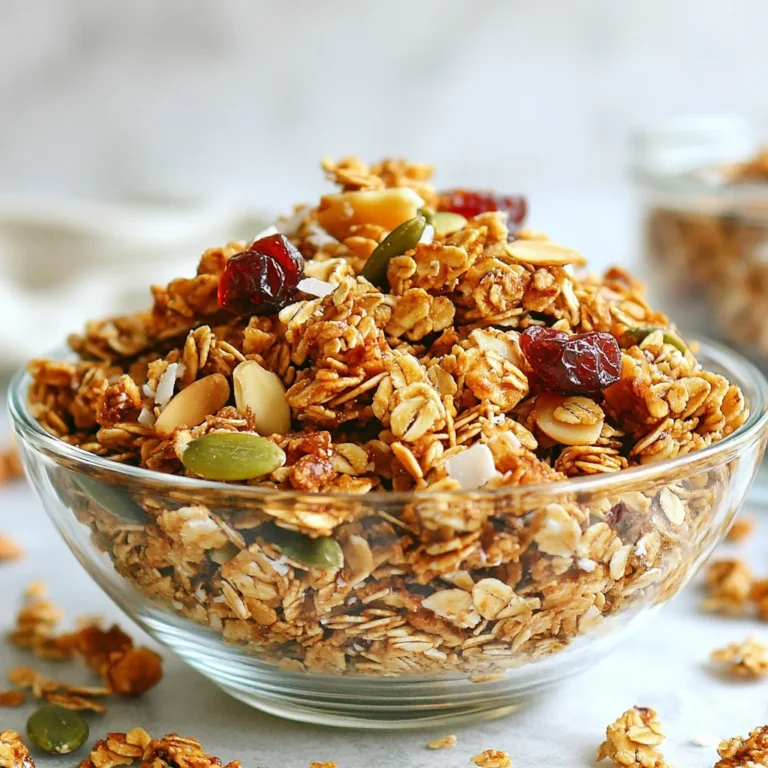
Almond Maple Granola Clusters Healthy and Tasty Snack

- 1 cup all-purpose flour - 1/2 cup unsweetened cocoa powder - 1/2 teaspoon baking soda - 1/4 teaspoon salt - 1/2 cup unsalted butter, softened - 1/2 cup granulated sugar - 1/2 cup packed brown sugar - 1 large egg - 1 teaspoon pure vanilla extract - 1/2 cup hazelnuts, toasted and finely chopped - 1/2 cup chocolate hazelnut spread - Additional granulated sugar for rolling Make sure the butter is at room temperature. This helps it mix well with the sugars. If you forget to take it out, you can cut it into small pieces to speed up softening. Toasting the hazelnuts is key for flavor. Just place them in a dry pan over medium heat. Stir them for about 5 minutes until they smell nutty. Let them cool before chopping. If you need a gluten-free option, use almond flour instead of all-purpose flour. For cocoa powder, you can use carob powder for a different flavor. If you want a dairy-free version, replace the butter with coconut oil. You can also use sunflower seed butter if you can't have hazelnuts. Lastly, maple syrup can replace granulated sugar but will change the texture slightly. {{ingredient_image_2}} First, you need to preheat your oven to 350°F (175°C). This step ensures your cookies bake evenly. While the oven warms up, grab a baking sheet. Line it with parchment paper. This keeps the cookies from sticking. It's simple but very important. Now, let’s make the dough. In a medium bowl, whisk together these dry ingredients: - 1 cup all-purpose flour - 1/2 cup unsweetened cocoa powder - 1/2 teaspoon baking soda - 1/4 teaspoon salt Set this bowl aside. In a large bowl, use an electric mixer to cream: - 1/2 cup unsalted butter, softened - 1/2 cup granulated sugar - 1/2 cup packed brown sugar Mix until it’s light and fluffy. This takes about 2-3 minutes. Next, add in: - 1 large egg - 1 teaspoon pure vanilla extract Beat until smooth. Now, slowly add the dry mixture to the wet. Stir gently until just combined. Be careful not to overmix. The dough should be thick and hold together well. Lastly, fold in: - 1/2 cup hazelnuts, toasted and finely chopped This adds a nice crunch. Now it’s time to shape the cookies. Scoop out small portions of dough, about 1 inch wide. Roll them into balls. Roll each dough ball in granulated sugar. Place them on the baking sheet, leaving about 2 inches between them. Next, create a gentle indent in each ball using your thumb or a small spoon. This is where the chocolate hazelnut spread will go. Fill each thumbprint with about 1/2 teaspoon of spread. Bake the cookies for 10-12 minutes. You’ll know they are done when the edges are set and the tops have small cracks. After baking, let them cool on the sheet for 5 minutes. Then, move them to a wire rack to cool down fully. Enjoy the delightful aroma while they cool! To get the best cookie, focus on these tips. First, soften the butter well. It helps to mix it easily with the sugars. Cream the butter and sugars until they look light and fluffy. This step adds air, making cookies soft. When you mix in the dry ingredients, do not overmix. Stop as soon as it comes together. This helps keep your cookies tender. Watch out for these common mistakes. One big mistake is using cold butter. Always make sure it is at room temperature. Another mistake is not measuring ingredients properly. Use a kitchen scale if you have one. This way, you get the right amounts. Finally, do not bake cookies too long. They should look set but still soft in the center. Make your cookies shine when serving them. Arrange them on a nice platter to show them off. For a special touch, drizzle a bit of chocolate hazelnut spread on top. You can also dust them with powdered sugar for a snowy look. Serve them with hot cocoa or milk. This makes a cozy treat everyone will love. Pro Tips Use Fresh Ingredients: Ensure your hazelnuts are fresh and toasted just before using them for the best flavor and crunch. Chill the Dough: If the dough feels too soft, refrigerate it for 15-20 minutes before rolling to make shaping easier. Perfect Indent: Use the back of a measuring spoon for a uniform indent size, ensuring enough space for the chocolate hazelnut spread. Storage Tips: Store cookies in an airtight container at room temperature for up to a week; they also freeze well for longer storage. {{image_4}} You can switch up the filling in thumbprint cookies to keep things fun. Try using fruit jams, like raspberry or apricot, for a fruity twist. A creamy peanut butter or almond butter can add a rich flavor. If you love caramel, that works great too! Just remember to keep the filling about 1/2 teaspoon, so it fits nicely. Adding new flavors can really change your cookies. Mix in some spices like cinnamon or cardamom for warmth. You can also add a pinch of sea salt on top for a sweet and salty combo. If you want a crunch, toss in some chocolate chips or dried fruit. The options are endless, and you can get creative! Making these cookies gluten-free is easy. Just use gluten-free flour instead of all-purpose flour. For a vegan version, swap the egg for a flax egg made from ground flaxseed and water. Use a vegan butter alternative and a dairy-free chocolate hazelnut spread. Your cookies will still taste amazing, and everyone can enjoy them! To keep your chocolate hazelnut thumbprint cookies fresh, store them in an airtight container. This will help them stay soft and tasty. Place a piece of wax paper between layers if you stack them. Keep the container in a cool, dry place, away from sunlight. You can freeze both the cookie dough and the baked cookies. For the dough, scoop it into balls and flash freeze on a baking sheet. Once firm, transfer the balls into a freezer bag. They can last up to three months in the freezer. For baked cookies, let them cool completely before wrapping them tightly in plastic wrap. Place them in a freezer-safe container. They also last about three months. When stored properly, these cookies stay fresh for about one week at room temperature. If you keep them in the fridge, they can last up to two weeks. Always check for any signs of spoilage before eating. Enjoy these sweet treats while they are at their best! These cookies stay fresh for about one week. Keep them in an airtight container. This helps keep them soft and tasty. If you want them to last longer, you can freeze them. They freeze well for up to three months. Yes, you can use other nuts. Walnuts or pecans work well in this recipe. Just chop them finely like you would with hazelnuts. Each nut will bring its own flavor, making the cookies unique. You can use peanut butter or almond butter. These spreads will change the taste, but they will still be good. Look for a nut butter that is smooth to make filling easier. Yes, you can make the dough ahead of time. Chill it in the fridge for up to two days. When you're ready, just scoop and bake! You can even freeze the dough for later use. Just thaw it before baking. In this post, we covered how to make chocolate hazelnut thumbprint cookies. We shared a detailed list of ingredients, ways to prep, and even smart substitutes. You learned step-by-step how to bake these cookies perfectly and tips to avoid common mistakes. We also discussed fun variations and how to store your tasty treats. Remember, making these cookies is fun and easy! Enjoy trying new flavors and sharing them with others. Happy baking!

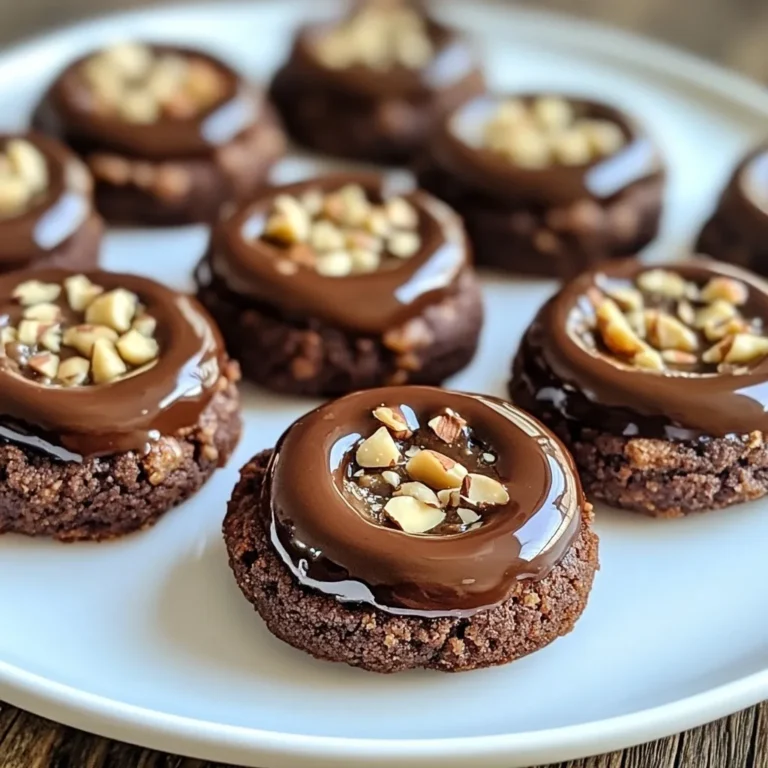
Chocolate Hazelnut Thumbprint Cookies Delight Recipe

- 4 cups green cabbage, finely shredded - 1 cup red cabbage, finely shredded - 1 cup carrots, grated - 1/2 cup green onions, thinly sliced - 1/4 cup fresh cilantro, chopped - 1/2 cup mayonnaise - 2 tablespoons lime juice (freshly squeezed) - 1 tablespoon honey - 1 teaspoon lime zest - 1/2 teaspoon garlic powder - Salt and pepper to taste To make the best coleslaw, you need to measure well. Use dry measuring cups for solids like cabbage and carrots. Use liquid measuring cups for the dressing. When shredding cabbage, use a sharp knife for clean cuts. For carrots, a box grater works great. Aim for thin, even pieces for a perfect texture. This helps everything mix well and taste great. {{ingredient_image_2}} First, grab a large mixing bowl. In it, combine the shredded green cabbage, red cabbage, grated carrots, thinly sliced green onions, and chopped cilantro. Mixing well is key. It helps the flavors blend nicely. You want every bite to be full of taste. So, toss the mixture thoroughly. This step is fun and makes your dish colorful. Next, you’ll prepare the dressing. In a medium bowl, whisk together the mayonnaise, freshly squeezed lime juice, honey, lime zest, and garlic powder. Mix until the dressing is smooth and creamy. A good dressing makes the coleslaw shine. Don't rush this step; the right texture matters for the best taste. Now, pour the creamy dressing over your vibrant vegetable mix. Toss gently to coat all the veggies well. This ensures every piece gets that zesty flavor. Season with salt and pepper to your liking. After that, cover the bowl with plastic wrap or a lid. Refrigerate for at least 30 minutes. This wait is worth it. It allows the flavors to meld beautifully. Just before serving, give it a gentle toss again to refresh the flavors. To make your coleslaw shine, adjust the lime juice and honey to your taste. If you want it tangy, add more lime juice. If you prefer it sweet, increase the honey. A little spice can also elevate the dish. Try adding a pinch of cayenne or paprika for warmth. For salt, I suggest starting with a half teaspoon. Taste it and add more if needed. Balance is key for great flavor. For a stunning look, serve your coleslaw in a large, clear glass bowl. This showcases the vibrant colors of the cabbage, carrots, and cilantro. Garnishing is fun, too! Add a few lime wedges around the bowl. A sprinkle of fresh cilantro on top adds a nice touch. These little details make your dish visually appealing. Make your coleslaw about 30 minutes before serving for the best taste. This time allows the flavors to meld nicely. Refrigerate it for at least that long. If you can, let it chill for an hour or more. Just before serving, give it a gentle toss. This helps redistribute the dressing and keeps it fresh. Always taste again and adjust seasoning if needed. Pro Tips Fresh Ingredients: Use the freshest vegetables possible for the best flavor and crunch in your coleslaw. Customize Your Dressing: Feel free to adjust the sweetness by adding more or less honey according to your taste preferences. Make It Ahead: Prepare the coleslaw a few hours before serving to let the flavors meld together for a more delicious result. Add Some Heat: For a spicy twist, consider adding diced jalapeños or a splash of hot sauce to the dressing. {{image_4}} You can easily change this coleslaw to fit your taste. If you want a lighter option, try using yogurt or sour cream instead of mayonnaise. These choices still create a creamy texture. You can also add more crunch by including veggies like bell peppers or radishes. Both options give great color and taste. To change the flavor, explore using different vinegars. Apple cider vinegar adds a fruity note. Rice vinegar gives a softer taste. You can also add fruits like pineapple or mango for a sweet twist that contrasts nicely with the lime. These fruits enhance the overall flavor and make it fun. For those with dietary needs, you have options. You can make this coleslaw gluten-free by ensuring all ingredients are free from gluten. If you need dairy-free options, yogurt or mayonnaise made from plants works well. For low-sugar diets, reduce the honey or use a sugar substitute. These changes keep the dish tasty while meeting your needs. Store your Zesty Lime Coleslaw in the refrigerator. Use an airtight container to keep it fresh. If you use a bowl, cover it tightly with plastic wrap. This helps to lock in moisture and flavor. Your coleslaw will stay fresh in the fridge for about three days. Look out for signs of spoilage such as a sour smell or discoloration. If the cabbage starts to wilt, it’s time to toss it. You can extend the use of coleslaw in many ways. Mix it into tacos for a crunchy topping. Use it as a filling in sandwiches or wraps. You can also add it to salads for extra texture. Zesty Lime Coleslaw lasts about 3 to 5 days in the fridge. To keep it fresh, store it in an airtight container. Make sure to seal it well. This helps keep moisture in and prevents the coleslaw from getting soggy. Always check for any signs of spoilage before eating. Yes, you can make this coleslaw a day ahead. Just mix the vegetables and dressing separately. When ready to serve, combine them. This keeps the veggies crisp and fresh. If you mix it too early, it may become watery. Absolutely! You can use Napa cabbage or savoy cabbage. Each type brings its flavor and texture. Napa cabbage is softer and sweeter. Savoy cabbage has a crinkly texture that adds crunch. Feel free to mix and match! Yes, this coleslaw is gluten-free. All the ingredients, like the cabbages and carrots, are naturally gluten-free. Just make sure your mayonnaise does not contain gluten. Always check the label to be safe. Zesty Lime Coleslaw pairs well with grilled meats, tacos, or sandwiches. It adds a refreshing crunch to any meal. Try it alongside barbecue chicken or fish tacos. You can also serve it as a topping on burgers for extra zing! To make Zesty Lime Coleslaw, you need fresh veggies and a creamy dressing. Mix well for the best taste. Remember to store leftovers properly to keep them fresh. You can adjust flavors and try new ingredients to make it your own. This coleslaw suits many meals, adding a bright, crunchy touch. Enjoy experimenting with variations, and don’t hesitate to try new flavors. Your coleslaw journey can be fun and tasty!

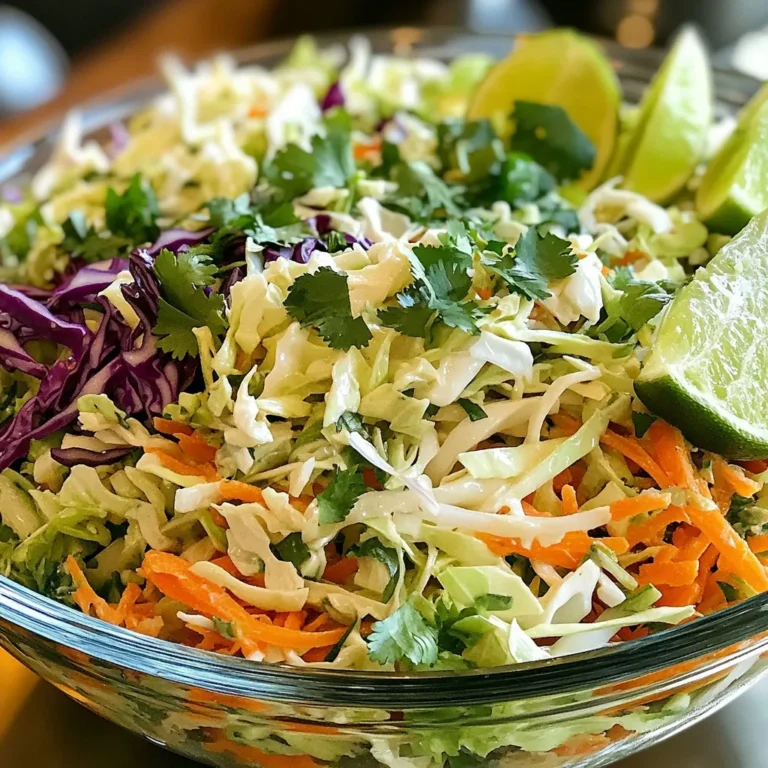
Zesty Lime Coleslaw Refreshing Side Dish Recipe

PREV 1 … 3 4 5 … 48 NEXT
purelyyumrecipes

explore

DessertsDinnerAppetizersDrinks

Our Policies

  • Cookie Policy
  • Copyright Policy
  • Disclaimer
  • GDPR Policy
  • Terms Of Use
Back to Top
  • About
  • Contact Us
  • Privacy Policy
© 2026 purelyyumrecipes