FREE DINNER EBOOK! Get your copy!
  • Cookie Policy
  • GDPR Policy
  • Disclaimer
  • Terms Of Use
  • Visit my other site: Fun Cookie Recipes
purelyyumrecipes
  • Home
  • Dinner
  • Desserts
  • Drinks
  • Appetizers
  • Contact
  • About
  • Privacy Policy
  • Home
  • Dinner
  • Desserts
  • Drinks
  • Appetizers
  • Contact
  • About
  • Privacy Policy
  • Cookie Policy
  • GDPR Policy
  • Disclaimer
  • Terms Of Use
Visit my other site: Fun Cookie Recipes

HOME / CATEGORIES /

Latest

- 12 oz white chocolate - 1/2 cup crushed peppermint candies - 1/4 teaspoon pure peppermint extract - 1/2 cup dark chocolate chips (optional) - Double boiler or microwave - Baking sheet - Parchment paper - Spatula - Toothpick To make the White Chocolate Peppermint Bark, you need simple yet vibrant ingredients. The star is the white chocolate, which gives a sweet, creamy taste. I prefer using high-quality chocolate for the best results. Crushed peppermint candies add a festive crunch and a refreshing taste. You’ll need about half a cup, plus a little more to sprinkle on top. The pure peppermint extract boosts the flavor, making each bite exciting. If you want to add a twist, consider dark chocolate chips. They bring a rich taste that pairs well with the sweet white chocolate. For tools, you can use a double boiler to melt the chocolate gently. If you do not have one, a microwave works too. Just be sure to heat it slowly. A baking sheet lined with parchment paper helps keep the bark from sticking. A spatula helps spread the mixture evenly. Lastly, a toothpick comes in handy if you’re swirling in dark chocolate. Gather your ingredients and equipment, and let’s create a treat that’s sure to dazzle! {{ingredient_image_2}} - Prepare the baking sheet with parchment paper. This keeps the bark from sticking. - Melt the white chocolate using your preferred method. You can use a double boiler, or a microwave works well too. If you use a microwave, heat the chocolate in 30-second bursts. Stir after each burst to keep it smooth. - Incorporate peppermint extract and crushed candies. Stir the extract into the melted chocolate until mixed. Then fold in the crushed peppermint candies, saving some for later. - Spread the mixture on the baking sheet. Pour the mixture onto the parchment and use a spatula to spread it evenly. Aim for about a 1/4-inch thickness. - If you want a dark chocolate layer, melt the dark chocolate in the same way. Drizzle it on top of the white layer, and use a toothpick to swirl them together. - Sprinkle reserved candies on top while the mixture is still soft. This adds flavor and a nice look. - Chill the baking sheet in the fridge for 1-2 hours. Wait until the chocolate hardens. - Break into pieces once the chocolate sets. Lift the bark off the parchment and snap it into bite-sized pieces. Enjoy the festive treat! To make great white chocolate peppermint bark, you need to melt the chocolate gently. Use a double boiler or microwave. If you choose the microwave, heat in 30-second bursts. Stir well after each burst. This keeps your chocolate from burning. If you want a marbled look, you can add dark chocolate. Melt the dark chocolate in the same way. Once melted, drizzle it over the white chocolate. Take a toothpick and swirl the dark chocolate in. This gives a beautiful design. For a festive display, arrange the peppermint bark on a colorful plate. A tiered dessert stand works well too. This adds height and makes it eye-catching. If you plan to gift the bark, wrap each piece in clear cellophane. Use bright ribbons to tie them up. This adds a special touch and shows you care. Pro Tips Use High-Quality Chocolate: Opt for premium white chocolate chips or bars for a smoother melt and richer flavor. Control the Temperature: When melting chocolate, keep the heat low to prevent burning; it should be smooth and glossy. Chill Thoroughly: Ensure the bark is completely set before breaking it into pieces for a clean and professional look. Experiment with Toppings: Feel free to add nuts, dried fruits, or different types of chocolate for a unique twist on the classic bark. {{image_4}} You can switch things up by using milk chocolate instead of white chocolate. Milk chocolate adds a creamy touch and sweet flavor. It pairs well with peppermint, giving a new twist to the bark. If you want to layer flavors, try dark chocolate. Melt dark chocolate and drizzle it over the white layer. Swirl it lightly with a toothpick for a fancy look. This mix of chocolates creates a rich taste and beautiful layers. Adding nuts or other candies can make your bark even better. Try chopped almonds or pecans for a crunchy bite. You can also use different candies like M&M's or festive sprinkles for color. For a more unique flavor, think about infused options. You could add orange zest or almond extract instead of peppermint. These flavors can give your bark a fresh twist. Feel free to experiment and find your favorite mix! To keep your white chocolate peppermint bark fresh, use an airtight container. This helps prevent moisture and air from spoiling the bark. Store it in a cool, dry place. Avoid areas with direct sunlight or heat, as this may cause the chocolate to melt or become soft. When stored properly, your peppermint bark can stay fresh for up to two weeks. However, always check for signs of spoilage. Look for any discoloration or an off smell. If the bark feels sticky or overly soft, it's best to discard it. Enjoy your festive treat while it's at its best! Can I make white chocolate peppermint bark ahead of time? Yes, you can make this bark a few days before you need it. Just store it in an airtight container. Keep it in a cool place to maintain freshness. How do I melt chocolate without a double boiler? You can use a microwave instead. Place the chopped chocolate in a bowl and heat it in 30-second bursts. Stir after each interval until it is smooth. What's the best way to crush peppermint candies? Place the candies in a zip-top bag and seal it. Use a rolling pin or a heavy pan to crush them. This method keeps the mess contained. Can I use sugar-free white chocolate? Yes, sugar-free white chocolate works well. It will still melt and taste great. Just ensure it has a good quality for the best flavor. Is there a way to make this recipe vegan? You can use vegan white chocolate. Look for brands that do not contain dairy. Substitute with coconut oil for a smooth texture if needed. This blog post shared a straightforward guide to making white chocolate peppermint bark. You learned about key ingredients, important equipment, and essential steps. I also shared tips for perfecting your bark and enhancing its look. Remember to store it correctly for the best taste. You can experiment with flavors and variations to make this treat your own. Enjoy your delicious creation, and share it with friends or family!

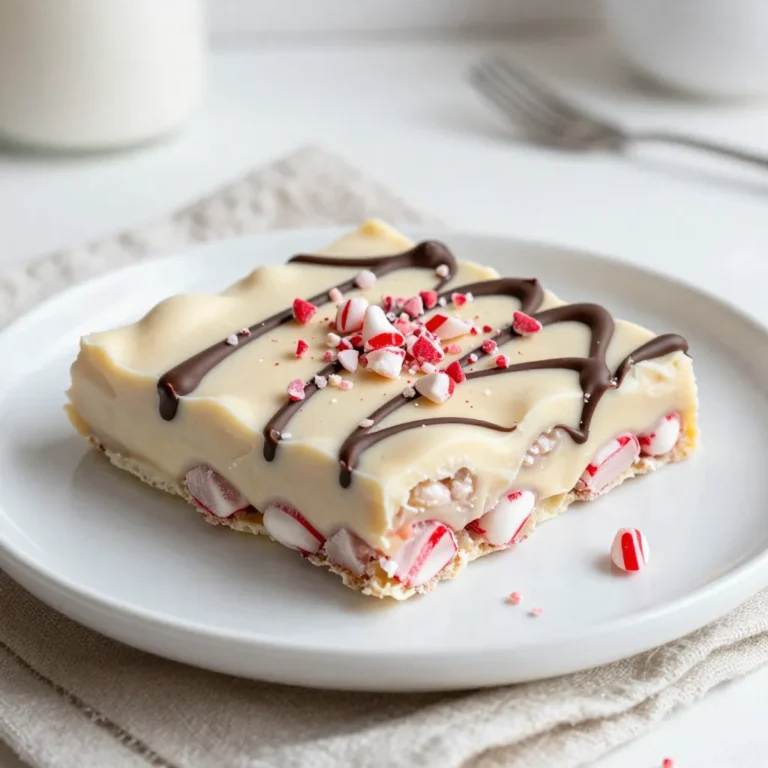
White Chocolate Peppermint Bark Delightful Treat

For this recipe, you need 1 sheet of puff pastry, fully thawed. Puff pastry gives the braid its flaky and light texture. You can find it in the frozen section of your grocery store. Make sure it is completely thawed before you start. You will need 1 cup of cherry pie filling. This adds a sweet and tart flavor to the braid. You can use store-bought cherry pie filling or make your own with fresh cherries. For the almond cream, use 1/2 cup. You can buy it or make it at home. If you want to make it, blend ground almonds, sugar, and a bit of butter. It will add a rich taste that pairs well with cherries. - 1 egg, beaten (for egg wash) - 1/4 cup sliced almonds - 2 tablespoons powdered sugar (for garnishing) - 1 teaspoon vanilla extract - 1/2 teaspoon almond extract - 1 tablespoon milk (optional, to adjust almond cream consistency) Having these ingredients ready will set you up for a successful baking experience. Enjoy crafting this delightful Cherry Almond Danish Braid! {{ingredient_image_2}} First, preheat your oven to 400°F (200°C). This helps the pastry rise perfectly. Line a baking sheet with parchment paper. This keeps the braid from sticking. Next, take your thawed puff pastry sheet. Place it on a clean, lightly floured surface. Gently roll it out to about 10x14 inches. You want a smooth rectangle with no creases. Spread the almond cream down the center of the pastry. Make sure to leave about 2 inches on each side. Drizzle vanilla and almond extracts over the cream. Then, spoon cherry pie filling on top. Spread it evenly for the best taste. Now, starting at the edges, make diagonal cuts about 1 inch apart. This creates strips on both sides. Fold the strips over the filling, alternating sides. This gives a nice braided look. Keep braiding until the filling is fully covered. Tuck the ends under to seal the braid. Brush the top with beaten egg for color. Sprinkle sliced almonds on top for crunch. Place it in the oven and bake for 25-30 minutes. Look for a golden brown finish. Once baked, cool for a few minutes. Dust with powdered sugar for a lovely touch. To get the best puff pastry, always use a fully thawed sheet. Keep the pastry cold until you roll it out. If it warms up, it won’t puff well. Lightly flour your surface to avoid sticking. Roll it to about 10x14 inches for even baking. Thin layers help it rise beautifully. Cherry almond is a classic mix, but feel free to get creative! Use different fruits like blueberries or peaches. You can swap almond cream for cream cheese for a rich flavor. Add spices like cinnamon or nutmeg for warmth. Each choice adds a unique twist to your Danish braid. An egg wash gives your braid a shiny, golden finish. Brush the top with a beaten egg just before baking. This step is key for that perfect color. Also, watch the oven closely. If it browns too fast, lower the heat. Aim for a beautiful golden brown for the best look and taste. Pro Tips Use Cold Puff Pastry: Ensure your puff pastry is cold when you work with it; this helps create those delicious, flaky layers when baked. Customize Fillings: Feel free to experiment with other fruit fillings like raspberry or blueberry for a different flavor profile. Egg Wash Alternatives: For a vegan option, you can use almond milk or soy milk brushed on the pastry before baking for a golden finish. Serve Warm: This Danish braid is best served warm right out of the oven to enjoy the flaky texture and warm cherry filling. {{image_4}} You can change the fruit filling to suit your taste. Try using blueberry, raspberry, or even peach. Each fruit adds its own flavor. Just make sure to use a similar amount as the cherry pie filling. This keeps the braid balanced and delicious. Nuts can give your Danish braid extra crunch. You can use chopped walnuts, pecans, or hazelnuts. Simply mix them into the almond cream or sprinkle them on top. This adds a nice texture and richer taste. Just remember, if you have nut allergies, skip this step for safety. You can switch up the flavors in your cream. Use different extracts like orange or lemon for a fresh twist. You can also mix in a bit of cocoa powder for a chocolate almond cream. Be creative! Adjust the amounts to keep the cream smooth. This lets you enjoy a unique Danish each time you bake. To keep your cherry almond Danish braid fresh, store it in an airtight container. Place it at room temperature if you plan to eat it within a day or two. For longer storage, put it in the fridge. This will help maintain its texture and flavor. Make sure to wrap it tightly with plastic wrap before storing. When you are ready to enjoy your Danish braid again, preheat your oven to 350°F (175°C). Place the braid on a baking sheet. Heat for about 10-15 minutes, or until it warms through. This method keeps the pastry flaky. You can also use a microwave, but the pastry may become soft. If you choose this method, heat it for about 30 seconds. If you want to save some for later, freezing works well. Wrap the Danish braid tightly in plastic wrap, then in aluminum foil. This double layer prevents freezer burn. You can freeze it for up to three months. When you are ready to eat it, thaw it in the fridge overnight before reheating. This keeps the taste and texture intact. Yes, you can make almond cream at home. To do this, mix 1/2 cup of almond flour, 1/4 cup of sugar, 1/4 cup of softened butter, and 1 egg. Blend well until creamy. This gives a fresh taste that pairs well with the pastry. If you don't have cherry pie filling, try using fresh or frozen cherries. Cook them with a little sugar and cornstarch to thicken. You can also use other fruits like blueberries or raspberries for a twist. Yes, you can use phyllo dough. However, phyllo will be less flaky than puff pastry. You’ll need to layer several sheets, brushing each with butter to mimic the puff pastry's texture. The Danish braid stays fresh for about 2-3 days at room temperature. Keep it in an airtight container to maintain its taste and texture. If you want to keep it longer, store it in the fridge. Yes, you can prepare the braid ahead of time. Assemble it, cover it tightly, and store it in the fridge. Bake it just before serving. This way, you enjoy warm, fresh Danish bread without extra hassle. You now know how to make a delicious Danish braid with cherry and almond flavors. We covered the key ingredients, step-by-step instructions, helpful tips, and various filling options. You can mix and match ingredients to suit your taste. Store leftovers properly to enjoy them later. This treat is fun to make and great to share. I hope you try it out and impress your friends and family with your baking skills.

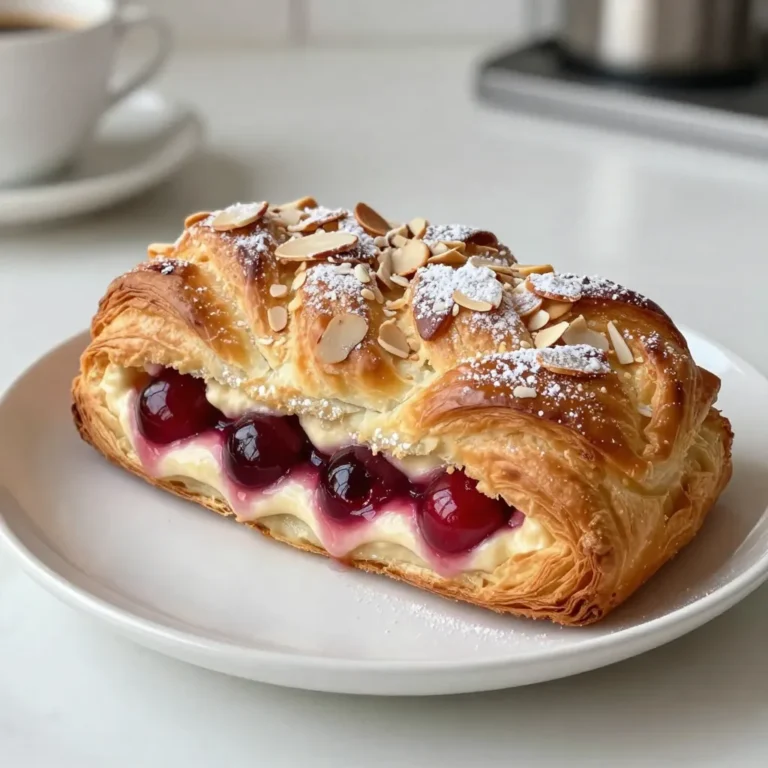
Cherry Almond Danish Braid Tasty Homemade Delight

- 1 bag of tortilla chips - 1 pound boneless, skinless chicken breast, thinly sliced - 1 red bell pepper, sliced into strips - 1 green bell pepper, sliced into strips - 1 medium onion, sliced into rings - 2 tablespoons extra-virgin olive oil - 2 teaspoons fajita seasoning (store-bought or homemade) - 1 cup shredded sharp cheddar cheese - 1 cup shredded Monterey Jack cheese - 1 cup canned black beans, drained and thoroughly rinsed - 1 fresh jalapeño, sliced (optional for added spice) - Fresh cilantro leaves, roughly chopped, for garnish - Sour cream and guacamole, for serving To make perfect Sheet Pan Fajita Nachos, gather all the ingredients first. This helps keep you organized. You need tortilla chips as the base. Use 1 pound of boneless, skinless chicken breast. Slice it thin for quick cooking. Next, grab a red bell pepper and a green bell pepper. Slice them into strips for a colorful look. A medium onion, sliced into rings, adds sweetness. You also need olive oil to coat the chicken and veggies. Fajita seasoning gives that classic flavor. For the cheese lovers, use sharp cheddar and Monterey Jack cheese. Black beans add protein and texture. If you enjoy heat, slice a fresh jalapeño. Lastly, fresh cilantro leaves add a lovely garnish. Serve with sour cream and guacamole for extra creaminess. When you have everything ready, you can start cooking. This recipe is fun, easy, and perfect for sharing. {{ingredient_image_2}} Preheating your oven is key. Set it to 400°F (200°C). This helps nachos bake evenly. A hot oven makes all the difference in cooking time and texture. In a large bowl, toss the chicken, bell peppers, and onion with olive oil and fajita seasoning. Make sure everything is covered well. This step adds great flavor to your filling. Take the seasoned chicken and veggies and spread them on a large sheet pan. Place them evenly across the pan. This ensures the chicken cooks well and the veggies get tender. Roast the mixture in your preheated oven for about 15 to 20 minutes. Check that the chicken reaches 165°F and the veggies are soft and slightly caramelized. This step is vital for taste and texture. Once roasted, remove the pan from the oven. Layer the tortilla chips on top of the chicken and veggie mix. Make sure to cover the base well for a strong nacho foundation. Now, distribute the cooked chicken and veggies over the tortilla chips. This way, every chip gets some tasty toppings. It creates a burst of flavor in each bite. Sprinkle the shredded cheddar and Monterey Jack cheese generously over the nachos. Try to cover all the toppings so you get a cheesy experience. I like to use a mix for depth of flavor. Next, add the drained black beans and sliced jalapeños on top. The beans add protein and the jalapeños give a nice kick. These layers create a wonderful taste contrast. Return the sheet pan to the oven for another 5 to 7 minutes. Bake until the cheese melts and bubbles up slightly. The cheese should look golden and delicious at this stage. After baking, carefully take the pan out of the oven. Let it cool a bit, then garnish with fresh cilantro. This adds a bright pop of color and freshness to your dish. Serve your nachos hot with bowls of sour cream and guacamole. These dips add creaminess and flavor, making the meal even better. Enjoy! You can make your fajita nachos unique. Here are some topping ideas: - Diced tomatoes - Sliced olives - Corn - Avocado or guacamole - Fresh lime juice - Different types of cheese like pepper jack - Salsa or pico de gallo Feel free to mix and match your favorite flavors. The key is to balance flavors and textures. Having the right tools makes cooking easier. Here’s what I recommend: - Large mixing bowl for tossing ingredients - Sheet pan for roasting - Spatula for mixing and serving - Sharp knife for slicing veggies - Measuring spoons for precise seasoning These simple tools help you achieve the best results. To save time, prepare ingredients before you start cooking. Here are some tips: - Slice veggies and chicken in advance. - Preheat the oven while you prep. - Use a timer to track cooking time for each step. - Clean as you go to keep your workspace tidy. These steps make the process quicker and more fun. Pro Tips Use Fresh Ingredients: Fresh vegetables and high-quality chicken will enhance the flavor of your nachos significantly. Opt for organic produce if possible for the best taste. Customize Your Heat: Adjust the spiciness by adding more or fewer jalapeños, or even using a spicier cheese. You can also incorporate some hot sauce for an extra kick. Layer Wisely: For a well-balanced nacho experience, layer toppings evenly. This ensures that every chip has a bit of everything, preventing any dry bites. Serve Immediately: Nachos are best enjoyed fresh out of the oven while the cheese is still gooey. Plan to serve them right after baking for maximum enjoyment. {{image_4}} To make vegetarian fajita nachos, swap the chicken for plant-based options. You can use mushrooms or zucchini for a meaty texture. Black beans add protein and fiber. Try using extra cheese or a plant-based cheese for flavor. You can also load up on bell peppers and onions for a fresh crunch. These swaps keep the dish tasty and filling. If you love heat, there are easy ways to spice things up. Add more jalapeños or use spicy peppers like serranos. You can also sprinkle some chili powder or cayenne pepper on the chicken and veggies. For a fiery kick, try drizzling hot sauce over the nachos before serving. These options will set your taste buds on fire! You don’t have to stick to chicken for your nachos. Try using beef for a heartier flavor. Ground turkey or pork can also work well. If you prefer seafood, shrimp makes a great topping too. Just remember to adjust the cooking time for different proteins. This allows everyone to enjoy their favorite flavors. To keep your fajita nachos fresh, store them in an airtight container. Make sure the nachos have cooled down first. This helps keep them from getting soggy. You can store them in the fridge for up to three days. If you want to enjoy them later, separate the chips from the toppings. This helps maintain the crunchiness of the chips. When reheating, use the oven to keep the nachos crispy. Preheat your oven to 350°F (175°C). Spread the nachos on a baking sheet. Heat them for about 10-15 minutes. You can also cover them with foil to avoid burning. If you want to use the microwave, heat in short bursts of 30 seconds. This method may make the chips a bit soggy, so be careful. Freezing nachos is possible, but I recommend freezing the toppings separately. Place the chicken, veggies, and beans in a freezer-safe bag. Remove as much air as possible, and seal it tight. You can freeze these for up to three months. When you're ready to eat, thaw overnight in the fridge. Reheat the toppings on the stove or in the oven. Serve them over fresh tortilla chips for the best taste. Yes, you can switch cheeses. Here are a few options: - Monterey Jack - Pepper Jack for spice - Queso Blanco for creaminess - Mozzarella for a stretchy texture Try different blends for unique flavors! You can keep leftover nachos for about 2-3 days. Store them in an airtight container. Use foil or plastic wrap to cover the nachos. This helps keep them fresh. Fajita nachos pair well with: - Fresh guacamole - Creamy sour cream - Salsa for added flavor - A side of refried beans - Crispy tortilla strips These sides will enhance your nacho experience! Yes, you can prep fajita nachos in advance. Here are some tips: - Cook the chicken and veggies a day before. - Store them separately from the chips. - Layer everything just before baking. This way, you get fresh nachos quickly! Fajita nachos are a fun, delicious dish. We covered the key ingredients and steps. Preheating the oven ensures perfect cooking. Layer your tacos right to enhance flavor. Explore variations to suit your taste. Remember to store leftovers correctly for later. Finally, making these nachos can bring joy to your table. Try them out and enjoy!

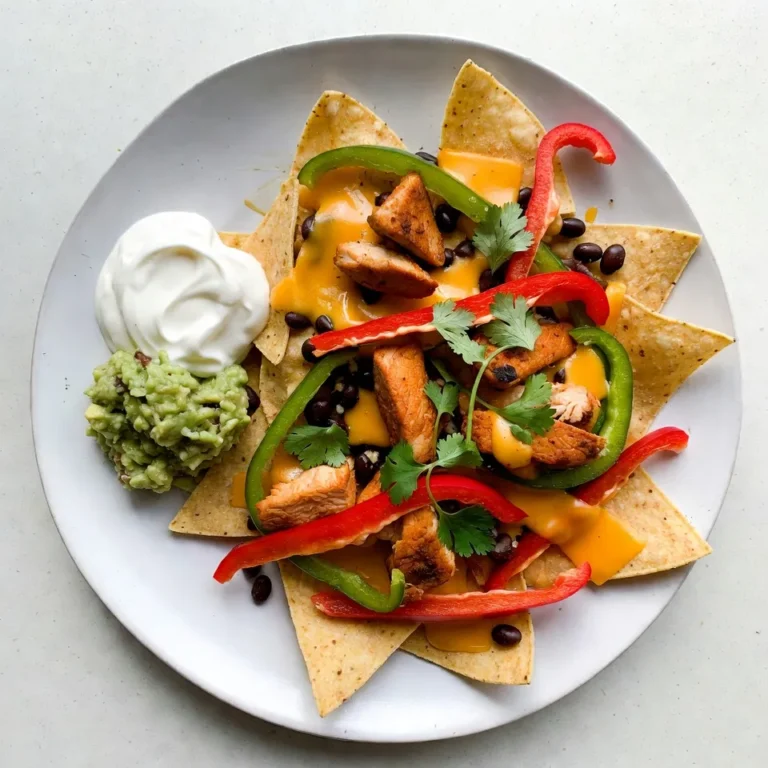
Sheet Pan Fajita Nachos Savory and Easy Recipe

For these enchiladas, you need: - 2 cups cooked chicken, shredded - 1 cup corn (canned or frozen) - 1 red bell pepper, diced - 1 small red onion, finely chopped These ingredients create a tasty base. The shredded chicken adds protein. Corn adds sweetness. The red bell pepper brings color and crunch. The onion gives depth to the flavor. You will need: - 2 cups shredded cheddar cheese, divided - 1 cup sour cream - 1/4 cup honey - 1/4 cup fresh lime juice - 2 teaspoons chili powder - 1 teaspoon ground cumin - Salt and pepper to taste The cheddar cheese melts beautifully. Sour cream makes the sauce creamy. Honey and lime juice create a sweet and zesty sauce. Chili powder and cumin add warmth and depth. For the wraps, use: - 8 small flour tortillas Flour tortillas are soft and easy to roll. They hold all the good stuff inside. You can also add salt and pepper to enhance flavors. These ingredients combine to create a rich and flavorful dish. Each bite offers a mix of tastes and textures. {{ingredient_image_2}} Start by preheating your oven to 375°F (190°C). This sets the stage for a great bake. In a large bowl, mix together 2 cups of shredded chicken, 1 cup of corn, 1 diced red bell pepper, and 1 small finely chopped red onion. Add 1 cup of shredded cheddar cheese. Stir until everything blends well. In a small bowl, whisk together 1 cup of sour cream, 1/4 cup of honey, and 1/4 cup of fresh lime juice. Add 2 teaspoons of chili powder and 1 teaspoon of ground cumin. Season with a pinch of salt and pepper. This creamy sauce adds zing! Take 8 small flour tortillas and lay them flat. Spoon some chicken mixture into each tortilla's center. Roll them tightly, tucking in the ends as you go. Grab a greased 9x13 inch baking dish. Place the rolled tortillas seam-side down in a single layer. Drizzle the rest of the honey-lime sauce over the enchiladas. Sprinkle with the remaining 1 cup of shredded cheddar cheese. Cover with aluminum foil and bake for 20 minutes. Remove the foil and bake for another 10 minutes until the cheese is melted and bubbly. Let the enchiladas cool for a few minutes after baking. Top with chopped fresh cilantro just before serving for color and flavor. Enjoy every bite! To shred chicken, first, let it cool a bit. Use two forks to pull the meat apart. You can also use your hands if the chicken is cool enough. For faster results, try using a stand mixer. Just place the chicken in the bowl and mix on low speed. It shreds quickly and evenly. A great honey-lime sauce is key to this dish. Start with fresh lime juice for the best flavor. Mix it well with honey, sour cream, chili powder, and ground cumin. Adjust to taste. If you like it sweeter, add more honey. For a zesty kick, squeeze in some extra lime juice. Serve your enchiladas on a large platter. Garnish with fresh cilantro and lime wedges. This adds color and freshness. You can also pair them with a side salad or some rice. For extra heat, serve with sliced jalapeños or hot sauce. Enjoy the delightful mix of flavors! Pro Tips Use Rotisserie Chicken: For a quicker preparation, consider using store-bought rotisserie chicken. It saves time and adds a delicious flavor to your enchiladas. Customizable Fillings: Feel free to add other veggies like spinach or zucchini, or swap out the chicken for beef or beans for a vegetarian option. Make Ahead: You can prepare the enchiladas a day in advance. Just assemble them and refrigerate before baking. This allows the flavors to meld beautifully. Experiment with Cheese: While cheddar is classic, try using Monterey Jack or pepper jack cheese for added flavor and a bit of spice. {{image_4}} You can make these enchiladas vegetarian by swapping the chicken for black beans. Use two cups of cooked black beans. This adds protein and a great flavor. You can also add more veggies like zucchini or spinach for extra nutrients. Just be sure to mix in the honey-lime sauce to keep that tangy taste. Add some heat to your enchiladas! Try adding diced jalapeños to the chicken mix. You can also use spicy pepper jack cheese instead of cheddar. If you want even more spice, add a pinch of cayenne pepper to the honey-lime sauce. Adjust the spice to your taste for a fiery kick. Cheese plays a big role in flavor. While cheddar is great, you can mix it up. Try using Monterey Jack or crumbled feta for a unique twist. You can even blend different cheeses for a richer taste. Mixing cheeses can add depth and make your enchiladas more exciting. You can store leftover honey lime chicken enchiladas in the fridge. Place them in an airtight container. They will stay fresh for up to four days. Make sure to cool them to room temperature before sealing. This helps keep them from getting soggy. If you want to save enchiladas for later, freezing is a great option. Wrap each enchilada in plastic wrap and place them in a freezer-safe bag. They can last for up to three months in the freezer. When you’re ready to eat, simply thaw them in the fridge overnight. Reheating is easy! You can use the oven or microwave. For the oven, preheat it to 350°F (175°C). Place the enchiladas in a baking dish and cover with foil. Bake for about 20 minutes, or until heated through. In the microwave, heat them on a plate for 2-3 minutes, checking often. Enjoy your delicious leftovers! Yes, you can use rotisserie chicken. It saves time and adds great flavor. Just shred it into bite-sized pieces. This option makes the recipe even quicker. To spice up your enchiladas, add chopped jalapeños. You can also use a spicier chili powder. Another option is to drizzle hot sauce on top before serving. Adjust the heat to your liking! I love serving these enchiladas with a fresh salad. A side of black beans pairs well too. You could also add rice for a heartier meal. Don’t forget some lime wedges for extra zing! Yes, corn tortillas can work well. They add a nice flavor and texture. Just make sure to warm them first. This makes them easier to roll without breaking. Leftovers stay good for about three to four days in the fridge. Store them in an airtight container. Reheat in the oven for the best taste! We've covered everything you need for honey-lime chicken enchiladas. You learned about the key ingredients, from chicken and veggies to cheeses and tortillas. I shared clear steps to make your dish perfect, with tips for easy prep and storage. You also found fun variations to try. To sum it up, these enchiladas are tasty and easy. They fit many tastes and are great for any meal. Enjoy making and sharing them with others!

Honey Lime Chicken Enchiladas Flavorful and Easy Meal

- 3 cups all-purpose flour - 1 packet (2 ¼ teaspoons) active dry yeast - ½ teaspoon granulated sugar - 1 teaspoon kosher salt - ¼ cup unsalted butter, melted - 1 cup warm milk (approximately 110°F or 45°C) - 4 cloves garlic, finely minced - ½ cup freshly grated Parmesan cheese - 1 teaspoon dried Italian herbs (a blend of oregano and basil) - 2 tablespoons fresh parsley, finely chopped - Mixing bowls - Measuring cups and spoons - Bundt pan or round cake pan - Rolling pin (optional) To make these rolls, gather all the ingredients. Fresh ingredients make a big difference. The all-purpose flour gives the rolls their structure. The active dry yeast helps them rise. Sugar feeds the yeast, while salt adds flavor. Melted butter enriches the dough, and warm milk activates the yeast. Minced garlic adds that bold taste, and freshly grated Parmesan brings a cheesy delight. Dried Italian herbs enhance the flavor. Finally, fresh parsley adds a pop of color and freshness. For equipment, you need mixing bowls for combining ingredients. Measuring cups and spoons will ensure accuracy. A bundt pan or round cake pan is perfect for shaping the rolls. A rolling pin is optional but can help with dough prep if you choose to roll out the dough. Now, you're ready to create these soft and cheesy Garlic Parmesan Pull-Apart Rolls! {{ingredient_image_2}} To start, we need to activate the yeast. Take a small bowl and mix together warm milk, sugar, and active dry yeast. Stir it gently and let it sit for about 5 to 10 minutes. You want to see it froth and bubble. This shows the yeast is active. Next, grab a large mixing bowl. Whisk together all-purpose flour and kosher salt. Make a well in the center of the flour. Pour in the melted butter and the frothy yeast mixture. Now, it’s time to form the dough. Stir the mixture until it becomes a shaggy dough. Transfer the dough onto a lightly floured surface. Knead it for about 5 to 7 minutes. You want the dough to be smooth and elastic. Proper kneading helps develop gluten, making the rolls soft. After kneading, place the dough in a lightly greased bowl. Cover it with a damp cloth or plastic wrap. Let it rise in a warm spot for about 1 hour. The dough should double in size. This is a good sign that the yeast is working. Once the dough has risen, gently punch it down to deflate it. Knead it for one more minute to keep it cohesive. Now, divide the dough into 12 equal pieces. Shape each piece into a small, smooth ball. To coat the rolls, mix minced garlic, grated Parmesan cheese, and dried Italian herbs in a bowl. Dip each dough ball into melted butter to coat it. Then roll it in the garlic-Parmesan mixture for an even coating. Arrange the coated dough balls in a greased bundt pan or round cake pan. Stack them slightly for that great pull-apart look. Lightly cover the pan and let the rolls rise for another 30 minutes. While the rolls rise, preheat your oven to 350°F (175°C). After the second rise, place the rolls in the oven. Bake for 25 to 30 minutes. They should turn golden brown and puff up beautifully. Once baked, remove them from the oven and brush the tops with more melted butter. Sprinkle chopped fresh parsley on top for added flavor. Enjoy pulling apart these soft, cheesy delights! To make great pull-apart rolls, avoid a few common mistakes. First, don’t rush the yeast activation. If your milk is too hot, it can kill the yeast. Always check the temperature. It should feel warm but not hot. Second, don’t skip the kneading step. Kneading helps develop gluten, which gives the rolls their soft texture. For the right dough consistency, look for a smooth, elastic feel. If the dough is too sticky, add a bit more flour. If it’s too dry, a splash of milk can help. The dough should be soft but not stick to your hands. To boost the flavor of your rolls, consider adding herbs and spices. Dried rosemary or thyme can add a lovely taste. You can also mix in some red pepper flakes for a hint of heat. If you want to swap out Parmesan, try mozzarella or cheddar. These cheeses melt beautifully and add a different twist. These rolls pair well with many meals. They are great with pasta dishes or soups. You can also serve them alongside a fresh salad. If you’re hosting a dinner, make these rolls a star of your feast. They look beautiful on a table and are fun to share. Try serving them with a warm, herbed dip for a tasty addition. Pro Tips Activate Your Yeast: Make sure your milk is warm but not too hot, as temperatures above 120°F (49°C) can kill the yeast. This step is crucial for a good rise. Kneading Technique: Knead the dough until it's smooth and elastic, which usually takes about 5-7 minutes. This develops the gluten, giving the rolls their structure. Flavor Infusion: For an extra flavor boost, let the garlic and herb mixture sit for a few minutes before rolling the dough balls in it. This allows the flavors to meld beautifully. Perfect Baking: Keep an eye on the rolls as they bake; if they start to brown too quickly, cover them loosely with aluminum foil for the remainder of the baking time. {{image_4}} You can switch up the cheese for your pull-apart rolls. Try adding mozzarella for extra stretch. Cheddar gives a sharp bite, while gouda adds a smoky flavor. If you want a twist, use feta or blue cheese for a unique taste. For those who prefer vegan options, several substitutes work well. Look for vegan mozzarella or cream cheese. Nutritional yeast adds a cheesy flavor without dairy. You can also blend cashew cheese for a creamy texture. Fresh herbs can elevate your rolls. Consider using rosemary, thyme, or chives. These herbs bring fresh notes that brighten the flavor. You can mix dried herbs like oregano and basil, too. Using flavored oils is another way to add depth. Garlic-infused olive oil or herb oil can pack a punch. Just brush it on your rolls before baking for a fragrant treat. You can make a sweet version of these rolls, too. Swap garlic for cinnamon and sugar for a delightful twist. Add vanilla extract for extra flavor. Incorporate fillings like chocolate chips, dried fruit, or nuts. These sweet pull-apart rolls can serve as a dessert or a fun breakfast treat. To keep your Garlic Parmesan Pull-Apart Rolls fresh, follow these steps: - Let the rolls cool completely. - Place them in an airtight container. - You can also wrap them in plastic wrap. This method keeps them soft for a few days. If you want them warm, reheat them briefly in the oven. For long-term storage, you can freeze your rolls: - Freeze unbaked rolls by placing them on a baking sheet. - Once frozen, transfer them to a freezer bag. - For baked rolls, let them cool. Then, wrap them tightly in foil before freezing. When you're ready to enjoy, bake unbaked rolls directly from the freezer. Bake for about 30-35 minutes. For baked rolls, reheat them at 350°F for 10-15 minutes. Garlic Parmesan Pull-Apart Rolls last about three days at room temperature. After that, they may start to harden. Signs of spoilage include: - A hard texture or dry surface. - An off smell that is not buttery or garlicky. - Mold or discoloration on the rolls. When stored correctly, your rolls will stay tasty and enjoyable! Yes, you can use instant yeast. The main difference is that instant yeast does not need to be activated in warm milk. You can mix it directly with the dry ingredients. Use the same amount: one packet of instant yeast is about 2 ¼ teaspoons. If you use instant yeast, the dough may rise a bit faster. To reheat, wrap the rolls in foil and place them in a preheated oven at 350°F (175°C) for about 10-15 minutes. This keeps them soft and warm. You can also use the microwave. Heat them for about 15-20 seconds, but they may get chewy. Enjoy them fresh and warm for the best taste. Yes, you can make the dough ahead. After kneading, cover it and place it in the fridge for up to 24 hours. When ready to use, let it sit at room temperature for about 30 minutes before shaping. This helps the dough rise better. You can also freeze the dough for up to three months. Thaw it overnight in the fridge before use. These rolls pair well with many meals. Serve them with soups, salads, or pasta dishes. They also make a great side for grilled meats. For a fun snack, enjoy them with marinara sauce or a garlic dip. You learned how to make Garlic Parmesan Pull-Apart Rolls from scratch. We explored the key ingredients, tools, and step-by-step guides. Each part of the process helps you create tasty rolls for any meal. Remember to experiment with flavors and variations. Proper storage keeps your rolls fresh for longer. Enjoy these rolls with friends and family, or make them for a feast. Now, it’s your turn to bake and share. Your kitchen adventure awaits!

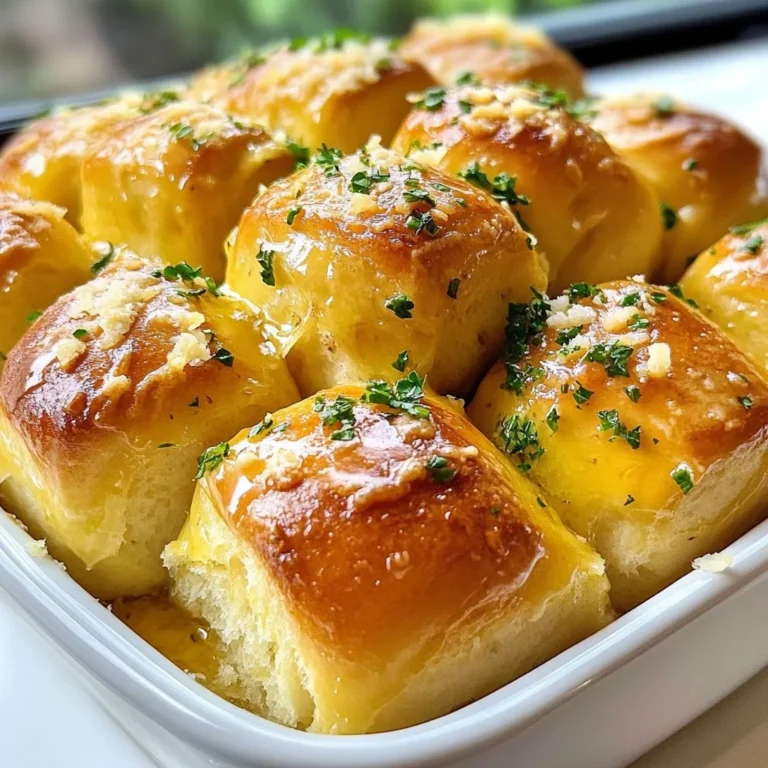
Garlic Parmesan Pull-Apart Rolls Soft and Cheesy Delight

- 1 cup unsalted butter, softened to room temperature - 1 cup granulated sugar - 1/2 cup packed brown sugar - 1/2 cup pumpkin puree (canned or homemade) - 1 large egg - 1 teaspoon pure vanilla extract - 2 3/4 cups all-purpose flour - 2 teaspoons cream of tartar - 1 teaspoon baking soda - 1 teaspoon ground cinnamon - 1/2 teaspoon ground nutmeg - 1/4 teaspoon ground ginger - 1/2 teaspoon salt - 1/4 cup granulated sugar (for rolling) - 1 tablespoon ground cinnamon (for rolling) Using fresh pumpkin puree can add a unique flavor. If you can't find cream of tartar, you may use lemon juice instead. For a gluten-free option, substitute the all-purpose flour with a gluten-free blend. If you want a vegan version, try using a flax egg and vegan butter. Quality ingredients can enhance the taste of your cookies. Fresh, high-quality spices like cinnamon and nutmeg bring warmth and flavor. Using good butter makes the cookies rich and creamy. Always choose fresh pumpkin for a vibrant taste and color. Remember, great cookies start with great ingredients! {{ingredient_image_2}} First, gather all your ingredients. You will need butter, sugars, pumpkin puree, egg, vanilla, flour, cream of tartar, baking soda, and spices. Preheat your oven to 350°F (175°C). Line your baking sheet with parchment paper. This step helps keep cookies from sticking. 1. In a large bowl, cream the softened butter with both sugars. Use an electric mixer for about 3-4 minutes. You want it light and fluffy. 2. Add pumpkin puree, egg, and vanilla extract. Mix until smooth and combined. 3. In a separate bowl, whisk together flour, cream of tartar, baking soda, cinnamon, nutmeg, ginger, and salt. This mix adds flavor and lifts your cookies. 4. Gradually add the dry mix to the wet mix. Stir gently until just combined. The dough should feel slightly sticky but firm. 5. Make the cinnamon-sugar mix by combining 1/4 cup sugar and 1 tablespoon cinnamon in a small bowl. 6. Roll the dough into 1-inch balls. Coat each ball in the cinnamon-sugar mix. 7. Place the balls on the baking sheet, leaving 2 inches between each one. 8. Bake for 10-12 minutes. Look for set edges and slight cracks on top. They will firm up as they cool. 9. After baking, let the cookies cool for 5 minutes on the sheet. Then, transfer them to a wire rack to cool completely. - Do not overmix the dough. This can make your cookies tough. - Ensure your butter is at room temperature. Cold butter doesn't mix well. - Watch baking time closely. Every oven is different, so check a minute early. - Leave enough space between cookies on the sheet. They need room to spread. - If your cookies are too soft, bake them a bit longer. Just be careful not to burn them. To get soft, chewy cookies, watch your mixing. Cream the butter and sugars until fluffy, but don’t overmix the dough. This keeps your snickerdoodles light and tender. If the dough feels too sticky, chill it for 30 minutes. This helps the cookies hold their shape when baking. Store your snickerdoodles in an airtight container. They stay fresh for up to a week at room temperature. If you like warm cookies, pop them in the microwave for 5-10 seconds. This brings back that fresh-baked taste. You can also freeze them for up to three months. Just thaw them at room temperature before enjoying. Want to boost flavor? Try adding a pinch of allspice or cloves. These spices add warmth and depth. You can also mix in chopped nuts or chocolate chips for a fun twist. Get creative! Each spice makes your snickerdoodles unique and delicious. Pro Tips Chill the Dough: For thicker cookies, refrigerate the dough for at least 30 minutes before baking. This helps prevent spreading and results in a chewier texture. Use Fresh Spices: Ensure your spices are fresh for optimal flavor. Old spices can lead to bland cookies, so consider purchasing whole spices and grinding them yourself. Check for Doneness: Cookies will look slightly underbaked when you take them out of the oven. They continue to cook on the baking sheet, so don’t overbake them! Store Properly: Keep cookies in an airtight container at room temperature for up to a week. You can also freeze them for longer storage; just ensure they are well-wrapped. {{image_4}} To make gluten-free pumpkin spiced snickerdoodles, swap all-purpose flour for a gluten-free blend. Many brands work well, but look for one that includes xanthan gum. This helps keep the cookies chewy and soft. Mix the gluten-free flour with your spices and cream of tartar. Follow the same steps in the recipe, and enjoy your gluten-free treats! For a vegan version, replace the egg with a flax egg. To do this, mix one tablespoon of ground flaxseed with three tablespoons of water. Let it sit for about five minutes until it thickens. Use a plant-based butter instead of regular butter. This keeps the same creamy texture while being dairy-free. Your cookies will still taste fantastic! You can add fun twists to your pumpkin spiced snickerdoodles. Try adding chocolate chips for a sweet surprise. Just fold in a cup of semi-sweet or dark chocolate chips after mixing the dough. For a nutty flavor, mix in some chopped pecans or walnuts. Both add a lovely crunch. You can also experiment with different spices like cardamom or allspice for a unique flavor. To keep your pumpkin spiced snickerdoodles fresh, use an airtight container. Store cookies at room temperature. Place parchment paper between layers to avoid sticking. This way, you can enjoy them for days. Freezing snickerdoodles is easy and fun. First, let the cookies cool completely. Then, place them in a single layer on a baking sheet. Freeze for about an hour. After that, transfer them to a freezer bag. Remove excess air and seal tightly. They’ll stay fresh for up to three months. Pumpkin spiced snickerdoodles last about a week at room temperature. For longer freshness, store them in the fridge. You can also check for softness. If they feel hard, they may not taste as good. Enjoy your cookies fresh for the best flavor. Snickerdoodles have a unique taste and texture. They are soft and chewy. Their signature flavor comes from the cream of tartar and the cinnamon-sugar topping. Other cookies, like chocolate chip, focus on chocolate flavor. Snickerdoodles shine with their warm spices. The slight tang from cream of tartar gives them a special twist. This makes snickerdoodles stand out among cookie options. Yes, you can use fresh pumpkin! Just make sure to cook it first. Roast or steam fresh pumpkin until soft, then puree it. This gives your cookies a fresh taste. However, canned pumpkin is easier to use and saves time. Both options work well, so choose what you prefer. Just measure the same amount, 1/2 cup, for your recipe. Watch the edges of the cookies closely. They should look set and firm. The tops will show slight cracks, which is a good sign. Bake for 10-12 minutes, but check early. If they look too soft, give them a minute or two more. Remember, they will firm up as they cool. Let them rest on the baking sheet for 5 minutes before moving them. In this guide, I shared how to create perfect snickerdoodles. We covered key ingredients and their importance. I shared step-by-step baking instructions and tips to avoid mistakes. You can also try different variations for special diets or flavors. Storing and reheating tips keep your cookies fresh and tasty. Feel free to experiment and make these recipes your own. Enjoy baking and sharing your delicious treats!

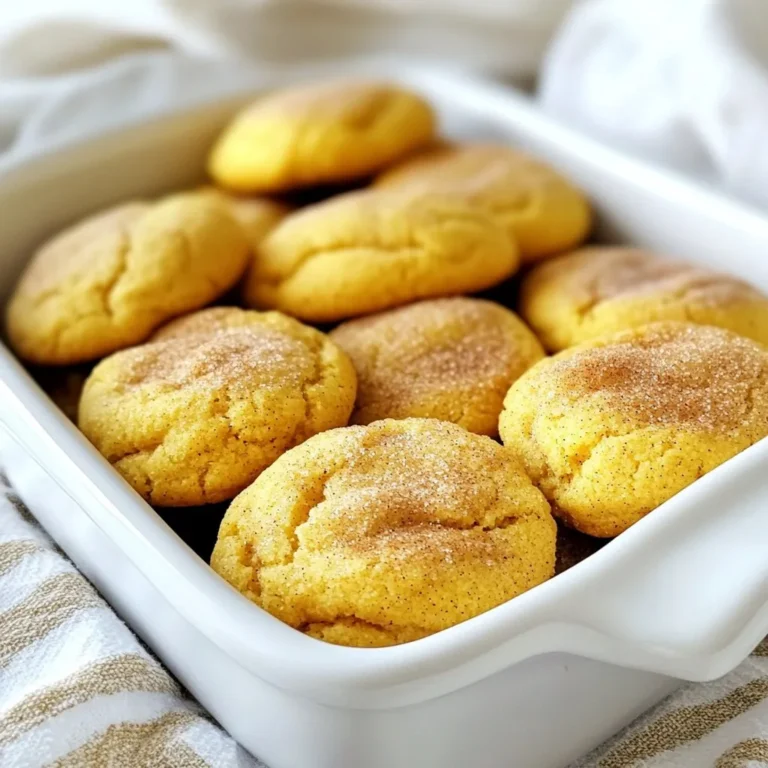
Pumpkin Spiced Snickerdoodles Delightful Seasonal Treat

- 4 boneless, skinless chicken breasts - 1 cup crushed pretzels - 1/2 cup breadcrumbs - 2 tablespoons olive oil - 1/4 cup honey - 1/4 cup Dijon mustard - 1 teaspoon garlic powder - 1 teaspoon onion powder - Salt and pepper to taste You need these simple items to make honey mustard pretzel chicken. The chicken is the star of the dish. The crushed pretzels give a nice crunch. Breadcrumbs help make the chicken crispy. The honey and Dijon mustard add sweet and tangy flavor. Garlic powder and onion powder bring out the best taste. Don't forget salt and pepper to season! - Fresh parsley for garnish If you want to add color and flavor, fresh parsley is a great choice. It makes the dish look pretty and brightens up the plate. - Baking sheet - Parchment paper - Medium-sized mixing bowl You will need a baking sheet to bake the chicken. Parchment paper keeps it from sticking. A medium-sized mixing bowl is perfect for making the marinade. These tools help make the cooking process easy and fun! {{ingredient_image_2}} First, set your oven to 400°F (200°C). This heat will help the chicken cook evenly. Next, grab a baking sheet. Line it with parchment paper. This step keeps the chicken from sticking and makes clean-up easy. In a medium bowl, add 1/4 cup honey and 1/4 cup Dijon mustard. Whisk them together until smooth. Then, mix in 1 teaspoon garlic powder and 1 teaspoon onion powder. Don't forget to add a pinch of salt and pepper. This marinade gives the chicken a tasty kick. Grab 4 boneless, skinless chicken breasts. Place them in a shallow dish or a resealable bag. Pour the marinade over them. Make sure each piece is well coated. Let it marinate for 15-20 minutes. This time allows the chicken to soak up the flavors. While the chicken marinates, combine 1 cup crushed pretzels and 1/2 cup breadcrumbs in another bowl. This crispy mix will give the chicken a crunchy crust. After marinating, take each chicken breast out of the marinade. Let any extra marinade drip off. Dip each breast into the pretzel-breadcrumb mix. Press down to ensure the coating sticks well. Lay the coated chicken breasts on the prepared baking sheet. Drizzle 2 tablespoons of olive oil over the top of each piece. This oil helps the coating turn golden brown. Now, place the baking sheet in the oven. Bake for 20-25 minutes. Make sure the chicken reaches an internal temperature of 165°F (75°C). The coating should be golden and crispy. When done, take the chicken out of the oven. Let it rest for a few minutes. This step keeps the chicken juicy. If you like, sprinkle fresh parsley on top for a nice touch. Enjoy your honey mustard pretzel chicken! To get a crispy crust on your chicken, use crushed pretzels and breadcrumbs. Mix them well for a crunchy texture. Press the chicken into the mixture firmly to help it stick. Drizzle olive oil on top before baking. This adds flavor and helps the crust get golden brown. Marinating is key for tasty chicken. Mix honey, Dijon mustard, garlic powder, and onion powder in a bowl. Add salt and pepper for extra flavor. Coat each chicken breast evenly and let them sit in the marinade for 15-20 minutes. This step boosts flavor and makes the meat tender. To ensure your chicken is done, use a meat thermometer. The internal temperature should reach 165°F (75°C). If you don’t have a thermometer, cut into the thickest part. The juices should run clear, not pink. Let the chicken rest after baking for juicy meat. Pro Tips Marinate Longer for More Flavor: If time allows, marinate the chicken for up to 2 hours or even overnight. This will deepen the flavors and enhance the tenderness of the meat. Use Fresh Pretzels: For an extra crunchy coating, consider using freshly baked pretzels and crush them yourself. This will provide a more robust pretzel flavor and texture. Check Doneness with a Thermometer: Always use a meat thermometer to ensure your chicken has reached an internal temperature of 165°F (75°C) for safe consumption and optimal juiciness. Serve with Dipping Sauce: Enhance the dish by serving it with a side of honey mustard dipping sauce. It complements the flavors and adds an extra layer of enjoyment to your meal. {{image_4}} Oven-baked honey mustard pretzel chicken is simple and healthy. You preheat the oven to 400°F (200°C). The chicken gets a crunchy pretzel coating that keeps it juicy inside. This method is great for a classic taste. The flavors mix well, and the baking gives a lovely finish. Air-frying is a quick and smart way to cook this dish. It gives you a crispy outside with less oil. Set your air fryer to 375°F (190°C). Cook the chicken for about 15-20 minutes. Flip halfway through for even cooking. This method makes it easy and fun, with less clean-up too! You can switch up the coatings for new tastes. Try using crushed cornflakes or panko breadcrumbs for a crunchier bite. For added flavor, mix in spices like paprika or cayenne pepper. You can even add grated cheese to the pretzel mix for a cheesy twist. Explore and enjoy your unique versions! After enjoying your honey mustard pretzel chicken, let it cool down. Place leftovers in an airtight container. This keeps the chicken fresh and tasty. Store it in the fridge for up to three days. Always check for any off smells or changes in texture before eating. To reheat the chicken, preheat your oven to 350°F (175°C). Place the chicken on a baking sheet. Cover it with foil to keep it moist. Heat for about 15-20 minutes. You can also use a microwave, but it may not keep the crunch. Heat in 30-second intervals until warmed through. You can freeze leftover chicken for later. Wrap each piece tightly in plastic wrap or foil. Place the wrapped chicken in a freezer bag. Make sure to remove as much air as possible. It can stay frozen for up to three months. When ready to eat, thaw it in the fridge overnight before reheating. You should marinate the chicken for 15-20 minutes. This time allows the flavors to soak in well. The chicken becomes more tender and tasty with this step. If you have extra time, you can marinate it longer. Just be careful not to overdo it, as it may get too salty. Yes, you can use regular mustard instead of Dijon. However, it will change the flavor a bit. Dijon has a unique taste that adds depth. If you want a milder flavor, regular mustard is a good choice. Feel free to experiment and find what you like best. Many side dishes go well with honey mustard pretzel chicken. Here are a few ideas: - Roasted vegetables: Carrots, broccoli, or Brussels sprouts make a great choice. - Mashed potatoes: Creamy mashed potatoes complement the crunchy chicken. - Salads: A light salad with mixed greens adds freshness. - Rice: Serve with white or brown rice for a filling meal. These options will create a balanced and delicious dinner. In this article, we explored the key ingredients and steps for making honey mustard pretzel chicken. We discussed essential tips to achieve a crispy crust and the best ways to store leftovers. You can enjoy variations like air-fried chicken or try different coatings. Remember, marinating adds flavor and checking doneness ensures safe eating. With these easy steps, you can create a tasty dish that delights the whole family. Happy cooking!

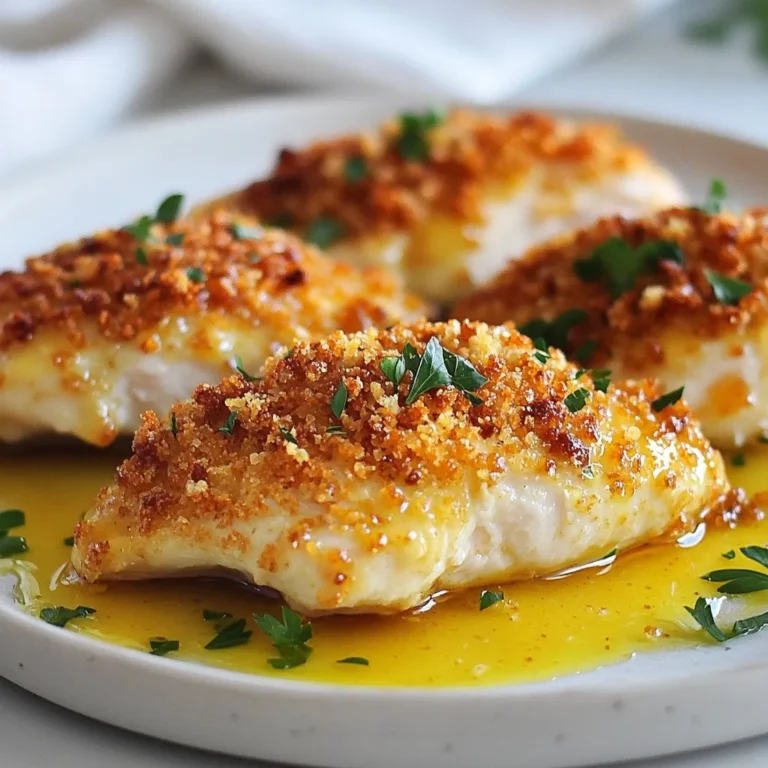
Honey Mustard Pretzel Chicken Savory and Simple Meal

- 1 cup unsalted butter, softened to room temperature - 1 cup packed brown sugar (light or dark) - 1/2 cup granulated sugar - 1 teaspoon pure vanilla extract - 2 large eggs - 2 1/4 cups all-purpose flour - 1 teaspoon baking soda - 1/2 teaspoon fine sea salt - 1 cup chocolate chips (semi-sweet or dark) - 1/2 cup caramel sauce (homemade or store-bought) - Flaky sea salt, for sprinkling - Use a standard cup for measuring ingredients. - For brown sugar, pack it firmly into the cup for accurate amounts. - Ensure butter is at room temperature for easy mixing. - Measure flour by spooning it into the cup and leveling with a knife. - Use a scale for precise weight if needed, especially for flour. - Choose unsalted butter for better control over salt content. - Select high-quality brown sugar for a richer flavor. - Use pure vanilla extract instead of imitation for the best taste. - For chocolate chips, opt for premium brands for a more intense flavor. - If using store-bought caramel, look for natural ingredients without additives. These careful choices elevate the taste and texture of your cookies. Happy baking! {{ingredient_image_2}} Start by preheating your oven to 350°F (175°C). This temperature helps the cookies bake evenly. While the oven heats, prepare two large baking sheets. Line them with parchment paper. This step prevents the cookies from sticking. In a big mixing bowl, add 1 cup of softened unsalted butter, 1 cup of brown sugar, and 1/2 cup of granulated sugar. Use an electric mixer to cream them together. Mix until the mixture is light and fluffy, for about 2-3 minutes. Next, add 1 teaspoon of pure vanilla extract. Then, add 2 large eggs, one at a time. Make sure to mix well after each egg. Take another bowl and combine 2 1/4 cups of all-purpose flour, 1 teaspoon of baking soda, and 1/2 teaspoon of fine sea salt. Use a whisk to mix these dry ingredients well. Gradually add this flour mixture to the wet ingredients. Stir until just combined to keep your cookies soft. Avoid overmixing. Now gently fold in 1 cup of chocolate chips and 1/2 cup of caramel sauce. Make sure the chips and caramel are evenly distributed. Scoop generous tablespoons of dough onto your lined baking sheets. Leave about 2 inches between each scoop. This space helps the cookies spread. Bake the cookies for 10-12 minutes. Look for lightly golden edges. The centers may look a bit underbaked, but they will set as they cool. Once you take them out of the oven, drizzle extra caramel sauce on each warm cookie. Sprinkle a pinch of flaky sea salt on top. This adds contrast to the sweet cookie. Let the cookies cool on the baking sheets for about 5 minutes. Then, move them to wire racks to cool completely. This step gives them the perfect texture. To get the best texture, use room-temperature butter. This helps create a light and fluffy mix. Mix the butter and sugars for about two to three minutes. You want it to look creamy and smooth. Don't skip the resting time after baking. Letting cookies cool on the sheet helps them firm up. They will stay soft inside while being golden on the outside. Start by creaming the butter and sugars well. This step makes your cookies airy. Add the eggs one at a time, mixing well after each. This keeps the batter smooth and even. When adding dry ingredients, mix gently. Overmixing can make your cookies tough. Use a spatula to fold in chocolate chips and caramel sauce. This keeps the mix light and fluffy. If you use store-bought caramel, choose a high-quality brand. Check for smoothness and flavor. For homemade caramel, cook sugar slowly to avoid burning. Stir constantly until it turns golden brown. Allow the caramel to cool slightly before adding it to the dough. This prevents it from melting the butter. Drizzle some extra caramel on warm cookies for a delicious finish. Sprinkle flaky sea salt on top to enhance the flavor. Pro Tips Use Chilled Dough: Chilling your cookie dough for at least 30 minutes before baking can help prevent the cookies from spreading too much and result in a thicker, chewier texture. Experiment with Chocolates: Mixing different types of chocolate chips, such as semi-sweet and dark chocolate, can create a more complex flavor profile in your cookies. Perfect Caramel Distribution: For even caramel distribution, consider drizzling some caramel sauce into the dough before folding in the chocolate chips, ensuring every bite is rich and gooey. Storing Cookies: To keep your cookies fresh, store them in an airtight container at room temperature. You can also freeze the cookie dough for later use; just thaw before baking! {{image_4}} You can switch up the chocolate chips in this cookie recipe. Try using white chocolate chips for a sweet twist. Milk chocolate chips bring a creamy flavor. Dark chocolate adds a rich touch. You can even mix different types for more fun. Just remember to keep the chocolate flavor balanced with the caramel. Caramel sauce can be fun to play with. You can use flavored caramel sauce, like sea salt or vanilla. This will enhance the overall taste. If you want something special, try adding a touch of coffee to your caramel. It gives a nice depth to the cookies. You can also make your own caramel sauce for freshness! For those with allergies, there are swaps you can make. Use dairy-free butter and chocolate chips for a vegan option. You can also try gluten-free flour to make these cookies safe for gluten sensitivities. Always check labels for any hidden allergens. These swaps keep everyone included in the cookie joy! To keep your salted caramel chocolate chip cookies fresh, store them in an airtight container. Place parchment paper between layers to prevent sticking. This simple step keeps them soft and chewy. A cool, dark place works best, like a pantry or cupboard. You can freeze these cookies if you want to save some for later. First, let the cookies cool completely. Then, place them in a single layer on a baking sheet and freeze for about an hour. Once frozen, transfer them to a freezer bag. Try to remove as much air as you can to prevent freezer burn. They will stay fresh for up to three months. If stored properly, these cookies can last about one week at room temperature. After that, they may lose their soft texture. If you freeze them, they will taste just as good after a few months. Always check for any signs of spoilage before enjoying them. Yes, you can use homemade caramel sauce. Making it at home adds a special touch. To make it, melt sugar on low heat until it turns golden. Then, slowly mix in butter and cream. Stir until smooth. Homemade caramel is rich and flavorful, perfect for these cookies. Just make sure it cools before adding it to the dough. I recommend semi-sweet or dark chocolate chips. They balance well with the sweet caramel. Semi-sweet gives a classic taste, while dark chocolate adds depth. You can also mix both types for fun flavors. Choose high-quality chocolate for the best results. Good chocolate really makes a difference in taste. To prevent cookies from spreading, chill the dough before baking. After mixing, cover the bowl and refrigerate for at least 30 minutes. This helps the butter firm up. Also, don’t overmix the dough. Overmixing can make cookies spread more. Lastly, use a cookie scoop to keep sizes even. This helps them bake uniformly. This post covered how to make cookies from scratch. We looked at the right ingredients, steps to mix and bake, and how to store your treats. I shared tips for the perfect texture and discussed variations for everyone’s taste. Remember, using fresh ingredients makes a difference. You can enjoy cookies made with care and creativity. Try different flavors and enjoy your baking journey. Share your results with friends and family for even more fun!

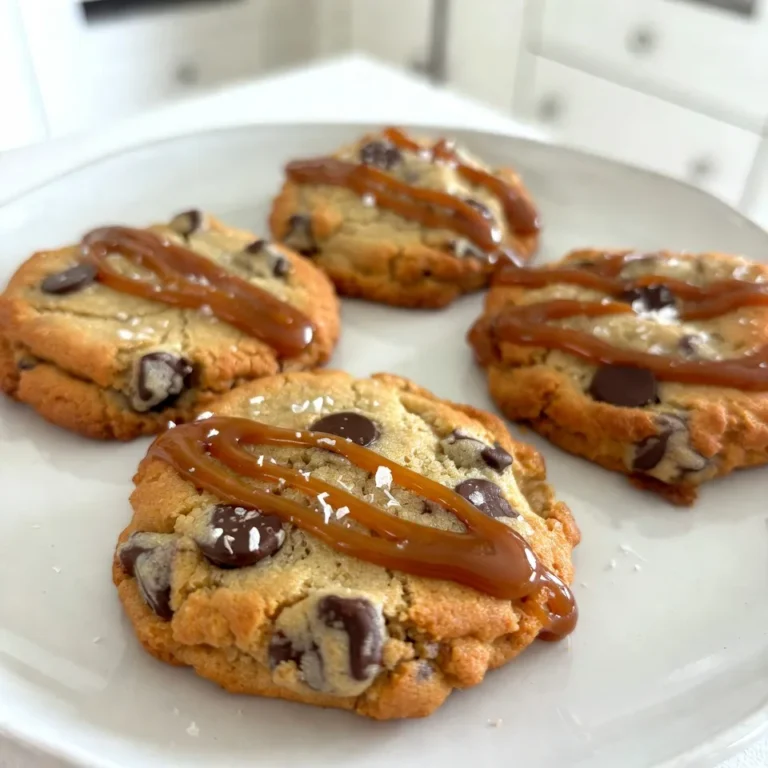
Salted Caramel Chocolate Chip Cookies Delightful Treat

- 1 cup fresh strawberries, hulled and diced into small pieces - 1 cup ripe mango, peeled and diced evenly - 1 small red onion, finely chopped - 1 jalapeño pepper, deseeded and minced - 1/4 cup fresh cilantro, roughly chopped - Juice of 1 lime, freshly squeezed - Salt and pepper to taste You can swap fresh strawberries for blueberries. They add a nice twist. If you want less heat, use sweet bell pepper instead of jalapeño. You can also use green onions instead of red onion for a milder flavor. If you don’t have fresh cilantro, try parsley. It gives a fresh taste, too. For lime juice, lemon juice works well in a pinch. Strawberries are rich in vitamin C and antioxidants. They help boost your immune system. Mangoes provide vitamin A and fiber, aiding digestion. Red onion has anti-inflammatory properties and supports heart health. Jalapeños contain capsaicin, which may boost metabolism. Cilantro is high in vitamins and may help detoxify heavy metals. Lime juice adds flavor and helps with hydration. Overall, this salsa is not just tasty but also packs a healthy punch! {{ingredient_image_2}} First, gather all your fresh ingredients. You need: - 1 cup fresh strawberries, hulled and diced - 1 cup ripe mango, peeled and diced - 1 small red onion, finely chopped - 1 jalapeño pepper, deseeded and minced - 1/4 cup fresh cilantro, roughly chopped - Juice of 1 lime, freshly squeezed - Salt and pepper to taste Start by hulling the strawberries. Cut them into small pieces. Next, peel the mango and dice it evenly. Place both fruits in a medium bowl. Then, finely chop the red onion and add it to the bowl. This onion will balance the sweetness of the fruit. For some heat, mince the jalapeño and add it too. If you want less heat, use less jalapeño. Finally, chop the cilantro and add that for freshness. Once you have all your fresh ingredients ready, it’s time to mix. Squeeze the juice of one lime over the fruit and onion mixture. The lime juice will brighten the flavors. Now, gently fold the ingredients together. Use a spatula or a large spoon. Be careful to keep the fruit intact. You want nice pieces in your salsa. Now it’s time to season your salsa. Sprinkle salt and pepper over the mix. Start with a pinch of each. Then, give it a gentle stir to combine. Taste it and adjust as needed. If you want more flavor, add a bit more salt or lime juice. Let the salsa sit for about 10 minutes. This will help the flavors blend and develop. Enjoy your fresh and tasty strawberry mango salsa! To boost the flavors in your salsa, try adding a pinch of cumin. This spice adds warmth and depth. You can also mix in some chopped pineapple for extra sweetness. If you want a bit more heat, add more jalapeño. Always taste as you go. This helps you find the right balance of sweetness and spice. I love serving this salsa with crunchy tortilla chips. The contrast in textures makes it fun to eat. You can also use it as a topping for grilled chicken or fish. The bright flavors enhance the meal perfectly. Try it with tacos or quesadillas for a tasty twist. To make your salsa look great, serve it in a colorful bowl. A sprig of cilantro on top adds a nice touch. You can also use lime wedges on the side. This adds color and gives guests a chance to add more lime if they wish. The vibrant colors of strawberries and mangoes will catch everyone’s eye! Pro Tips Fresh Ingredients Matter: Always use ripe, in-season fruits for the best flavor in your salsa. Adjust the Heat: Start with a small amount of jalapeño and gradually add more until you reach your desired spice level. Let It Rest: Allow the salsa to sit for at least 10 minutes before serving to enhance the flavor melding. Perfect Pairings: This salsa is not just for chips; try it on tacos, grilled meats, or as a salad topping for a fresh twist. {{image_4}} If you love heat, try adding more jalapeño. Use one whole pepper for a bold kick. You can also blend in some diced serrano peppers for extra spice. Mix in red pepper flakes to give it depth. This spicy version will surely liven up your meal. For a tropical touch, add diced pineapple or kiwi. These fruits bring a sweet and tangy taste. You can also use papaya for a unique twist. This blend gives your salsa a fresh vibe. It’s perfect for summer barbecues or beach parties. Try mixing in fresh mint or basil for new flavors. These herbs add a refreshing note that brightens the salsa. You can also use a dash of cumin for a warm, earthy taste. Experiment with your favorite spices to create your own version. This can make your salsa stand out at any gathering. To keep your strawberry mango salsa fresh, use an airtight container. Glass or plastic works well. Always store it in the fridge, away from strong odors. This way, the flavors stay bright and tasty. When stored properly, your salsa lasts about 2 to 3 days in the fridge. After that, the fruit may become mushy and lose flavor. Always check for any signs of spoilage before eating. You can freeze strawberry mango salsa, but the texture may change. To freeze, place the salsa in a freezer-safe bag. Remove as much air as possible before sealing. It can last up to 3 months in the freezer. Thaw it in the fridge before serving. Use it in smoothies or as a topping for grilled meats. Yes, you can make Strawberry Mango Salsa ahead of time. I recommend preparing it within 24 hours before serving. This gives the flavors time to mix. However, if you wait too long, the fruits might get mushy. To keep it fresh, store it in an airtight container in the fridge. You have many tasty options! Serve this salsa with crunchy tortilla chips for a fun snack. It also pairs well with grilled chicken or fish. You could use it as a topping for tacos or burritos, too. The bright flavors enhance any meal! Adjusting spice is easy! Start with a small jalapeño pepper, as its heat varies. If you want more heat, add more minced jalapeño. If you prefer less spice, you can leave it out completely. Taste as you go to get it just right for you. Yes, this salsa is quite healthy! It uses fresh fruits and veggies, which provide vitamins and minerals. Strawberries and mangoes are rich in antioxidants. Plus, cilantro adds more nutrients. This dip is low in calories and great for snacking or topping meals. Enjoy guilt-free! In this article, I shared how to make Strawberry Mango Salsa. We covered the ingredients, step-by-step instructions, and key tips. You learned about healthy substitutions and how to store your salsa for later use. Remember, exploring flavors and variations can make your salsa unique. Enjoy your cooking journey and share your delicious salsa with friends and family!

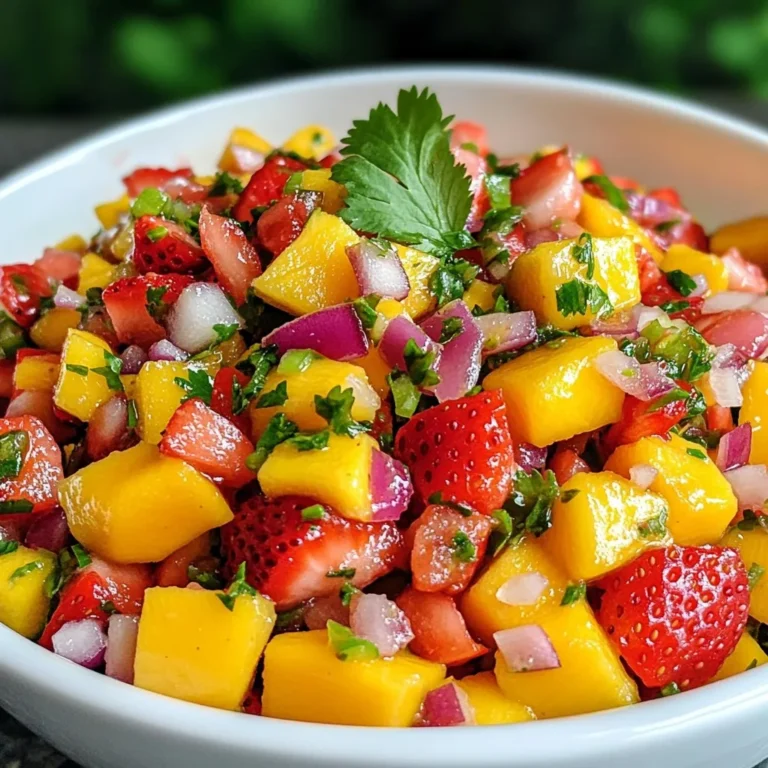
Savory Strawberry Mango Salsa Fresh and Flavorful Dip

To make a warm bowl of creamy chicken gnocchi soup, gather these key items: - 1 tablespoon olive oil - 1 pound boneless, skinless chicken breasts, diced - 1 medium onion, finely chopped - 3 cloves garlic, minced - 3 medium carrots, diced - 3 celery stalks, diced - 4 cups chicken broth - 1 teaspoon dried thyme - 1 teaspoon dried oregano - Salt and freshly ground black pepper - 1 package (16 oz) potato gnocchi - 1 cup heavy cream - 2 cups fresh spinach, chopped - 1/4 cup freshly grated Parmesan cheese For this soup, I prefer using olive oil. It adds a nice flavor and helps cook the chicken. You can use other oils if you like, but olive oil always works best. For an extra touch, consider adding: - Fresh parsley, chopped This adds color and a fresh taste to your soup. You can also skip this step if you want a simpler look. {{ingredient_image_2}} Start by heating 1 tablespoon of olive oil in a large pot over medium heat. Once the oil is hot, add 1 pound of diced chicken breasts. Season the chicken well with salt and freshly ground black pepper. Cook the chicken for about 5 to 7 minutes. You want it to turn golden brown and be cooked through. When done, take the chicken out of the pot and place it in a bowl. This step builds a great base for your soup. In the same pot, without cleaning it, add 1 medium chopped onion, 3 diced medium carrots, and 3 diced celery stalks. Sauté these veggies for 5 to 6 minutes. You want them to soften and smell great. After this, add 3 minced garlic cloves. Keep sautéing for an extra minute. This will make the garlic fragrant and delicious. Now, pour in 4 cups of chicken broth. Add 1 teaspoon of dried thyme and 1 teaspoon of dried oregano. Turn up the heat to bring it to a gentle simmer. This helps the flavors blend well. Carefully add a package of potato gnocchi to the simmering broth. Cook according to the package instructions, which is usually about 3 to 4 minutes. You'll know they are ready when they float to the top. Next, reduce the heat to low. Stir in 1 cup of heavy cream and the cooked chicken. Let everything warm for about 5 minutes, stirring occasionally. Then, add 2 cups of chopped fresh spinach. Stir until the spinach wilts, which takes about 2 minutes. Finally, mix in 1/4 cup of grated Parmesan cheese. This will melt into the soup, making it creamy and rich. Taste your soup and adjust the seasoning with more salt and pepper if needed. Serve your soup hot. If you like, garnish each bowl with chopped fresh parsley for a lovely touch. Enjoy your creamy chicken gnocchi soup! To make the soup creamy, use heavy cream. This gives it a rich finish. Stir it in slowly to blend well. If you want a lighter soup, swap half the cream with milk. Remember, the gnocchi will soak up some liquid. So, don’t make it too thick at first. You can always add more broth later. Fresh herbs can boost flavor. I love using thyme and oregano for warmth. Add them early in the cooking process. This lets their flavors infuse the broth. If you want a pop of freshness, sprinkle some parsley just before serving. It adds a nice touch to the look and taste. Avoid overcooking the gnocchi. They should float in the soup, which means they are done. If you cook them too long, they can become mushy. Also, don’t rush adding the spinach. Let it wilt gently in the soup to keep its bright color and crunch. Lastly, taste as you cook. Adjusting the seasoning early can save your soup from being bland. Pro Tips Use Homemade Broth: If possible, use homemade chicken broth for a richer flavor and better quality soup. Customize the Vegetables: Feel free to add or substitute other vegetables like peas or mushrooms for extra nutrition and flavor. Adjust Creaminess: For a lighter version, you can substitute half of the heavy cream with milk or use a plant-based cream alternative. Store Properly: To keep the gnocchi from becoming mushy, store the soup and gnocchi separately if you plan to have leftovers. {{image_4}} You can change the chicken to suit your taste. Try turkey, which works well too. If you prefer seafood, shrimp adds a nice twist. Just cook shrimp until pink and tender. You can also use tofu for a plant-based protein. Dice it, then sauté until golden. This keeps the soup rich and satisfying. For a vegan version, skip the chicken and cream. Use vegetable broth instead of chicken broth. Replace heavy cream with coconut cream or cashew cream. These options add a creamy texture. Use beans or lentils for protein. They make the soup hearty and filling. Add more veggies like mushrooms or zucchini for extra flavor. Incorporating seasonal vegetables can enhance your soup. Try adding sweet potatoes in fall. They add sweetness and color. In spring, use peas and asparagus for a fresh taste. Summer brings zucchini and corn, making the soup light. In winter, root vegetables like parsnips work great. These additions keep the dish exciting and flavorful. To store leftovers, wait until the soup cools. Then, pour it into an airtight container. Make sure to seal it well. Place the container in the fridge. It can last for 3 to 4 days. If you want to keep it longer, consider freezing it. When you're ready to enjoy the soup again, reheat it gently. You can use a pot on the stove. Pour the soup in and heat over medium-low heat. Stir often to prevent sticking. You can also use a microwave. Transfer the soup to a microwave-safe bowl. Heat it in short bursts, stirring in between. To freeze the soup, use a freezer-safe container. Leave some space at the top for expansion. The soup can last up to 3 months in the freezer. When you’re ready to eat, defrost it in the fridge overnight. Reheat it on the stove or in the microwave. This soup will taste great even after freezing! Yes, you can use frozen gnocchi in this soup. Just add them directly to the broth without thawing. They will cook in about the same time as fresh gnocchi. This saves time and makes the soup even easier. You can make a gluten-free version of this soup. Use gluten-free gnocchi made from rice or potato. Make sure the chicken broth is also gluten-free. This way, you can enjoy this dish without gluten. The soup lasts for about three to four days in the fridge. Store it in an airtight container to keep it fresh. Just remember, the gnocchi may soak up some broth as it sits. Yes, you can make this soup ahead of time. Just prepare it and store it in the fridge. Reheat it when you are ready to serve. This dish tastes even better the next day! You can add other vegetables to this soup. For example, peas, corn, or green beans work well. Just make sure to add them at the right time so they cook fully. This soup pairs well with crusty bread or a fresh salad. The bread is great for dipping, and the salad adds a nice crunch. Both make for a complete meal. Yes, you can add more protein if you like. Cooked shrimp or diced ham are good options. Just add them in while the soup is warming on low heat. In this blog post, we explored essential ingredients, step-by-step cooking, and tips for success. You learned how to prepare chicken, sauté veggies, and create a tasty soup with gnocchi. We covered easy ways to add flavor and avoid common mistakes. You also saw different options for proteins and how to store leftovers. With this knowledge, you can create a warm, delicious soup any time. Enjoy making it your own!

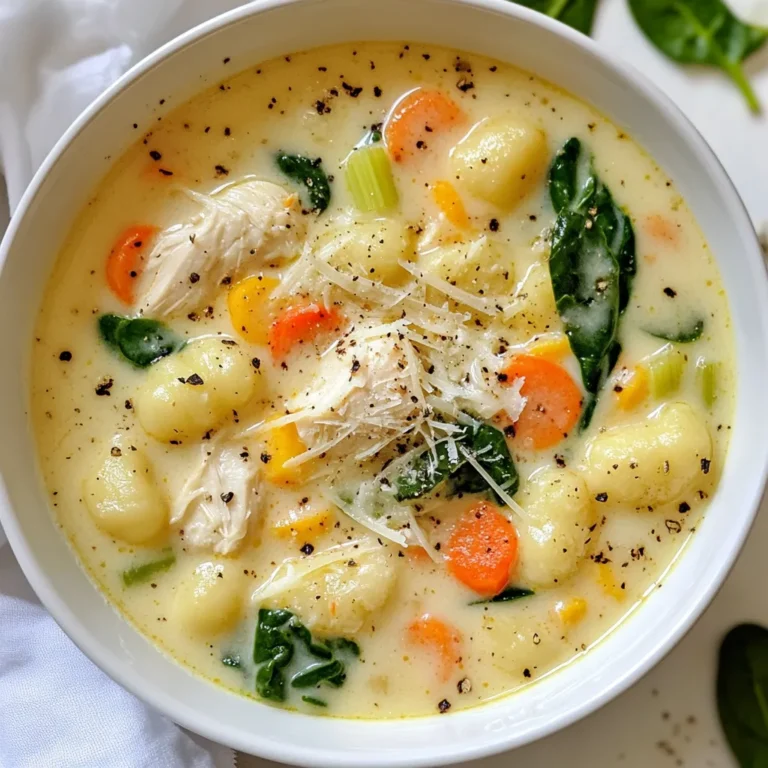
Creamy Chicken Gnocchi Soup Flavorful Comfort Dish

PREV 1 … 44 45 46 … 48 NEXT
purelyyumrecipes

explore

DessertsDinnerAppetizersDrinks

Our Policies

  • Cookie Policy
  • Copyright Policy
  • Disclaimer
  • GDPR Policy
  • Terms Of Use
Back to Top
  • About
  • Contact Us
  • Privacy Policy
© 2026 purelyyumrecipes