FREE DINNER EBOOK! Get your copy!
  • Cookie Policy
  • GDPR Policy
  • Disclaimer
  • Terms Of Use
  • Visit my other site: Fun Cookie Recipes
purelyyumrecipes
  • Home
  • Dinner
  • Desserts
  • Drinks
  • Appetizers
  • Contact
  • About
  • Privacy Policy
  • Home
  • Dinner
  • Desserts
  • Drinks
  • Appetizers
  • Contact
  • About
  • Privacy Policy
  • Cookie Policy
  • GDPR Policy
  • Disclaimer
  • Terms Of Use
Visit my other site: Fun Cookie Recipes

HOME / CATEGORIES /

Latest

To make Honey Garlic Glazed Carrots, you need a few simple ingredients. These will create a dish that is both sweet and savory. Here’s what you’ll need: - 500g baby carrots, trimmed and peeled - 3 tablespoons honey - 2 tablespoons unsalted butter - 3 cloves garlic, minced - 1 tablespoon soy sauce (or tamari for a gluten-free option) - 1 teaspoon fresh ginger, finely grated - Salt and pepper to taste - Fresh parsley, finely chopped for garnish Each ingredient plays a key role in flavor and texture. The baby carrots give a sweet base. Honey adds natural sweetness. Unsalted butter brings richness. Garlic and ginger provide a warm, aromatic touch. Soy sauce adds depth and umami. Salt and pepper enhance the overall taste. Fresh parsley adds a burst of color and freshness to the dish. With these ingredients, you're set to create a delightful side dish that pairs well with many meals. {{ingredient_image_2}} First, bring a medium pot of water to a gentle boil. Once it starts bubbling, add 500g of baby carrots. Cook them for about 5 minutes. You want them tender but still crunchy. After cooking, drain the carrots and set them aside to cool a bit. Next, grab a large skillet and melt 2 tablespoons of unsalted butter over medium heat. Watch it bubble, then add 3 cloves of minced garlic and 1 teaspoon of finely grated ginger. Sauté this mix for about 1 minute. Stir often to keep the garlic from burning. When it smells great, stir in 3 tablespoons of honey and 1 tablespoon of soy sauce. Make sure everything blends well. Now, gently toss the boiled carrots into the skillet. Coat them in the honey-garlic glaze without breaking them. Season with salt and pepper to taste. Cook for an extra 3-4 minutes. This step lets the glaze thicken and caramelize on the carrots. Once ready, remove the skillet from heat. Serve the carrots in a dish, and garnish with finely chopped parsley for a fresh touch. To get the right crunch in your carrots, cook them for about 5 minutes. They should be tender but not mushy. This short boil helps keep their natural sweetness. After boiling, drain the carrots and let them cool a bit. This step ensures they soak up the glaze without turning too soft. Burnt garlic can ruin your dish. To avoid this, sauté the minced garlic and ginger for only 1 minute. Watch them closely as they cook. If they start to brown too much, take them off the heat. The key is to let the garlic become fragrant without burning it. Fresh herbs can really boost the taste of your carrots. Consider adding thyme or rosemary for added depth. You can also play with spices like cumin or smoked paprika. These flavors blend well with the sweet glaze. If you find the glaze too sweet, add a pinch of salt. This balances the flavors nicely. Taste as you go, and adjust the sweetness or saltiness to your liking. Cooking should be a fun experiment! The way you plate your carrots can make them shine at any meal. For a stunning look, arrange the glazed carrots in a circular pattern on a clean, white plate. This makes the bright orange pop against the plate. Drizzle any leftover glaze over the carrots for extra shine. Finish by sprinkling fresh parsley on top. This adds a splash of green and brightens the dish. Your guests will love the care you put into both flavor and presentation! Pro Tips Choose Fresh Carrots: Select firm, vibrant baby carrots for the best flavor and texture. Fresh carrots will ensure your dish is both visually appealing and delicious. Control the Heat: When sautéing garlic and ginger, keep the heat at medium to prevent burning. Burnt garlic can impart a bitter taste to your dish. Thicken the Glaze: If you prefer a thicker glaze, allow the honey-garlic mixture to simmer a bit longer before adding the carrots. This will create a richer coating. Garnish Wisely: Fresh herbs like parsley not only add color but also enhance the overall flavor. Consider using chives or dill for an alternative twist. {{image_4}} You can easily make these carrots gluten-free. Simply replace soy sauce with tamari. Tamari has a similar taste but does not contain wheat. This swap keeps the dish just as flavorful. Feel free to mix in other root vegetables. Some great choices are parsnips, turnips, or sweet potatoes. These will add more texture and flavor. You can also choose colorful blends. Try rainbow carrots for a vibrant dish. They are not only tasty but also look stunning on the plate. Want to change the taste? Infuse the glaze with citrus. Add lemon or orange juice for a fresh twist. If you like heat, try adding chili flakes. This can bring a spicy kick to your sweet carrots. Experimenting with these flavors can make the dish new and exciting every time. To store your honey garlic glazed carrots, wait until they cool down. Place them in an airtight container. This keeps them fresh and tasty. You can store them in the fridge. They will stay good for about three to five days. Make sure to check for any signs of spoilage before using. If you want to save some for later, freezing is a great option. First, let the glazed carrots cool completely. Then, transfer them to a freezer-safe bag or container. Remove as much air as possible to prevent freezer burn. They can last up to three months in the freezer. When you're ready to eat them, take the carrots out of the freezer. Let them thaw in the fridge overnight. You can also use the microwave for a quicker option. Reheat them gently in a pan over low heat. This helps to maintain their flavor and texture. Enjoy your delicious side dish any time! Yes, you can use regular carrots. Just peel and cut them into similar sizes. This helps them cook evenly. Aim for pieces about 1 to 2 inches long. This way, they absorb the honey garlic glaze well. To serve more people, simply scale the ingredients. If you want to double the recipe, use 1,000g of carrots and adjust the honey, butter, and seasonings too. Keep the same ratios for the glaze to ensure flavor stays strong. These carrots pair well with many dishes. Try serving them with roasted chicken or grilled fish. They also work well with rice or quinoa. For a full meal, add a fresh salad to balance the sweet and savory flavors. In this blog post, you learned how to make honey garlic glazed carrots. We discussed key ingredients, including baby carrots, honey, and soy sauce. You followed step-by-step instructions for boiling, glazing, and enhancing flavors. We also shared tips for texture and presentation. Remember, you can adjust this recipe or store leftovers safely. These glazed carrots can add a tasty twist to any meal. Enjoy experimenting with different flavors and serving ideas. Your cooking will impress everyone at the table. Happy cooking!

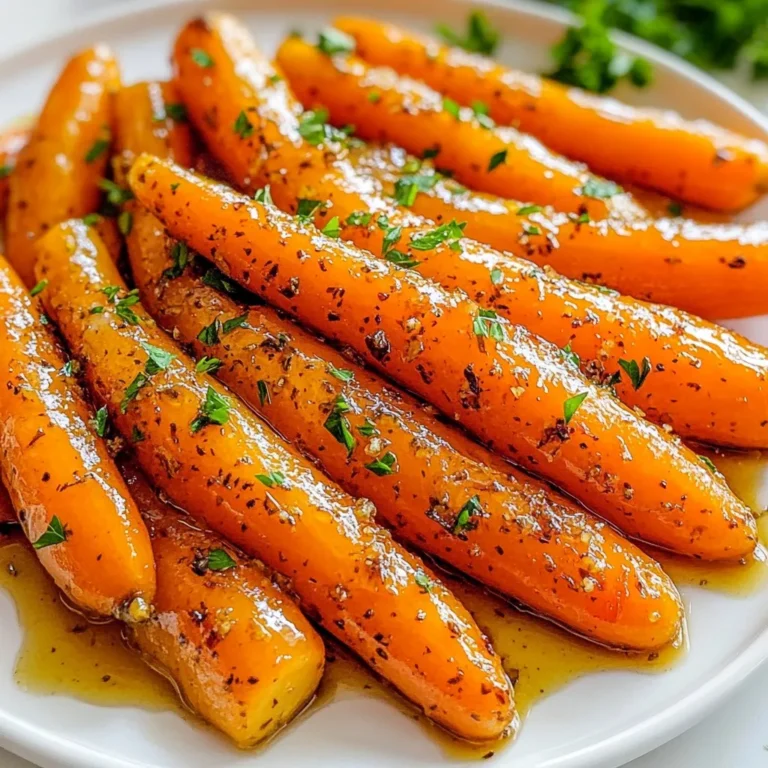
Honey Garlic Glazed Carrots Sweet and Savory Side

- 4 bone-in, skin-on chicken thighs - ¼ cup pure maple syrup - 2 tablespoons Dijon mustard - 1 tablespoon soy sauce (or tamari for gluten-free) - 2 cloves garlic, minced - 1 teaspoon fresh thyme leaves - Salt and freshly cracked pepper to taste - 1 tablespoon olive oil - Fresh parsley, chopped, for garnish - Oven-safe skillet - Mixing bowl - Whisk - Paper towels The main ingredients for Maple Dijon Chicken Thighs are simple yet flavorful. The chicken thighs are the star of this dish. Bone-in and skin-on make them juicy and delicious. The skin provides a crispy texture. Maple syrup adds a sweet touch. Dijon mustard gives it a nice tang. Soy sauce or tamari brings in a salty depth. Garlic adds warmth, while fresh thyme gives a hint of earthiness. For seasoning, you just need salt and pepper. They help enhance the dish’s natural flavors. Olive oil is important for searing the chicken. It prevents sticking and adds flavor. Fresh parsley is a lovely garnish. It brightens the plate and adds color. You will need an oven-safe skillet to start on the stove and finish in the oven. A mixing bowl is for combining your marinade. A whisk helps blend the ingredients smoothly. Paper towels are crucial to dry the chicken. Drying helps achieve that crispy skin we all love. {{ingredient_image_2}} Set your oven temperature to 400°F (200°C). This helps the chicken cook evenly. In a mixing bowl, combine the following ingredients: - ¼ cup pure maple syrup - 2 tablespoons Dijon mustard - 1 tablespoon soy sauce (or tamari) - 2 cloves garlic, minced - 1 teaspoon fresh thyme leaves Whisk the mix until it is smooth and blended. This marinade adds great flavor. Take the chicken thighs and pat them dry with paper towels. This step helps the skin get crispy. Then, season both sides with salt and pepper. In a large, oven-safe skillet, heat 1 tablespoon of olive oil over medium-high heat. When the oil shimmers, add the chicken thighs skin-side down. Sear for 5-7 minutes until the skin is golden brown and crispy. After searing, flip the thighs so the skin side is facing up. Pour the maple Dijon marinade over the chicken. Make sure each piece is well coated. Carefully transfer the skillet to your preheated oven. Roast the chicken for 25-30 minutes. Use a meat thermometer to check that it reaches 165°F (75°C). Once cooked, take the skillet out of the oven. Let the chicken thighs rest for a few minutes. This step keeps the meat juicy. Before serving, garnish the chicken with freshly chopped parsley. It adds color and freshness to the dish. To get crispy skin on your chicken thighs, start by patting them dry. This step removes moisture and helps the skin become golden. Aim to dry both sides well. Next, sear the chicken thighs skin-side down. Cook them for 5 to 7 minutes. You want the skin to turn a lovely, deep brown. This creates a crispy layer that makes each bite delightful. For the best flavor, marinate your chicken for at least 30 minutes. If you have more time, let it sit for up to 2 hours in the fridge. This allows the flavors to soak in well. You can add a splash of apple cider vinegar for a tangy twist. Another option is to include some chopped fresh herbs like rosemary or sage. These add depth and make your dish even more special. Pair your Maple Dijon Chicken Thighs with colorful sides. Roasted seasonal vegetables work great. You can also serve it with a light salad for freshness. For a beautiful presentation, arrange the chicken on a large platter. Drizzle the pan juices over the top. A sprinkle of chopped parsley adds a vibrant touch. Your meal will look as good as it tastes! Pro Tips Pat the Chicken Dry: Ensuring your chicken thighs are dry before searing will help achieve that perfect crispy skin. Use a Meat Thermometer: To ensure your chicken is perfectly cooked, use a meat thermometer to check that the internal temperature reaches 165°F (75°C). Rest the Chicken: Allowing the chicken to rest for a few minutes after cooking helps retain its juices, making it more tender and flavorful. Customize the Sauce: Add your favorite herbs or spices to the maple Dijon sauce to personalize the flavor profile to your liking. {{image_4}} You can make this dish gluten-free easily. Just swap soy sauce for tamari. Tamari is a great choice. It tastes just like soy sauce but has no gluten. Want to jazz up your dish? Try adding fresh herbs like rosemary or sage. These herbs give the chicken a lovely aroma. You can also add some red pepper flakes for a spicy kick. Adjust the amount based on your taste. If you prefer a different protein, you can substitute chicken thighs. Try using chicken breasts or even pork chops. Both options work well with the maple Dijon sauce. Just adjust cooking times as needed. To keep your Maple Dijon Chicken Thighs fresh, store them in the fridge. Use an airtight container to prevent moisture loss. Make sure the chicken cools down before sealing it. This helps keep the flavors intact and the meat juicy. To reheat chicken thighs, use the oven. Preheat it to 350°F (175°C). Place the chicken in a baking dish and cover it with foil. Heat for about 15-20 minutes. This method helps keep the skin crispy and the meat tender. You can freeze cooked chicken thighs for later use. Allow them to cool completely before freezing. Wrap the thighs tightly in plastic wrap, then place them in a freezer bag. For best flavor, use them within three months. To thaw, place them in the fridge overnight. This gentle method keeps the meat juicy and flavorful. Cook chicken thighs for 25-30 minutes at 400°F (200°C). Use a meat thermometer. The chicken should reach 165°F (75°C) inside. This ensures it is safe to eat. If you have larger thighs, they may need a few extra minutes. Always check for doneness to avoid undercooking. Yes, you can use boneless thighs. Adjust the cooking time to 20-25 minutes. Boneless thighs cook faster than bone-in ones. Keep an eye on them to avoid drying out. They will still soak up all the tasty maple Dijon sauce. Marinating isn't mandatory but it helps. Soaking the chicken in the sauce for a bit adds flavor. It also makes the meat juicy and tender. If you have time, let it marinate for 30 minutes to an hour. You can even marinate overnight for more depth. Pair these chicken thighs with simple sides. Roasted vegetables are a great choice. You can also serve them with rice or a fresh salad. A crisp white wine or iced tea works well as a drink. These flavors complement the sweetness of the maple syrup beautifully. This recipe for Maple Dijon Chicken Thighs offers a blend of flavor and ease. Starting with key ingredients, like chicken thighs and a tasty marinade, you can create a dish everyone will love. Remember to sear the chicken well for crispy skin and use fresh herbs for extra flavor. With the right tips and serving suggestions, you can impress your guests. Enjoy cooking this simple, yet delicious meal that fits any occasion. Cooking can be fun and satisfying when you make something special!

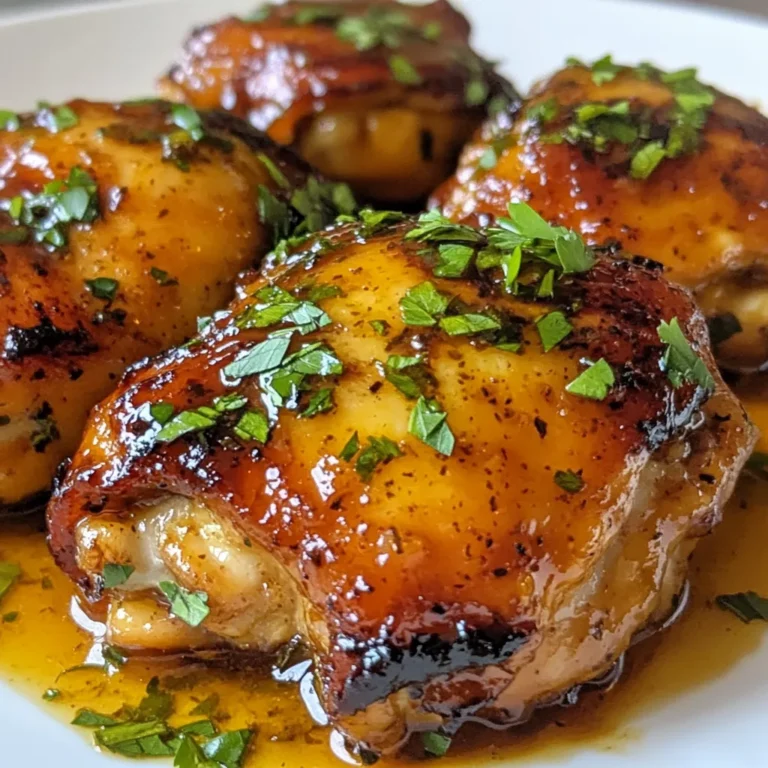
Maple Dijon Chicken Thighs Flavorful and Easy Recipe

- 300g penne pasta - 1 cup fresh basil leaves - 1/3 cup toasted pine nuts - 1/2 cup freshly grated Parmesan cheese - 2 cloves garlic, peeled - 1/2 cup high-quality olive oil - 1 cup heavy cream - Salt and freshly cracked pepper, to taste The heart of creamy pesto penne lies in its fresh flavors. The penne pasta acts as the base, holding onto the sauce perfectly. Fresh basil brings a bright taste, while toasted pine nuts add a nutty crunch. Parmesan cheese lends a salty depth, and garlic boosts the overall flavor. - Cherry tomatoes, halved - Extra toasted pine nuts - Fresh basil leaves Garnishes elevate the dish. Halved cherry tomatoes add a pop of color and sweetness. Extra pine nuts provide crunch, and fresh basil gives a fragrant touch. These simple additions make your plate look lovely and appetizing. - Use whole wheat penne for a healthier option. - Swap pine nuts with walnuts or sunflower seeds. - Replace heavy cream with coconut milk for a lighter dish. You can easily adapt the recipe. If you want a different taste, try whole wheat penne. Walnuts or sunflower seeds can replace pine nuts. Coconut milk can substitute heavy cream for a dairy-free option. These swaps keep the dish tasty while catering to various diets. {{ingredient_image_2}} Start by boiling a large pot of water. Add a good amount of salt. Once the water boils, add 300g of penne pasta. Cook it according to the package instructions. You want it to be al dente, which means it should have a slight bite. After cooking, drain the pasta in a colander. Be sure to save about 1/2 cup of the pasta water. Set the pasta aside for later. Grab your food processor. Add 1 cup of fresh basil leaves, 1/3 cup of toasted pine nuts, 1/2 cup of grated Parmesan cheese, and 2 peeled garlic cloves. Pulse these ingredients together until they are coarsely chopped. This will create a bright green mixture. In a large skillet, pour in 1 cup of heavy cream. Turn the heat to medium. Warm the cream for about 2-3 minutes. Stir it often to make sure it doesn’t scorch on the bottom. Now, add the pesto you made into the warm cream. Stir it well until everything is blended. If the sauce is too thick, add a splash of the reserved pasta water. Keep mixing until you get a nice, creamy texture. Take the drained penne and gently add it to the skillet. Use a large spoon or tongs to toss the pasta in the creamy pesto sauce. Make sure every piece is well-coated. Serve the creamy pesto penne in bowls or on plates. For a lovely finish, add halved cherry tomatoes, extra toasted pine nuts, and fresh basil leaves on top. Enjoy your dish! To get the best creamy texture, start with warm cream. Heat it gently in your skillet. This helps the pesto mix smoothly. If your sauce feels thick, add a little of the reserved pasta water. Just a splash! Stir until you reach that dreamy creamy state. This simple step makes a big difference. If you have leftovers, store them in an airtight container. Make sure they cool down first. Place them in the fridge for up to three days. When you reheat, add a splash of cream or water. This keeps the pasta from drying out. Stir well to bring back the creamy goodness. Want to boost the flavor? Try adding some lemon juice. A squeeze brightens the dish. You can also mix in sun-dried tomatoes for a tangy twist. Don't forget about extra cheese! Sprinkling more Parmesan on top gives a nice salty bite. Experiment with these ideas to find your perfect balance. Pro Tips Use Fresh Ingredients: For the best flavor, always opt for fresh basil and high-quality olive oil. Fresh ingredients elevate the dish significantly. Adjust the Creaminess: If the sauce is too thick, gradually add reserved pasta water until you reach your desired consistency. This helps the sauce cling better to the pasta. Customize Your Pesto: Feel free to experiment with different nuts or cheeses in the pesto. Walnuts or pecans can provide a unique twist, and you can try different types of cheese for varied flavors. Perfect Pasta Cooking: Always salt your pasta water generously. This is your opportunity to flavor the pasta from the inside out, enhancing the overall dish. {{image_4}} You can add chicken to your creamy pesto penne for more protein. Start by cooking about 400g of boneless chicken breasts. Season them with salt and pepper, then grill or sauté until they are golden brown and cooked through. Slice the chicken into strips and mix it into the pasta just before serving. This addition makes the dish heartier and adds a nice texture. If you want a vegetarian twist, use vegetables instead of chicken. Roasted bell peppers, zucchini, or mushrooms are great choices. Just roast or sauté them until tender. You can toss them with the creamy pesto sauce and pasta at the end. This keeps the dish vibrant and colorful while adding more flavor and nutrients. For a gluten-free version, use gluten-free penne pasta. Many brands offer tasty options made from rice or corn. Cook the pasta according to the package directions. The creamy pesto sauce works well with gluten-free pasta, keeping the dish rich and satisfying. Enjoy the same delightful flavors without the gluten! To store Creamy Pesto Penne, let it cool to room temperature. Then, place it in an airtight container. This will keep the pasta fresh for about 3 days in the fridge. Make sure to cover it well to prevent drying out. When you're ready to enjoy leftovers, reheat the pasta gently. You can use a microwave or a stovetop. If using the stovetop, add a splash of water or cream to keep it moist. Stir frequently and heat until warm. Avoid high heat to prevent the cream from separating. You can freeze Creamy Pesto Penne, but it may change texture. Place the cooled pasta in a freezer-safe container. Make sure to leave some space for expansion. It can last up to 2 months in the freezer. To thaw, move it to the fridge overnight. Reheat as mentioned above for best results. You can use half-and-half or whole milk if you want a lighter sauce. For a dairy-free option, try coconut cream or cashew cream. Both will add a rich taste without dairy. Yes, store-bought pesto works well for this dish. It saves time and still offers great flavor. Just ensure it is a high-quality brand to keep the taste vibrant. Pasta is al dente when it is firm but cooked through. To check, taste a piece a minute before the package time ends. It should have a slight bite. You can spread it on sandwiches or use it as a dip for veggies. Pesto also tastes great on grilled chicken or fish. Mix it into scrambled eggs for a tasty breakfast twist. Yes, you can prepare the sauce and pasta ahead of time. Store them separately in airtight containers. Just heat them gently before serving to enjoy the creamy goodness. Creamy pesto penne is easy and fun to make. We covered key ingredients, cooking steps, and tasty tips. You can enjoy it with chicken, keep it vegetarian, or choose gluten-free pasta. Storing and reheating leftover pasta is simple. Explore other uses for pesto to avoid waste. Embrace your kitchen skills. With these ideas, you can create delicious meals. Enjoy cooking!

Creamy Pesto Penne Rich and Flavorful Pasta Dish

- 2 cups cooked chicken breast, shredded - 1 cup fresh spinach, roughly chopped - 1/2 cup dried cranberries - 1/2 cup pecans, roughly chopped The main ingredients in this salad pack a punch of flavor and nutrition. The cooked chicken breast provides protein, while fresh spinach adds vitamins. Dried cranberries give a sweet burst, and pecans add a nice crunch. - 1/2 cup plain Greek yogurt - 2 tablespoons mayonnaise - 1 tablespoon honey - 1 tablespoon Dijon mustard - 1 teaspoon fresh lemon juice - Salt and pepper, to taste The dressing makes this salad shine. Greek yogurt keeps it creamy while being healthy. Mayonnaise adds richness. Honey balances the tanginess of Dijon mustard and lemon juice. Salt and pepper round out the flavors. - Mixed greens - Arugula For serving, you can use mixed greens or arugula. These greens add extra color and texture to your dish. They also enhance the taste and make it more appealing. {{ingredient_image_2}} To start, you need to gather your ingredients. In a large mixing bowl, combine the shredded chicken, chopped spinach, dried cranberries, and chopped pecans. Use a gentle tossing motion to mix everything evenly. Be careful not to break the spinach too much. This step helps create a colorful and tasty base for your salad. Next, grab a smaller bowl for the dressing. Whisk together the Greek yogurt, mayonnaise, honey, Dijon mustard, lemon juice, salt, and pepper. Keep whisking until the mixture is smooth. You want to avoid any lumps. This dressing adds a creamy and zesty flavor to the salad. Once your dressing is ready, pour it over the chicken mixture in the large bowl. Stir thoroughly to coat every piece of chicken and vegetable with the dressing. This ensures every bite is full of flavor. Taste your salad and adjust the seasoning with more salt and pepper if needed. For the best results, cover the bowl with plastic wrap and chill it in the fridge for at least 30 minutes. This time allows the flavors to meld. When ready to serve, you can place the chicken salad on a bed of mixed greens or arugula. Enjoy your fresh and flavorful dish! Adjusting seasoning is key to a great salad. After mixing your ingredients, taste it. If it needs more flavor, add salt or pepper. You can also add a bit more lemon juice for brightness. Each bite should sing with flavor. Presentation matters! Use extra chopped pecans and cranberries as garnishes. They add color and texture. Place your salad on a bed of mixed greens or arugula for a lovely display. A sprinkle of these garnishes makes each plate pop. You can even add lemon wedges on the side. They give a fresh touch when guests squeeze them over their salad. Chilling your salad is essential for great flavor. I recommend a minimum chill time of 30 minutes. This allows the flavors to blend well. The longer you chill, the better it gets. So, if you have time, let it sit in the fridge for an hour or more before serving. Your patience will pay off! Pro Tips Chicken Choice: Use rotisserie chicken for a quick and flavorful option, saving you time on cooking and shredding. Nut Variation: If you're allergic to pecans, substitute with walnuts or almonds for a similar crunch without compromising flavor. Chill Time: For optimal flavor, let the salad chill for at least one hour before serving, allowing the flavors to meld beautifully. Serving Suggestions: Pair this salad with whole grain crackers or serve it as a sandwich filling for a delightful lunch option. {{image_4}} You can make this salad healthier by changing the dressing. Instead of mayonnaise, try using more Greek yogurt. This cuts fat and adds protein. You can also use avocado instead of chicken for a tasty vegan option. Just mash it up and mix it in! Adding seasonal fruits makes this salad pop. In fall, add diced apples or pears for crunch and sweetness. In summer, try fresh berries like strawberries or blueberries for a vibrant twist. You can switch out spinach for kale in winter for a heartier feel. There are fun ways to serve this salad. You can stuff it in a pita for a quick lunch. Or, try serving it on cucumber slices for a refreshing bite. For a fancy touch, serve it in lettuce cups as a light appetizer. Each method adds a unique flair to your meal! Store your Cranberry Pecan Chicken Salad in an airtight container. This keeps it fresh and tasty. Make sure to place it in the fridge as soon as possible. It stays good for about three days. If you notice any change in smell or color, it's best to toss it. You can freeze this salad, but it’s not the best choice. The texture of the chicken and spinach may change. If you want to freeze it, store the salad without dressing. Use a freezer-safe container. It can last up to three months in the freezer. Just remember to thaw it in the fridge overnight before eating. To refresh the salad before serving, simply give it a good stir. If it seems dry, add a bit more dressing. You can also squeeze fresh lemon juice on top to brighten the flavors. Avoid using heat as it may change the salad's fresh taste. Enjoy it cold for the best experience! Yes, you can prepare this salad a day in advance. Store it in an airtight container in the fridge. The flavors will blend well, and it will taste even better the next day. Just remember to add any greens right before serving to keep them fresh. If you need to store leftovers, eat them within 3 days for the best taste. If you want a non-dairy option, try using silken tofu. It gives a smooth texture. Another great swap is sour cream, which adds a nice tang. For a lighter choice, consider using low-fat yogurt. Each option brings a unique flavor, so feel free to experiment! This salad stays fresh in the fridge for about 3 to 4 days. Watch out for changes in smell or texture, as these can be signs of spoilage. If the salad looks watery or has an off smell, it’s best to toss it out. Always store it in a sealed container to keep it fresh longer. This article covered how to make a tasty Cranberry Pecan Chicken Salad. We looked at the main ingredients, the dressing, and optional items to serve it with. I shared steps to prepare, tips for flavor, and storage advice. You can even play with variations to keep things fresh. Enjoy trying this salad as a meal or a side dish. Remember, it's flexible, so make it your own. Happy cooking!

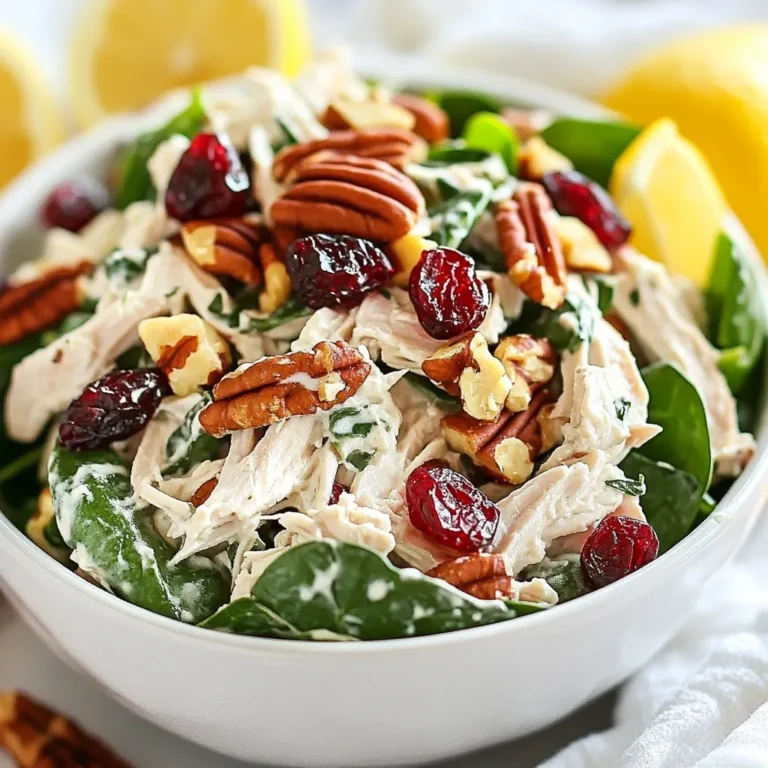
Cranberry Pecan Chicken Salad Fresh and Flavorful Dish

- 4 medium-sized sweet potatoes - 2 cups cooked chicken, shredded - 1 cup of your favorite BBQ sauce Sweet potatoes are the star here. They bring sweetness and nutrition. I use medium-sized ones for a perfect balance. Next, I add cooked chicken. Shredded chicken works best. It soaks up the BBQ flavor well. Speaking of BBQ, the sauce is key. Choose a sauce you love. Sweet, tangy, or spicy, it adds a punch. - 1/2 cup black beans, drained and rinsed - 1/2 cup corn (freshly cooked or frozen) - 1 cup shredded cheddar cheese Now, let’s add black beans. They add protein and fiber. Rinse them well to get rid of extra salt. Next, add corn. It can be fresh or frozen, depending on what you have. Corn adds a nice crunch. Finally, cheddar cheese makes everything better. It melts nicely and gives a rich flavor. - Sour cream - Fresh cilantro - Avocado slices Toppings can make this dish even more fun. Sour cream adds creaminess. Fresh cilantro gives a burst of flavor. Avocado slices add richness too. Feel free to mix and match these toppings to suit your taste! {{ingredient_image_2}} - Preheat the oven: Start by preheating your oven to 400°F (200°C). A hot oven helps cook sweet potatoes well. - Bake the sweet potatoes: Rinse four medium sweet potatoes under cold water. Pierce them several times with a fork. This lets steam escape while they bake. Place them on a foil-lined baking sheet for easy clean-up. Bake for 45-60 minutes until tender. You should be able to pierce them easily with a fork. - Combine chicken and sauce: In a large bowl, mix two cups of shredded chicken with one cup of BBQ sauce. Stir well to coat the chicken with the sauce. - Add beans and corn: Next, add half a cup of black beans and half a cup of corn to the chicken mix. This adds texture and flavor to the dish. - Prepare sweet potatoes for stuffing: After baking, let the sweet potatoes cool for a few minutes. Cut a slit down the center of each potato without cutting all the way through. Fluff the insides with a fork and add a sprinkle of salt and pepper. - Fill with BBQ mixture: Generously scoop the BBQ chicken mixture into each sweet potato. Make sure they are well filled with the tasty mixture. - Melt cheese on top: Top each stuffed potato with a cup of shredded cheddar cheese. Place them back in the oven for 10-15 minutes. You want the cheese to melt and bubble for a gooey finish. Choosing the right sweet potatoes makes a big difference. Look for medium-sized sweet potatoes. They should feel firm and heavy. Check for any soft spots or blemishes. Fresh sweet potatoes have smooth skin and a vibrant color. You might wonder about organic versus non-organic. Organic sweet potatoes can be a better choice. They often have fewer chemicals. However, non-organic can still taste great and save you money. Pick what fits your budget and values. Making your BBQ chicken mixture unique is fun! Start with your favorite BBQ sauce. You can swap it out for different flavors. Try spicy, smoky, or even honey BBQ. Each will change the taste of your dish. Adding other veggies can boost nutrition. Consider diced bell peppers or corn. You can even mix in chopped spinach. These additions add flavor and color to your dish. The cheese you choose is key to a gooey topping. I recommend using sharp cheddar cheese. It melts well and gives great flavor. You could also try mozzarella or pepper jack for a twist. To get the cheese perfectly melted, bake your stuffed sweet potatoes longer. Keep an eye on them. You want the cheese to be bubbly and brown. This creates a delicious topping that everyone will love! Pro Tips Choose the Right Sweet Potatoes: Look for sweet potatoes that are firm, smooth, and free of blemishes for the best flavor and texture. Enhance Your BBQ Sauce: Consider adding a splash of apple cider vinegar or a pinch of smoked paprika to your BBQ sauce for extra depth of flavor. Make It a Meal Prep: Prepare extra stuffed sweet potatoes and store them in the refrigerator for up to 3 days. Reheat in the oven or microwave for a quick meal. Experiment with Toppings: Don’t hesitate to customize your toppings! Try adding jalapeños for heat, or a drizzle of ranch dressing for creaminess. {{image_4}} Pulled Pork Variation You can switch the chicken for pulled pork. This gives a nice twist to the dish. Just mix the pulled pork with BBQ sauce as you would with the chicken. The sweet potatoes will still shine with this change. Vegetarian Option For a veggie version, use black beans and corn as the main filling. Add sautéed mushrooms or grilled veggies for extra flavor. This keeps the sweet potatoes hearty and filling without meat. Spicy BBQ Addition If you like heat, add hot sauce to your BBQ mix. This gives a nice kick to the dish. You can also use spicy BBQ sauce instead of regular sauce for a bold flavor. Sweet vs. Tangy BBQ Sauce Choosing between sweet and tangy BBQ sauce can change the whole taste. Sweet sauce offers a rich, caramelized flavor. Tangy sauce adds a zesty, fresh kick. Try both to see which one you like best! Southwest Style Garnishes Top your stuffed potatoes with avocado, diced tomatoes, and jalapeños for a Southwest twist. These toppings add brightness and zing to each bite. Greek Yogurt vs. Sour Cream You can use Greek yogurt instead of sour cream for a healthier option. It adds creaminess and protein. Both choices give a nice cooling effect to balance the BBQ flavors. After your meal, let the stuffed sweet potatoes cool down. This keeps them safe and tasty. For storage, use airtight containers. They help keep out air and moisture. You can also use mason jars for individual servings. They are fun and easy to store. Just make sure they are sealed well. You can reheat your BBQ chicken stuffed sweet potatoes in two ways. The microwave is quick but may make them a bit soggy. For better texture, use the oven. Preheat it to 350°F (175°C). Place the stuffed sweet potatoes on a baking sheet. Heat for about 15-20 minutes until warm. This keeps the cheese melty and the potato soft. Freezing is a great option for leftovers. First, let them cool completely. Wrap each sweet potato tightly in plastic wrap. Then, place them in a freezer bag. This helps prevent freezer burn. When you’re ready to eat, take one out. Thaw it in the fridge overnight. Reheat it in the oven for best results. Enjoy a delicious meal later! Yes, you can prepare BBQ Chicken Stuffed Sweet Potatoes ahead of time. First, bake the sweet potatoes and let them cool. Then, mix the chicken, BBQ sauce, beans, and corn. Store the sweet potatoes and the filling separately in the fridge for up to two days. When you are ready to eat, stuff the sweet potatoes and bake them until warm. To reheat stuffed sweet potatoes, use an oven for the best taste. Preheat the oven to 350°F (175°C). Place the stuffed sweet potatoes on a baking sheet. Cover them with foil to keep them moist. Bake for 15-20 minutes until they are heated through. You can also use a microwave for quick reheating, but the oven gives a better texture. Absolutely! You can use many sauces in this recipe. Try teriyaki sauce for a sweet twist. If you like heat, a spicy BBQ sauce works great too. You can even use a homemade sauce for a personal touch. Just make sure the sauce complements the other flavors in the dish. BBQ Chicken Stuffed Sweet Potatoes are easy to make and full of flavor. We covered the key ingredients like sweet potatoes, chicken, and BBQ sauce. We also looked at tips for choosing the best sweet potatoes and customizing the dish. Remember, you can swap proteins or play with toppings to match your taste. Don't forget to store leftovers properly and reheat them to keep that great texture. With these steps, you can enjoy a tasty and satisfying meal anytime.

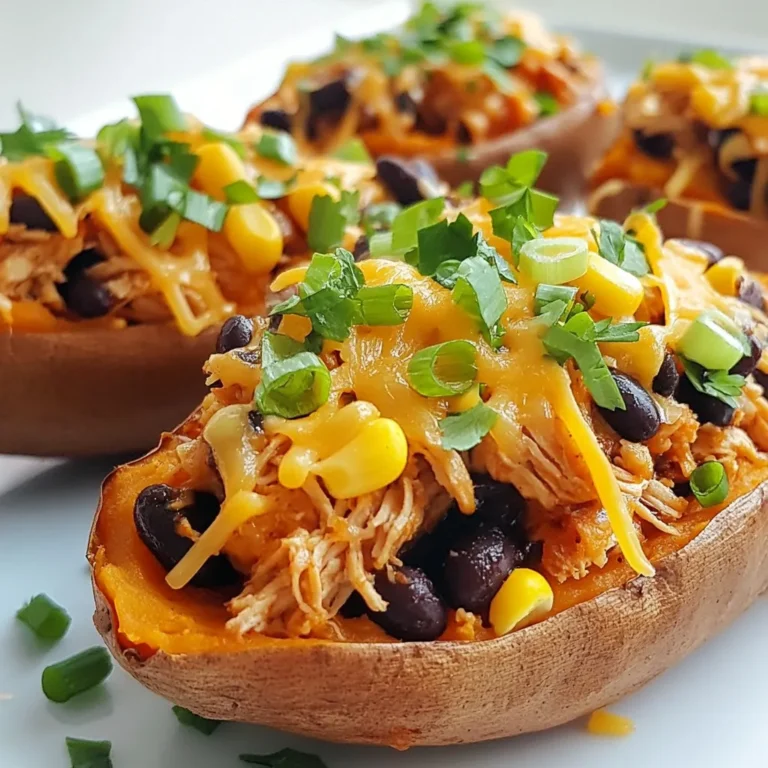
BBQ Chicken Stuffed Sweet Potatoes Tasty and Filling

To make garlic herb flatbread, gather these key ingredients: - 2 cups all-purpose flour - 1 teaspoon salt - 1 teaspoon baking powder - 3/4 cup warm water - 2 tablespoons extra virgin olive oil, plus more for brushing - 3 cloves garlic, finely minced - 1 tablespoon fresh rosemary, finely chopped - 1 tablespoon fresh thyme, finely chopped - 1 tablespoon fresh parsley, finely chopped - Sea salt, for sprinkling These ingredients create a simple yet flavorful flatbread that is easy to make. Want to enhance your garlic herb flatbread? Consider these optional add-ins: - Crushed red pepper flakes for heat - Grated cheese like Parmesan or mozzarella for a cheesy touch - Sun-dried tomatoes for a sweet and tangy flavor - Olives for a briny bite These add-ins can elevate your flatbread, making it more exciting. Selecting the right herbs is key for great taste. Here are some tips: - Look for vibrant colors in the leaves. They should be bright and fresh. - Smell the herbs. Fresh herbs have a strong, pleasant aroma. - Avoid wilted or brown leaves. These are signs of old herbs. - Store herbs properly. Keep them in the fridge wrapped in a damp paper towel. Using fresh herbs makes your flatbread taste amazing and adds a lovely aroma. {{ingredient_image_2}} Start by gathering your ingredients. You need 2 cups of flour, 1 teaspoon of salt, and 1 teaspoon of baking powder. In a large mixing bowl, combine these dry ingredients. Whisk them well to mix everything evenly. Next, pour in 3/4 cup of warm water and 2 tablespoons of olive oil. Use a wooden spoon to stir until you see a dough forming. Once it starts to come together, move the dough to a floured surface. Knead it for about 5 minutes. You want the dough to feel smooth and elastic. After kneading, cover the dough with a clean kitchen towel. Let it rest for 30 minutes. This helps the dough become softer and easier to roll out later. After the dough has rested, divide it into four equal pieces. Roll each piece into a thin circle, about 1/4 inch thick. Heat a non-stick skillet over medium-high heat. Lightly brush the skillet with olive oil to avoid sticking. Place one flatbread in the skillet. Cook it for 2-3 minutes. Look for bubbles forming on the surface. Once you see bubbles, flip it over and cook the other side for 1-2 minutes. The flatbread should have a nice golden color when done. While the flatbread is hot, brush it with a bit more olive oil. Now, it’s time to add flavor! Take your garlic herb mixture, which includes minced garlic, chopped rosemary, thyme, and parsley. Sprinkle this mixture generously over the hot flatbread. For an extra touch, add a sprinkle of sea salt on top. This enhances the flavor and makes it even tastier. Repeat the cooking steps for the remaining dough portions, adding more oil to the pan as needed. Once all the flatbreads are ready, you can serve them warm. Enjoy them alone or with some delicious dips! To get the best dough, use the right flour. All-purpose flour works great for this recipe. Make sure to mix your dry ingredients well. This ensures even flavor. When adding water, do it slowly. This helps you control the dough's stickiness. Knead the dough for about five minutes. You want it smooth and elastic. Cover it while it rests. This lets the gluten relax, making it easier to roll. You can cook garlic herb flatbread in a skillet or an oven. A skillet gives you nice, charred spots. This adds flavor and a great look. Heat your skillet over medium-high heat and brush it with olive oil. Cook for 2-3 minutes on one side. Then flip and cook for 1-2 more minutes. If you prefer the oven, preheat it to 450°F (232°C). Place the flatbread on a baking sheet. Bake for about 8-10 minutes. Both methods create tasty flatbreads! Serve these flatbreads warm for the best taste. They pair well with dips like hummus or tzatziki. You can stack them on a wooden board for a nice look. Drizzle extra olive oil on top for added flavor. Add fresh herb sprigs for color. These flatbreads also make a great side for soups or salads. Enjoy them with your favorite main dishes too! Pro Tips Resting the Dough: Allowing the dough to rest for 30 minutes enhances its elasticity, making it easier to roll out and resulting in a softer flatbread. Olive Oil Brushing: Brushing the flatbreads with olive oil immediately after cooking not only adds flavor but also keeps them moist and prevents them from drying out. Flavor Variations: Experiment with different herbs and spices in the garlic herb mixture, such as oregano or basil, for unique flavor profiles that suit your taste. Cooking Temperature: Ensure your skillet is preheated properly before adding the flatbread; this helps achieve the perfect golden-brown color and texture. {{image_4}} If you need a gluten-free version, swap the all-purpose flour with a gluten-free blend. Look for a blend that contains xanthan gum. This helps bind the flatbread together. The rest of the recipe stays the same. You still mix in the salt and baking powder before adding warm water and olive oil. Knead the dough just like the regular version, and you will have a tasty gluten-free flatbread. You can change the herbs to fit your taste. For a more robust flavor, try using sage or dill. Mix in some oregano or basil for a Mediterranean twist. You can even add a bit of cilantro for a fresh kick. Just remember to use about one tablespoon of each herb. This keeps the flatbread flavorful and fragrant. Want to make your flatbread extra special? Add cheese! Sprinkle shredded mozzarella or feta on top before cooking. You can also try adding sun-dried tomatoes or olives for a savory touch. If you like heat, add some red pepper flakes. These toppings make the flatbread even more delicious and fun to eat. You can get creative and make it your own! To keep your leftover flatbread fresh, let it cool first. Once it's cool, stack the flatbreads. Place parchment paper between each one. This prevents sticking. Then, put them in an airtight container or a zip-top bag. Store in the fridge for up to 3 days. If you want to keep them longer, freezing works great too. When you’re ready to enjoy your flatbread again, you can reheat it easily. Use a skillet over low heat. Warm each flatbread for about 1-2 minutes on each side. This keeps the outside crisp. You can also reheat in the oven. Preheat to 350°F. Place flatbreads on a baking sheet and heat for about 5 minutes. Freezing is a smart way to save your garlic herb flatbreads. After they cool, wrap each flatbread in plastic wrap. Then, put them in a freezer-safe bag. Make sure to label the bag with the date. You can freeze them for up to 3 months. When you want to eat one, just thaw it in the fridge overnight before reheating. This keeps the flavors fresh and tasty! Making garlic herb flatbread takes about 45 minutes from start to finish. You spend about 15 minutes on prep. The dough rests for 30 minutes. This time allows the dough to relax and rise a little. Cooking each flatbread takes just a few minutes. In no time, you'll have warm, tasty flatbreads ready to enjoy! Yes, you can use dried herbs instead of fresh. Dried herbs have a stronger taste, so use less. For example, if a recipe calls for one tablespoon of fresh herbs, use one teaspoon of dried herbs instead. Just remember that fresh herbs bring a vibrant flavor. If you have them, I suggest using fresh when you can. Garlic herb flatbread pairs well with many dishes. Here are some great options: - Hummus: The creamy texture complements the flatbread. - Tzatziki: This yogurt dip adds a cool touch. - Soups: Serve flatbread with soups like tomato or lentil. - Salads: It’s great alongside a fresh green salad. - Grilled meats: Use it as a side for chicken or fish. These pairings enhance the flatbread experience. Enjoy mixing and matching with your favorite dishes! This blog post covered all you need to make garlic herb flatbread. We explored essential and optional ingredients. You learned how to prepare the dough and cook your flatbread. I shared tips to get the right texture and various cooking methods. We also discussed tasty variations and how to store leftovers. In the end, making this dish adds joy to your meals. Enjoy experimenting with flavors and pairings. Your kitchen adventures are just beginning!

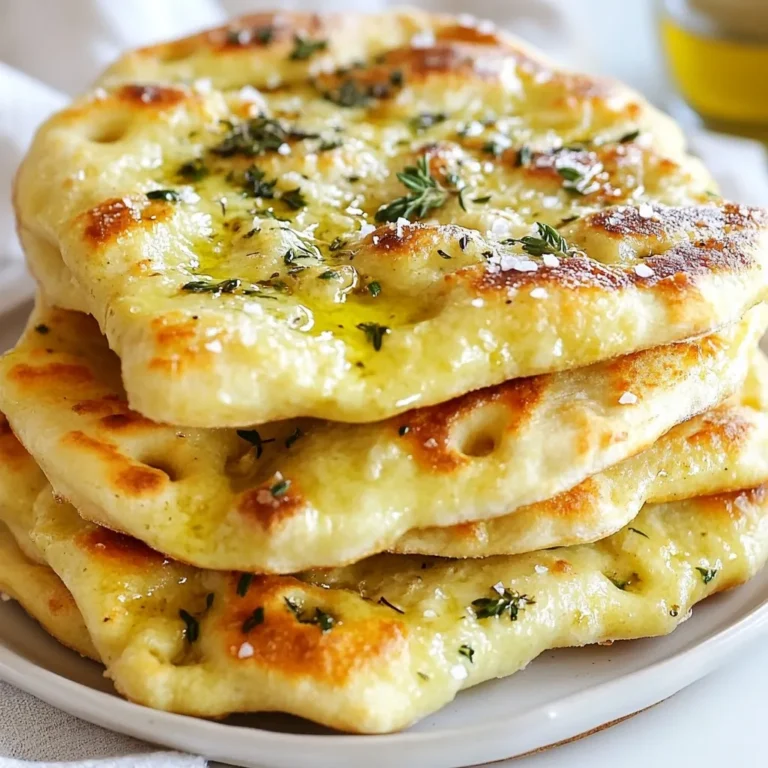
Garlic Herb Flatbread Easy and Flavorful Recipe

- 1 ½ cups whole wheat flour - ½ cup almond flour - ½ cup pure maple syrup - ¼ cup unsweetened applesauce - 2 teaspoons baking powder - ½ teaspoon baking soda - ½ teaspoon salt - Zest of 1 lemon - 1 tablespoon fresh lemon juice - 1 cup fresh blueberries (or frozen) - ½ cup chopped walnuts or pecans (optional) - 1 teaspoon vanilla extract - 2 large eggs (or 2 flax eggs) Whole wheat flour adds fiber and nutrients. It helps keep you full longer. Almond flour gives a nice texture and healthy fats. Maple syrup adds sweetness and antioxidants. Applesauce keeps muffins moist and cuts sugar. Baking powder and baking soda help muffins rise well. Salt enhances flavor and balances sweetness. Lemon zest adds brightness and fresh taste. Blueberries are rich in vitamins and antioxidants. Nuts provide healthy fats and crunch. Vanilla extract adds warmth and depth, while eggs (or flax eggs) bind ingredients. You can use all-purpose flour if you don't have whole wheat flour. Honey or agave syrup can replace maple syrup. If you don't have applesauce, try mashed bananas. For a nut-free version, leave out the walnuts or pecans. You can use any milk in place of eggs, like almond milk, if you prefer a vegan option. Flax eggs are a great substitute for eggs if you're vegan. {{ingredient_image_2}} Start by preheating your oven to 350°F (175°C). This step ensures even baking. While the oven heats, get your muffin tin ready. Line it with paper liners or grease each cup lightly. This helps the muffins come out easily after baking. In a large bowl, mix the whole wheat flour, almond flour, baking powder, baking soda, and salt. Whisk these dry ingredients until they blend well. Next, add the zest of one lemon to the dry mix. In another bowl, whisk together the maple syrup, applesauce, fresh lemon juice, vanilla extract, and eggs (or flax eggs). Make sure this mixture is smooth. Slowly pour the wet mix into the dry mix. Stir gently with a spatula. Remember, a few lumps are okay. Now, fold in the blueberries and nuts if you choose to add them. Be gentle to keep the blueberries whole. Using a spoon or scoop, fill each muffin cup about ¾ full. This space allows the muffins to rise nicely. Bake in the preheated oven for 18-20 minutes. To check if they are done, insert a toothpick in the center of a muffin. If it comes out clean, they are ready. After baking, let the muffins cool in the tin for about 5 minutes. Then, transfer them to a wire rack to cool completely. Enjoy the aroma as they cool! To get soft muffins, use fresh ingredients. Whole wheat flour adds fiber while almond flour gives a nice crumb. Mix the dry and wet ingredients gently. Overmixing makes the muffins tough. Aim for a few lumps in the batter. This keeps them light and fluffy. Bake until they are golden. A toothpick should come out clean when done. For extra flavor, add more lemon zest. A pinch of cinnamon or nutmeg can elevate the taste. If you like nuts, chopped walnuts or pecans add a nice crunch. You can also swap in some dark chocolate chips for a treat. Consider adding shredded coconut for a tropical twist. These little changes can make a big difference. One common mistake is using old baking powder. It should be fresh for the muffins to rise well. Also, do not skip the lemon juice; it brightens the flavor. Make sure to fold in blueberries gently to avoid mush. Lastly, let the muffins cool before serving. This helps them set and makes them easier to eat. Pro Tips Use Fresh Ingredients: Whenever possible, opt for fresh blueberries and lemons. They enhance the flavor and nutritional value of your muffins. Don’t Overmix: When combining the wet and dry ingredients, mix just until incorporated. Overmixing can lead to dense muffins. Adjust Sweetness: Depending on your taste preference, you can adjust the amount of maple syrup. Start with less and add more if needed. Storage Tips: Keep your muffins in an airtight container at room temperature for up to three days, or freeze them for longer storage. {{image_4}} To make vegan blueberry lemon energy muffins, swap the eggs for flax eggs. Mix two tablespoons of ground flaxseed with six tablespoons of water. Let it sit for about five minutes until it thickens. Use this mix instead of the two large eggs. The rest of the recipe stays the same, using maple syrup and applesauce for moisture. These muffins taste just as good and are plant-based. If you need gluten-free muffins, use gluten-free flour instead of whole wheat and almond flour. Look for a blend that works for baking. Check labels to ensure they don’t contain gluten. You can also use certified gluten-free oats ground into flour. This keeps the muffins light and fluffy while still packing a flavorful punch. For nut-free muffins, simply leave out the almond flour and optional nuts. Replace almond flour with an equal amount of whole wheat flour or oat flour. This change still gives you a great texture. When you skip the nuts, your muffins will remain soft and tasty. Always check your other ingredients to ensure they are nut-free, especially your baking powder. To keep your blueberry lemon energy muffins fresh, let them cool completely first. Place them in an airtight container. Store at room temperature for up to three days. If you want them to last longer, consider refrigeration. In the fridge, they can stay fresh for up to a week. Just remember, they might lose some fluffiness in the fridge. Freezing muffins is a smart choice! To freeze, place them in a single layer on a baking sheet. Freeze until solid, usually about an hour. Once frozen, transfer them to a freezer-safe bag or container. Label the bag with the date. These muffins can last up to three months in the freezer. When you’re ready to enjoy, simply thaw them at room temperature. Reheating muffins is easy. If you want them warm, preheat your oven to 350°F (175°C). Place the muffins on a baking sheet and heat for about 5-10 minutes. You can also use the microwave. Just heat for 15-20 seconds at a time until warm. Enjoy your muffins as if they were freshly baked! You can check if your muffins are done by using a toothpick. Insert it into the center of a muffin. If it comes out clean, the muffins are ready. The tops should look golden brown and spring back when touched. Yes, you can use frozen blueberries. Just add them straight to the batter without thawing. They will keep the muffins moist and flavorful. Be gentle when folding them in, so they don’t break apart. For a vegan option, use flax eggs. To make one flax egg, mix one tablespoon of ground flaxseed with two and a half tablespoons of water. Let it sit for five minutes to thicken. This works well in muffins and keeps them moist. In this blog post, I covered key points about making muffins. We discussed the ingredients, their benefits, and substitutions. You learned step-by-step instructions for preparation, mixing, baking, and cooling. I shared tips for perfecting texture, enhancing flavors, and avoiding mistakes. We explored variations for different diets and storage tips for freshness. Muffins can be fun to make and enjoy. Use these insights to try new recipes and share them with friends.

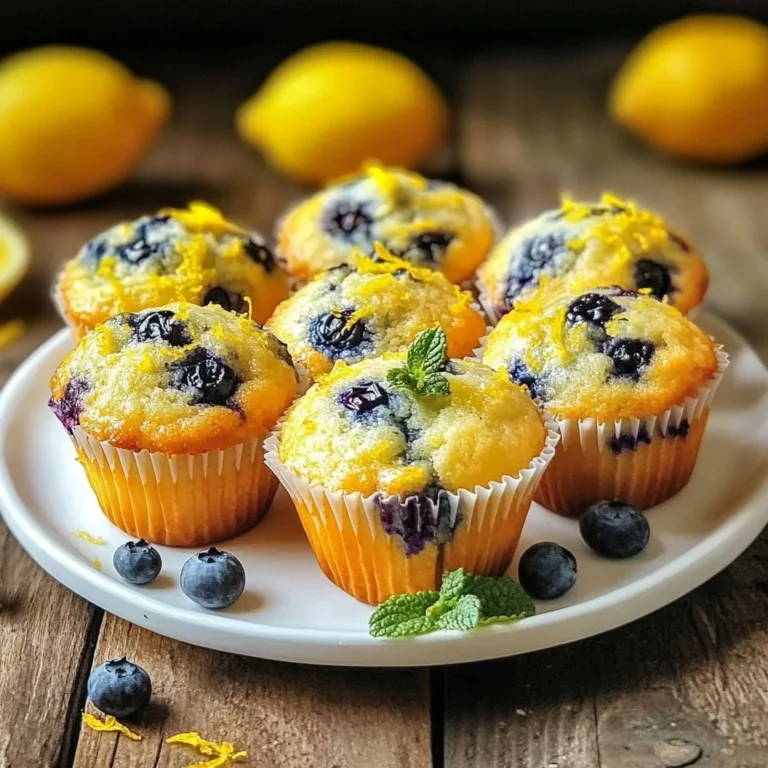
Blueberry Lemon Energy Muffins Simple Recipe Guide

- 1 pound boneless, skinless chicken thighs - 1 cup cooked quinoa (white, red, or a mix) - 1 cup cherry tomatoes, halved - 1 cucumber, diced - 1 medium red onion, thinly sliced - 1 cup tzatziki sauce - Fresh parsley and lemon wedges for garnish - 2 tablespoons extra virgin olive oil - 2 teaspoons dried oregano - 1 teaspoon garlic powder - 1 teaspoon onion powder - 1 teaspoon smoked paprika - Salt and freshly ground black pepper I love using boneless, skinless chicken thighs for this recipe. They stay juicy and flavorful. For the base, I use quinoa, which adds protein and fiber. You can pick any color—white, red, or a mix. Next, I add fresh veggies. Cherry tomatoes bring sweetness, while diced cucumber adds crunch. Thinly sliced red onion gives a nice sharp flavor. You’ll also need tzatziki sauce. You can buy it or make your own. It adds creaminess and a cool bite. Garnish with fresh parsley for color and lemon wedges for a zesty touch. The lemon really brightens the flavors. Each ingredient works together to create a fresh and tasty meal! {{ingredient_image_2}} - Preheat the oven to 400°F (200°C). This step is key for even cooking. - In a medium bowl, mix 2 tablespoons of extra virgin olive oil, 2 teaspoons of dried oregano, 1 teaspoon of garlic powder, 1 teaspoon of onion powder, and 1 teaspoon of smoked paprika. Add salt and pepper to taste. This marinade adds great flavor. - Add 1 pound of boneless, skinless chicken thighs to the bowl. Make sure each piece gets coated well. Let the chicken marinate for at least 15 minutes. This wait makes a big difference in taste. - After marinating, spread the chicken on a baking sheet lined with parchment paper. Bake for 25-30 minutes until the chicken is cooked through. The internal temperature should reach 165°F (75°C). - While the chicken bakes, cook 1 cup of quinoa. Follow the package instructions for best results. Fluff it with a fork once done and let it cool a bit. - In a large mixing bowl, combine the cooked quinoa, 1 cup of halved cherry tomatoes, 1 diced cucumber, and 1 thinly sliced red onion. Toss everything gently to mix. - Once the chicken has rested for about 5 minutes, slice each thigh into strips. This helps keep the juices inside. - Divide the quinoa salad mixture among serving bowls. Top each bowl with slices of chicken and drizzle with 1 cup of tzatziki sauce. - Finally, garnish with chopped fresh parsley and serve with lemon wedges. A squeeze of lemon adds a refreshing zing! Marinating your chicken is key for great flavor. It allows the spices to soak in. I suggest marinating for at least 15 minutes. This helps the chicken absorb the olive oil and spices. You can even marinate it overnight for a deeper taste. Baking your chicken just right keeps it juicy. Preheat your oven to 400°F (200°C). Lay the chicken on parchment paper for easy cleanup. Bake for 25 to 30 minutes. Always check the internal temperature. It should reach 165°F (75°C). Let the chicken rest for 5 minutes after baking. This step helps keep the juices inside. Layering your bowl makes it look amazing. Start with quinoa at the bottom. Then, add diced cucumber and halved cherry tomatoes. Place chicken on top in a fan shape. This creates a nice visual and makes it easy to eat. Choose colorful serving bowls to make your meal pop. Bright bowls can enhance the look of your dish. Use white bowls for a clean look. The colors of the food will shine more. Add fresh parsley as a garnish. It adds color and freshness, making your bowl even more inviting. Pro Tips Marinate Longer for Flavor: For even more flavorful chicken, marinate the chicken thighs for up to 2 hours in the refrigerator. This allows the spices to penetrate the meat deeply. Rest the Chicken: Always let the chicken rest for a few minutes after baking. This helps the juices redistribute, making the meat more tender and juicy. Customize Your Toppings: Feel free to add other toppings like feta cheese, olives, or bell peppers to the salad mix for more variety and flavor. Make It Ahead: This dish is great for meal prep! Store the quinoa and chicken separately in the refrigerator for up to 4 days, and assemble when ready to eat. {{image_4}} You can create a tasty vegetarian option by using chickpeas or grilled vegetables instead of chicken. Chickpeas add protein and a nice texture. Grilled zucchini or bell peppers also work well to keep the flavor fresh. If you need a gluten-free meal, choose quinoa as your base. Just skip any wheat-based sauces and check labels on what you buy. For a twist, try different dressings or sauces. A lemon vinaigrette or tahini sauce can brighten your bowl. You can also add olives or feta cheese for a more authentic Greek taste. These add-ins bring richness and a nice salty kick to your meal. Don't hesitate to mix and match to find your favorite combination! To store leftovers safely, place them in an airtight container. This keeps them fresh and prevents odors. You can keep Greek chicken gyro bowls in the fridge for up to three days. After that, they may lose their taste and texture. You can freeze cooked chicken and quinoa. Make sure they are cool before you pack them. Use freezer-safe bags or containers with tight lids. For best results, eat frozen meals within three months. When you want to eat, thaw the chicken and quinoa overnight in the fridge. Reheat in the oven or microwave until hot. This helps keep the flavors intact. Yes, you can use chicken breast. Chicken thighs are juicier and full of flavor. They also stay moist during cooking. Chicken breast can dry out faster if overcooked. If you prefer the taste of breast meat, go for it. Just adjust the cooking time to avoid drying out the chicken. If you want a different sauce, try these options: - Hummus for a creamy texture - Greek yogurt mixed with herbs for a fresh taste - A lemon vinaigrette for a zesty kick These alternatives can add unique flavors to your bowl. Choose what you enjoy most! This recipe takes about 50 minutes in total. Here’s the breakdown: - Prep time: 15 minutes to marinate chicken and prepare ingredients - Cook time: 25-30 minutes to bake chicken and cook quinoa Plan accordingly, so you can enjoy this meal with ease! This article covered a tasty chicken quinoa bowl with fresh veggies and tzatziki. You learned about the simple ingredients, easy steps, and helpful tips for perfecting the dish. Remember, marinating brightens flavors and makes chicken juicy. You can switch ingredients to fit your diet or add new flavors. Whether you’re cooking for yourself or a group, this meal is a hit. Enjoy storing leftovers and feel free to mix it up next time! Happy cooking!

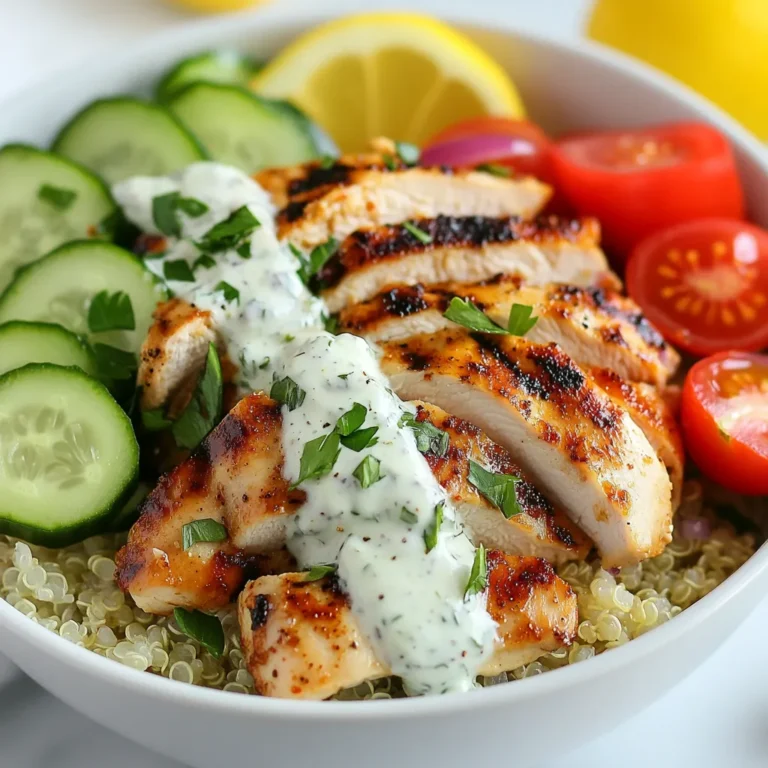
Greek Chicken Gyro Bowls Flavorful and Easy Recipe

- Shrimp: 1 pound of raw shrimp, peeled and deveined - Fresh Produce: - 2 ripe avocados, diced - 1 large tomato, diced - 1/2 red onion, finely chopped - 1 jalapeño, seeded and minced - 1/4 cup fresh cilantro, chopped - Marinade Components: - Juice of 2 limes - 2 tablespoons extra virgin olive oil - Salt and freshly ground black pepper to taste - 1 teaspoon smoked paprika - 1 teaspoon garlic powder When I prepare this dish, I choose fresh shrimp for the best taste. Look for shrimp with a firm texture. The avocados should be ripe and slightly soft for easy dicing. Fresh lime juice adds a bright flavor, while smoked paprika gives a nice depth. Each ingredient plays a role in making the salad taste fresh and unique. The lime juice not only adds zest but also helps the shrimp and veggies blend well. I love using fresh herbs like cilantro for a burst of flavor. You can easily adjust the spice level with the jalapeño. Gather these ingredients, and you will be on your way to a delightful meal. It's a perfect salad for sunny days or when you want something light and tasty. {{ingredient_image_2}} First, gather your ingredients for the marinade. In a medium bowl, mix together the juice of two limes, two tablespoons of olive oil, one teaspoon of smoked paprika, one teaspoon of garlic powder, salt, and freshly ground black pepper. Whisk everything until smooth. This marinade is key. It adds bold flavors to the shrimp, making each bite delightful. Next, add one pound of peeled and deveined shrimp to the marinade. Make sure the shrimp are fully coated. Let them sit for 15 to 20 minutes at room temperature. This time allows the shrimp to absorb all that tasty flavor. Don’t skip this step; it makes a big difference. Now, it’s time to cook the shrimp. Heat a large skillet over medium heat. Once hot, add the shrimp in a single layer. Cook for two to three minutes on each side. Look for the shrimp to turn pink and opaque; this means they are done. Remove them from the heat and let them cool for a moment. In a large mixing bowl, combine the fresh ingredients. Add two diced avocados, one diced tomato, half a finely chopped red onion, one minced jalapeño, and a quarter cup of chopped cilantro. Stir gently to mix without mashing the avocados. This keeps the salad fresh and bright. Once the shrimp have cooled, fold them into the bowl with the avocado mixture. Squeeze a bit more lime juice over everything for a zesty kick. Toss the salad gently to mix all the flavors. Finally, taste the salad and adjust the seasoning with more salt and pepper if needed. This is your chance to make it perfect! To find ripe avocados, look for these signs: - The skin should be dark green or black. - Gently press the avocado. It should yield slightly but not feel mushy. - Check the stem; if it pops off easily and is green underneath, it’s ripe. For shrimp freshness, follow these guidelines: - Look for shrimp that are translucent and firm. - They should have a mild ocean scent, not a strong fishy smell. - Avoid shrimp with black spots or a strong odor. You can cook shrimp in many ways. Grilling adds a smoky flavor. Sautéing keeps them juicy. Choose your cooking method based on your taste. - For grilling, preheat the grill. Skewer shrimp to make flipping easier. - For sautéing, use a hot skillet with olive oil. Cook until they turn pink. You can also change the flavor by using spices. Try adding chili powder for heat or lemon juice for a citrus twist. Presentation matters. Serve the salad in chilled bowls. You can also use a large platter for gatherings. Here are some tips for a beautiful look: - Scatter lime wedges around the salad. - Sprinkle extra cilantro on top for color. Pair this salad with light dishes. It goes well with crusty bread or grilled veggies. Enjoy the fresh taste and colorful display! Pro Tips Fresh Shrimp is Key: Always choose the freshest shrimp available. This makes a significant difference in taste and texture, enhancing the overall quality of your salad. Perfectly Ripe Avocados: Ensure your avocados are perfectly ripe for the best flavor and creaminess. A ripe avocado should yield slightly to gentle pressure. Chill Your Ingredients: For an extra refreshing salad, chill the shrimp and mix your ingredients beforehand. Serving cold adds to the overall enjoyment. Customize the Heat: Adjust the amount of jalapeño to suit your spice tolerance. You can also add other peppers or even a dash of hot sauce for an extra kick. {{image_4}} You can boost the flavor of your Avocado Lime Shrimp Salad by adding a few extra ingredients. Consider mixing in corn or black beans for a hearty touch. Both add texture and a subtly sweet taste that complements the shrimp and avocados. If you want to enhance the flavor further, try using fresh herbs like dill or basil. These herbs can add unique notes to the dish and bring freshness to each bite. This salad can fit many diets with a few tweaks. For those who follow a gluten-free diet, this recipe is already suitable. The ingredients are naturally gluten-free. If you want a low-carb option, focus on the shrimp and fresh veggies. You can also make this salad vegan or vegetarian. Swap the shrimp for chickpeas or tofu. Both options provide protein and work well with the other ingredients. Just be sure to adjust the marinating step to fit your choice! To keep your salad fresh, store it in airtight containers. Glass or plastic with tight lids works best. Place the leftover salad in the fridge right away. It stays good for about one to two days. After that, the avocados may brown, and the shrimp may lose their texture. If you want to reheat the shrimp, do it gently. Use a skillet on low heat. This helps keep the shrimp tender and juicy. Avoid the microwave as it can make the shrimp rubbery. When you reheat, check the salad first. If the shrimp are warm, add more fresh avocado and lime juice. This keeps the salad fresh and flavorful. Enjoy your delicious meal! Yes, you can use frozen shrimp. First, thaw them properly. Place the shrimp in a bowl of cold water for about 15-20 minutes. This helps them defrost quickly. Once thawed, drain and pat dry with a paper towel. Frozen shrimp can taste great if thawed well. However, fresh shrimp often have a better texture and flavor. You can prep some ingredients a day before. Dice the avocados, tomatoes, onion, and jalapeño, then store them in separate containers. Keep the shrimp marinated but cook them just before serving. This keeps the salad fresh and vibrant. Squeeze lime juice on the avocados to prevent browning. Mix everything together just before serving for the best taste. This salad pairs well with many dishes. Try serving it with tortilla chips for crunch. A side of rice or quinoa complements the flavors nicely. Grilled vegetables also work well. For drinks, a chilled white wine or iced tea enhances the meal. Enjoy mixing and matching to find your favorite pairings! You’ve learned how to make a delicious Avocado Lime Shrimp Salad. We covered the ingredients, marinating tips, and cooking methods. I shared ways to enhance your dish with variations and storage tips. This salad is fresh, tasty, and fun to prepare. Whether for a special meal or a quick weeknight dinner, it fits perfectly. Enjoy making it your own with different flavors and extras. Remember, tasting along the way brings the best results!

Avocado Lime Shrimp Salad Fresh and Flavorful Meal

- 1 lb (450g) boneless chicken thighs, cut into bite-sized pieces - 3 tablespoons honey - 3 tablespoons low-sodium soy sauce - 2 tablespoons sesame oil - 4 cloves of garlic, finely minced - 1 tablespoon fresh ginger, finely grated - 1/4 cup cornstarch - 2 tablespoons vegetable oil (for frying) - Salt and pepper to taste To make this dish, you will need: - A large skillet - Mixing bowls - Whisk - Paper towels - Tongs or a spatula For a nice touch, consider these garnishes: - 1 tablespoon sesame seeds - 2 green onions, thinly sliced {{ingredient_image_2}} Start by taking a mixing bowl. Add 3 tablespoons of honey. Next, pour in 3 tablespoons of low-sodium soy sauce. Then, add 2 tablespoons of sesame oil. Now, finely mince 4 cloves of garlic and grate 1 tablespoon of fresh ginger. Toss them into the bowl. Whisk all the ingredients well until mixed. Set the honey garlic sauce aside for later. Take 1 pound of boneless chicken thighs and cut them into bite-sized pieces. Lightly season them with salt and pepper. Now, dust each piece with 1/4 cup of cornstarch. Make sure each piece is evenly coated. Heat 2 tablespoons of vegetable oil in a large skillet over medium-high heat. When the oil shimmers, add the chicken in a single layer. Fry until golden brown, about 5 to 7 minutes per side. If needed, fry in batches to avoid crowding. Once cooked, place the chicken on a paper towel-lined plate to drain excess oil. In the same skillet, pour in the honey garlic sauce you made earlier. Let it simmer over medium heat for about 2 to 3 minutes. Stir occasionally to keep it from sticking. When the sauce thickens slightly, lower the heat. Add the fried chicken back into the skillet. Gently toss the chicken to coat it well in the sauce. Remove from heat. Before serving, sprinkle sesame seeds and sliced green onions on top for added flavor and crunch. Enjoy your delicious honey garlic sesame chicken with fluffy rice and vegetables! To get the best flavor, use fresh garlic and ginger. These add a bright taste to the sauce. I also recommend low-sodium soy sauce. This keeps the dish from being too salty. Honey should be pure and natural. It gives a rich sweetness that balances the flavors. Coating the chicken in cornstarch is key for crispiness. Make sure every piece is covered well. Fry the chicken in batches. This helps avoid overcrowding the skillet. If the pieces touch, they won’t crisp up. When frying, look for a golden brown color. This shows they are cooked and crispy. For a pretty presentation, use a large platter. Place the chicken in the center and drizzle extra sauce on top. Garnish with sesame seeds and green onions for color. Serve with fluffy steamed rice and stir-fried veggies. This makes the meal colorful and complete. Pro Tips Use Fresh Ingredients: Fresh garlic and ginger significantly enhance the flavor of the sauce, making your dish more aromatic and delicious. Don't Skip the Cornstarch: Coating the chicken in cornstarch before frying will give it a crispy texture that holds up well against the sauce. Adjust the Sweetness: Feel free to modify the amount of honey in the sauce to cater to your personal taste for sweetness. Garnish for Appeal: Adding extra sesame seeds and green onions not only enhances the presentation but also adds texture and flavor. {{image_4}} You can easily switch the chicken for other proteins. Try using shrimp for a quick cook. Pork tenderloin works well too; just adjust the cooking time. Tofu is a great choice for a plant-based meal. Cut it into cubes and press out the water before cooking. For a vegetarian or vegan version, use firm tofu or tempeh. Marinate it in the honey garlic sauce for extra flavor. You can also use chickpeas for a protein-packed option. Just toss them in the sauce and bake until crispy. If you like heat, add red pepper flakes to the sauce. Sriracha also works well; just mix in a teaspoon or two. For a deeper heat, try fresh sliced chili peppers. Adjust the amount to suit your taste. Spice can elevate the dish to new levels! To store your leftover Honey Garlic Sesame Chicken, let it cool first. Place it in an airtight container. Ensure you keep it in the fridge. It will stay fresh for about three to four days. If you want to keep it longer, consider freezing it. When it's time to reheat, I recommend using a skillet. Heat it over medium-low heat. Add a splash of water or broth to keep the chicken moist. Stir occasionally until heated through. You can also use a microwave, but it may not keep the chicken crispy. If you want to freeze the chicken, use a freezer-safe bag. Remove as much air as possible before sealing. You can freeze it for up to three months. When ready to eat, thaw it in the fridge overnight before reheating. This way, you can enjoy its sweet and savory flavors again! You can serve Honey Garlic Sesame Chicken with several tasty sides. Fluffy white rice or jasmine rice is a great choice. It soaks up the sweet sauce perfectly. You can also pair it with steamed broccoli or mixed stir-fried vegetables. These add color and nutrition to your meal. For extra crunch, try a side of crispy spring rolls or a fresh salad. These options make your dinner both filling and fun. You can store leftovers in the fridge for up to three days. Make sure to put the chicken in an airtight container. This helps keep it fresh and tasty. If you want to enjoy it later, it’s best to eat it within this time frame. This way, you can savor the flavors and avoid waste. Yes, you can make this dish in advance! You can prepare the honey garlic sauce and cook the chicken ahead of time. Just store them separately in the fridge. When ready to serve, reheat the chicken and toss it in the warm sauce. This saves time on busy nights and allows the flavors to meld even more. Enjoy your delicious meal! Honey Garlic Sesame Chicken is a simple, tasty dish with great flavors. You learned the key ingredients, how to cook the chicken, and the best tips for serving. I shared variations to fit your taste and gave storage tips for leftovers. Remember, you can easily adapt this recipe to enjoy different options. Cooking is about fun and creativity. Enjoy making this dish and share it with family and friends!

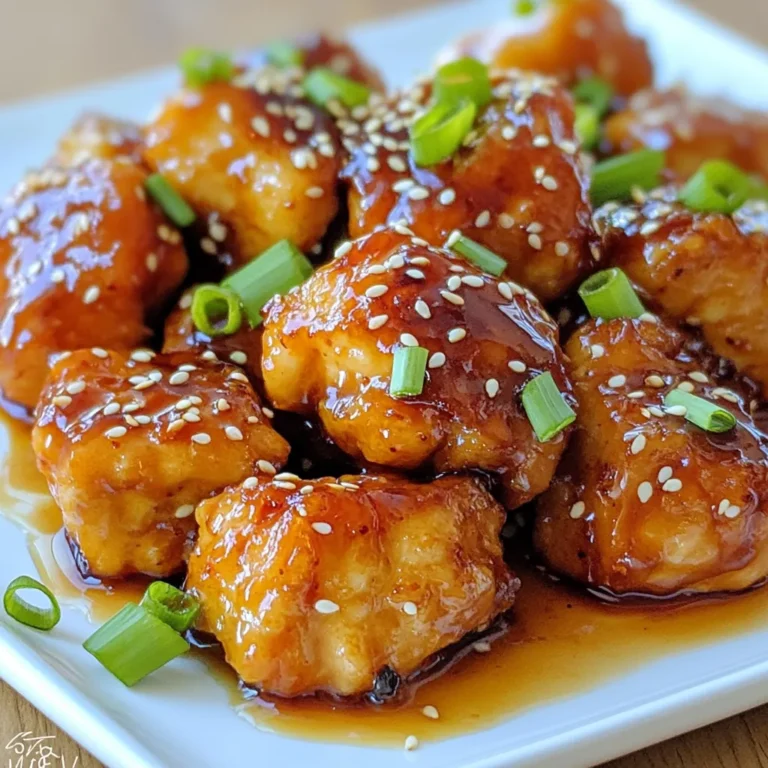
Honey Garlic Sesame Chicken Flavorful Dinner Recipe

PREV 1 … 46 47 48 NEXT
purelyyumrecipes

explore

DessertsDinnerAppetizersDrinks

Our Policies

  • Cookie Policy
  • Copyright Policy
  • Disclaimer
  • GDPR Policy
  • Terms Of Use
Back to Top
  • About
  • Contact Us
  • Privacy Policy
© 2026 purelyyumrecipes