FREE DINNER EBOOK! Get your copy!
  • Cookie Policy
  • GDPR Policy
  • Disclaimer
  • Terms Of Use
  • Visit my other site: Fun Cookie Recipes
purelyyumrecipes
  • Home
  • Dinner
  • Desserts
  • Drinks
  • Appetizers
  • Contact
  • About
  • Privacy Policy
  • Home
  • Dinner
  • Desserts
  • Drinks
  • Appetizers
  • Contact
  • About
  • Privacy Policy
  • Cookie Policy
  • GDPR Policy
  • Disclaimer
  • Terms Of Use
Visit my other site: Fun Cookie Recipes

HOME / CATEGORIES /

Latest

- 2 cups cooked chicken, either shredded or diced - 1 ripe avocado, perfectly mashed - 1/4 cup plain Greek yogurt - 1 tablespoon freshly squeezed lemon juice - 1 small red onion, finely chopped - 1/2 cup celery, diced - 1/4 cup fresh cilantro, chopped - 1/2 teaspoon garlic powder - Salt and freshly ground black pepper - Optional: Crisp lettuce leaves for serving Each ingredient adds flavor and health benefits. - Chicken: High in protein, it helps build strong muscles. - Avocado: Packed with healthy fats, it supports heart health. - Greek yogurt: Adds creaminess and probiotics for digestion. - Lemon juice: Boosts vitamin C for immunity. - Red onion: Contains antioxidants, promoting overall health. - Celery: Low in calories, it adds crunch and hydration. - Cilantro: Rich in vitamins, it adds bright flavor. - Garlic powder: May boost immunity and add depth. - Salt and pepper: Enhance flavors and balance the dish. If you need swaps, here are some ideas: - Use rotisserie chicken for quick prep. - Swap Greek yogurt with mashed beans for vegan options. - Try lime juice instead of lemon for a different zing. - Replace red onion with green onions for a milder taste. - Use parsley if you don’t like cilantro. - Substitute any crunchy veggie for celery, like bell peppers. {{ingredient_image_2}} 1. Start by mashing the ripe avocado in a bowl. Aim for a smooth texture but keep a few small chunks for fun. 2. Add the plain Greek yogurt and freshly squeezed lemon juice to the mashed avocado. Mix well until creamy. 3. Next, gently fold in the cooked chicken, chopped red onion, diced celery, and fresh cilantro. Make sure everything is coated with the avocado mix. 4. Season the salad with garlic powder, salt, and freshly ground black pepper. Stir gently to mix the flavors. 5. Cover the bowl and chill in the fridge for about 30 minutes. This step helps the flavors blend. 6. Serve the salad on crisp lettuce leaves if you like. Spoon it on just before serving for a pretty look. - Choose a ripe avocado; it should feel soft but not mushy. - Use a fork or a potato masher for easy mashing. - Mash until just smooth, leaving some chunks for texture. - Add a splash of lemon juice right away to prevent browning. - Mix gently when adding chicken and veggies to avoid breaking them down. - Make sure all ingredients are at room temperature for better mixing. - Taste the salad before serving to check the seasoning. Adjust if needed. - Garnish with extra cilantro or lemon wedges for a fresh look. To make this salad super creamy, focus on the avocado. Use a ripe avocado, as it gives the best texture. Mash it well but keep a few small chunks. This adds a nice, rich feel. Mix in plain Greek yogurt to enhance the creaminess. The yogurt also provides a tangy flavor, which I love. Serving this salad on crisp lettuce leaves makes it look fresh and inviting. I like to use large leaves, as they hold the salad well. For a pop of color, sprinkle extra cilantro on top. Add lemon wedges on the side for a zesty touch. This simple trick makes your dish look gourmet. To bring out the best flavors, season well with salt and pepper. Don't forget the garlic powder; it adds depth. Fresh lemon juice brightens the salad, balancing the creaminess. Experiment with herbs like dill or parsley for a twist. Each of these steps helps create a flavor explosion in every bite. Pro Tips Use Fresh Ingredients: Always opt for the freshest chicken and ripe avocados to ensure the best flavor and texture in your salad. Customize Your Add-ins: Feel free to add ingredients like diced apples, grapes, or nuts for added sweetness and crunch, making the salad your own. Perfectly Mash Avocados: For a creamier texture, mash the avocado with a fork or a potato masher, but leave some chunks for added richness. Chill for Flavor: Letting the salad chill in the refrigerator for at least 30 minutes helps meld the flavors, enhancing the overall taste experience. {{image_4}} You can boost this salad's nutrition easily. Add some spinach for iron or kale for fiber. Chopped apples give sweetness and crunch. You can mix in walnuts or almonds for healthy fats, too. They also add a nice crunch. If you want a bit more color, try diced bell peppers. They bring vitamins and a fresh taste. Chicken is great, but you can switch it up! Use canned tuna for a quick option. It adds a nice flavor and is packed with protein. Turkey is another tasty choice and works well if you have leftovers. If you want something different, try chickpeas. They make the salad vegan and add extra fiber. The creamy dressing makes this salad shine. But if you want a twist, try adding a bit of mustard. It gives a tangy kick. You can also use avocado oil for a lighter touch. For a spicy kick, add some sriracha or hot sauce! Mix in some honey or maple syrup for a sweet contrast. Each option can give your salad a unique taste. Store leftover chicken salad in an airtight container. This keeps it fresh and tasty. Make sure to place it in the fridge right away. Avoid leaving it out for too long. This dish is best enjoyed within three days. If you notice any changes in smell or color, it is safer to throw it away. To meal prep chicken salad, follow a few simple steps. First, cook and cool the chicken. Then, prepare the salad but don’t add salt until serving. This helps keep it fresh longer. You can also store the salad in individual containers. This makes it easy to grab for lunch or snacks. The creamy avocado chicken salad lasts three days in the fridge. It’s not best for freezing due to the avocado. When frozen, the texture may change. If you want to freeze leftovers, skip the avocado. You can add fresh avocado when you’re ready to eat it again. Creamy avocado chicken salad lasts about 3 to 4 days in the fridge. To keep it fresh, store it in an airtight container. This helps prevent browning of the avocado. If you see browning, it's still safe to eat. Just give it a good stir to mix it up. Yes, you can make this salad ahead of time. It tastes even better after a little chill in the fridge. Just prepare it and store it in a covered bowl. If you want, you can add the lettuce right before serving. This keeps it crisp and fresh. You can serve creamy avocado chicken salad on crisp lettuce leaves. It works well as a sandwich filling, too. Try it in a wrap or with whole grain crackers. Pair it with a light soup or a fresh garden salad for a full meal. Enjoy the blend of flavors! In this blog post, we explored the key ingredients for creamy avocado chicken salad and their benefits. You learned how to prep the salad, tips for mashing avocado, and making it creamy. We shared fun variations and storage tips to keep your salad fresh. You can mix flavors with different proteins and dressings for a tasty twist. With these insights, you can create a delicious and nutritious dish that fits your needs, making salad time enjoyable and easy. Enjoy your cooking!

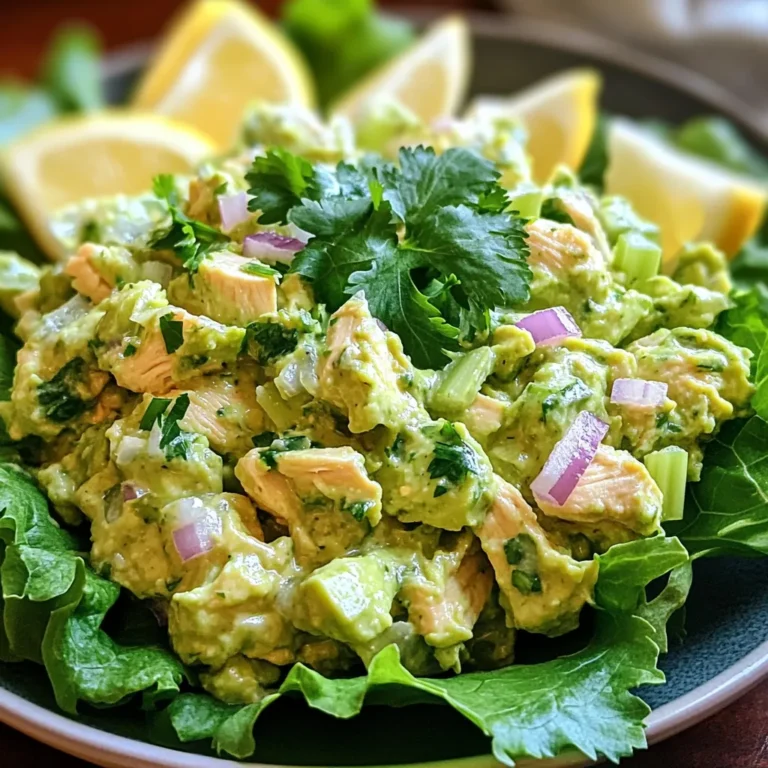
Creamy Avocado Chicken Salad Delightful and Easy Meal

- 1 cup rolled oats - 1/2 cup pure pumpkin puree - 1/4 cup nut butter (almond, peanut, or cashew) - 1/4 cup honey or maple syrup - 1/2 teaspoon pure vanilla extract - 1 teaspoon pumpkin spice blend - 1/4 cup chia seeds - 1/4 cup mini chocolate chips (optional) - Pinch of salt - 1 cup = 8 fluid ounces - 1/2 cup = 4 fluid ounces - 1/4 cup = 2 fluid ounces - 1 teaspoon = 5 milliliters If you need a smaller batch, just halve the amounts. For example, use 1/2 cup of oats instead of 1 cup. You can customize your energy balls with some fun add-ins. Try: - Dried fruit like cranberries or apricots - Seeds like pumpkin or sunflower seeds - Protein powder to boost protein content - Coconut flakes for a tropical twist These options add flavor and texture. Mix and match based on your taste. {{ingredient_image_2}} First, grab a large mixing bowl. Pour in 1 cup of rolled oats. Next, add 1/2 cup of pure pumpkin puree. Choose your favorite nut butter and add 1/4 cup to the bowl. You can pick almond, peanut, or cashew. Then, add 1/4 cup of honey or maple syrup. If you want a vegan option, stick with maple syrup. Don’t forget 1/2 teaspoon of pure vanilla extract. Mix all these ingredients well. You want a smooth and uniform mixture. Now it's time for the fun part—adding flavor! Sprinkle in 1 teaspoon of pumpkin spice blend. If you like, you can make your own with cinnamon, nutmeg, and ginger. Also, add 1/4 cup of chia seeds for extra crunch and nutrition. If you want a touch of sweetness, gently fold in 1/4 cup of mini chocolate chips. Mix everything together until it’s well combined. Taste your mixture. If you think it needs more sweetness, add a little extra honey or maple syrup. After mixing, cover the bowl and chill it in the refrigerator for about 30 minutes. This step helps the mixture firm up, making it easier to shape. When the time is up, take out the bowl. Scoop out portions of the mixture and roll them into small balls, about 1 inch in diameter. You should end up with 12 to 15 energy bites. Store your energy balls in an airtight container in the fridge. They stay fresh for up to a week. If you want to keep them longer, freeze them in a single layer, then move them to a container. If your mixture feels too dry, add a splash of water or more pumpkin puree. You can also add more nut butter to bind the ingredients better. If it’s too wet, add more oats or chia seeds. Adjusting is key to finding the perfect texture. Want to spice it up? Try adding a handful of nuts or seeds. You can also use dried fruits like cranberries or raisins for extra sweetness. A pinch of sea salt can balance flavors well. Experiment and find what you love most! Mix ingredients in a large bowl to ensure even blending. Use clean hands to form the balls; this gives you better control. Store your energy balls in an airtight container. Keep them in the fridge for a week or freeze for longer storage. Enjoy them as a quick, healthy snack! Pro Tips Chill for Better Texture: Chilling the mixture for at least 30 minutes helps to firm it up, making it easier to roll into bites. Customize Your Sweetness: Taste the mixture before rolling and adjust sweetness by adding more honey or maple syrup as desired. Experiment with Add-ins: Feel free to mix in other ingredients like dried fruit, nuts, or seeds for added texture and flavor. Storage Tips: Store the energy bites in an airtight container in the fridge for up to a week, or freeze them for longer-lasting snacks. {{image_4}} You can choose many nut butters for your Pumpkin Spice Energy Balls. I love almond butter for its creamy taste. Peanut butter adds a classic flavor that many enjoy. Cashew butter is smooth and slightly sweet. Each nut butter brings its own flair. Feel free to mix and match based on what you have at home. This simple change can make your snacks feel fresh and new. Want to switch things up? Try adding different flavors. You can fold in mini chocolate chips for a sweet twist. Dried fruits like cranberries or raisins add a chewy texture. For a fruity touch, consider using apple or banana puree instead of pumpkin. You can even add cocoa powder for a rich chocolate flavor. These variations can keep your energy balls exciting and fun. Making these energy balls gluten-free is easy. Just ensure your oats are certified gluten-free. If you're vegan, use maple syrup instead of honey. You can also choose a nut butter that fits your diet. Many brands offer vegan options. This way, everyone can enjoy these tasty treats without worry. You can store pumpkin spice energy balls in the fridge. Place them in an airtight container. They will stay fresh for up to a week. This way, you can enjoy a quick snack anytime. If you want to keep them longer, freezing is a great option. First, lay the energy balls in a single layer on a baking sheet. Freeze them for about two hours. After they are firm, transfer them to a freezer-safe container. They can last up to three months this way. To keep the energy balls fresh, avoid exposing them to air. Always use an airtight container. If you notice any moisture inside the container, it’s best to eat them sooner. Enjoying them while they are fresh gives the best taste and texture. Yes, you can use different sweeteners. Honey and maple syrup work well. If you prefer, try agave syrup or date syrup. Each sweetener brings a unique taste. You might want to adjust the amount based on your preference. If you like it sweeter, add a bit more. These energy balls last up to one week in the fridge. To store them, use an airtight container. If you want to keep them longer, freeze them. They freeze well and can last for months. Just make sure to thaw them before enjoying. Yes, pumpkin spice energy balls are healthy. They contain rolled oats, pumpkin puree, and nut butter. These ingredients provide fiber, protein, and healthy fats. Chia seeds add extra nutrients too. The sweetness from honey or maple syrup is natural. Enjoy them as a snack or energy booster! In this article, we explored making energy balls. We covered key ingredients, from base mixtures to optional add-ins. You learned step-by-step instructions, tips for success, and fun variations. Finally, we discussed how to store them safely. Energy balls are easy and tasty. They fit many diets and flavors. Now, you're ready to create your own energy-packed snacks! Enjoy making and sharing them with friends and family.

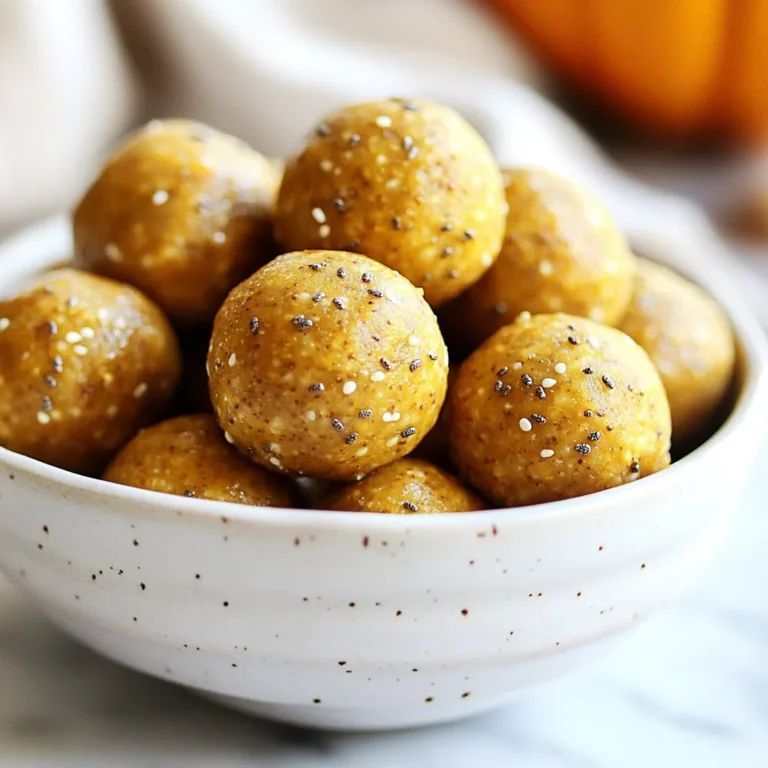
Pumpkin Spice Energy Balls Perfect for a Snack

To make these tasty turkey meatballs, gather these key ingredients: - 1 lb ground turkey - 1/4 cup breadcrumbs - 1/4 cup freshly grated Parmesan cheese - 1 large egg, beaten - 2 tablespoons honey - 2 tablespoons Sriracha sauce - 1 teaspoon garlic powder - 1 teaspoon onion powder - 1/2 teaspoon salt - 1/2 teaspoon freshly ground black pepper These ingredients work together to create juicy meatballs with a sweet and spicy kick. For a fresh touch, consider these optional garnishes: - 1 tablespoon freshly chopped cilantro Cilantro adds a bright flavor and color to your dish. Pair your Honey Sriracha Turkey Meatballs with these tasty sides: - Steamed rice - Mixed green salad - Roasted vegetables These options balance the meal and complement the meatballs perfectly. {{ingredient_image_2}} Start by preheating your oven to 400°F (200°C). This step is key for cooking the meatballs evenly. Line a baking sheet with parchment paper. This will help keep the meatballs from sticking and make cleaning easier. In a large bowl, add 1 pound of ground turkey. Next, mix in 1/4 cup of breadcrumbs and 1/4 cup of grated Parmesan cheese. Then, add 1 beaten egg, 2 tablespoons of honey, and 2 tablespoons of Sriracha sauce. Sprinkle in 1 teaspoon each of garlic powder and onion powder, plus 1/2 teaspoon of salt and black pepper. Use your hands or a spatula to mix everything gently. Remember, do not overmix; this keeps the meatballs light and fluffy. Now it’s time to shape the meatballs. Scoop out about 2 tablespoons of the mixture. Roll it into a smooth ball with your hands. Place each meatball on the baking sheet, making sure to leave about 1 inch of space between them. This space allows them to cook evenly. Put the baking sheet in your preheated oven. Bake the meatballs for 20 to 25 minutes. They should be golden brown and reach an internal temperature of 165°F (74°C). This ensures they are fully cooked and safe to eat. While the meatballs bake, prepare the glaze. In a small bowl, mix together 1 tablespoon of honey and 1 tablespoon of Sriracha sauce. Stir until the two ingredients blend well. This glaze will add a sweet and spicy kick to the meatballs. Once the meatballs finish baking, take them out of the oven. Carefully brush or spoon the honey-Sriracha glaze over each meatball. For a thicker glaze, return them to the oven for another 5 minutes. This helps the glaze stick and caramelize. When done, let the meatballs cool for a minute. Then, sprinkle with chopped cilantro for a fresh touch. Enjoy your flavorful dish! To keep your meatballs moist, avoid overmixing. When you combine the turkey, breadcrumbs, and other ingredients, use a gentle touch. This helps the meatballs stay tender. Adding a bit of grated cheese, like Parmesan, also adds moisture. If you love heat, keep the Sriracha as is. For a milder glaze, reduce the Sriracha and add more honey. You can start with one tablespoon of each, then taste and tweak. This way, you get the balance that fits your palate perfectly. These meatballs shine on their own but pair well with many sides. Try serving them over rice or in a fresh salad. You can also serve them with toothpicks for a fun appetizer. Drizzle more honey-Sriracha glaze on top for an extra kick. Don't forget to sprinkle fresh cilantro for color and taste! Pro Tips Don’t Overmix: When combining the ingredients for the meatballs, mix until just combined to keep them light and tender. Temperature Check: Use a meat thermometer to ensure the meatballs reach an internal temperature of 165°F (74°C) for safety and juiciness. Customize the Heat: Adjust the amount of Sriracha in the glaze based on your spice preference—more for heat, less for a milder flavor. Serving Suggestions: These meatballs are great as an appetizer or main dish; serve with a side of rice or in a wrap for a complete meal. {{image_4}} You can switch the ground turkey for other meats. Ground chicken works well. You can also use lean beef or pork. Each choice changes the flavor slightly. Choose what you like best. Just keep the same amounts. It will still taste great. To make this dish gluten-free, swap breadcrumbs for gluten-free options. You can use crushed rice crackers or almond flour. Both work nicely. They keep the meatballs light and tasty. Check the labels to ensure they are truly gluten-free. This way, everyone can enjoy them. You can play with the sauce too! If you want less heat, mix honey with barbecue sauce. This creates a sweet and tangy flavor. For a different kick, try adding garlic chili sauce. It gives a nice twist without being too spicy. Get creative and find your favorite flavor combo! After you cook your Honey Sriracha Turkey Meatballs, let them cool down. Place them in an airtight container. Store them in the fridge for up to four days. This keeps them fresh and tasty. When you’re ready to eat, just take them out. To freeze the meatballs, first let them cool completely. Arrange them in a single layer on a baking sheet. Freeze them for about an hour. Once they’re firm, transfer them to a freezer-safe bag or container. Label the bag with the date. You can freeze them for up to three months. This way, you can enjoy them later! When it’s time to reheat, there are a few ways to do it. For the best taste, bake them in the oven at 350°F (175°C) for 10-15 minutes. If you’re in a hurry, you can also use the microwave. Heat them on medium power for about 1-2 minutes. Just make sure they’re hot all the way through. Enjoy your tasty meal! Yes, you can! If you prefer milder flavors, try sweet chili sauce. For more heat, use a hot sauce with a similar consistency to Sriracha. You can also mix different sauces. Just keep the balance of sweet and spicy for the best taste. The best way to check is with a meat thermometer. Insert it into the center of a meatball. It should read 165°F (74°C). If you don’t have a thermometer, cut one open. The meat should be no longer pink inside. These meatballs pair well with many sides. Here are some ideas: - Steamed rice or quinoa - A fresh salad with greens and veggies - Roasted vegetables like broccoli or carrots - Noodles, like rice noodles or spaghetti - A dipping sauce, like extra honey-Sriracha glaze Feel free to mix and match! This blog post explored honey sriracha turkey meatballs. We discussed key ingredients, how to prepare them, and serving ideas. I shared tips for keeping meatballs moist and adjusting spice levels. You can also try various sauces for new flavors. Remember to store leftovers properly for future meals. Enjoy making these meatballs with friends and family! They are sure to impress everyone at your table. With these easy steps, you’ll create a delicious dish everyone loves. Happy cooking!

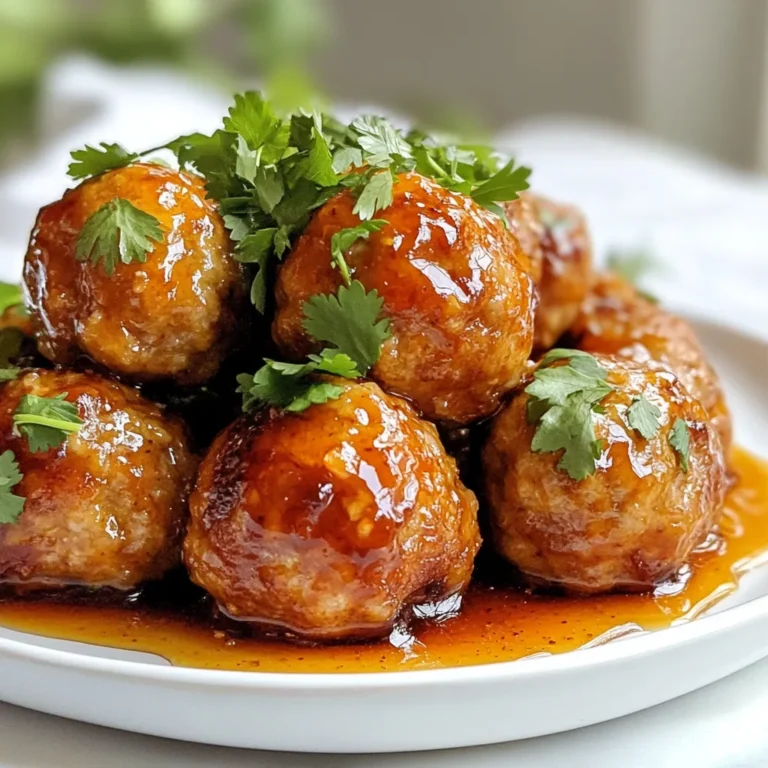
Honey Sriracha Turkey Meatballs Flavorful Dinner Recipe

To make the best caramel pecan cheesecake dip, you need these key ingredients: - 8 oz cream cheese, softened to room temperature - 1/2 cup powdered sugar - 1/2 cup packed brown sugar - 1 teaspoon pure vanilla extract - 1/2 cup heavy whipping cream, chilled - 1/2 cup pecans, finely chopped - 1/2 cup caramel sauce These items form the base of your dip. The cream cheese gives it a rich texture. The sugars add sweetness, while the vanilla adds depth. The whipped cream makes it light and fluffy. Chopped pecans give a nice crunch, and caramel sauce provides a sweet finish. For a delightful experience, consider these tasty dippers: - Graham crackers - Crisp apple slices - Crunchy pretzels These options add fun textures and flavors. The sweet crackers balance the dip's richness. Apples add a refreshing crunch. Pretzels bring a salty twist. You can easily swap some ingredients if needed: - Use low-fat cream cheese for a lighter option. - Replace heavy cream with whipped topping for ease. - If you don't have brown sugar, regular sugar works fine. These substitutions keep the flavor while fitting your needs. Always remember, cooking is about experimenting and personalizing! {{ingredient_image_2}} First, grab a large mixing bowl. Use an electric mixer to beat 8 oz of softened cream cheese. Mix it for about 2-3 minutes until it's smooth and creamy. Next, add 1/2 cup of powdered sugar and 1/2 cup of packed brown sugar gradually. Keep mixing on low speed until both sugars blend in well. Now, pour in 1 teaspoon of pure vanilla extract and mix it briefly. This adds a nice flavor to your dip. In another bowl, whip 1/2 cup of chilled heavy cream. Use clean beaters and whip until you see stiff peaks, which should take about 3-5 minutes. Now, gently fold the whipped cream into the cream cheese mixture. Do this in batches to keep the airiness. Use a spatula to mix until it's just combined. This step makes your dip light and fluffy. Transfer your cheesecake dip into a decorative bowl. Drizzle 1/2 cup of caramel sauce over the top. Save some chopped pecans to sprinkle on for a crunchy finish. For dipping, serve with graham crackers, crisp apple slices, or crunchy pretzels. This mix of textures makes every bite exciting! For a fun twist, you can also show off the dip in a clear glass bowl to highlight the layers. To get that smooth and creamy dip, start with softened cream cheese. Use an electric mixer for about 2-3 minutes. This makes sure it blends well. Add the sugars slowly, mixing on low speed. This prevents lumps. When you fold in the whipped cream, be gentle. This keeps the dip light and airy. If you mix too hard, it can become dense. If you have any dip left, store it in an airtight container. It stays fresh in the fridge for up to three days. When you want to eat it again, just stir it well before serving. If it looks a bit thick, add a splash of cream to restore its texture. Avoid freezing this dip, as it can change the texture. For a stunning display, use a clear glass bowl. This shows off the creamy dip and the drizzled caramel. Sprinkle some extra pecans on top for a crunchy touch. You can also place a small dish of extra caramel sauce on the side. This lets guests add more sweetness if they want. Serve with colorful graham crackers or fresh apple slices to create a fun contrast. Pro Tips Serve Chilled: For the best flavor and texture, ensure that the cheesecake dip is chilled before serving. This helps to enhance the creamy consistency and flavor profile. Customize Your Dippers: While graham crackers and apple slices are classic choices, feel free to get creative! Try using chocolate wafers, pretzel crisps, or even sliced strawberries for a fun twist. Make It Ahead: This dip can be prepared a day in advance. Just store it in an airtight container in the refrigerator, and give it a gentle stir before serving. Drizzle with Extra Caramel: For an extra indulgent touch, serve the dip with a small bowl of additional caramel sauce on the side, allowing guests to add as much sweetness as they desire. {{image_4}} You can easily change the flavor of your dip. Try adding a pinch of cinnamon for warmth. You can also mix in some cocoa powder for a chocolate twist. If you love coffee, add a teaspoon of instant coffee granules. Each addition brings its own charm to the dip. While pecans are classic, you can use other nuts. Walnuts add a rich taste and crunchy texture. Almonds are a great choice too. They give a nice crunch and a sweet flavor. Just chop them finely before mixing into the dip. Seasonal flavors can make this dip even more fun. In fall, add pumpkin spice for a cozy vibe. During the holidays, try mixing in peppermint extract for a festive touch. In summer, fresh berries can brighten the dip and add a fruity note. Each season brings a new way to enjoy this treat! You should keep any leftover dip in an airtight container. This helps keep it fresh for longer. Place it in your fridge right after serving. The cool air will slow down spoilage. Make sure to seal it well to avoid any odors from mixing. This dip is best enjoyed cold, so reheating is not needed. If you prefer it warm, use a microwave. Heat it in short bursts of about 15 seconds. Stir in between until it reaches your desired warmth. Be careful not to overheat, as this can change the texture. The dip lasts about 3-5 days in the fridge. If you want it to last longer, consider freezing it. Place it in a freezer-safe container. It can stay good for about 2-3 months in the freezer. To thaw, put it in the fridge overnight. Stir it well before serving to regain the creamy texture. Yes, you can make this dip ahead of time. Just prepare it and store it in the fridge. It stays tasty for up to two days. This makes it great for parties. Just remember to add the caramel sauce before serving. This keeps it fresh and yummy. You can serve this dip with many fun snacks. Here are some great options: - Graham crackers - Crisp apple slices - Crunchy pretzels These snacks give a nice crunch and contrast to the creamy dip. You can mix and match, too! Yes, low-fat cream cheese can work here. It changes the texture a bit, but it will still taste good. Just make sure to mix it well for a creamy dip. If you prefer lighter options, this is a good choice! This blog post covered the key ingredients, step-by-step instructions, and helpful tips for caramel pecan cheesecake dip. You learned how to create a creamy texture and how to add personal touches. Remember, storage is simple, and variations are fun. This dip is a great treat for any gathering. Keep experimenting with flavors and presentation to make it your own. Enjoy sharing this delicious dip with friends and family!

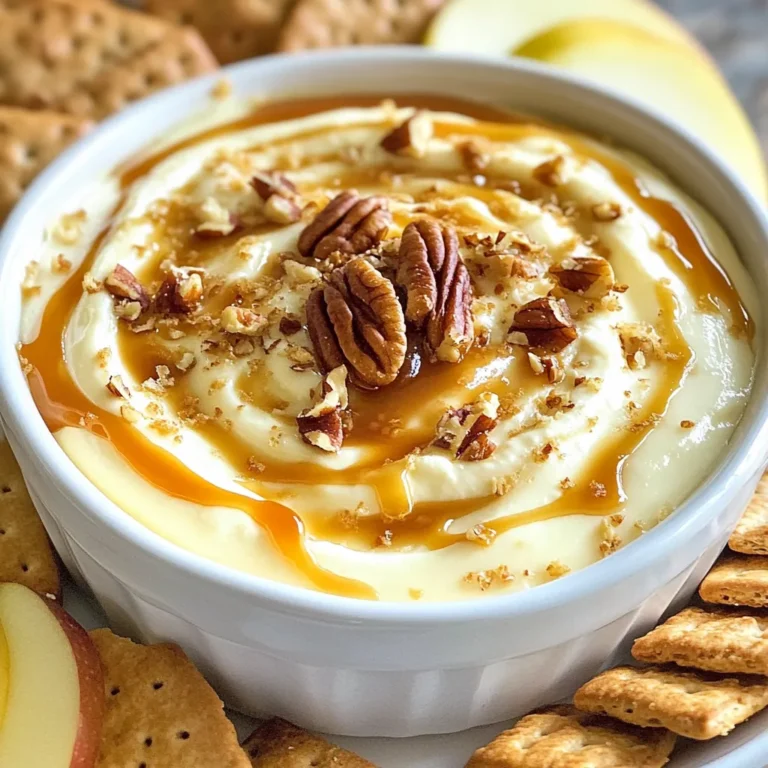
Caramel Pecan Cheesecake Dip Delightful and Easy Treat

- 1 lb large shrimp, peeled and deveined - 2 tablespoons extra virgin olive oil - 3 cloves garlic, finely minced - 1 cup cherry tomatoes, halved - 1 cup fresh baby spinach - 1 cup heavy cream - ½ cup freshly grated Parmesan cheese - 1 teaspoon Italian seasoning blend - Salt and freshly ground black pepper, to taste - Fresh basil leaves, for garnish You can swap some ingredients if needed. For a lighter sauce, use half-and-half instead of heavy cream. If you prefer a vegan version, try using plant-based cream and tofu instead of shrimp. For extra flavor, add red pepper flakes or fresh herbs like oregano or thyme. {{ingredient_image_2}} 1. Heat the Oil: Start by placing a large skillet on medium heat. Add 2 tablespoons of extra virgin olive oil. Wait until it shimmers. This step takes about 1 minute. 2. Cook the Shrimp: Add 1 pound of peeled and deveined shrimp to the skillet. Season them with salt and freshly ground black pepper. Cook for 2 to 3 minutes. Watch for the shrimp to turn pink and curl slightly. That means they are done. Remove them from the skillet and set them aside. 3. Sauté Garlic and Tomatoes: In the same skillet, add 3 cloves of minced garlic and 1 cup of halved cherry tomatoes. Stir often for about 2 minutes. Look for the tomatoes to soften and release their juices. 4. Add Spinach: Toss in 1 cup of fresh baby spinach next. Cook for another minute. Stir occasionally until the spinach wilts. This adds lovely color and nutrition to your dish. 5. Make the Creamy Sauce: Pour in 1 cup of heavy cream. Then, add ½ cup of freshly grated Parmesan cheese and 1 teaspoon of Italian seasoning. Stir well until the cheese melts and creates a creamy sauce. Let it simmer gently. This step takes about 3 to 4 minutes. 6. Combine the Shrimp: Return the cooked shrimp to the skillet. Stir to coat the shrimp in the sauce. Heat for an additional 2 to 3 minutes. Taste the sauce. Adjust the seasoning if you like with more salt or pepper. 7. Garnish and Serve: Once done, remove the skillet from heat. Top the dish with fresh basil leaves for garnish. Serve it hot over rice or pasta, and enjoy your meal! - Sautéing techniques for shrimp: Start with a hot skillet. Heat your olive oil until it shimmers. Add the shrimp in a single layer. Don't crowd the pan; this helps them cook evenly. Sauté for just 2-3 minutes until they turn pink. Remove them quickly to avoid overcooking. - Tips for achieving the perfect creamy sauce: Use heavy cream for richness. Stir in the Parmesan slowly to let it melt fully. Keep the heat low once you add the cream. This prevents it from curdling. Let the sauce simmer gently to enhance the flavors. - Seasoning adjustments based on personal preference: Always taste your sauce! If you like it spicier, add red pepper flakes. Want more herbs? Fresh parsley or thyme can boost flavor. Adjust the salt and pepper to suit your taste. Cooking is all about personal touches! Pro Tips Fresh Ingredients: Always use the freshest shrimp and vegetables for the best flavor and texture. Fresh ingredients make a significant difference in the overall quality of the dish. Adjusting Creaminess: If you prefer a lighter sauce, you can substitute half of the heavy cream with chicken or vegetable broth. This will still give you a delicious flavor without being too rich. Perfect Seasoning: Taste the sauce before serving and adjust the seasoning as necessary. A touch more salt or pepper can elevate the entire dish, so don’t skip this step! Serving Suggestions: This dish pairs wonderfully with a side of garlic bread or a fresh salad. These sides can balance the richness of the creamy sauce and enhance the meal experience. {{image_4}} You can change the taste of Creamy Tuscan Shrimp by adding spices or herbs. A pinch of red pepper flakes gives a warm kick. Fresh parsley or oregano can add a nice touch too. If you want to switch proteins, consider chicken or salmon. Chicken breast works well if you sauté it first. Salmon adds a rich flavor that pairs great with the cream sauce. For a vegetarian or vegan version, replace the shrimp with firm tofu or chickpeas. Use coconut cream instead of heavy cream to keep it creamy and rich. You can also skip the Parmesan cheese or use a vegan cheese substitute. To keep your Creamy Tuscan Shrimp fresh, follow these tips: - Refrigeration: Store leftovers in an airtight container. They last about 3 days in the fridge. Reheat gently on the stove or in the microwave. Add a splash of cream to restore the sauce's richness. - Freezing: You can freeze this dish, but be aware that the texture may change. The sauce may separate when thawed. To freeze, place the shrimp and sauce in a freezer-safe container. It lasts up to 3 months. - Containers: Use glass or BPA-free plastic containers for storage. They seal tightly and keep the shrimp safe. Avoid metal containers as they may react with the cream. Following these storage tips helps ensure your Creamy Tuscan Shrimp remains delicious and safe to enjoy later. To add heat, try these options: - Mix in red pepper flakes while cooking. - Add sliced jalapeños for a fresh kick. - Stir in hot sauce to your taste. These additions will give your dish a nice spicy twist. Yes, you can use frozen shrimp! Just make sure to thaw them first. - Place them in cold water for quick thawing. - Once thawed, pat them dry before cooking. This helps them sear nicely in the pan. Creamy Tuscan Shrimp pairs well with many sides: - Fluffy white rice absorbs the sauce well. - Pasta, like fettuccine or penne, complements the dish. - A fresh green salad adds a nice crunch. These options create a balanced and satisfying meal. In this blog post, I covered the essential ingredients and how to prepare them for your dish. You learned step-by-step instructions for a delicious meal, plus tips for perfecting the sauce and cooking shrimp. I provided flavor variations and recommended storage methods for leftovers. Remember, cooking is all about creativity and personal taste. Use these guidelines to make the dish your own. Enjoy experimenting and savoring every bite!

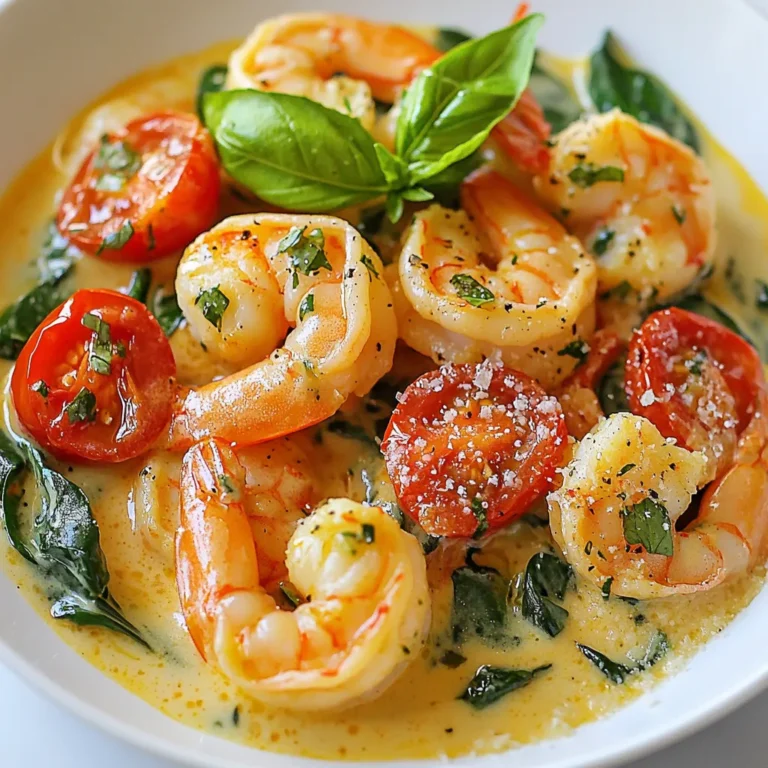
Creamy Tuscan Shrimp Flavorful and Easy Recipe

When making Maple Dijon Roasted Carrots, you need simple and fresh ingredients. Here’s what you will need: - 1 lb (450g) baby carrots, thoroughly washed and trimmed - 3 tablespoons pure maple syrup - 2 tablespoons Dijon mustard - 2 tablespoons extra virgin olive oil - 1 teaspoon garlic powder - 1 teaspoon fresh thyme leaves (or ½ teaspoon dried thyme) - Salt and freshly cracked black pepper, to taste - Fresh parsley, finely chopped (for garnishing) These ingredients work together to create a sweet and savory blend. The baby carrots bring a tender crunch. Maple syrup adds sweetness, while Dijon mustard offers a tangy kick. Extra virgin olive oil helps everything roast nicely. Garlic powder gives depth, and thyme adds earthy notes. Salt and pepper enhance all the flavors. Finally, parsley gives a bright touch. You can find these ingredients at your local store or farmers' market. Fresh ingredients always taste better. Use pure maple syrup for the best flavor. Avoid imitation syrups, as they lack the real taste. Keep these tips in mind when gathering your ingredients! {{ingredient_image_2}} Start by preheating your oven to 425°F (220°C). This high heat helps the carrots caramelize well. To make cleanup easy, line a baking sheet with parchment paper. It will catch any sticky glaze. In a large bowl, mix together three tablespoons of pure maple syrup, two tablespoons of Dijon mustard, and two tablespoons of extra virgin olive oil. Add one teaspoon of garlic powder and one teaspoon of fresh thyme leaves. Season with a pinch of salt and freshly cracked black pepper. Whisk until it is smooth and well-blended. Take one pound of baby carrots and wash them thoroughly. Trim the tops if needed. Add the carrots to the bowl with the dressing. Toss the carrots gently to ensure they are fully coated in the maple Dijon glaze. Each carrot should be covered in that sweet and tangy goodness. Spread the coated carrots on the lined baking sheet. Make sure they are in a single layer for even roasting. Place the tray in the oven and roast for about 25 to 30 minutes. Halfway through, flip the carrots to promote even cooking and caramelization. Once the carrots are tender and caramelized, take them out of the oven. Let them cool for a few minutes. Transfer the roasted carrots to a serving dish. For a bright finish, sprinkle some finely chopped fresh parsley on top. This adds color and flavor to the dish! Roasting time is key to great carrots. Aim for 25-30 minutes at 425°F (220°C). Flip them halfway. This step helps them cook evenly. You want them tender and a bit caramelized. If they are not tender enough after 30 minutes, roast them a bit longer. Mix it up with herbs! You can use rosemary or oregano for a new flavor. Fresh herbs add brightness. Dried herbs work too, just use less. You can also try adding a pinch of cayenne for some heat. These carrots shine on any plate. Serve them warm as a side dish. They pair well with roasted meats and grains. For a special touch, drizzle pan juices over them. This adds flavor and looks nice. Don't forget the fresh parsley! It boosts color and taste. Pro Tips Use Fresh Thyme: For a more aromatic flavor, opt for fresh thyme instead of dried. It elevates the dish with its vibrant taste. Adjust Sweetness: If you prefer a sweeter glaze, feel free to add a bit more maple syrup to the mix. Taste as you go! Roasting Time Variations: Keep an eye on the carrots as roasting times can vary based on size. Smaller baby carrots may need less time, while larger ones may take longer. Serve Warm: For the best flavor, serve the roasted carrots warm. They taste divine when freshly out of the oven! {{image_4}} You can swap out maple syrup for honey. Honey adds a nice sweetness. It also brings a unique flavor. Just use the same amount as maple syrup. This change makes the carrots taste even sweeter. Want some heat? Add a few drops of hot sauce to the dressing. This will give the carrots a spicy twist. Start with a small amount. You can always add more if you like it hot. The blend of sweet and spicy will surprise your taste buds. To make this dish vegan, check your Dijon mustard. Some brands use egg. Choose a vegan-friendly mustard. For a creamier texture, add a splash of coconut milk. This will keep the dish rich and tasty without any animal products. After enjoying your Maple Dijon Roasted Carrots, store any leftovers in an airtight container. Make sure the container is clean and dry. You can keep them in the fridge for up to three days. If you want to store them longer, freeze them. Place the carrots in a freezer-safe bag. They will stay good for up to three months. When you’re ready to eat them, just thaw in the fridge overnight. Reheating your Maple Dijon Roasted Carrots is easy. If you want to use the oven, set it to 350°F (175°C). Spread the carrots on a baking sheet. Heat them for about 10-15 minutes until warm. You can also use a microwave. Place the carrots in a microwave-safe bowl. Heat them for 1-2 minutes, stirring halfway through. Be careful not to overheat, as this can make them soggy. Enjoy the sweet and savory taste again! Yes, you can use regular carrots. Just cut them into equal pieces. Aim for about 2 to 3 inches long. This helps them cook evenly. Baby carrots are sweet and tender, but regular carrots can work just as well. They may take a bit longer to roast, so check them often. Maple Dijon Roasted Carrots go well with many dishes. You can serve them with chicken, pork, or fish. They add a nice color to any plate. Try them next to rice or quinoa for a complete meal. A fresh salad also complements their sweet and savory taste. You will know the carrots are done when they are tender. A fork should easily pierce them. Look for a nice caramel color on the outside. This shows they are well-roasted. If they look golden and smell sweet, they are ready to enjoy! We covered many great ways to make maple Dijon roasted carrots. You learned about the fresh ingredients needed, like baby carrots, maple syrup, and Dijon mustard. I shared simple steps to prep and roast the carrots. We discussed tips for perfecting the dish and fun variations to try. Finally, I provided storage advice and answered common questions. Enjoy making this dish. It’s easy, tasty, and perfect for any meal.

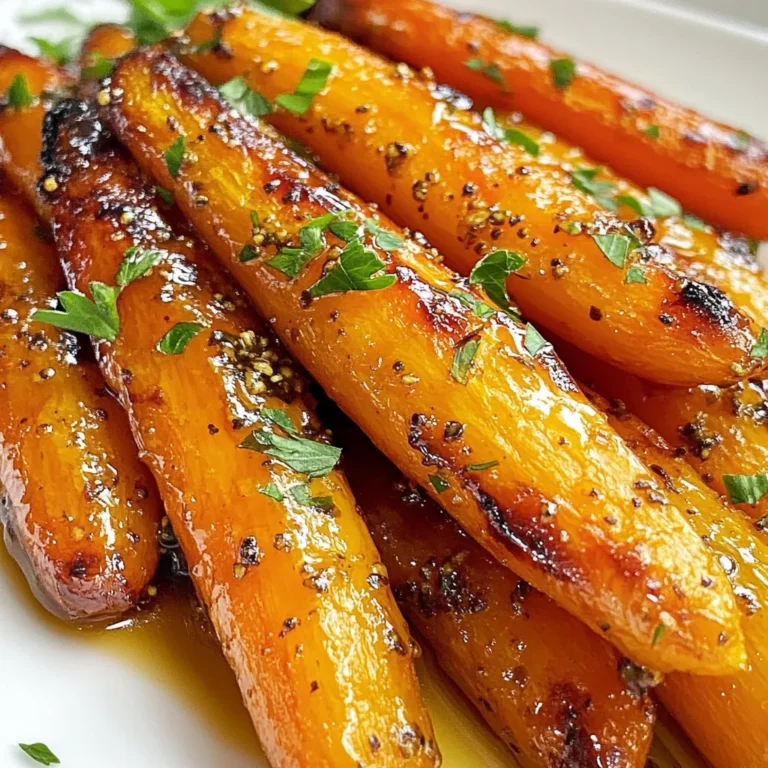
Maple Dijon Roasted Carrots Savory and Sweet Side

PREV 1 … 47 48
purelyyumrecipes

explore

DessertsDinnerAppetizersDrinks

Our Policies

  • Cookie Policy
  • Copyright Policy
  • Disclaimer
  • GDPR Policy
  • Terms Of Use
Back to Top
  • About
  • Contact Us
  • Privacy Policy
© 2026 purelyyumrecipes