FREE DINNER EBOOK! Get your copy!
  • Cookie Policy
  • GDPR Policy
  • Disclaimer
  • Terms Of Use
  • Visit my other site: Fun Cookie Recipes
purelyyumrecipes
  • Home
  • Dinner
  • Desserts
  • Drinks
  • Appetizers
  • Contact
  • About
  • Privacy Policy
  • Home
  • Dinner
  • Desserts
  • Drinks
  • Appetizers
  • Contact
  • About
  • Privacy Policy
  • Cookie Policy
  • GDPR Policy
  • Disclaimer
  • Terms Of Use
Visit my other site: Fun Cookie Recipes

HOME / CATEGORIES /

Latest

- 8 oz. rice noodles - 1 cup creamy peanut butter - 3 tablespoons soy sauce - 2 tablespoons rice vinegar - 2 tablespoons sesame oil - 2 tablespoons chili paste (adjust to taste) - 2 cloves garlic, minced - 1 tablespoon ginger, minced - Cooked chicken or tofu (optional) - 1 cup shredded carrots - 1 red bell pepper, thinly sliced - 2 green onions, chopped - 1/4 cup chopped cilantro - Crushed peanuts for garnish Having the right ingredients makes all the difference. I love using rice noodles. They soak up flavors well and offer a great texture. Creamy peanut butter gives richness. Soy sauce adds depth, while rice vinegar brings a little tang. Sesame oil completes the flavor with its nutty notes. For some heat, I often add chili paste. Garlic and ginger boost the dish’s aroma. If you want protein, chicken or tofu are great options. Finally, toppings like shredded carrots, red bell pepper, and green onions add color and crunch. Cilantro gives a fresh taste, and crushed peanuts enhance the dish's texture. All these ingredients combine to make a delicious meal you can whip up easily. To cook rice noodles, follow the package instructions. Usually, you need to boil water and add the noodles. Cook them until they are al dente. This means they should still have a slight bite. After cooking, drain the noodles in a colander. Rinsing is very important. Rinse the noodles under cold water right away. This stops the cooking process. It also keeps the noodles from sticking together. In a medium bowl, combine the creamy peanut butter, soy sauce, rice vinegar, and sesame oil. Add the chili paste, minced garlic, ginger, and honey to the mix. Use a whisk to blend everything until it is smooth. If the sauce is too thick, add warm water. This helps adjust the sauce to your liking. In a large bowl, combine the cooled rice noodles, shredded carrots, sliced red bell pepper, and chopped green onions. Mix them well so each ingredient is spread out. Then, drizzle the peanut sauce over the noodle mix. Use tongs or a fork to toss everything together. Make sure each noodle is coated in sauce. If you want to add protein, now is the time. Fold in cooked chicken or tofu for extra flavor and nutrition. Taste your dish! If you want more heat, add more chili paste or soy sauce. This is your chance to customize the flavor. When serving, garnish with chopped cilantro and crushed peanuts. This adds a nice crunch and bright flavor. For an extra touch, consider adding more green onions or a drizzle of sesame oil. Enjoy your vibrant and tasty chili garlic peanut noodles! To avoid sticky noodles, rinse them under cold water. This stops the cooking and removes excess starch. For the best texture, cook the rice noodles until al dente. Follow the package instructions closely, usually about 4-6 minutes. Adjusting spice levels is easy. Start with less chili paste and add more as needed. For dietary needs, swap peanut butter with sunflower seed butter. You can also choose gluten-free soy sauce for a gluten-free version. For a stunning plate, drizzle a bit of sesame oil before serving. Garnish with chopped green onions and crushed peanuts for texture. Pair this dish with a light salad or steamed veggies for a complete meal. {{image_4}} To make this dish vegetarian or vegan, swap chicken for tofu. Tofu adds a nice texture and absorbs flavors well. You can also use plant-based sauces. Check the labels to ensure they are vegan-friendly. You can change the spice level by adjusting chili paste amounts. If you like it hot, add more! For a milder dish, start with less. You can also add fresh chilies for extra heat. Sliced jalapeños or Thai bird chilies work great. Feel free to add other vegetables to your noodles. Broccoli, bell peppers, or snap peas add color and crunch. You might also want to toss in some nuts or seeds for texture. Chopped peanuts or sesame seeds offer a delightful crunch. To keep your chili garlic peanut noodles fresh, follow these steps: - Refrigeration: Place leftovers in the fridge within two hours of cooking. - Containers: Use airtight containers for best results. Glass or BPA-free plastic works well. This way, your noodles stay tasty for up to four days. Always label the container with the date. If you want to save some for later, freezing is a good option. - Guidelines: Let the noodles cool completely before freezing. Portion them into freezer-safe bags. Squeeze out the air to prevent freezer burn. - Reheating: When ready to eat, thaw the noodles in the fridge overnight. Reheat in a pan over low heat. Add a splash of water or sauce for moisture. Enjoy your delicious chili garlic peanut noodles even after a few weeks! Chili garlic peanut noodles last about 3 to 5 days in the fridge. Store them in an airtight container. This keeps the flavors fresh and prevents spoilage. When you’re ready to eat, just reheat them in the microwave or on the stove. Yes, you can use other noodles! Some great options are spaghetti, udon, or soba noodles. Each type of noodle brings a unique texture. Just make sure to cook them according to the package instructions. If you need a substitute for peanut butter, try almond butter or sunflower seed butter. Both options give a nice taste and creamy texture. They work well in the sauce and keep the dish tasty. To make chili garlic peanut noodles gluten-free, use gluten-free soy sauce. You can also choose rice noodles, as they are naturally gluten-free. Ensure all other ingredients are gluten-free too, especially sauces and condiments. Yes, you can prepare chili garlic peanut noodles ahead of time. Cook and mix the noodles and sauce, then store them separately. This helps keep the noodles from becoming mushy. When you’re ready to eat, just combine and heat! Chili garlic peanut noodles are simple and tasty. We covered the key ingredients, like rice noodles and peanut butter. I shared steps for cooking, mixing, and garnishing. You learned tips for perfect noodles and how to personalize the dish. Feel free to adjust spices and add your favorite veggies. This dish is great for any meal. Enjoy your cooking adventure with chili garlic peanut noodles!

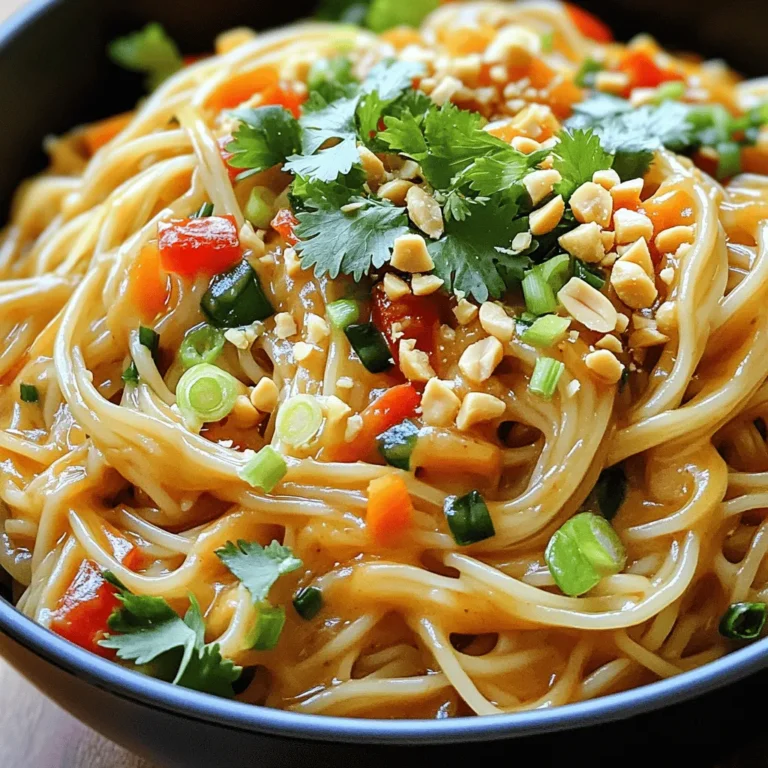
Chili Garlic Peanut Noodles Flavorful and Easy Recipe

- 1 pound large shrimp, peeled and deveined - 4 cups fresh broccoli florets - 4 cloves of garlic, finely minced - 3 tablespoons extra virgin olive oil - 1 tablespoon freshly squeezed lemon juice - 1 teaspoon dried oregano - 1 teaspoon dried thyme - 1/2 teaspoon red pepper flakes (optional) - Zest of 1 lemon - Fresh parsley, roughly chopped - Salt and freshly cracked black pepper, to taste Each ingredient plays a key role in this dish. The shrimp offer a sweet, tender bite. The broccoli adds a nice crunch and bright green color. Garlic brings a strong flavor that pairs well with both. Olive oil helps everything cook evenly and adds richness. The lemon juice adds brightness, while oregano and thyme give an earthy taste. Red pepper flakes can bring heat if you like a spicy kick. The lemon zest and parsley finish the dish with fresh flavors. Salt and pepper season everything perfectly. This balance of flavors makes each bite delightful! - Preheat the oven to 425°F (220°C). This step is key for even cooking. - In a large bowl, mix the shrimp with minced garlic, olive oil, lemon juice, oregano, thyme, red pepper flakes, salt, and pepper. Make sure all the shrimp are coated well. Let them sit for a few minutes to soak up the flavors. - Take a large baking sheet. Spread the marinated shrimp in one area, leaving room for the broccoli. - Add the fresh broccoli florets to the same bowl. Drizzle more olive oil and sprinkle extra salt and pepper. Toss gently to coat the broccoli. Place the broccoli on the sheet pan next to the shrimp. Keep everything in a single layer for best results. - Put the sheet pan in the oven. Bake for 12-15 minutes. Keep an eye on the shrimp. They should turn pink and opaque. The broccoli should be tender and have crispy edges. - Once cooked, take the pan out and sprinkle lemon zest over both the shrimp and broccoli. This adds a fresh touch. Enjoy your meal! Marinating shrimp is key for great flavor. Start with fresh shrimp for the best taste. Use garlic, olive oil, and lemon juice to create a simple mix. - Best practices for marinating shrimp: Always marinate in the fridge. This keeps the shrimp safe and flavorful. Avoid long marinating times; 15-30 minutes is enough. - Time considerations for maximum flavor: The longer you marinate, the more flavor shrimp will absorb. But don’t go over 30 minutes to prevent a mushy texture. Baking shrimp and broccoli together saves time and effort. - Importance of single-layer arrangement: Spread shrimp and broccoli in one single layer on the sheet pan. This helps them cook evenly and get crispy. - Adjusting baking time based on shrimp size: Larger shrimp may need a few extra minutes. Keep an eye on them, so they stay juicy. Plating makes a big difference in how food looks and tastes. - Plating ideas: Use a large platter for family-style serving. For a fancy touch, plate individual portions with a sprinkle of parsley on top. - Pairing dishes or sides: Serve with rice or a fresh salad. A crisp white wine pairs well, adding brightness to your meal. {{image_4}} You can easily change up this dish with different veggies. Try adding bell peppers, carrots, or snap peas. They add color and flavor. Each veggie cooks well with shrimp and broccoli. If you want more protein, swap shrimp for chicken or fish. Chicken breasts or salmon fillets work great. Just adjust the cooking time depending on the protein you choose. Adding new herbs and spices can boost the flavor. Fresh basil or parsley can brighten your dish. You might also try dill or cilantro for a fresh twist. To spice things up, you can use different peppers. Use jalapeños for more heat or sweet bell peppers for a mild flavor. Adjust the red pepper flakes to match your taste. You can make this dish vegetarian by using tofu or tempeh. Both soak up flavors well. Just cut them into small pieces and marinate like the shrimp. For a hearty base, add quinoa or brown rice. They provide great texture and make the dish filling. Always adjust cooking time to ensure everything cooks evenly. To store leftovers, let the dish cool. Place it in a shallow container. Use a container with a tight lid to keep it fresh. This helps maintain flavor and texture. I recommend using glass or BPA-free plastic containers. These materials are safe and easy to clean. To freeze the dish, first, let it cool completely. Divide it into single-serving portions. Use freezer-safe bags or containers. Squeeze out as much air as possible to avoid freezer burn. When you’re ready to eat, thaw it in the fridge overnight. You can also use the microwave for quick thawing. Reheat in the oven at 350°F (175°C) until hot. This keeps the shrimp juicy and the broccoli tender. In the fridge, the dish lasts for 3 to 4 days. In the freezer, it can stay good for up to 3 months. Always check for any signs of spoilage before eating. If it smells off or has changed color, it’s best to toss it. Proper storage is key to enjoying your Garlic Herb Shrimp Broccoli Sheet Pan at its best! This dish takes about 25 minutes to make. You spend 10 minutes prepping the shrimp and broccoli. Then, you cook everything in the oven for 12-15 minutes. It’s quick and easy, perfect for busy days. Yes, you can use frozen shrimp. Just be sure to thaw them first. Place the shrimp in cold water for about 15-20 minutes. Drain and pat them dry before marinating. This way, the shrimp absorbs all the tasty flavors. This dish pairs well with rice or quinoa. You can also serve it with a fresh salad. For drinks, try a light white wine or sparkling water with lemon. These sides will complement the shrimp and broccoli nicely. Yes, this recipe is great for meal prep. You can make it ahead and store it in the fridge for up to three days. Use airtight containers to keep it fresh. Just reheat in the oven or microwave before serving. This blog post covered all you need to make Garlic Herb Shrimp with Broccoli. We discussed key ingredients, like shrimp and broccoli, and shared easy steps to create a delicious dish. I offered tips for marinating and baking, plus ideas for serving. Remember that variations exist, allowing for your personal touch. Enjoy this recipe for its flavor and ease. Make it your own by trying new ingredients or spices. Get cooking and share this meal with family and friends!

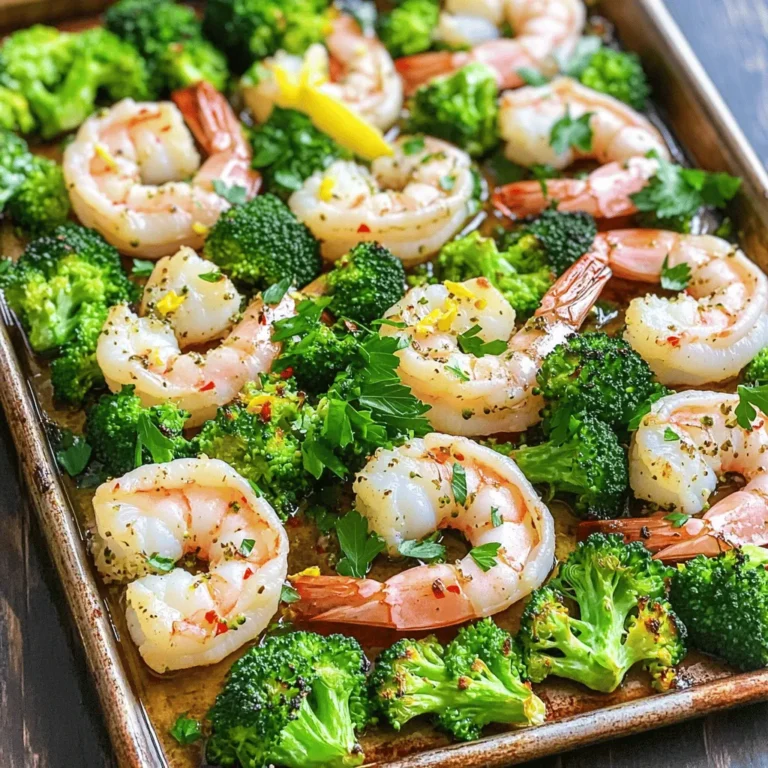
Garlic Herb Shrimp Broccoli Sheet Pan Delight

- 1 ripe banana - 1 cup canned pumpkin puree - 1 cup unsweetened almond milk - 1 scoop vanilla protein powder - 1/2 teaspoon pumpkin pie spice - 1 tablespoon maple syrup - 1 tablespoon chia seeds (optional) - Ice cubes You need just a few simple ingredients for the Protein Pumpkin Pie Smoothie. Each one adds flavor and nutrition. The ripe banana is key for natural sweetness and creaminess. Canned pumpkin puree gives that classic pumpkin flavor, plus it packs in lots of vitamins. Use unsweetened almond milk to keep it light and dairy-free. Vanilla protein powder boosts the protein content. This makes the smoothie filling and great for muscle health. Pumpkin pie spice adds warmth and a hint of spice that makes this drink special. Maple syrup is my go-to sweetener. You can swap it for honey if you prefer. Lastly, chia seeds are optional but great for extra nutrients. Add some ice cubes to make your smoothie cold and refreshing. With these ingredients, you can whip up a tasty, healthy drink in no time! - First, slice one ripe banana and add it to your blender. - Next, add one cup of canned pumpkin puree. Make sure it's not pie filling! - Pour in one cup of unsweetened almond milk. This adds creaminess. - Add one scoop of your favorite vanilla protein powder. This boosts protein. - Sprinkle in half a teaspoon of pumpkin pie spice for flavor. - Optional: Add one tablespoon of chia seeds for extra nutrition. - Blend everything on high until it’s smooth. If it’s too thick, add ice cubes. - After blending, taste your smoothie. Adjust the sweetness to your liking. - Pour the smoothie into a glass or bowl to serve. - For a lovely finish, sprinkle extra pumpkin pie spice on top. - Use ripe bananas for natural sweetness. They add a lovely flavor and creaminess. - Adjust almond milk for desired consistency. More milk makes it thinner, less makes it thicker. - Blend longer for creamier texture. This helps to break down all the ingredients well. - High protein content from protein powder. This helps you feel full and energized. - Fiber from pumpkin and chia seeds. Fiber aids digestion and keeps your tummy happy. - Healthy fats if using nut butter. Nut butter adds creaminess and boosts nutrition. {{image_4}} You can make this smoothie even more fun by swapping ingredients. Try these swaps: - Use coconut or oat milk instead of almond milk. Both will add unique flavors. - Experiment with different protein flavors. Chocolate or unflavored options can change the taste. Want to add more taste and nutrition? Here are some great ideas: - Include a scoop of nut butter. This adds creaminess and healthy fats. - Toss in spinach or kale for added greens. They blend well and boost nutrients. To store any leftover protein pumpkin pie smoothie, place it in an airtight container. This will keep it fresh. It tastes best when you drink it right away, but it can last for about 1-2 days in the fridge. If you notice separation, just give it a good shake before drinking. If you want to save some smoothie for later, freezing is a great choice. Pour the leftover smoothie into ice cube trays. Once frozen, you can pop out the cubes and store them in a bag. When you're ready for a quick smoothie, blend the frozen cubes with some almond milk. This makes a tasty and easy treat! Yes, you can easily make this smoothie vegan. To do this, swap the protein powder for a plant-based option. There are many great vegan protein powders made from pea, rice, or hemp. For sweetening, use maple syrup or agave nectar instead of honey. Both options keep the smoothie tasty and plant-based. To boost the protein in your smoothie, try these options: - Add a second scoop of protein powder. - Mix in Greek yogurt for creaminess. - Toss in a tablespoon of nut butter for extra protein and flavor. These options enhance the protein without changing the taste much. This smoothie can work as a meal replacement. It has protein from the powder and healthy carbs from the banana and pumpkin. It has around 300-400 calories, depending on your choices. Make sure to pair it with some fiber or healthy fats if you need a more balanced meal. Yes, you can use fresh pumpkin! For this, cook the pumpkin first. Cut it in half and remove the seeds. Roast it in the oven or steam it until soft. Then, scoop out the flesh and blend it until smooth. This fresh pumpkin adds a lovely, rich flavor to the smoothie. This blog post shared a simple, tasty pumpkin smoothie recipe. You learned the key ingredients and easy steps for making it. I highlighted tips for perfecting your blend, along with variations to suit your taste. Plus, I covered storage options for leftovers and answered common questions. Enjoy creating your own smoothie, and don't hesitate to experiment. The right mix can boost your nutrition and delight your taste buds. Remember, making healthy choices can be fun and delicious!

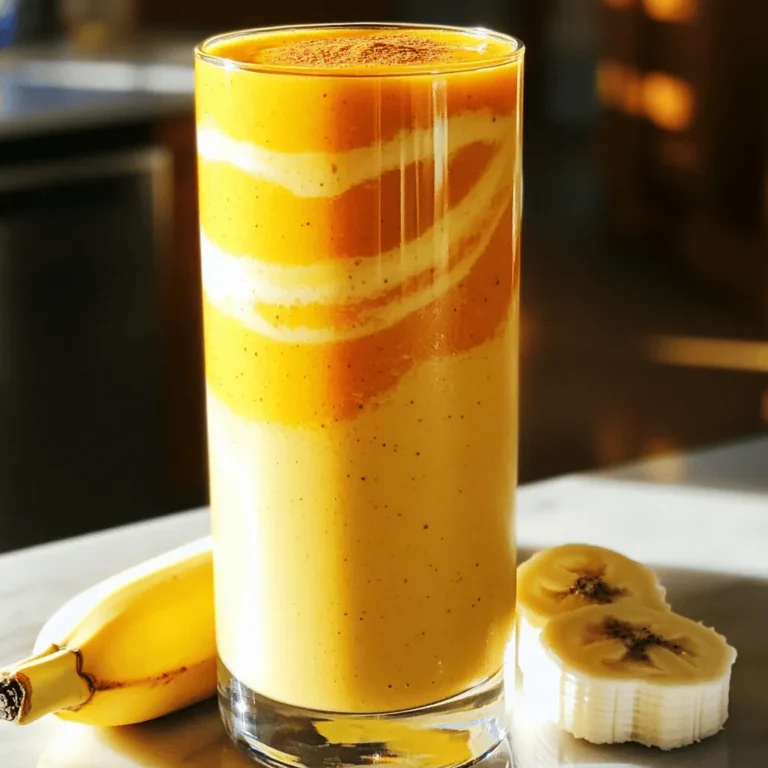
Protein Pumpkin Pie Smoothie Easy and Tasty Recipe

To make these No Bake Chocolate Peanut Butter Cheesecake Bars, gather these simple ingredients: - 1 ½ cups graham cracker crumbs - ½ cup unsweetened cocoa powder - ⅓ cup granulated sugar - ½ cup unsalted butter, melted - 1 (8 oz) package cream cheese, softened - ½ cup creamy peanut butter - 1 cup powdered sugar - 1 teaspoon pure vanilla extract - 1 cup heavy whipping cream - 1 cup chocolate chips (for topping) - Sea salt (for garnish) Each ingredient plays a key role in building flavor. The graham cracker crumbs give a nice base. Cocoa powder adds rich chocolate notes. Granulated sugar sweetens the crust. Unsalted butter helps bind it all together. For the filling, cream cheese creates a smooth texture. Creamy peanut butter offers a delightful flavor. Powdered sugar sweetens the filling while vanilla extract rounds out the taste. Heavy whipping cream makes the filling light and fluffy. Finally, chocolate chips melt beautifully on top, and sea salt enhances the sweet and salty balance. Each bite delivers a perfect mix of chocolate and peanut butter. - Combine graham cracker crumbs, cocoa powder, and granulated sugar. - Mix in melted butter until texture resembles damp sand. To start, take a medium bowl. Pour in 1 ½ cups of graham cracker crumbs. Add ½ cup of cocoa powder and ⅓ cup of granulated sugar. Stir these together until they blend. Now, pour in ½ cup of melted unsalted butter. Mix well until it feels like damp sand. This mixture will be the base of your cheesecake bars. - Line an 8x8 inch baking dish with parchment paper. - Press crust mixture firmly into the bottom and chill. Next, grab an 8x8 inch baking dish. Line it with parchment paper, leaving some overhang. This helps later when you remove the bars. Take your crust mixture and press it firmly into the bottom. Make sure it’s even. Place the dish in the fridge for about 15 minutes. This helps it set. - Beat cream cheese until creamy and smooth. - Mix in creamy peanut butter. - Gradually sift in powdered sugar and vanilla extract. Now, let’s make the filling. In a large bowl, beat 1 package of softened cream cheese using a hand mixer. Keep mixing until it’s creamy and smooth. Then, add ½ cup of creamy peanut butter. Blend until they mix well. Slowly sift in 1 cup of powdered sugar and 1 teaspoon of pure vanilla extract. Keep mixing until it’s fluffy and smooth. - Whip heavy cream until stiff peaks form. - Fold whipped cream into the cheesecake mixture. In another bowl, take 1 cup of heavy whipping cream. Use a hand mixer to whip it until stiff peaks form. This means it will hold its shape. Now, gently fold the whipped cream into your cheesecake filling. Do this carefully to keep the air in the whipped cream. - Pour cheesecake filling over the set crust and smooth out. Once the crust is chilled, it’s time for the filling. Pour the creamy cheesecake mixture over the crust. Use a spatula to spread it evenly. Make sure it looks nice and smooth on top. - Heat chocolate chips in intervals until melted. - Drizzle and spread over cheesecake layer. For the topping, take 1 cup of chocolate chips. Place them in a microwave-safe bowl. Heat them in 15-second intervals, stirring in between. Keep doing this until the chocolate melts and looks glossy. Carefully drizzle the melted chocolate over the cheesecake layer. Use a spatula to spread it well. - Cover and refrigerate for 4 hours, preferably overnight. - Slice and sprinkle with sea salt before serving. Finally, cover your baking dish with plastic wrap or foil. Put it in the fridge for at least 4 hours, but overnight is best. When ready, lift the bars out using the parchment overhang. Cut them into 16 square bars. Before serving, sprinkle a pinch of sea salt on top for extra flavor. Enjoy your delicious treat! To get the best texture, chill the crust well. Chilling helps it set and hold its shape. When you press the crust into the pan, make sure it is compact. This step is key to avoid a crumbly base. Next, let's talk about folding whipped cream. When you whip the cream, it should form stiff peaks. This means it stands tall and doesn't droop. Gently fold the whipped cream into the cheesecake mix. Use a spatula and be careful not to stir too hard. You want to keep that airy fluffiness. For presentation, arrange the bars on a nice plate. You can use a wooden cutting board for a rustic look. Drizzle extra melted chocolate over the bars for style. Sprinkle crushed peanuts or graham cracker crumbs on top for texture. Pair these bars with coffee or dessert wine. A rich coffee balances the sweetness. A sweet dessert wine can enhance the flavors too. Both options make your dessert stand out. One common mistake is overmixing the cheesecake filling. If you mix it too much, the filling can become too soft. This makes it hard to set properly. Mix just until everything is smooth and fluffy. Another mistake is not allowing enough chilling time. Chill the bars for at least four hours. If you can, chill them overnight. This helps the flavors blend and the bars to firm up. {{image_4}} You can switch up the peanut butter for a fun twist. Using chunky peanut butter adds a nice texture. The bits of peanuts give each bite a delightful crunch. If you prefer other nut butters, try almond or cashew butter. These options bring different flavors while keeping the same creamy feel. The type of chocolate you use can change the taste. Dark chocolate adds a rich flavor that many love. Milk chocolate is sweeter and creamy, so choose what you like best. You can also add cocoa powder to the filling. This gives the cheesecake a deeper chocolate taste, making each bite even more satisfying. If you need gluten-free bars, use gluten-free graham crackers. They work just as well and keep the crust tasty. For a vegan version, replace dairy ingredients with plant-based ones. Use dairy-free cream cheese and coconut cream for whipping. These swaps let everyone enjoy this treat without missing out! To keep your No Bake Chocolate Peanut Butter Cheesecake Bars fresh, store them in the fridge. Use an airtight container for leftovers. This helps to prevent them from absorbing other smells in the fridge. If you want to freeze them, wrap each bar in plastic wrap, then place them in a freezer-safe bag. This keeps them safe from freezer burn. These bars can last up to five days in the fridge. Always check for any signs of spoilage. If they smell off or have a change in texture, it’s best to throw them out. You want to enjoy your dessert at its best! You can use other cookies for the crust. Try using digestive biscuits, vanilla wafers, or even Oreo cookies. Just crush them into fine crumbs. Mix them with cocoa powder and melted butter. This will give you a tasty base for your cheesecake bars. Yes, you can! This recipe is perfect for making ahead. Prepare the bars a day before you want to serve them. Just cover the dish tightly with plastic wrap. Chill overnight for the best taste and texture. Absolutely! You can use sugar substitutes like stevia or erythritol. These options keep the sweetness without the extra sugar. You may also reduce the amount of powdered sugar in the filling. Just taste as you go to ensure it’s sweet enough for your liking. Yes, you can use regular cream cheese. It will make the cheesecake richer and creamier. The flavor will be fuller, but it may add more fat. If you prefer a lighter version, stick with low-fat cream cheese. If your cheesecake is too runny, it often means it didn’t set properly. Make sure to whip the cream until stiff peaks form. Also, ensure you chill the bars for enough time. If it’s runny after chilling, you can try adding a bit more cream cheese or whipped cream to thicken it up during the mixing stage. This recipe offers a delicious peanut butter chocolate cheesecake experience. You learned the key ingredients, simple steps, and helpful tips. Remember to chill your crust and filling for the best texture. Feel free to experiment with variations like different nut butters or chocolate types. Store leftovers properly to keep the cheesecake fresh. Enjoy this treat with friends or family, and share your creations! Happy baking!

No Bake Chocolate Peanut Butter Cheesecake Bars Delight

To make Creamy Alfredo Stuffed Shells, gather these simple ingredients: - 20 large pasta shells - 2 cups ricotta cheese - 1 cup grated mozzarella cheese (divided) - 1/2 cup grated Parmesan cheese - 1 cup fresh spinach, chopped - 2 cups Alfredo sauce (store-bought or homemade) - 1 clove garlic, minced - 1 teaspoon Italian seasoning - Salt and pepper to taste - Fresh basil leaves for garnish These ingredients blend to create a rich and creamy dish. The large pasta shells serve as the perfect vessel for the cheese filling. Ricotta cheese adds a smooth texture, while the mozzarella and Parmesan give a nice cheesy taste. Fresh spinach not only brings color but also adds nutrients. The Alfredo sauce ties everything together with its creamy goodness. Feel free to mix and match these ingredients. You can add more cheese or use different greens. Each change will give your stuffed shells a unique twist. I often encourage people to taste as they go. Cooking should be fun and personal! {{ingredient_image_2}} Set your oven to 375°F (190°C). This helps the shells bake evenly and come out perfectly. Boil a large pot of salted water. Add the pasta shells and cook them until they are al dente. Drain the shells and rinse them with cold water. This stops the cooking process and helps them cool down. In a big mixing bowl, combine ricotta cheese, 1/2 cup of mozzarella, Parmesan, chopped spinach, minced garlic, Italian seasoning, salt, and pepper. Mix everything well until it is creamy and smooth. Take a spoon and fill each pasta shell with the cheese mixture. Press it gently to make sure the shell is full. Place the stuffed shells on a plate or a clean surface. Spread about 1/2 cup of Alfredo sauce across the bottom of a 9x13-inch baking dish. This creates a tasty base for your pasta. Carefully place the stuffed shells in a single layer over the Alfredo sauce. Make sure they are close but not touching. Pour the rest of the Alfredo sauce over the stuffed shells. Make sure each shell is covered to keep them moist while baking. Sprinkle the remaining grated mozzarella cheese over the top of the shells. This will give you a nice, cheesy crust when it bakes. Cover the baking dish tightly with aluminum foil. Bake it in the preheated oven for 25 minutes. This helps the shells cook and the flavors blend. After 25 minutes, take off the foil. Bake for another 10-15 minutes. You want the cheese to bubble and turn golden brown. Let the dish cool for a few minutes before serving. Add fresh basil leaves on top for a burst of flavor and color. To cook pasta shells perfectly, follow these steps: - Use a large pot to allow the shells to move freely. - Add enough salt to the water. It should taste like the ocean. - Cook the shells until they are al dente. This means they are firm but not hard. - After cooking, drain the shells and rinse them with cold water. This stops the cooking. - Let them cool before you fill them. Following these steps will help your shells stay intact and hold the filling well. For the cheese mixture, I like to add a few simple touches: - Use fresh spinach. It adds color and a mild flavor. - Mix ricotta cheese with mozzarella and Parmesan for depth. - Add minced garlic for a nice punch. It brings the flavors together. - Don’t forget the Italian seasoning! It ties everything together. - A pinch of salt and pepper enhances all the flavors. These steps make your cheese filling rich and tasty. To get that dreamy melted cheese on top, try these tips: - Use fresh mozzarella instead of pre-shredded cheese. It melts better. - Spread the cheese evenly over the shells. This ensures every bite is cheesy. - Cover the dish with foil while baking. This helps the cheese melt without burning. - Remove the foil near the end of baking. This allows the cheese to brown nicely. Following these tips will give you that perfect, bubbly, golden cheese crust on your stuffed shells. Pro Tips Prepping the Pasta: Make sure to cook the pasta shells al dente to prevent them from becoming mushy during baking. Mixing the Cheese: For a creamier filling, let the ricotta cheese sit at room temperature for about 30 minutes before mixing. Layering for Flavor: Consider adding diced tomatoes or cooked chicken to the cheese mixture for extra flavor and texture. Storing Leftovers: Store any leftovers in an airtight container in the fridge for up to 3 days, and reheat gently in the oven. {{image_4}} You can add artichoke hearts to your filling. They mix well with spinach and cheese. This twist gives a rich taste. Just chop the artichokes and stir them in with the ricotta mixture. Add a little more garlic for a punch. This variation gives a creamy, savory surprise in every bite. For meat lovers, include cooked ground beef or sausage in your shells. Brown the meat in a pan before adding it to the cheese mix. This adds a hearty flavor. You can also use cooked chicken or turkey. Top with extra cheese for a gooey finish. It turns your dish into a filling feast. You can mix up the greens for a fresh taste. Try kale, Swiss chard, or even arugula. Just chop them fine and add them to the cheese mix. Each green brings a unique flavor and adds color. This option is healthy and keeps your meal exciting. Use fresh herbs like parsley or dill for extra zest. To keep your Creamy Alfredo Stuffed Shells fresh, store them in an airtight container. Make sure to let the dish cool down first. This helps keep the flavors intact. The shells will stay good in the fridge for about 3 to 5 days. If you notice any strange smells or colors, throw them out. When you are ready to enjoy the leftovers, preheat your oven to 350°F (175°C). Place the shells in a baking dish and cover them with foil. Bake for about 20 minutes until they are heated through. You can also microwave them. Put your shells on a microwave-safe plate. Heat in short bursts, stirring in between, until warm. If you want to freeze the stuffed shells, do it before baking. First, stuff the shells and place them in a baking dish. Then, cover it tightly with plastic wrap and aluminum foil. Label the dish with the date. They can stay frozen for up to 2 months. When you are ready to eat, thaw them in the fridge overnight. Bake as usual, and enjoy! Yes, you can use homemade Alfredo sauce. It adds a fresh touch. To make your own, melt butter, add cream, and stir in Parmesan cheese. Season with garlic, salt, and pepper. A homemade sauce can enhance the taste of your stuffed shells. To make Creamy Alfredo Stuffed Shells gluten-free, use gluten-free pasta shells. Many brands offer great options that taste similar to regular pasta. Always check the labels for any hidden gluten. You can also ensure your Alfredo sauce is gluten-free. I like to serve a fresh salad with this dish. A simple green salad with vinaigrette works well. Garlic bread is also a great side. You can add roasted vegetables for extra color and flavor. These sides make the meal complete and satisfying. This post covered making delicious Creamy Alfredo Stuffed Shells. We went through the key ingredients, step-by-step instructions, and some handy tips. I shared tasty variations, storage advice, and answered common questions. Remember, cooking should be fun and creative. Feel free to change ingredients and try new flavors. You can make this dish your own. Enjoy making and sharing this delightful meal with others!

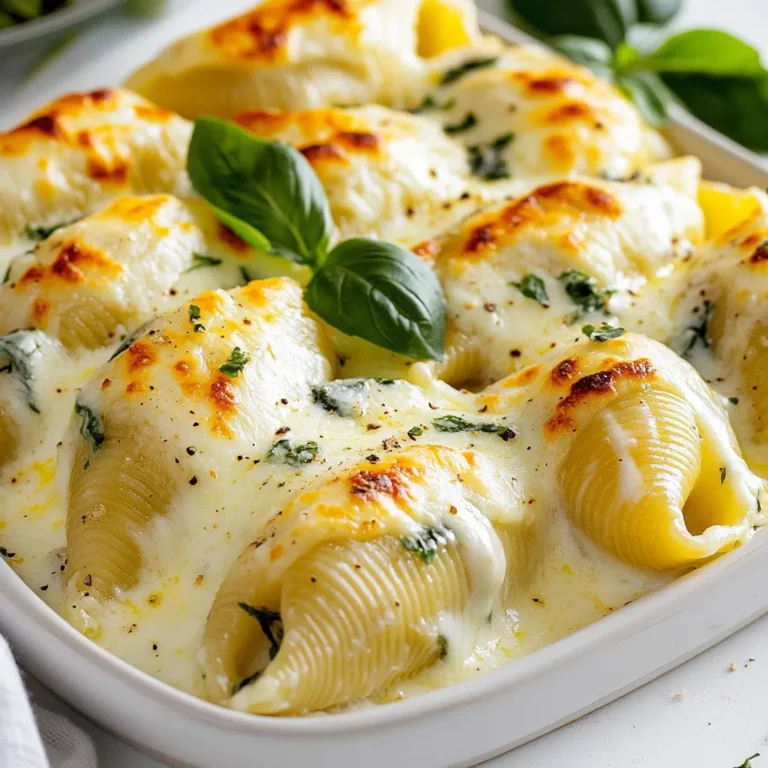
Creamy Alfredo Stuffed Shells Flavorful Family Meal

- 1 cup all-purpose flour - 1 cup whole wheat flour - 1 teaspoon baking powder - 1/2 teaspoon baking soda - 1/2 teaspoon salt - 1 tablespoon ground cinnamon These dry ingredients are the foundation of your muffins. The all-purpose flour and whole wheat flour give the muffins a nice texture. Baking powder and baking soda help them rise. Salt enhances the flavor, while ground cinnamon adds warmth. - 1/2 cup unsalted butter, softened - 3/4 cup packed brown sugar - 1/2 cup granulated sugar - 2 large eggs - 1 teaspoon pure vanilla extract - 1 cup buttermilk - 1/2 cup pure maple syrup The wet ingredients bring moisture and sweetness. Softened butter blends well with the sugars, creating a rich base. Eggs add structure and help bind everything together. The vanilla and maple syrup add depth and a sweet aroma, while buttermilk keeps the muffins tender. - 1 cup chopped pecans - Additional pecans for topping Pecans offer crunch and nutty flavor. They enrich the muffin's taste and add texture. Sprinkling extra pecans on top creates a delightful finish. You get both flavor and a pretty look with these toppings. First, preheat your oven to 350°F (175°C). This heat is perfect for baking muffins. While the oven warms up, prepare your muffin tin. You can line it with paper liners or grease it lightly with softened butter. This step keeps your muffins from sticking. In a medium bowl, combine the all-purpose flour, whole wheat flour, baking powder, baking soda, salt, and ground cinnamon. Use a whisk to mix them well. This ensures all dry ingredients blend together evenly. In a large mixing bowl, beat the softened butter with brown sugar and granulated sugar. Use an electric mixer for this task. Mix until the mixture is light and fluffy. This usually takes about 3 to 5 minutes. A good creaming gives your muffins a nice rise. Next, add the eggs to your butter-sugar mix. Do this one at a time, mixing well after each egg. Then, pour in the pure vanilla extract and maple syrup. Keep mixing until the batter is smooth and well blended. Now, it’s time to combine the dry and wet ingredients. Add the dry mix to the wet mix in parts. Start with dry ingredients and end with them. Alternate this with the buttermilk. Stir gently to avoid overmixing. After this, carefully fold in the chopped pecans. Save a handful for later. Using a cookie scoop or a large spoon, fill each muffin cup about two-thirds full of batter. Sprinkle the reserved pecans on top of each muffin for a nice crunch. Place the muffin tin in the hot oven. Bake for 18 to 20 minutes. Check doneness by inserting a toothpick into the center of a muffin. If it comes out clean, the muffins are ready. After baking, let them cool in the tin for 5 minutes. Then, move them to a wire rack to cool completely. To get the best muffins, avoid overmixing the batter. Mix until just combined. This keeps the muffins light and fluffy. When you see flour, stop mixing. Overmixing leads to tough muffins. The right oven temperature is key. Preheat your oven to 350°F (175°C). An accurate temperature ensures even baking. Use an oven thermometer if you're unsure about your oven's settings. Serve these muffins warm for the best flavor. Add a light dusting of powdered sugar on top. This makes them look fancy and taste sweet. For extra maple goodness, drizzle warm maple syrup over each muffin. It adds flavor and makes them even more delicious. I recommend using a non-stick muffin tin. This helps the muffins release easily. If you prefer, you can use paper liners for easy cleanup. You need basic mixing tools to make these muffins. A large mixing bowl and a whisk are essential. An electric mixer helps cream the butter and sugars. Make sure you have a good cookie scoop or large spoon to fill the muffin cups evenly. {{image_4}} You can make these muffins gluten-free. Use a gluten-free flour blend instead of all-purpose and whole wheat flour. This swap keeps the muffins light and fluffy. If you prefer a different sweetener, try honey or agave syrup. These options will give a unique taste while still being delicious. Want to add more fun? You can toss in chocolate chips. They will melt in the warm muffins and add a rich flavor. You can also mix in fruits like blueberries or bananas. They pair nicely with maple and pecans. Just make sure to adjust the batter for extra moisture. For a fall twist, add spices like nutmeg or ginger. These spices warm up the flavor and fit the season perfectly. In summer, brighten the muffins with citrus zests. Lemon or orange zest adds a fresh taste that makes the muffins pop. These small changes keep your muffins exciting all year round. After baking, let your Maple Pecan Coffee Cake Muffins cool down. Place them at room temperature. They stay fresh for about three days. Keep them covered with a clean kitchen towel or in a container. This helps keep them soft and moist. For longer storage, you can use the refrigerator or freezer. In the fridge, muffins can last for up to a week. Make sure to store them in an airtight container. For the freezer, wrap each muffin in plastic wrap and place them in a freezer bag. They will stay good for up to three months. To enjoy warm muffins again, use the oven or microwave. If using the oven, preheat it to 350°F (175°C). Place the muffins on a baking sheet and heat for about 10 minutes. For the microwave, heat each muffin for about 15-20 seconds. This will bring back their soft texture. To stop muffins from sticking, grease the pan well. Use softened butter or cooking spray. You can also use paper liners. If you use liners, make sure they fit snugly. This way, the muffins lift out easily after baking. Yes, you can. If you don't have buttermilk, use milk with vinegar. Add 1 tablespoon of vinegar to 1 cup of milk. Let it sit for five minutes. This makes a great substitute. You can also use yogurt mixed with water or regular milk. Check the muffins after 18 minutes. Insert a toothpick into the center. If it comes out clean, the muffins are done. The tops should look golden brown and spring back when touched lightly. If you have leftover muffins, store them in an airtight container. You can serve them warm the next day. For stale muffins, toast them lightly. Adding butter or maple syrup can help revive their flavor. You can also crumble them into yogurt or ice cream for a tasty treat. You learned how to make delicious muffins from scratch. We covered dry and wet ingredients, as well as tasty add-ins. I gave you clear steps to mix and bake your muffins perfectly. Tips for the best texture and flavor help you improve your skills. Remember, you can try different ingredients for your desired taste. Store your muffins right for freshness. Now, you’re ready to enjoy warm, tasty treats any time!

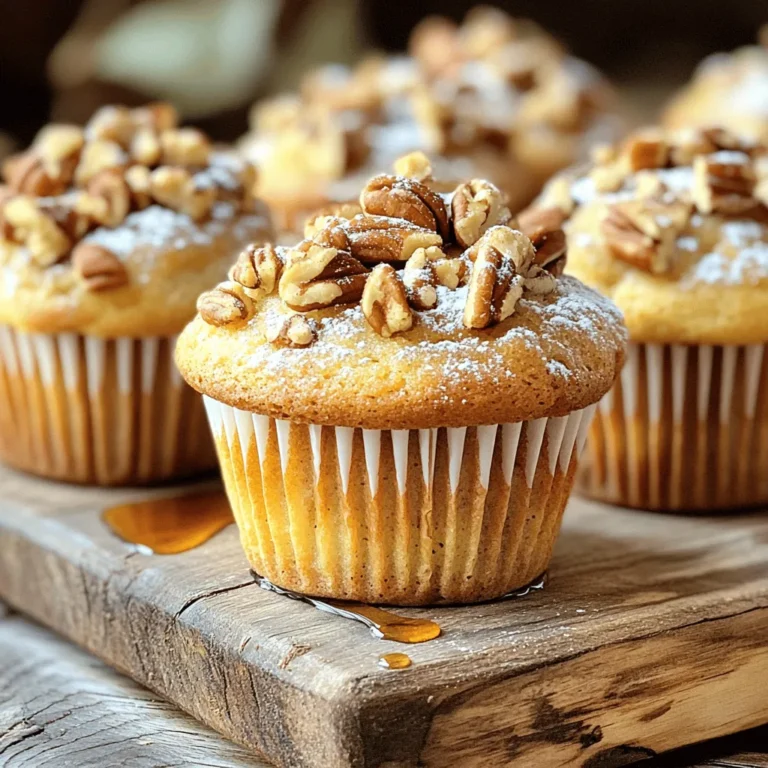
Maple Pecan Coffee Cake Muffins Flavorful and Easy

- 2 ripe bananas, sliced into rounds - 1 cup almond milk (or any milk of your choice) - 2 tablespoons natural peanut butter (creamy or crunchy) - 2 tablespoons unsweetened cocoa powder - 1 tablespoon honey or maple syrup (adjust based on your sweetness preference) - 1/4 cup Greek yogurt (optional, for added creaminess) - 1/2 teaspoon pure vanilla extract - A handful of ice cubes (optional, for a chilled smoothie) - Toppings: granola, chopped nuts, additional banana slices, or dark chocolate shavings You can swap some ingredients easily. Use soy milk or oat milk in place of almond milk. If you prefer another nut butter, try almond or cashew butter. You can also skip Greek yogurt for a lighter smoothie. Instead of honey, you can use agave syrup or coconut sugar. Don't have bananas? Use frozen berries for a fruity twist. - Bananas are a great source of potassium. They boost your energy and help with digestion. - Almond milk is low in calories and adds calcium, making it heart-friendly. - Peanut butter gives protein and healthy fats. It helps keep you full longer. - Cocoa powder is rich in antioxidants. It may improve mood and brain health. - Greek yogurt adds probiotics for gut health. It's also high in protein. - Honey or maple syrup offers natural sweetness without refined sugar. These ingredients work together to make this smoothie not just tasty but also good for you! To start, gather all your ingredients. You will need: - 2 ripe bananas, sliced into rounds - 1 cup almond milk - 2 tablespoons natural peanut butter - 2 tablespoons unsweetened cocoa powder - 1 tablespoon honey or maple syrup - 1/4 cup Greek yogurt (optional) - 1/2 teaspoon pure vanilla extract - A handful of ice cubes (optional) Now, add the sliced bananas, almond milk, peanut butter, cocoa powder, and honey into your blender. If you want to make it extra creamy, add Greek yogurt. Don’t forget the vanilla extract for extra flavor! Blend everything on high speed. You want it smooth and creamy. This usually takes about 30 seconds. If you like it cold, toss in some ice cubes and blend again. Check the texture. It should be thick but pourable. Next, grab your jars. Carefully pour the smoothie into each jar, filling them about three-quarters full. This leaves room for toppings. Now for the fun part! Choose your toppings. You can add granola, chopped nuts, extra banana slices, or dark chocolate shavings. This not only makes it tasty but also adds a nice look. Enjoy your tasty treat! To make the best chocolate peanut butter smoothie, start with a strong blender. This helps mix all the ingredients well. Add the softer items first, like bananas and almond milk. Then, add the thicker ingredients, such as peanut butter and cocoa powder. This order helps blend smoothly. If you want it cold, add ice cubes last. Blend until the mixture is creamy and smooth. Taste your smoothie before serving. If it isn’t sweet enough, add honey or maple syrup. Start with just a little, like a teaspoon. You can always add more if needed. Blend briefly after adding to mix it well. This way, you control the sweetness to match your taste. A great-looking smoothie jar makes it even better! Fill jars about three-quarters full. This leaves space for toppings. Use a spoon or straw that fits your jar. For toppings, try a mix of granola, nuts, or banana slices. Lay them on top nicely for a fun look. If you like, add some dark chocolate shavings for an extra treat! {{image_4}} You can mix flavors to create fun smoothie jars. Try adding berries, like strawberries or blueberries. They pair well with chocolate and peanut butter. You can also use a scoop of nut butter, like almond or cashew. If you want a tropical twist, add pineapple or mango. Each flavor brings a new taste to your smoothie. To make this smoothie dairy-free and vegan, use plant-based milk. Almond milk works great, but you can use oat or coconut milk too. Skip the Greek yogurt or use a dairy-free yogurt alternative. This keeps the creaminess while making sure it’s vegan. You can still enjoy delicious chocolate and peanut butter flavors without any animal products. To boost protein, add a scoop of protein powder. You can use plant-based protein for a vegan option. Another choice is chia seeds or flaxseeds. They add fiber and healthy fats too. If you prefer, toss in a tablespoon of hemp seeds. These small additions make your smoothie more filling and nutritious. To keep your chocolate peanut butter smoothie jars fresh, seal them well. Use lids that fit tight. Store the jars in the fridge. This way, they stay cool and tasty. If you want, you can also use glass or plastic containers. Just make sure they are clean and dry before adding your smoothie. Smoothie jars can last up to two days in the fridge. After that, they may lose taste and texture. If you see any change in color or smell, it is best to toss them. To keep them fresh longer, store the jars away from strong-smelling foods. This prevents unwanted flavors from mixing in. These smoothies are best served cold. If you want to enjoy them warm, heat them gently on the stove. Use low heat to avoid cooking the smoothie. Stir often to ensure even warming. When ready to serve, add your favorite toppings like granola or nuts. This adds crunch and flavor, making your smoothie even more enjoyable. Yes, you can use any milk type you like. Almond milk, oat milk, or soy milk all work well. Each option gives the smoothie a different taste and texture. If you want a creamier smoothie, try whole milk or coconut milk. Just pick what you enjoy most! To make your smoothie thicker, add more frozen banana or Greek yogurt. You can also use less liquid. If you want an even richer texture, add a scoop of protein powder. Blending in ice cubes can also help create a thicker, frosty feel. Toppings can make your smoothie jar even more fun! Granola adds crunch, while chopped nuts give a nice bite. Additional banana slices bring freshness, and dark chocolate shavings add a rich touch. Mix and match toppings to find your favorite combo! In this post, we explored how to create delicious smoothie jars. We covered key ingredients, substitutions, and their health benefits. Followed by step-by-step blending instructions for smooth results and tips for sweetening and presenting your jars. We also discussed flavor variations, storage methods, and addressed common questions. Smoothie jars are fun, healthy, and easy to make. Try them out to boost your nutrition and creativity in the kitchen!

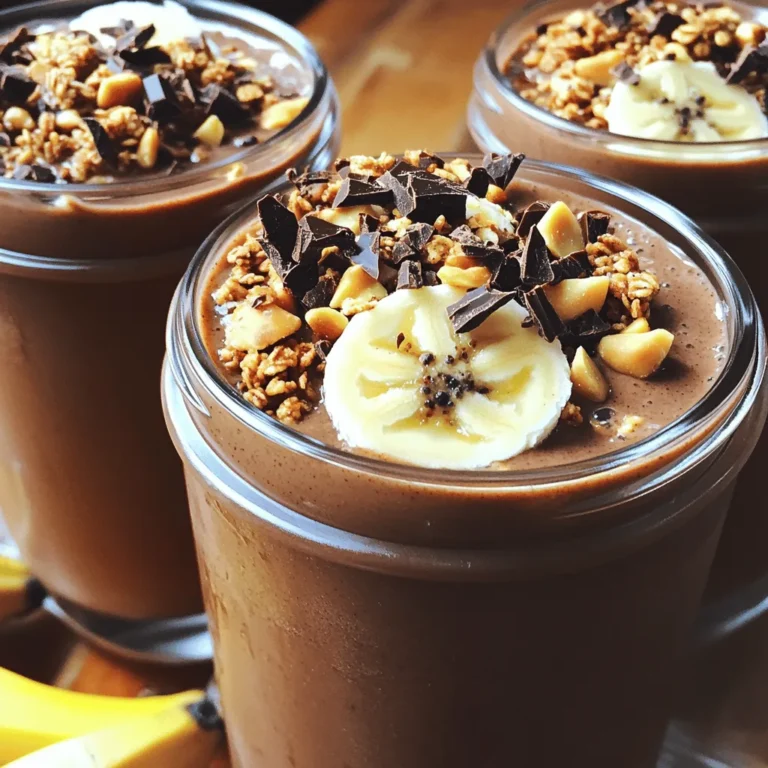
Chocolate Peanut Butter Smoothie Jars Nutritious Treat

- 8 oz penne pasta - 1 medium head of cauliflower, chopped into florets - 2 cups vegetable broth - 1 cup unsweetened almond milk - 3 cloves garlic, minced - 1 tablespoon olive oil - 1/4 teaspoon ground nutmeg - 1 teaspoon salt (or to taste) - 1/2 teaspoon freshly ground black pepper (or to taste) - 1/4 cup nutritional yeast (optional) - Fresh parsley, finely chopped This Cauliflower Alfredo Penne is simple yet full of flavor. The penne pasta serves as a great base. The cauliflower adds creaminess without extra fat. To make the sauce, I blend the cooked cauliflower with vegetable broth and almond milk. This mix brings a lightness that feels indulgent. I add garlic for a nice kick. Olive oil gives it richness, while nutmeg adds warmth. The salt and pepper enhance the flavor perfectly. You can also include nutritional yeast for a cheesy taste. Fresh parsley brightens the dish and makes it look appealing. These ingredients come together to create a comforting meal that everyone loves. You can customize it with your favorite herbs or spices. Enjoy the process of making this creamy dish, and share it with your loved ones. {{ingredient_image_2}} - Start by boiling salted water in a large pot. - Cook the penne pasta according to the package instructions. - Once done, drain the pasta in a colander and set it aside. - In a separate pot, combine the chopped cauliflower, vegetable broth, and almond milk. - Bring this mixture to a boil. Then, reduce the heat and let it simmer until the cauliflower is fork-tender. - In a skillet, heat the olive oil over medium heat. - Add the minced garlic and sauté it for about 1-2 minutes, stirring often. - When the garlic is fragrant and lightly golden, remove it from heat. - Use an immersion blender to puree the cauliflower mixture until it is smooth and creamy. - If you don't have an immersion blender, transfer it to a stand blender in batches. - Return the pureed mixture to the pot, then stir in the sautéed garlic, ground nutmeg, salt, and black pepper. - If you want a cheesy flavor, add nutritional yeast. Adjust the seasoning to your taste. - Add the cooked penne to the creamy cauliflower Alfredo sauce. - Toss the pasta gently to ensure each piece is coated evenly in the sauce. - To keep your pasta firm, cook it until it's al dente. This means it should have a slight bite. - When sautéing garlic, use medium heat. Stir it often, and stop when it’s golden. If it burns, it will taste bitter. - You can use an immersion blender to puree the sauce right in the pot. This saves time and makes cleanup easy. - If using a stand blender, be careful. Blend in batches to avoid spills. Aim for a creamy texture without lumps. - Make this dish your own. Add herbs like basil or oregano for extra flavor. - To deepen the taste, try adding a pinch of red pepper flakes or some lemon juice. Pro Tips Use Fresh Cauliflower: Fresh cauliflower will provide the best flavor and texture for your Alfredo sauce. Look for heads that are firm and free of blemishes. Adjust the Creaminess: If you prefer a creamier sauce, simply add more almond milk or vegetable broth to achieve your desired consistency. Enhance the Flavor: For a more robust flavor, try adding a pinch of smoked paprika or a splash of lemon juice to the sauce for an extra zing. Perfect Pasta Toss: When mixing the pasta with the sauce, do it while the sauce is warm to ensure it coats the pasta evenly and sticks well. {{image_4}} You can change the pasta type to suit your taste. Use whole wheat, gluten-free, or even spiralized vegetables. This adds a unique twist to the dish. Seasonal veggies like spinach, peas, or cherry tomatoes enhance flavor and nutrition. Toss them in during the last few minutes of cooking for a fresh touch. To make this dish vegan, you can replace nutritional yeast with other plant-based cheese options. Try cashew cheese or vegan cream cheese for a rich flavor. When it comes to milk, almond milk works well, but you can switch to oat milk or soy milk. Each option gives a distinct taste and creamy texture. You can amp up the flavor with fresh herbs like basil or thyme. These add a bright, fresh taste. For a spicy kick, consider adding red pepper flakes or a dash of cayenne pepper. This will elevate the dish and give it a new, exciting taste. To keep your Cauliflower Alfredo Penne fresh, follow these tips: - Place leftovers in an airtight container. - Let the dish cool before sealing. - Store in the fridge for up to 3 days. Using glass containers helps maintain the flavor. They are easy to clean and reusable. Avoid metal containers as they can alter the dish's taste. You can freeze Cauliflower Alfredo Penne for later use. Here's how: - Let the dish cool completely. - Divide it into portions and place in freezer bags. - Squeeze out air before sealing. To reheat, remove the dish from the freezer. Thaw overnight in the fridge. Then, heat in a skillet over low heat. Add a splash of almond milk to restore creaminess. Stir until warmed through. In the fridge, Cauliflower Alfredo Penne lasts about 3 days. After this, it may start to spoil. Look for these signs: - Off smell or taste. - Changes in texture or color. - Mold on the surface. When in doubt, throw it out! Enjoy your creamy pasta when it's fresh for the best taste. To make Cauliflower Alfredo Penne gluten-free, choose gluten-free penne pasta. Many brands now offer pasta made from rice, corn, or quinoa. These options cook well and taste great. Check the package for cooking times, as they may differ. Yes, you can make this dish in advance. Cook the penne and prepare the sauce. Store them separately in airtight containers. When ready to eat, reheat the pasta and sauce on the stove or in the microwave. Add a splash of almond milk to keep it creamy. One serving of Cauliflower Alfredo Penne has about 300 calories. It contains 10 grams of fat, 40 grams of carbs, and 8 grams of protein. Nutritional yeast adds extra nutrients and a cheesy flavor. Always check labels for detailed info. To spice up your Cauliflower Alfredo Penne, add red pepper flakes or hot sauce. You can also mix in diced jalapeños or chili powder. Start with a little, then taste and adjust as needed. This will make your meal more exciting and flavorful. This recipe for Cauliflower Alfredo Penne covers all you need. You learned about key ingredients, cooking steps, and helpful tips. Customizing flavors and storage options were also discussed. In making this dish, you can enjoy a tasty meal that’s both healthy and filling. Remember to try different herbs or pasta for variety. Enjoy making your creamy, plant-based pasta!

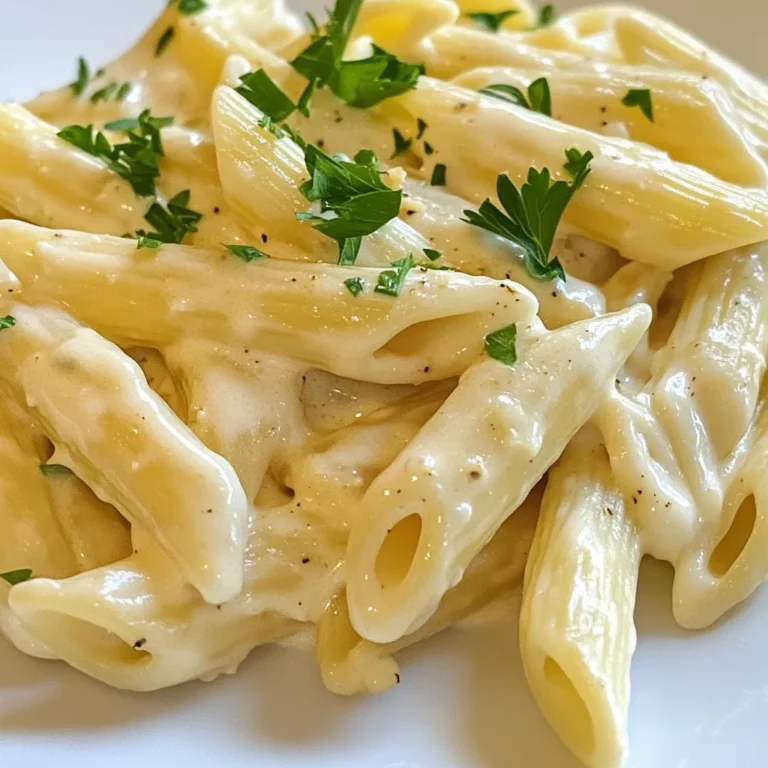
Cauliflower Alfredo Penne Simple and Tasty Meal

To make a cozy Spiced Apple Cider Hot Toddy, gather these simple ingredients: - 4 cups apple cider - 1 tablespoon honey (or more to taste) - 1 cinnamon stick - 2-3 star anise pods - 3-4 whole cloves - 1 inch piece of fresh ginger, sliced thinly - Juice of half a lemon For a lovely touch, consider these garnishes: - Thinly sliced apples - Thinly sliced lemon These add color and taste to your drink, making it even more inviting. If you prefer different sweeteners, try these options: - Maple syrup - Agave nectar - Brown sugar These alternatives can change the flavor and sweetness of your hot toddy. Experiment to find your favorite! To make the spiced apple cider hot toddy, I start by pouring 4 cups of apple cider into a medium saucepan. I set the heat to medium. As the cider warms, I add 1 tablespoon of honey. I stir gently until the honey dissolves completely. Next, I add 1 cinnamon stick, 2-3 star anise pods, 3-4 whole cloves, and a thinly sliced piece of fresh ginger. These spices create a warm and cozy aroma. I let the mixture heat until it steams, about 5-7 minutes. It’s important not to let it boil. When it’s steaming hot, I remove it from the heat and stir in the juice of half a lemon. This adds a bright flavor to the cider. Next, I carefully strain the spiced cider into mugs, discarding the solid spices and ginger slices. This gives me a smooth drink. While heating the cider, I keep an eye on the pot. I want it steaming but not boiling. Boiling can change the flavor and texture. If you want to speed up the process, use a lid on the pot. This traps heat and warms the cider faster. Just remember to check often to avoid boiling. For a lovely touch, I garnish each mug with thin slices of fresh apples and lemon. This adds a pop of color and extra flavor. I serve the hot toddy warm, perfect for chilly days. You can enjoy this cozy drink by the fire or while relaxing at home. It’s a comforting way to warm up and enjoy the season! To balance flavors in your Spiced Apple Cider Hot Toddy, start with sweet and tart. The honey adds sweetness, while the fresh lemon juice gives a bright, tangy kick. Adjust the honey based on your taste. If it’s too sweet, add more lemon. The spices bring depth, so make sure they complement, not overpower. Infusing spices takes patience but is worth it. Start by adding your spices early in the heating process. This allows the flavor to spread throughout the cider. Use a cinnamon stick for warmth and aroma. Star anise adds a sweet, licorice-like taste. Whole cloves give a rich, earthy feel. Slice fresh ginger to add a zing that brightens every sip. Serve your Spiced Apple Cider Hot Toddy in warm mugs. This keeps the drink hot longer. Strain out spices before serving for a smooth texture. Garnish with thin apple and lemon slices for a pretty look. A sprinkle of cinnamon on top makes it festive. Enjoy it fresh to savor the warm, cozy flavors. {{image_4}} You can enjoy this drink with or without alcohol. For a cozy, warm treat, add a splash of whiskey or rum. This will give your hot toddy a rich, warm flavor. If you prefer a non-alcoholic drink, skip the spirits. The spices and cider still create a lovely, festive drink. Feel free to play with the spices! You can swap out the star anise for allspice or nutmeg. Each spice brings a new twist to the flavor. Try adding cardamom for a unique taste. The key is to experiment and find what you love most. Seasonal fruits add a nice touch. In the fall, use sliced pears or cranberries. During winter, add orange slices for a bright flavor. You can even toss in a few pine needles for a fresh, festive aroma. These additions make the drink more special and fun. Store any leftover spiced apple cider hot toddy in an airtight container. Let the cider cool first. Then, place it in the fridge for up to three days. This prevents it from spoiling and keeps the flavors fresh. If you want, you can also freeze it. Use a freezer-safe container and leave some space for expansion. To reheat, pour the cider into a saucepan. Heat it over medium-low heat. Stir gently to mix the flavors and warm it evenly. Avoid boiling, as this can change the taste. You can also use a microwave. Heat in short bursts, stirring in between, until hot. The spiced apple cider hot toddy lasts three days in the fridge. If frozen, it can last up to three months. Always check for any off smells or changes in color before drinking. If you notice anything unusual, it’s best to discard it. Enjoy your warm drink safely! Yes, you can make Spiced Apple Cider Hot Toddy ahead of time. Prepare the cider, but skip the alcohol. Store it in the fridge for up to three days. When you're ready to serve, heat it gently on the stove. Add your choice of alcohol then. This way, you keep all the flavors fresh and bright. You can use different types of alcohol for your hot toddy. Whiskey is the most popular choice. It adds warmth and depth. Rum can also work well, giving a sweet touch. For a lighter option, try brandy or spiced rum. You can even skip the alcohol if you want a cozy drink for kids or a non-drinker. Spiced apple cider hot toddies can offer some health perks. Apple cider is rich in antioxidants. It may help with digestion. Honey adds soothing properties, especially for sore throats. Ginger can ease nausea and boost your immune system. While not a cure-all, this drink can be a warm comfort during chilly days or when you feel under the weather. This blog post covered how to craft a delicious spiced apple cider hot toddy. We discussed the key ingredients, tasty variations, storage tips, and common questions. You now have steps to make the perfect drink for any occasion. Experiment with flavors and enjoy customizing your hot toddy. Remember, the right mix of spices brings joy and warmth to every sip. Keep these tips in mind, and you’ll impress everyone with your drink-making skills. Enjoy each moment you create, sip by sip.

Spiced Apple Cider Hot Toddy Cozy and Comforting Drink

- 1 cup graham cracker crumbs - 2 tablespoons granulated sugar - 4 tablespoons unsalted butter, melted - 8 oz cream cheese, softened to room temperature - 1/2 cup canned pumpkin puree - 1/4 cup granulated sugar - 1 teaspoon pure vanilla extract - 1 teaspoon pumpkin pie spice - 1/4 teaspoon salt - 1/2 cup whipped cream (for topping) - Ground cinnamon (for dusting) You can swap graham cracker crumbs with crushed cookies for a twist. Try using gluten-free cookies for a gluten-free option. Cream cheese can be replaced with dairy-free cream cheese for a vegan version. If you want less sugar, cut down on the added sugar. You can also add a bit of maple syrup for a hint of sweetness. Top each cheesecake bite with a dollop of whipped cream. A sprinkle of ground cinnamon adds a lovely touch. You can also use chocolate shavings or caramel drizzle for extra flavor. For a festive look, add some crushed nuts or edible flowers on top. Consider using seasonal decorations around the platter for a fun display. First, grab a medium-sized bowl. In this bowl, mix 1 cup of graham cracker crumbs with 2 tablespoons of sugar. Next, pour in 4 tablespoons of melted butter. Stir this mixture well. You want it to look like wet sand. Now, line a mini muffin tin with paper liners or grease it lightly. Use a tablespoon to scoop the crust mix into each muffin cup. Press down firmly. Make sure each cup is packed tightly. This will hold the cheesecake filling well. In a large bowl, beat 8 oz of softened cream cheese with an electric mixer. Mix on medium speed until it is smooth and creamy. Add 1/2 cup of canned pumpkin puree, 1/4 cup of sugar, 1 teaspoon of vanilla extract, 1 teaspoon of pumpkin pie spice, and 1/4 teaspoon of salt. Keep mixing until everything is blended well and creamy. You should not see any lumps in the filling. Now, it’s time to fill the muffin cups. Spoon the pumpkin cheesecake mixture over the crusts. Fill each cup about 3/4 full. This gives them room to rise a bit as they set. Carefully transfer the muffin tin to the refrigerator. Let the cheesecake bites chill for at least 4 hours. This step is key for a great texture. When they are set, gently remove them from the tin. Top each bite with a dollop of whipped cream. Dust a little ground cinnamon on top to add flavor. Enjoy your tasty treats! When making pumpkin spice cheesecake bites, avoid over-mixing the filling. This can add air, making the bites too fluffy. Instead, mix until smooth and creamy. Another mistake is not chilling them long enough. These bites need at least four hours to set properly. Skipping this step can ruin the texture and taste. Lastly, be sure to pack the crust firmly. A loose crust will crumble when you serve them. To achieve a creamy texture, start with room temperature cream cheese. Cold cream cheese can lead to lumps. Also, mix gently when adding the canned pumpkin and sugar. This will help keep the filling smooth. After filling the muffin cups, make sure to leave some space at the top. This allows the filling to expand as it sets. Chilling them well is key. A longer chill time leads to a firmer bite. You can boost the flavor of your cheesecake bites with a few extras. Consider adding a pinch of nutmeg for warmth. A splash of maple syrup can add sweetness and depth. You might also try folding in mini chocolate chips for a fun twist. If you love nuts, crushed walnuts or pecans can add crunch. Finally, a drizzle of caramel on top before serving will elevate your treats even more. {{image_4}} To make gluten-free pumpkin spice cheesecake bites, swap graham crackers for gluten-free crumbs. You can use almond flour or gluten-free cookie crumbs. This change keeps the tasty crust while making it safe for those with gluten issues. Just make sure the other ingredients, like sugar and pumpkin puree, are also gluten-free. Everyone can enjoy these bites! You can easily make these cheesecake bites vegan. Replace cream cheese with a plant-based cream cheese. Use maple syrup or coconut sugar instead of granulated sugar. For the crust, use vegan butter or coconut oil. This way, you keep all the yumminess while making it plant-based. Your vegan friends will love these treats! While mini muffin tins are fun, you can try other serving styles. Use mini jars for a cute and trendy look. Layer the crust and filling in the jar for a delightful presentation. You can also make larger sizes in a cake pan. Just adjust the chilling time and slice them into squares. These serving ideas add a fun twist to your gatherings! To keep your pumpkin spice cheesecake bites fresh, store them in an airtight container. Place a piece of wax paper between layers to avoid sticking. This method helps keep the bites intact and tasty. Always refrigerate them if you have leftovers. You can safely enjoy these bites for up to five days in the fridge. After that, they may lose their creamy texture and flavor. If they look or smell off, it’s best to toss them. Want to save some for later? You can freeze these cheesecake bites! First, let them cool completely. Then, place them in a single layer on a baking sheet. Once frozen, transfer them to a freezer-safe container or bag. They can last for up to three months in the freezer. When you're ready to eat, just thaw them overnight in the fridge. Enjoy a taste of fall anytime! Serve pumpkin spice cheesecake bites chilled for the best taste. Top each bite with whipped cream. A sprinkle of ground cinnamon adds a lovely touch. Place them on a fun platter for a nice look. This makes them perfect for parties or family gatherings. Yes, you can use fresh pumpkin. Just cook it until soft, then mash or puree it. Make sure it is smooth and thick. Canned pumpkin is often easier and saves time, but fresh gives a great flavor too. You can make these cheesecake bites a day or two ahead. Just follow the recipe and chill them. They stay fresh in the fridge. This is great for busy days or when hosting a party. Yes, you can easily double the recipe. Just use a larger muffin tin or two tins. Make sure to adjust the chilling time if you make more. This way, everyone can enjoy these tasty treats! This blog post covered everything you need for making delicious pumpkin spice cheesecake bites. We discussed essential ingredients, toppings, and step-by-step instructions. I shared tips to avoid common mistakes and enhance flavor. We explored tasty variations and how to store leftovers properly. Remember, experimenting makes your recipes unique. Enjoy crafting your cheesecake bites, and don’t hesitate to try different flavors. Happy baking!

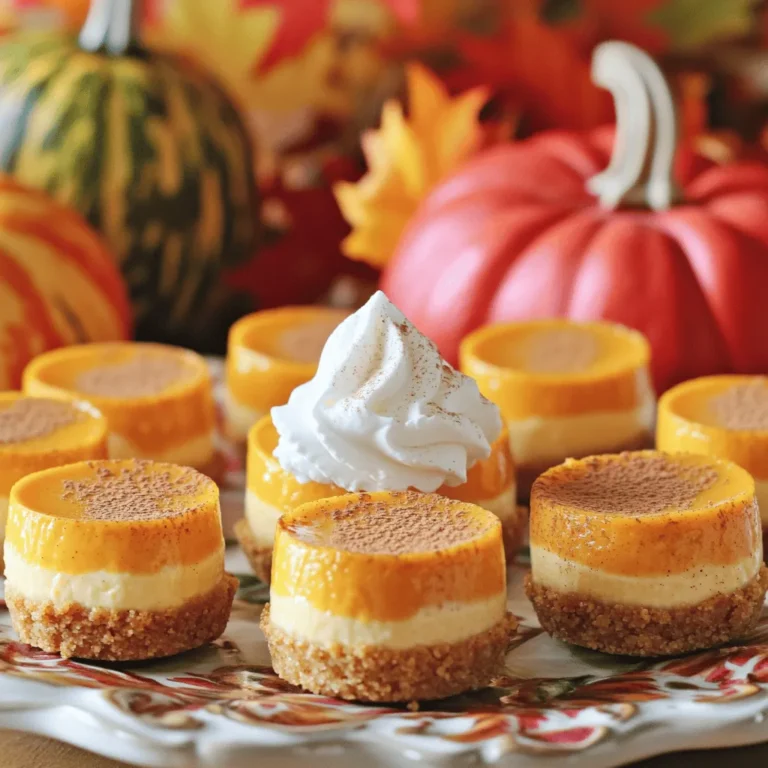
Pumpkin Spice Cheesecake Bites Irresistible Treats

PREV 1 … 6 7 8 … 20 NEXT
purelyyumrecipes

explore

DessertsDinnerAppetizersDrinks

Our Policies

  • Cookie Policy
  • Copyright Policy
  • Disclaimer
  • GDPR Policy
  • Terms Of Use
Back to Top
  • About
  • Contact Us
  • Privacy Policy
© 2025 purelyyumrecipes