FREE DINNER EBOOK! Get your copy!
  • Cookie Policy
  • GDPR Policy
  • Disclaimer
  • Terms Of Use
  • Visit my other site: Fun Cookie Recipes
purelyyumrecipes
  • Home
  • Dinner
  • Desserts
  • Drinks
  • Appetizers
  • Contact
  • About
  • Privacy Policy
  • Home
  • Dinner
  • Desserts
  • Drinks
  • Appetizers
  • Contact
  • About
  • Privacy Policy
  • Cookie Policy
  • GDPR Policy
  • Disclaimer
  • Terms Of Use
Visit my other site: Fun Cookie Recipes

HOME / CATEGORIES /

Latest

- 1 lb flank steak, thinly sliced against the grain - 1/4 cup cornstarch - 1/4 cup low-sodium soy sauce - 2 tablespoons sesame oil - 1/4 teaspoon red pepper flakes, adjust for spice - 2 cloves garlic, minced - 1-inch piece fresh ginger, grated - 2 cups cooked jasmine rice - 1 cup broccoli florets - 1 cup snap peas Gathering the right ingredients is key to making crispy sesame beef bowls that beat takeout. Flank steak provides rich flavor and tenderness. Coating it in cornstarch gives the beef a crispy texture. Low-sodium soy sauce adds umami without too much salt. Sesame oil enhances the dish with a nutty aroma. To customize your meal, consider adding red pepper flakes for heat, minced garlic for depth, or grated ginger for freshness. These optional ingredients can make a big difference in flavor. Pair your crispy sesame beef with cooked jasmine rice, steamed broccoli, and snap peas. This combination makes for a colorful and balanced meal. When you have all your ingredients ready, you're set to create a dish that will impress anyone! Start by slicing the flank steak against the grain. Aim for thin strips. Place the sliced beef in a large bowl. Sprinkle 1/4 cup of cornstarch over the beef. Toss the beef well until each piece is coated. This will help make the beef crispy when cooked. In a medium bowl, mix 1/4 cup of soy sauce, 2 tablespoons of sesame oil, and 2 tablespoons of honey. Add 1 tablespoon of rice vinegar, 2 minced garlic cloves, and 1 inch of grated ginger. For some heat, include 1/4 teaspoon of red pepper flakes. Whisk everything until combined. This mix will add great flavor to your beef. Once the beef is coated and marinated, heat a large skillet over medium-high heat. Add 1 tablespoon of cooking oil. When the oil is hot, add the marinated beef in batches. Make sure not to overcrowd the pan. Cook each batch for about 3 minutes on each side until crispy and cooked through. After cooking the beef, set it aside on a plate. In the same skillet, toss in your steamed broccoli and snap peas. Sauté them for about a minute to warm them up and mix with the beef flavors. Now, it's time to assemble your bowls. Start with a scoop of cooked jasmine rice. Top it with the crispy beef and then add the sautéed vegetables. Finish by sprinkling sesame seeds and sliced green onions on top. Enjoy your delicious, homemade crispy sesame beef bowls! Cornstarch is key for crispy beef. It forms a light crust when cooked. Here’s how to do it right: - Use 1/4 cup of cornstarch to coat the beef. - Make sure your oil is hot before adding the beef. This helps create that crunchy texture. Marinating enhances the taste of the beef. I suggest letting it sit for at least 30 minutes. For deeper flavor, extend it to 2 hours. Here’s a quick tip: - Mix soy sauce, sesame oil, honey, rice vinegar, garlic, ginger, and red pepper flakes for a great marinade. Presentation matters. A beautiful dish makes it more enjoyable. Here are some ideas: - Top your bowls with sliced green onions and sesame seeds. - Add a splash of extra soy sauce for more flavor. - Serve with lime wedges for a fresh twist. {{image_4}} You can change the protein in this dish. Try chicken for a lighter taste. Tofu is a great choice for a plant-based meal. Shrimp adds a nice seafood twist. Just cut the chicken or tofu into thin slices. For shrimp, use large ones and peel them. Adjust cooking times as needed. Chicken takes about the same time as beef, while shrimp cooks faster. Feel free to swap in other fresh veggies. Carrots, bell peppers, and zucchini work well. You can even add baby corn for a fun crunch. For a more colorful bowl, mix in red cabbage or snap peas. Just make sure to cut them into bite-sized pieces. This makes for easier eating and adds a nice look to your dish. You can change the sauce to match your taste. Try teriyaki for a sweeter flavor. Hoisin sauce adds a rich depth. A spicy chili sauce gives a nice kick. Mix and match sauces to create your own unique blend. Just keep the base of soy sauce to hold the flavors together. Experiment and have fun with your sauces! To store your crispy sesame beef bowls, follow these steps: - Cool down: Let the dish cool to room temperature before storing. - Refrigerate: Place leftovers in an airtight container. They can stay fresh for up to 3 days in the fridge. - Freeze: For longer storage, freeze the beef and veggies separately. Use freezer-safe bags or containers. They can last for about 3 months. Reheating is key to keeping that crispy texture: - Microwave: Use a microwave-safe plate. Cover the food with a damp paper towel. Heat in 30-second bursts until hot. - Skillet: For the best results, heat a non-stick skillet over medium heat. Add a splash of oil and warm the beef for 2-3 minutes. This keeps it crispy. - Avoid overcooking: Heat just until warm to avoid drying out the meat. Knowing how long your dish lasts is important: - In the fridge: Consume within 3 days for the best taste. - In the freezer: Enjoy within 3 months. After that, the quality may drop. Checking for off smells or changes in texture can help you decide if it’s still good. Yes, you can prepare this dish ahead of time. Here are some tips for meal prep and storage: - Marinate the beef: You can marinate the flank steak a day before. Just keep it in the fridge. - Cook rice and veggies: You can cook the jasmine rice and steam the veggies in advance. Store them in separate containers. - Store properly: Keep the beef, rice, and veggies in airtight containers. They will stay fresh for about 3 days in the fridge. - Reheat carefully: When ready to eat, reheat the beef and veggies in a skillet to keep them crispy. If you don’t have flank steak, there are other tasty options: - Skirt steak: This cut is similar to flank and cooks quickly. - Sirloin: A tender choice that works well in this dish. - Chicken or tofu: Both of these can absorb the flavors and stay juicy. - Pork tenderloin: This is another good substitute for beef in this recipe. To add some heat to your crispy sesame beef bowls, try these ideas: - Red pepper flakes: Increase the amount in the marinade for more spice. - Chili paste or sauce: Add a spoonful to the marinade for a bold kick. - Fresh jalapeños: Slice them thin and toss them with the veggies for extra heat. - Sriracha or hot sauce: Drizzle over the finished bowl for a spicy finish. In this article, I walked you through the steps for a delicious beef dish. We covered essential ingredients like flank steak, tips for marinating, and cooking techniques. You can customize your meal with various proteins and vegetables. Remember to store leftovers properly to keep them fresh. Overall, this recipe is simple, tasty, and can be made in many ways. I hope you feel inspired to try it, add your twist, and enjoy every bite!

Crispy Sesame Beef Bowls Better Than Takeout Treat

To make creamy pesto shrimp gnocchi, gather these simple items: - 1 pound of gnocchi (fresh or frozen) - 1 pound of shrimp, peeled and deveined - 1 cup heavy cream - ½ cup basil pesto (store-bought or homemade) - 2 tablespoons extra virgin olive oil - 2 cloves garlic, finely minced - Sea salt and freshly ground black pepper to taste - Grated Parmesan cheese, for serving - Fresh basil leaves, for garnish Choose shrimp that look shiny and clear. Avoid any with black spots or a strong odor. Fresh shrimp should feel firm to the touch. If you can, buy shrimp from local markets or trusted sources. Wild-caught shrimp often taste better than farmed shrimp. If you need to buy frozen shrimp, pick ones that are frozen quickly and are still firm. You can use fresh or frozen gnocchi for this recipe. Fresh gnocchi cooks faster and has a soft texture. Frozen gnocchi may need a minute longer to cook. Check the label for cooking time. Look for gnocchi made with quality ingredients. If you're feeling adventurous, you can even try making gnocchi at home using potatoes and flour. This adds a personal touch to your dish. Start by boiling a large pot of salted water. When the water is bubbling, add the gnocchi. Fresh gnocchi cooks fast, usually 2 to 4 minutes. You know they are done when they float to the top. Once cooked, drain them well. Make sure they are not sticky, or they will clump together. Next, grab a large skillet and heat olive oil over medium heat. Add minced garlic and cook it for about 30 seconds. You want it to smell nice, not burn. Now, add the shrimp to the skillet. Sprinkle sea salt and black pepper over them. Cook for 2 to 3 minutes on each side until they turn pink and opaque. After cooking, take the shrimp out and keep them warm while you move to the next step. In the same skillet, lower the heat and pour in the heavy cream. Stir in the basil pesto until it mixes well. Let the sauce simmer for 1 to 2 minutes. This step helps it thicken up a bit. Make sure to stir it occasionally so it does not stick to the pan. Now it's time to bring everything together. Add the cooked gnocchi and sautéed shrimp back into the skillet. Use a spatula to gently toss them in the creamy pesto sauce. Make sure all the gnocchi and shrimp get coated well. Heat through for another 1 to 2 minutes to blend the flavors. To keep your sauce creamy, start with heavy cream. It gives a rich base. Stir in the basil pesto slowly. This helps blend the flavors well. Let it simmer gently. Too much heat can make the sauce thin. If it gets too thick, add a splash of stock or water. This helps maintain the right consistency. Want to speed things up? Use frozen gnocchi. They cook quickly and save prep time. You can also buy pre-cooked shrimp. Just heat them up in the pan. If you have leftover pesto, use that instead of making fresh. This keeps the dish simple and quick. To prevent sticky gnocchi, follow these steps. First, boil water with plenty of salt. This adds flavor and helps the gnocchi cook evenly. Once they float, drain them right away. Don’t let them sit in the water. Toss them lightly with olive oil. This keeps them separate until you add them to the sauce. {{image_4}} You can switch up the shrimp for other proteins. Chicken works great in this dish. Just cut it into small pieces and cook it like the shrimp. Salmon is another option. You can pan-sear it until it's just cooked, then mix it with the sauce. Even tofu can be used for a plant-based choice. It will soak up the creamy sauce well. To make this dish vegetarian, skip the shrimp. Use mushrooms instead. Sauté them in olive oil until brown and tender. You can also add spinach for extra greens. It will wilt nicely in the creamy sauce. Another option is to use chickpeas. They add protein and a nice texture. You can add spices for extra flavor. A pinch of red pepper flakes gives a nice kick. Fresh herbs like parsley or thyme can brighten up the dish. You can also toss in some cherry tomatoes. They add a sweet burst and color. For a twist, try adding sun-dried tomatoes or olives for a Mediterranean flair. After enjoying your creamy pesto shrimp gnocchi, store any leftovers in an airtight container. This keeps the meal fresh and prevents it from drying out. Make sure to let it cool down before sealing. Store it in the fridge for up to three days. If you want to enjoy it later, keep it separate from the sauce to maintain texture. To reheat, place the leftovers in a skillet over low heat. Add a splash of cream or water to help revive the sauce. Stir gently to warm everything evenly. You can also microwave it in a bowl. Cover it with a damp paper towel to keep it moist. Heat in short bursts, stirring in between, until hot. Freezing creamy pesto shrimp gnocchi is not the best option. The sauce may separate and the texture of the shrimp can change. If you want to freeze it, do so without the sauce. Store the gnocchi and shrimp in a freezer-safe bag. When ready to eat, thaw in the fridge overnight. Then, cook fresh sauce to go with it. Yes, you can use homemade pesto. It adds a fresh taste. Making your own pesto is easy. Just blend basil, garlic, nuts, and olive oil. Then mix in some cheese. Use it in this dish for a personal touch. You can tell shrimp are cooked when they turn pink and opaque. Each shrimp should curl into a C shape. If they are gray or bend into an O shape, they need more time. For best results, cook shrimp for 2-3 minutes on each side. You can use half-and-half or coconut cream instead. Both options will give a creamy texture. If you want a lighter choice, use Greek yogurt mixed with a little milk. This keeps the dish rich without the extra calories. You can prepare parts of this dish ahead. Cook the gnocchi and shrimp earlier in the day. Store them separately in the fridge. Just make the sauce right before serving. This keeps everything fresh and tasty. In this article, we explored how to create a delicious shrimp and gnocchi dish. We discussed selecting fresh shrimp and the right type of gnocchi. You learned step-by-step instructions for cooking and making a creamy sauce. I shared tips for a creamy texture and how to keep gnocchi from sticking. You can also try different proteins or make it vegetarian. Remember, proper storage and reheating make leftovers enjoyable. With these insights, you can impress anyone with your cooking skills. Enjoy every bite!

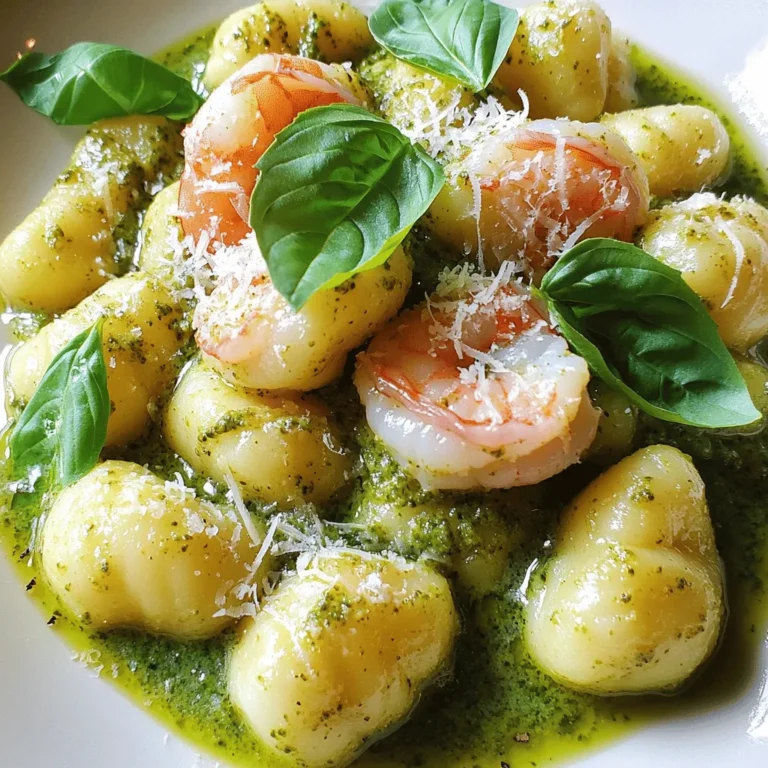
Creamy Pesto Shrimp Gnocchi 15 Minutes Delight

- 1 medium-sized pumpkin (approximately 3-4 pounds), peeled and diced into uniform pieces - 1 medium onion, finely chopped - 3 cloves of garlic, minced - 1 teaspoon ground ginger - 1 teaspoon ground cumin - 1 teaspoon ground coriander - 1 can (14 oz) coconut milk - 4 cups vegetable broth (preferably low-sodium) - 2 tablespoons extra virgin olive oil - Salt and pepper, to taste - Fresh cilantro leaves or toasted pumpkin seeds (for garnishing) In this recipe, pumpkin is the star. It gives the soup a creamy base and a sweet flavor. I love using a medium-sized pumpkin, as it provides just the right amount for this dish. When you peel and dice it, aim for uniform pieces. This helps in even roasting. Next, I add onion and garlic for depth. The onion adds sweetness, and the garlic gives a lovely aroma. Together, they create a great flavor foundation for the soup. Spices play a key role too. I use ground ginger, cumin, and coriander. They bring warmth and a hint of earthiness. The coconut milk makes the soup rich and creamy. It balances the flavors perfectly. Vegetable broth adds extra depth. I recommend using low-sodium broth. This way, you can control the saltiness of the soup. Olive oil helps in roasting the veggies and adds a nice richness. Finally, I season with salt and pepper. Adjust these to your taste for the perfect finish. Don't forget the garnishes! Fresh cilantro or toasted pumpkin seeds add a nice crunch and freshness to each bowl. They make the soup look beautiful too. Enjoy these simple and essential ingredients for a delightful creamy roasted pumpkin soup! - Preheat the Oven Start by preheating your oven to 400°F (200°C). A hot oven gives the pumpkin and onion a nice caramelization. - Prepare the Vegetables In a large baking tray, mix the diced pumpkin, chopped onion, and minced garlic. Drizzle olive oil over the veggies. Add salt and pepper to taste. Toss everything well until the vegetables are nicely coated. - Roast the Vegetables Place the tray in the preheated oven. Roast for 30-35 minutes. Stir halfway through for even cooking. Your pumpkin should become tender and golden. - Combine Spices and Broth Take the roasted veggies out of the oven. In a large pot, add the pumpkin, onion, and garlic. Sprinkle in ground ginger, cumin, and coriander. Stir well to mix the spices with the vegetables. - Blend the Soup Pour in the vegetable broth. Bring the mix to a boil, then lower the heat to a gentle simmer. Cook for about 10 minutes. This helps all the flavors come together. Use an immersion blender to puree the soup until smooth. You can also use a countertop blender, but remember to vent the top. - Incorporate Coconut Milk Add the coconut milk to the pot. Stir it in and let the soup heat on low for another 5 minutes. Taste the soup and adjust the salt and pepper if needed. - Serve and Garnish Serve the soup hot in bowls. Top with fresh cilantro leaves or a sprinkle of toasted pumpkin seeds. This adds a nice crunch and makes the soup look appealing. Enjoy every spoonful of this creamy delight! Roasting Time and Temperature Roasting your pumpkin at 400°F (200°C) for 30-35 minutes works well. This heat brings out the sweetness. The edges of the pumpkin and onion should brown slightly. This adds flavor and depth to the soup. Importance of Tossing Vegetables Toss your veggies well before roasting. This step helps them cook evenly. It ensures every piece gets coated with oil and seasoning. Stir halfway through the roasting time too. This keeps them from burning and promotes even cooking. Using an Immersion Blender vs. Countertop Blender An immersion blender is my favorite. It lets you blend the soup right in the pot. This saves time and cuts down on dishes. If you use a countertop blender, blend in small batches. Always vent the lid to let steam escape. This prevents spills and burns. Tasting and Seasoning Adjustments Always taste your soup before serving. You might need more salt or pepper. Feel free to add a touch of spice or sweetness if it needs it. A squeeze of lime can brighten flavors too. Adjusting flavors makes your soup unique and delightful. {{image_4}} If you want to change the coconut milk, you can use almond milk or cashew cream. Both options give a nice, creamy texture. You can also try oat milk for a milder taste. Each choice brings its own flavor, making the soup unique. You can mix in other veggies for extra taste. Carrots add sweetness. Sweet potatoes bring a lovely texture. You might also use butternut squash for a different flavor. Just make sure to roast them with the pumpkin. To kick up the flavor, add spices like nutmeg or smoked paprika. These spices add warmth and depth. Fresh herbs like thyme or sage also work well. You can stir them in right before serving for a bright flavor. Garnishes make your soup look special. You can top it with a swirl of coconut milk. Toasted pumpkin seeds add crunch. Fresh cilantro gives a nice touch of green. Each garnish adds a pop of color and taste. This soup is naturally vegan and gluten-free. It’s perfect for everyone! You can enjoy it without worry. Just check your broth to ensure it’s gluten-free. This way, everyone can savor the creamy goodness. Refrigeration Guidelines You can keep leftover creamy roasted pumpkin soup in the fridge. Place it in an airtight container. It stays fresh for about three to five days. Make sure the soup cools down before you store it. Freezing the Soup If you want to keep it longer, freezing is a great choice. Use a freezer-safe container. Leave some space at the top because the soup expands when frozen. It can last for up to three months in the freezer. When ready, thaw it in the fridge overnight before reheating. Best Methods for Reheating The best way to reheat the soup is on the stove. Pour the soup into a pot over low heat. Stir gently until it's warm. You can also use a microwave. Place the soup in a microwave-safe bowl. Heat it in 30-second bursts, stirring in between. How Long to Keep the Soup You can store the soup in the fridge for three to five days. If frozen, it lasts for about three months. After that, the soup can lose flavor and texture. Always check for signs of spoilage before eating. Yes, you can use fresh pumpkin. Fresh pumpkin adds a rich, vibrant flavor. It also gives a nice texture. Canned pumpkin is easy but may lack depth. Fresh pumpkin lets you control the taste and freshness. Advantages of Fresh vs. Canned Pumpkin: - Fresh pumpkin is more flavorful. - It offers better texture. - You can roast and caramelize it for added sweetness. - Canned pumpkin is convenient and saves time. To thicken the soup, you can add a few things. A common method is to include more roasted pumpkin. You can also blend it longer for a creamier texture. Tips for achieving a thicker consistency: - Add a potato when roasting for extra creaminess. - Use less broth than called for. - Try adding a cornstarch slurry to the simmering soup. - Blend some of the soup and leave the rest chunky. Pumpkin soup pairs well with several sides. A warm, crusty bread is a classic choice. It adds texture and makes the meal cozy. You could also serve a fresh salad for a light touch. Best Side Dish Pairings: - Crusty bread or rolls for dipping. - A simple green salad for freshness. - Grilled cheese sandwiches for a comforting bite. - Roasted vegetables for added flavor and nutrition. This article covered how to make a delicious pumpkin soup. You learned about essential ingredients, like pumpkin, spices, and coconut milk. We walked through preparation, cooking, and serving steps. Tips helped perfect your roasting and blending techniques. I also shared variations for customizing flavors and accommodating diets. Now, you can enjoy this warm, tasty soup any time. Try different garnishes and spices to make it your own. Happy cooking!

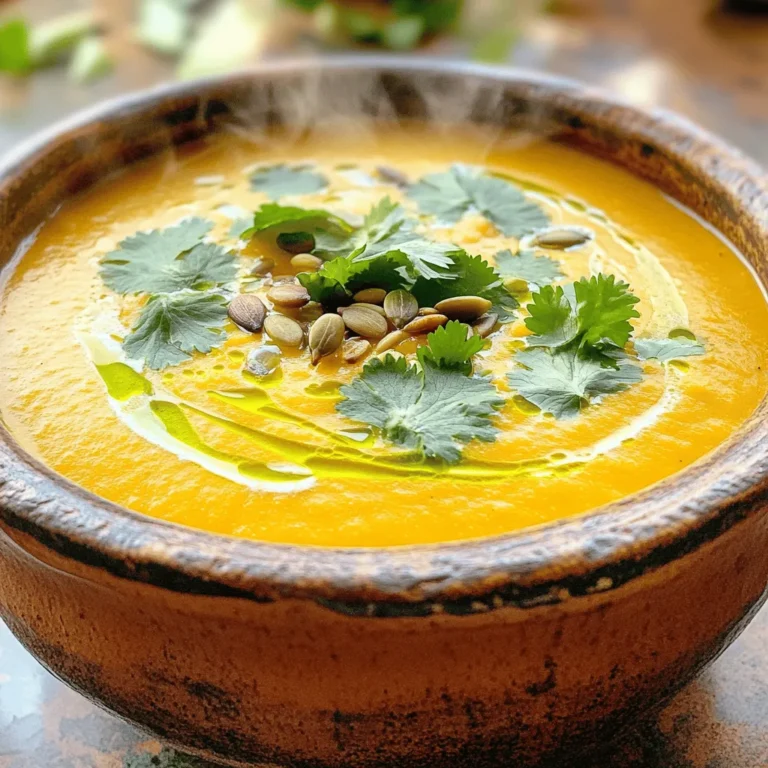
Creamy Roasted Pumpkin Soup With Coconut Milk Delight

- 1 cup all-purpose flour - 1/4 teaspoon salt - 1/2 teaspoon ground cinnamon For the crust, we need all-purpose flour. This gives our bars a nice base. Salt adds flavor and balances the sweetness. Ground cinnamon brings warmth and a hint of spice. - 1/2 cup unsalted butter, softened - 1/4 cup brown sugar, packed - 1/2 cup granulated sugar - 1 cup light corn syrup - 2 large eggs, at room temperature - 1 teaspoon pure vanilla extract Next, we have our wet ingredients. Unsalted butter makes the crust rich. Brown sugar adds a deep sweetness. Granulated sugar sweetens the filling. Light corn syrup gives it that gooey texture. Eggs help bind everything together. Pure vanilla extract adds a lovely aroma. - 1/2 cup roughly chopped pecans Finally, we can’t forget the pecans. They add crunch and a nutty flavor. Roughly chop them for a great texture. This mix of ingredients creates a perfect sweet treat. Start by preheating your oven to 350°F (175°C). This step is key for even baking. While the oven heats, grab an 8x8 inch baking dish. Lightly grease it or line it with parchment paper. If you use parchment, let it hang over the edges. This makes removal easy later. In a medium mixing bowl, cream together 1/2 cup of softened unsalted butter and 1/4 cup of packed brown sugar. Use a hand mixer or a wooden spoon. Mix for about 2-3 minutes until light and fluffy. Gradually add in 1 cup of all-purpose flour and 1/4 teaspoon of salt. Blend until a soft dough forms. Press this dough evenly into the bottom of your prepared baking dish. Make sure it’s a flat layer for good baking. Now, transfer the crust to the preheated oven. Bake it for about 15 minutes, or until it turns a light golden brown. When it’s done, remove it from the oven. Let it cool for a few minutes before adding the filling. In a large mixing bowl, combine 1 cup of light corn syrup, 1/2 cup of granulated sugar, and 2 large eggs. Add 1 teaspoon of pure vanilla extract and 1/2 teaspoon of ground cinnamon. Whisk this mixture well until it’s smooth and free of lumps. Next, gently fold in 1/2 cup of roughly chopped pecans. Once mixed, carefully pour this pecan filling over the warm crust. Use a spatula to spread it out evenly. Return the dish to the oven and bake for another 25-30 minutes. Look for a set filling and a golden top. After baking, take the dish out of the oven. Let it cool in the pan for about 1 hour at room temperature. Once cooled, move the dish to the refrigerator. This helps the bars firm up. When fully cooled, lift the bars out using the parchment overhang. Cut them into squares or bars. Enjoy your sweet treat! To make the crust just right, you need even pressure when pressing the dough. Start by using your fingers or a flat-bottomed cup to press it down evenly. This helps it cook well. You want a nice, golden color. To achieve this, bake the crust for about 15 minutes. Keep an eye on it. If it starts to brown too much, take it out early. For a smooth filling, whisk the mixture well. Combine the corn syrup, sugars, eggs, and vanilla. Use a strong whisk to break up any lumps. This ensures a creamy texture. When baking, check for doneness after about 25 minutes. The filling should be set and not jiggle too much. If it looks firm, it's ready. Presentation matters! Arrange the caramel pecan pie bars on a colorful platter. An elegant touch is to dust them with powdered sugar. Just before serving, drizzle some caramel sauce on top. This adds flavor and makes it look amazing. Enjoy these bars with a scoop of vanilla ice cream for a perfect treat! {{image_4}} You can easily change the flavor of these caramel pecan pie bars. Adding chocolate chips or butterscotch chips gives a sweet twist. It’s simple—just fold in a cup of chips before pouring the filling over the crust. You can also spice things up. Incorporating spices like nutmeg or ginger adds warmth and depth. A half teaspoon of nutmeg or ginger works well in the filling. If you want to switch up the nuts, walnuts or almonds work great instead of pecans. Walnuts offer a slightly bitter taste that balances the sweetness. Almonds bring a crunchy texture and a mild flavor. You can also mix different nuts for added texture. Try a combo of pecans and walnuts for a delightful surprise. For those who need gluten-free options, use almond flour or a gluten-free flour blend for the crust. It gives a nice flavor and texture. If you're looking for vegan ideas, replace eggs with flax eggs. Mix one tablespoon of flaxseed meal with three tablespoons of water for each egg. This keeps the bars moist and delicious without any animal products. Cooling your caramel pecan pie bars is key for great texture. After baking, let them cool in the pan for about 1 hour. This helps set the filling. Next, transfer them to the refrigerator to cool completely. Refrigeration gives the bars a firmer texture, making them easier to slice. To keep your bars fresh, place them in an airtight container. This prevents them from drying out. They can last for about 5 days in the fridge. If you want to keep them longer, you can freeze them. Wrap each bar in plastic wrap and then store them in a freezer bag. They can stay good in the freezer for up to 3 months. When it's time to enjoy leftovers, the microwave works well. Heat the bars for about 10-15 seconds. This warms them up without making them too soft. If you prefer the oven, preheat it to 350°F (175°C). Place the bars in for 5-10 minutes. This will help maintain their texture. Enjoy your sweet treat! Yes, you can make these bars ahead of time. I often bake them a day before. Let them cool, then store them in the fridge. They taste great after chilling! The bars are done when the top is golden. The filling should be set but still a bit jiggly. You can also insert a toothpick. If it comes out clean, they are ready! Definitely! You can use coconut sugar instead of brown sugar. Maple syrup can replace corn syrup. For a nut-free version, try using seeds like sunflower seeds. Use a sharp knife for clean cuts. Dip the knife in hot water, then wipe it dry. This helps prevent sticking. Cut them into even squares for a nice look. Store them in an airtight container. Keep them in the fridge to maintain freshness. They last about a week. You can also freeze them for up to three months. Just let them thaw before serving! This blog post covered how to make delicious pecan pie bars. We explored each ingredient, from dry and wet components to the nuts. I shared clear steps to create the perfect bars, with tips to enhance flavor and texture. You can even modify the recipe to fit your needs. Remember to store the bars properly for the best taste. Now, gather your ingredients and enjoy baking these tasty treats!

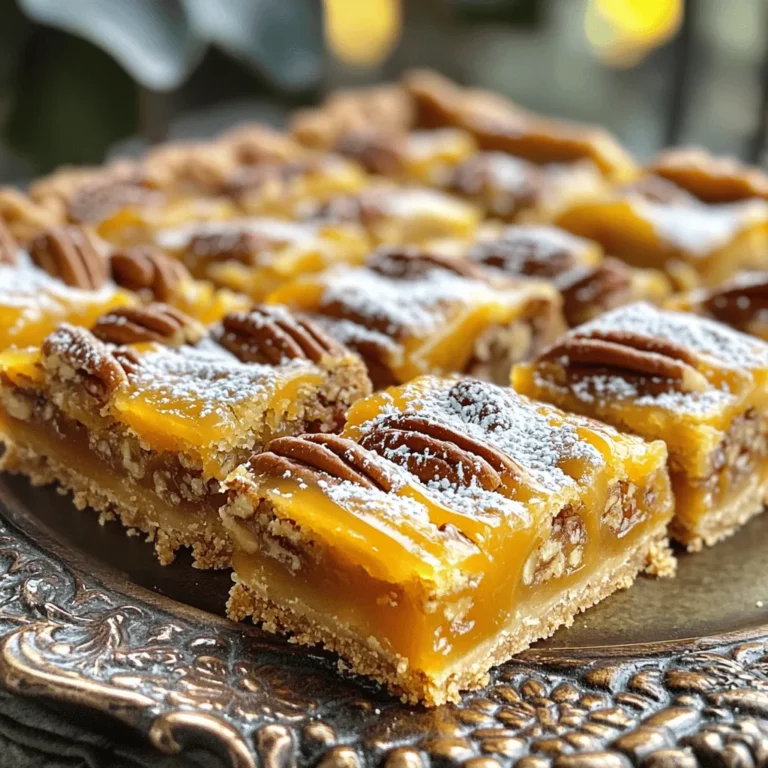
Caramel Pecan Pie Bars Irresistible and Sweet Treat

- 1 pound large shrimp, peeled and deveined - 4 tablespoons unsalted butter - 3 cloves garlic, finely minced - 1 teaspoon smoked paprika - Salt and freshly ground black pepper, to taste The shrimp is the star of this dish. Use large, fresh shrimp for the best flavor. The unsalted butter adds richness. Garlic gives a strong aroma and taste. Smoked paprika adds a hint of smokiness. Don’t forget the salt and pepper to season! - 4 large flour tortillas - 2 cups shredded cheese (a blend of cheddar and Monterey Jack) - 1 cup fresh spinach, loosely packed and roughly chopped - 1 small red bell pepper, diced into small pieces Flour tortillas are soft and easy to fold. The cheese blend melts perfectly and adds creaminess. Spinach adds color and nutrition. Diced red bell pepper gives a nice crunch. - 1 ripe avocado, thinly sliced (for serving) - Fresh cilantro, chopped (for garnish) - Lime wedges (for serving) Sliced avocado adds creaminess and richness. Chopped cilantro gives a fresh touch to each bite. Lime wedges add a burst of tangy flavor, making every bite amazing! To start, melt 4 tablespoons of unsalted butter in a large skillet over medium heat. As it melts, the rich aroma fills the air. Once the butter bubbles, add 3 finely minced garlic cloves. Sauté the garlic for about 1 minute. Keep stirring to avoid browning it. This step adds a lovely flavor to your dish. Next, increase the heat to medium-high. Add 1 pound of peeled and deveined shrimp to the skillet. Season the shrimp with 1 teaspoon of smoked paprika, salt, and freshly ground black pepper. Cook the shrimp for 2-3 minutes on each side. They should turn a bright pink and become opaque. Once cooked, transfer the shrimp to a plate and set it aside. Now it’s time to build your quesadilla! In the same skillet, place one large flour tortilla down. Sprinkle about ½ cup of shredded cheese on one half of the tortilla. I love using a blend of cheddar and Monterey Jack for great flavor. On top of the cheese, add a layer of roughly chopped spinach and small diced red bell pepper. Then, place a portion of the cooked garlic butter shrimp on top. The colors and textures create a feast for the eyes. Carefully fold the tortilla in half to form a semi-circle. Now, let’s cook the quesadilla! Place it in the skillet and cook for about 2-3 minutes on each side. The goal is to achieve a golden brown, crispy tortilla while ensuring the cheese melts perfectly. When flipping, use a spatula and be gentle. This helps avoid spills. Once done, remove the quesadilla from the skillet and keep it warm. Repeat this process with the remaining tortillas and filling ingredients until all your quesadillas are ready to serve. - Cheese melting tips: Use a mix of cheddar and Monterey Jack cheese. This blend melts well and gives great flavor. Spread the cheese evenly over half the tortilla for better melting. - Avoiding soggy tortillas: Always cook your tortillas in a hot skillet. This helps them stay crispy. Don’t overload the filling. A light hand keeps the tortilla firm. - Optional spices: Try adding chili powder or cumin for extra warmth. A pinch of cayenne can give a nice kick if you like heat. - Ideas for additional fillings: You can add cooked chicken or black beans for more protein. Sautéed mushrooms or zucchini are great veggie options too. - Best skillet types: A non-stick skillet works best for quesadillas. It prevents sticking and makes flipping easy. - Tools for easy flipping: Use a large spatula for flipping. A second spatula can help support the quesadilla when you flip it. This way, you keep all the tasty filling inside. {{image_4}} You can swap shrimp for chicken or beef. Cook the chicken in the same garlic butter until it's golden. Use thin slices of beef and cook them quickly for a nice sear. For a vegetarian twist, try black beans or pinto beans. They add protein and a creamy texture to your quesadillas. Cheese is key to gooey quesadillas. Try different blends like pepper jack for spice or mozzarella for a milder taste. You can also use dairy-free cheese if needed. It melts well and keeps your dish creamy. If you like heat, add diced jalapeños or crushed red pepper flakes. This will kick up the flavor. For kids or those who prefer mild, skip the hot stuff. You can use sweet bell peppers instead for a fresh crunch without heat. To keep your Minute Garlic Butter Shrimp Quesadillas fresh, store them in an airtight container. This helps to keep moisture out and flavor in. Place the quesadillas in the fridge. They stay fresh for about 3 days. After that, they may lose flavor and texture. The best way to reheat these quesadillas is in a skillet. Heat the skillet over medium heat. Place the quesadilla in the skillet for about 2-3 minutes on each side. This method helps keep the tortilla crispy. You can also use an oven. Preheat to 350°F (175°C) and bake for about 10 minutes. You can freeze quesadillas before or after cooking. To freeze before cooking, wrap them in plastic wrap and place them in a freezer bag. For cooked quesadillas, let them cool first, then wrap and freeze. They should stay good for 2-3 months. When ready to eat, thaw in the fridge overnight. Reheat in a skillet or oven as mentioned above. Enjoy your tasty meal again! Yes, you can use frozen shrimp. First, thaw them in cold water. This takes about 15 minutes. After thawing, pat them dry with paper towels. This helps them cook better. Follow the same cooking steps as fresh shrimp. Just make sure they turn pink and opaque. Feel free to add other veggies. Here are some tasty options: - Diced onions for sweetness - Chopped tomatoes for freshness - Sliced mushrooms for earthiness - Zucchini for extra crunch Mix and match to find your favorite combo! To make gluten-free quesadillas, use gluten-free tortillas. There are many brands available. Check the label to ensure they fit your needs. You can also use corn tortillas. They work well and add a nice flavor. Just make sure all other ingredients are gluten-free too. This blog post covered how to make delicious shrimp quesadillas. I shared the main ingredients, cooking steps, and handy tips for the best results. You learned how to customize them with varied proteins, cheeses, and spices. I discussed storage methods to keep leftovers fresh. In the end, these quesadillas are easy to make and taste great. Enjoy making your version, and feel free to experiment with new flavors!

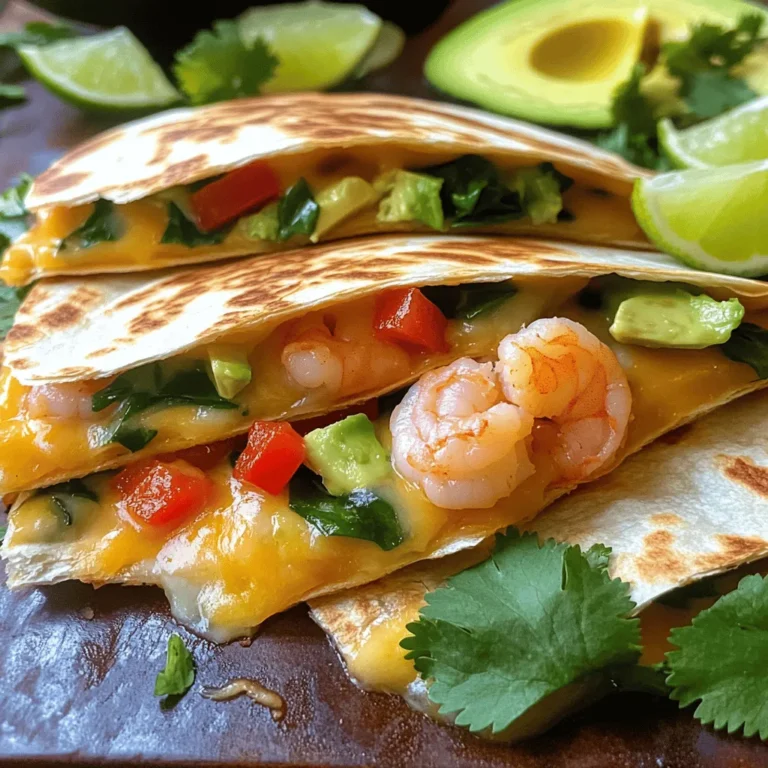
Minute Garlic Butter Shrimp Quesadillas Tasty Dish

Dry Ingredients - 1 cup all-purpose flour - 1 teaspoon baking powder - 1/2 teaspoon baking soda - 1/2 teaspoon salt - 1 tablespoon pumpkin pie spice - 1/2 cup granulated sugar - 1/2 cup packed brown sugar Wet Ingredients - 1/2 cup vegetable oil - 2 large eggs - 1 cup canned pumpkin puree - 1 teaspoon vanilla extract To make pumpkin spice cupcakes, you need both dry and wet ingredients. The dry ingredients create the structure. They include flour, baking powder, baking soda, salt, and spices. The wet ingredients add moisture. They consist of oil, eggs, pumpkin puree, and vanilla extract. Mixing these together gives the cupcakes their fluffy texture and delicious flavor. Main Ingredients - 8 ounces cream cheese, softened - 1/4 cup unsalted butter, softened - 2 cups powdered sugar - 1 teaspoon vanilla extract Optional Garnishes - A pinch of pumpkin pie spice To top your cupcakes, use cream cheese frosting. It adds a rich, tangy taste that pairs well with pumpkin spice. For the frosting, beat cream cheese and butter until fluffy. Then mix in powdered sugar and vanilla extract. A pinch of pumpkin pie spice makes it extra special. You can sprinkle it on top for a lovely finish. First, preheat your oven to 350°F (175°C). This step is key for baking. While it heats, line a muffin pan with cupcake liners. Choose fun or festive designs to brighten your treats. In a medium bowl, whisk the dry ingredients. Combine 1 cup of flour, 1 teaspoon of baking powder, 1/2 teaspoon of baking soda, 1/2 teaspoon of salt, and 1 tablespoon of pumpkin pie spice. Mix until everything is well blended. Set this dry mix aside for later. Next, take a large bowl and mix the sugars and oil. Add 1/2 cup of granulated sugar, 1/2 cup of packed brown sugar, and 1/2 cup of vegetable oil. Use a whisk to blend these until smooth. This mixture should look shiny and inviting. Now, it's time to add the eggs and pumpkin. Crack 2 large eggs into the sugar and oil mix. Beat well after each egg. Then, stir in 1 cup of canned pumpkin puree and 1 teaspoon of vanilla extract. Mix until your batter looks silky and smooth. Gradually fold the dry mix into the wet mix. Be gentle; this helps keep your cupcakes light. Stir just until you see no dry flour. Avoid overmixing to get the best texture. Next, divide the batter into the lined cupcake wells. Fill each about two-thirds full. Bake for 18-20 minutes. Check if they’re done by inserting a toothpick. If it comes out clean, they’re ready! After baking, let the cupcakes rest in the pan for 5 minutes. Then, move them to a wire rack to cool completely. This step is important for good frosting. To make the cream cheese frosting, beat 8 ounces of softened cream cheese and 1/4 cup of softened butter in a clean bowl. Mix until light and fluffy. Gradually add 2 cups of powdered sugar. Keep mixing until creamy. Don't forget to add 1 teaspoon of vanilla extract for extra flavor! Once the cupcakes are cool, it's time to frost them. Use a spatula or a piping bag for this. Spread the cream cheese frosting on each cupcake. Get creative with your designs! Finally, sprinkle a pinch of pumpkin pie spice on top for a nice touch. Enjoy your delicious pumpkin spice cupcakes! Avoiding overmixing Mixing too much can make your cupcakes tough. When you add the dry ingredients to the wet mix, fold gently. Stop when you no longer see dry flour. This keeps the batter light and airy. Ensuring perfect cupcake texture To get a great texture, use room-temperature ingredients. Eggs and pumpkin should not be cold. This helps them combine better. Also, fill the cupcake liners only two-thirds full. This gives them room to rise without overflowing. Achieving a smooth frosting Start with softened cream cheese and butter. Beat them together until fluffy. Gradually add powdered sugar. Mix until you get a creamy texture. If it’s too thick, add a tiny bit of milk to reach your desired consistency. Decorative frosting techniques To make your frosting pretty, use a piping bag. Swirl the frosting on top for a fun look. You can also use a spatula for a rustic finish. Sprinkle a pinch of pumpkin pie spice on top for flair. This adds a nice touch and shows off your baking skills! {{image_4}} You can easily change the taste of your pumpkin spice cupcakes. One fun way is by adding chocolate chips. Just fold in about half a cup of semi-sweet or dark chocolate chips to the batter. This adds a rich twist that pairs well with the pumpkin spice. Another option is to use different spices. If you want a unique flavor, try adding nutmeg or ginger. Just replace the pumpkin pie spice with your favorite blend. This can bring new warmth and depth to each cupcake. If you need gluten-free options, swap the all-purpose flour with a gluten-free blend. Make sure the blend has a good structure for baking. You may also need to add a bit of xanthan gum for better texture. For vegan substitutions, replace the eggs with flax eggs. Mix one tablespoon of ground flaxseed with three tablespoons of water. Let it sit for a few minutes until it thickens. Use a plant-based cream cheese for the frosting. This way, everyone can enjoy these delicious cupcakes! To keep your pumpkin spice cupcakes fresh, store them properly. - Room temperature storage: Place your cupcakes in an airtight container. They can stay at room temperature for 2-3 days. This keeps them soft and tasty. - Refrigeration guidelines: If you want to keep them longer, place the container in the fridge. They can last up to a week in the fridge. Just remember, they may dry out a bit. Freezing is a great option if you have extra cupcakes. - Proper freezing techniques: Allow the cupcakes to cool completely. Then, wrap each cupcake in plastic wrap. Place them in a freezer-safe bag or container. This helps to avoid freezer burn. - Thawing and reheating: When you’re ready to enjoy them, take out the cupcakes. Let them thaw in the fridge overnight. You can warm them slightly in the microwave for a few seconds if you want them cozy. Can I make these cupcakes ahead of time? Yes, you can make these cupcakes ahead of time. Bake them the day before your event. Store them in an airtight container. This keeps them fresh and moist. How do I know when the cupcakes are done? To check if the cupcakes are done, insert a toothpick into the center. If it comes out clean, the cupcakes are ready. They should also spring back when lightly touched. Can I use a different type of frosting? Sure! You can use buttercream or whipped cream instead. Each will give a unique taste. However, cream cheese frosting pairs best with pumpkin spice flavors. How long does cream cheese frosting last? Cream cheese frosting lasts up to one week in the fridge. Store it in an airtight container. If you freeze it, use it within three months for best taste. What can I substitute for pumpkin puree? You can use applesauce or mashed banana. Both options add moisture and sweetness. However, the flavor will change slightly, so keep that in mind. Can I reduce the sugar in the recipe? Yes, you can reduce the sugar. Cutting it by a quarter won't change the texture much. Just remember that less sugar may affect the sweetness. In this post, we explored making delicious pumpkin spice cupcakes. We covered essential ingredients and step-by-step instructions. I shared key tips, frosting ideas, and tasty variations. Finally, I included storage info and answered common questions. Now you're ready to bake and enjoy these treats. Remember, each step matters for great flavor. Try your own twists to make them uniquely yours. Happy baking!

Pumpkin Spice Cupcakes with Cream Cheese Frosting Delight

- 1 cup all-purpose flour - 1 cup rolled oats - ½ cup brown sugar, packed - ½ cup granulated sugar - ½ teaspoon baking powder - ½ teaspoon sea salt - ½ cup unsalted butter, melted and slightly cooled - 2 cups fresh strawberries, hulled and diced - 2 cups rhubarb, trimmed and chopped into small pieces - 1 tablespoon cornstarch - 1 tablespoon freshly squeezed lemon juice - 1 teaspoon pure vanilla extract The ingredients for my Strawberry Rhubarb Crisp Bars are simple and fresh. The dry ingredients form the base. The all-purpose flour and rolled oats give the bars a nice texture. I use brown sugar and granulated sugar for just the right sweetness. Baking powder helps the bars rise, while sea salt balances the flavors. For the wet ingredients, I melt unsalted butter first. This adds richness to the crust. Fresh strawberries and rhubarb are the stars of the show. Their tartness and sweetness complement each other. Cornstarch helps thicken the fruit mixture so it doesn't get too runny. Fresh lemon juice brightens the flavors, while vanilla extract adds warmth. Using these fresh, quality ingredients makes all the difference. They create a tasty summer treat that everyone will love! - Preheat your oven to 350°F (175°C). - Lightly grease a 9x9-inch baking pan with butter or line it with parchment paper. - In a large bowl, mix together the flour, oats, brown sugar, granulated sugar, baking powder, and sea salt. Stir it well to combine everything. - Pour the melted butter into the dry mix. Use a fork or your fingers to blend it until it looks like coarse crumbs. - Take half of this crumb mixture and press it firmly into the bottom of the baking pan. Make sure it forms an even layer. - In another bowl, toss the diced strawberries and chopped rhubarb. - Add the cornstarch, lemon juice, and vanilla extract. Mix it all until the fruit is evenly coated. - Spread this fruit mixture over the crust layer in the baking pan. - Sprinkle the remaining crumb mixture generously over the top of the fruit. - Place the pan in the oven and bake for 30-35 minutes. Look for a golden brown topping and bubbling fruit around the edges. - After baking, let it cool in the pan for at least 15 minutes before slicing into bars. This helps the layers set just right. - Ensuring even baking: To help your bars bake evenly, spread your crust and topping evenly. Use a spatula to press it down flat. This will give you a nice, even layer. - Checking for doneness: Look for a golden-brown top and bubbling fruit. Use a toothpick in the center to check for crumbs. If it comes out clean, your bars are ready! - Avoiding a soggy crust: To prevent sogginess, make sure your fruit is not too watery. Drain any excess juice from the strawberries and rhubarb before mixing. This keeps your crust firm and delicious. - Best served warm or at room temperature: I love these bars fresh from the oven. If you let them cool for 15 minutes, they slice better. They also taste great at room temperature! - Topping ideas: For a fun twist, sprinkle powdered sugar on top. You can also add a scoop of ice cream or whipped cream. These toppings make your bars a real treat! {{image_4}} You can easily make this treat gluten-free. Use almond flour or coconut flour instead of all-purpose flour. These choices give a great taste. For oats, pick certified gluten-free oats. They add texture without any gluten. Want to spice things up? Add a pinch of cinnamon or nutmeg. These spices add warmth and depth. You can also mix in other fruits. Blueberries or peaches pair well with strawberries and rhubarb. They add extra flavor and color to the bars. If you want a vegan version, swap the butter for coconut oil or vegan butter. Both work well and keep the bars rich. You can use maple syrup or coconut sugar in place of regular sugar. These options keep your treat plant-based and delicious. You can store leftover strawberry rhubarb crisp bars at room temperature. Keep them in an airtight container. This way, they stay fresh for up to three days. If you want to keep them longer, refrigerate them. Just make sure to cover them well so they don’t dry out. To enjoy these bars later, freezing is a great option. First, let the bars cool completely. Then, wrap them tightly in plastic wrap or aluminum foil. Place them in a freezer bag or container. They will stay good for up to three months in the freezer. When you're ready to eat them, thaw the bars overnight in the fridge. If you want them warm, reheat them in the oven at 350°F for about 10 minutes. This will make the topping crisp again and warm the fruit filling. Enjoy your sweet treat anytime! You can tell the bars are done when the topping is golden brown. The fruit should bubble up around the edges. This bubbling shows that the filling is hot and ready. Keep an eye on them during the last few minutes of baking. Yes, you can use frozen fruit. Just make sure to thaw and drain excess liquid first. This helps keep the bars from getting too soggy. Frozen fruit might take a bit longer to bake, so check for doneness. To cut the bars, let them cool for at least 15 minutes. Use a sharp knife for clean cuts. You can also use a ruler to measure even squares. This helps with serving and makes them look nice. These bars can last up to five days in the fridge. Store them in an airtight container. Keep them away from strong odors, as they can absorb those flavors. Yes, you can substitute the sugar. Try using coconut sugar or a sugar alternative like stevia. Just remember that the taste and texture might change slightly. Adjust to your liking for the best results. In this post, we covered how to make delicious Strawberry Rhubarb Crisp Bars. We looked at all the ingredients, from the dry to the wet ones. I explained each step, from preparing the pan to baking. We even talked about tips, fun variations, and how to store them. These bars are tasty and easy to share. Experiment with flavors and enjoy them warm. Remember, baking is all about fun and trying new things! Happy baking!

Strawberry Rhubarb Crisp Bars Tasty Summer Treat

To make a tasty Wild Rice Mushroom Pilaf, you will need these main items: - 1 cup wild rice blend - 4 cups vegetable broth - 8 ounces mushrooms (cremini or button), sliced - 1 medium onion, finely chopped - 2 cloves garlic, minced - 2 tablespoons olive oil - 1 teaspoon dried thyme - 1 teaspoon dried rosemary - Salt and pepper to taste These ingredients bring out the best flavors in your dish. The wild rice blend gives a nutty taste, while the mushrooms add a rich depth. Onions and garlic provide a savory base, and the herbs give it a fresh kick. You can make your pilaf even better with these optional items: - ½ cup pecans, chopped - Fresh parsley, chopped for garnish Pecans add a nice crunch and extra flavor. Fresh parsley brightens up the dish and makes it look pretty. Choosing the right rice blend is key. Wild rice is unique. It has a chewy texture and a nutty taste. You can mix it with brown rice for a softer bite. This blend will cook well together, giving you a great texture. Always rinse the rice before cooking. This step removes extra starch and helps it cook fluffy. First, rinse 1 cup of wild rice blend under cold water. This step is key for removing extra starch. It helps the rice stay fluffy and light. Next, bring 4 cups of vegetable broth to a boil in a medium pot. Once boiling, add the rinsed rice and stir gently. Lower the heat to a simmer, cover the pot, and let it cook for 40 to 50 minutes. The rice will be tender when done and will split open. After cooking, keep it covered for an extra 10 minutes to steam. While the rice cooks, heat 2 tablespoons of olive oil in a large skillet over medium heat. Add 1 medium onion, finely chopped, and sauté for about 5 minutes. The onion should turn translucent and smell great. Now, add 2 minced garlic cloves and cook for another minute. The garlic will smell amazing, but watch it closely to prevent burning. After the garlic, add 8 ounces of sliced mushrooms to the skillet. Cook for 8 to 10 minutes, stirring occasionally. The mushrooms will lose moisture and turn brown. Season the mixture with 1 teaspoon each of dried thyme and rosemary, plus salt and pepper to taste. Stir well to mix in the herbs. When the wild rice is ready, fluff it with a fork. Carefully mix the rice into the skillet with the mushrooms. If you like, add ½ cup of chopped pecans for extra crunch. Stir until everything is well combined. Taste the pilaf and adjust the seasoning if needed. Let it rest for a few minutes before serving. This step helps the flavors blend beautifully. To make sure your wild rice is fluffy, start by rinsing it. Rinse it under cold water to wash away the extra starch. This step helps the rice not stick together. After rinsing, use four cups of vegetable broth for cooking. Once it boils, add the rice and stir gently. Cover and simmer it on low heat for 40 to 50 minutes. When finished, let it sit covered for 10 extra minutes. This steaming step keeps the rice light and fluffy. You can easily enhance the flavors in this dish. For a richer taste, try adding a splash of white wine when cooking the mushrooms. You might also swap dried herbs for fresh ones. Fresh thyme and rosemary give a more vibrant flavor. If you want a bit of heat, sprinkle in some red pepper flakes. For added crunch, toss in the optional pecans. They add a nice nutty flavor to the dish. Serving your wild rice mushroom pilaf in a beautiful way makes it more appetizing. Use a large serving bowl to display the pilaf. Before serving, garnish it with fresh parsley. This adds a pop of color and freshness. Consider sprinkling extra chopped pecans on top for texture. This makes the dish look more inviting and delicious. Enjoy sharing this vibrant dish with friends and family! {{image_4}} You can change the flavor by using different mushrooms. Cremini mushrooms give a deep taste. Button mushrooms are lighter but still tasty. Try shiitake for a rich, earthy flavor. If you want a unique touch, use oyster mushrooms. Each type adds its own twist to the dish. You can add protein to make this dish more filling. Cook diced chicken breast in the skillet before adding mushrooms. This gives a nice texture and flavor. If you prefer plant-based options, use tofu. Press and cube the tofu, then sauté until golden. Both options make the pilaf more nutritious. Adding seasonal veggies can brighten up the pilaf. In spring, stir in peas or asparagus. Summer calls for zucchini or bell peppers. In fall, add roasted squash or carrots. Each vegetable adds color and health benefits. You can mix and match to fit your taste and the season. After enjoying your Wild Rice Mushroom Pilaf, let it cool down. Then, place the leftovers in an airtight container. This helps keep the dish fresh. Store it in the fridge for up to four days. If you want to keep it longer, consider freezing it. To reheat the pilaf, use the stovetop or microwave. On the stovetop, add a splash of vegetable broth. Warm it over low heat, stirring often. If using a microwave, place the pilaf in a safe bowl. Cover it with a damp paper towel and heat for 1-2 minutes. Make sure it’s hot all the way through before serving. To freeze Wild Rice Mushroom Pilaf, use a freezer-safe container. Divide it into portions for easy meals later. Seal the container tightly and label it with the date. You can freeze it for up to three months. When ready to eat, thaw it in the fridge overnight before reheating. You can serve this pilaf with many tasty dishes. Grilled chicken pairs well with it. A fresh salad adds a nice crunch. Roasted vegetables also make a great side. You might enjoy it with fish, too. It works well as a base for stir-fried greens or tofu, adding more nutrients. Yes, you can make this dish ahead of time. Cook the pilaf and store it in the fridge. It stays fresh for up to three days. When ready to eat, reheat it gently. You can add a splash of vegetable broth to keep it moist. This recipe is already vegan! All the ingredients are plant-based. Use vegetable broth to keep it vegan-friendly. You can also add more veggies like spinach or carrots for extra flavor and nutrition. Enjoy the rich taste without any animal products! This blog post covered the essential ingredients and steps to make wild rice mushroom pilaf. You learned about key ingredients, helpful tips, and variations to customize your dish. I shared storage tips to keep your leftovers fresh and answered common questions. Making this pilaf is simple and fun. With practice, you can impress others with your cooking. Try different ingredients and share your creations. Enjoy all the flavorful options wild rice mushroom pilaf offers!

Wild Rice Mushroom Pilaf Flavorful and Nutritious Dish

To make Creamy Spinach Artichoke Chicken, gather these simple ingredients: - 4 boneless, skinless chicken breasts - 1 cup fresh spinach, finely chopped - 1 can (14 oz) artichoke hearts, drained and coarsely chopped - 1 cup cream cheese, softened to room temperature - 1/2 cup sour cream - 1 cup shredded mozzarella cheese - 1/2 cup freshly grated Parmesan cheese - 3 cloves garlic, minced - 1 teaspoon onion powder - 1 teaspoon garlic powder - 2 tablespoons extra virgin olive oil - Sea salt and cracked black pepper to taste - Fresh parsley, finely chopped, for garnish You can make this dish work with some easy swaps. - Chicken: Use turkey breasts for a leaner option. - Spinach: Frozen spinach works too; just thaw and drain it well. - Cream cheese: Greek yogurt can replace cream cheese for a lighter version. - Cheeses: Swap mozzarella with cheddar or gouda for a different flavor. - Garlic: If you don’t have fresh garlic, use garlic powder instead. Each serving is packed with nutrients. Here’s a quick breakdown: - Calories: About 480 calories per serving - Protein: Around 40 grams - Carbohydrates: About 6 grams - Fat: Approximately 32 grams - Fiber: 1 gram This dish provides a good balance of protein and fats, making it a satisfying meal. Enjoy it while staying mindful of portion sizes! {{ingredient_image_2}} Start by getting your oven ready. Preheat it to 375°F (190°C). This step is key for cooking the chicken evenly. Next, gather your ingredients. You will need chicken breasts, spinach, artichokes, cream cheese, sour cream, mozzarella, Parmesan, garlic, onion powder, garlic powder, olive oil, salt, and pepper. Finely chop the spinach and artichokes. Mince the garlic. This makes the cooking process smooth. In a medium skillet, heat the olive oil over medium heat. Once hot, add the minced garlic. Sauté the garlic for about 1 minute. It should smell great and turn slightly golden. Then, add the chopped spinach and artichokes. Cook them together for about 3-4 minutes. Stir often until the spinach wilts. In a large bowl, mix the softened cream cheese, sour cream, mozzarella, and Parmesan. Add the onion and garlic powders. Stir until it’s smooth. Now, gently fold in the sautéed spinach and artichokes. Season this mixture with salt and pepper to taste. Take the seasoned chicken breasts and arrange them in a greased baking dish. Spoon the creamy mixture over each chicken breast. Spread it out evenly. Cover the dish tightly with aluminum foil to keep the moisture in. Bake it in the oven for 25 minutes. After that, remove the foil and bake for another 15 minutes. This makes the cheese bubbly and golden. Once done, let the dish rest for about 5 minutes. This helps keep the chicken juicy. Finally, garnish with freshly chopped parsley for a nice touch. Enjoy your meal! To get the best texture, start with fresh ingredients. Use fresh spinach and artichoke hearts for a vibrant taste. Make sure your cream cheese is at room temperature. This helps it mix smoothly with the other ingredients. When you combine the sautéed spinach and artichokes, fold gently. This keeps the mixture light and fluffy. Finally, let the chicken rest after baking. This step helps keep the chicken juicy and tender. Seasoning is key to flavor. Use sea salt and cracked black pepper to enhance the dish. A sprinkle of onion powder and garlic powder adds depth. For a little heat, try a pinch of crushed red pepper flakes. Fresh parsley on top adds a nice touch and fresh taste. Feel free to taste the mixture before spreading it on the chicken. Adjust salt and pepper as needed for your taste. One common mistake is overcooking the chicken. Keep an eye on the baking time to ensure it stays juicy. Another mistake is not preheating the oven. A hot oven cooks the chicken evenly. Avoid skipping the resting time after baking. This step helps keep the juices in the chicken. Lastly, don’t rush the mixing process. Take your time to blend the ingredients well for a creamy result. Pro Tips Use Fresh Ingredients: For the best flavor, opt for fresh spinach and artichokes instead of canned or frozen. Fresh ingredients will elevate the dish's taste and nutritional value. Control the Creaminess: Adjust the amount of cream cheese and sour cream based on your preference for creaminess. You can add a bit more for a richer sauce or reduce it for a lighter option. Resting Time is Key: Allow the chicken to rest after baking. This step is crucial as it helps the juices redistribute, ensuring that each bite is tender and juicy. Garnish for Presentation: Don't skip the fresh parsley garnish! It adds a pop of color and freshness that enhances the visual appeal of the dish. {{image_4}} You can easily boost this dish by adding other proteins. Shrimp or salmon works well here. Just cook them lightly before adding them to the creamy mix. You can also add veggies. Try using mushrooms or bell peppers for extra flavor and color. These vegetables are tasty and add a nice crunch to each bite. To make this meal lighter, swap cream cheese with Greek yogurt. This keeps the creaminess but cuts the fat. If you want a vegan option, use cashew cream instead of cream cheese. You can also replace chicken with firm tofu. Just press it to remove excess water, then sauté it before adding to the mix. You can change the flavors by adding spices. A pinch of red pepper flakes adds heat. For a zestier taste, mix in some lemon juice or zest. Fresh herbs like basil or dill can also brighten the dish. These small changes can create a whole new experience with each bite. To store leftovers, let the chicken cool down first. Place it in an airtight container. Cover it tightly to keep out air. This helps keep the dish fresh. You can store it in the fridge for up to three days. If you want to keep it longer, freezing is a great option. When reheating, use the oven for best results. Preheat the oven to 350°F (175°C). Place the chicken in a baking dish. Add a splash of water or broth to keep it moist. Cover the dish with foil to lock in heat. Heat for about 20-25 minutes. Check that it’s hot all the way through. You can also use a microwave, but it may dry out the chicken. To freeze, wrap each piece of chicken tightly in plastic wrap. Place it in a freezer-safe bag. Remove as much air as possible. This helps prevent freezer burn. You can freeze it for up to three months. To thaw, move it to the fridge overnight before reheating. This keeps the taste and texture nice. The best side dish is creamy mashed potatoes. They soak up the sauce well. Another great choice is crusty garlic bread. It pairs nicely and adds crunch. You can also serve this dish with a fresh salad. A simple green salad adds a crisp touch that balances the creaminess. Yes, you can use frozen spinach. Just make sure to thaw it first. Drain any excess water to keep the dish creamy. Frozen spinach is a great time-saver. It also packs a lot of nutrients. To add heat, use red pepper flakes in the cheese mix. You can also add diced jalapeños for a fresh kick. Another option is to use a spicy cheese blend. Adjust the amount based on your heat preference. Enjoy the bold flavor! In this post, I shared ingredients for a creamy spinach artichoke chicken dish. You learned the best cooking steps, plus key tips for flavor and texture. I also covered how to store leftovers and even addressed common questions. Cooking can be fun and easy with the right info. Try different variations to make this dish your own. Enjoy making this healthy meal and impress your family!

Creamy Spinach Artichoke Chicken Tasty and Simple Meal

To make Mediterranean quinoa salad, gather these fresh ingredients: - 1 cup quinoa, thoroughly rinsed - 2 cups water - 1 medium cucumber, diced into small cubes - 1 cup cherry tomatoes, halved - 1 red bell pepper, diced into bite-sized pieces - 1/2 red onion, finely chopped - 1/2 cup Kalamata olives, pitted and halved - 1/2 cup feta cheese, crumbled - 1/4 cup fresh parsley, finely chopped - 1/4 cup extra virgin olive oil - 2 tablespoons freshly squeezed lemon juice - 1 teaspoon dried oregano - Salt and freshly ground black pepper to taste Fresh ingredients make this salad vibrant and tasty. The crunch from the cucumber and bell pepper adds texture, while the juicy cherry tomatoes burst with flavor. When you use fresh herbs like parsley, they bring brightness to the dish. Fresh produce not only tastes better but also packs more nutrients. Using high-quality olive oil enhances the overall flavor, making each bite delightful. This quinoa salad is not just delicious; it’s also healthy! Each serving provides a good balance of protein, fiber, and healthy fats. Quinoa is a complete protein, meaning it contains all nine essential amino acids. The vegetables add vitamins, minerals, and antioxidants. Feta cheese adds a creamy texture while providing calcium. Overall, this salad supports a balanced diet with fresh, wholesome ingredients. First, rinse one cup of quinoa under cold water. This helps remove any bitter taste. Then, in a medium pot, bring two cups of water to a boil over medium heat. Once it bubbles, add the rinsed quinoa. Lower the heat, cover the pot, and let it simmer for about 15 minutes. Check to see if the water has absorbed. If it has, take it off the heat. Let it sit for another 5 to 10 minutes. Finally, fluff the quinoa with a fork. This makes it light and fluffy. Next, take a large mixing bowl. Dice one medium cucumber into small cubes. Halve one cup of cherry tomatoes. Cut one red bell pepper into bite-sized pieces. Finely chop half of a red onion. Add half a cup of Kalamata olives, pitted and halved. Lastly, chop a quarter cup of fresh parsley. Toss all the vegetables gently in the bowl. This step adds color and freshness to your salad. In a small bowl, whisk together a quarter cup of extra virgin olive oil and two tablespoons of freshly squeezed lemon juice. Add one teaspoon of dried oregano. Season the dressing with salt and freshly ground black pepper to taste. Mix until it is well combined. This dressing adds a zesty flavor that ties the salad together. Now, add the cooked quinoa to the bowl with the vegetables. Pour the dressing over the top. Gently toss everything together. Be careful not to mash the ingredients. Finally, sprinkle half a cup of crumbled feta cheese on top. Give the salad one last gentle toss. This will help distribute the flavors evenly. Rinsing quinoa is key to a great salad. Quinoa has a natural coating called saponin. This can taste bitter. To rinse it, place the quinoa in a fine-mesh strainer. Run cold water over it for at least 30 seconds. Shake the strainer gently to remove the bitter coating. This step makes your salad taste fresh and light. Serve your Mediterranean quinoa salad cold or at room temperature. It looks great in a large bowl. You can also use individual plates for a nice touch. Add a sprig of parsley on top for color. A lemon wedge on the side gives a nice pop of flavor. This salad is perfect for lunch, dinner, or picnics. To boost the flavor, try adding fresh herbs. Basil and mint work well with this salad. You can also add spices like cumin or paprika for extra zest. Remember to taste as you go! This helps you find the perfect balance. A little extra lemon juice can brighten the entire dish. Don't be afraid to experiment for your ideal flavor. {{image_4}} You can easily make this salad vegetarian or vegan. Just skip the feta cheese, or use a vegan cheese substitute. You can also add more veggies like avocado or spinach for extra flavor. This makes a colorful dish that is still tasty and healthy. If you want to add protein, try chicken, chickpeas, or tuna. Grilled chicken works well and adds a nice texture. Chickpeas are great for a vegetarian option and add fiber. Tuna gives it a hearty boost and pairs well with the veggies. Each option keeps the salad filling and satisfying. You can change the vegetables based on the season. In summer, add fresh zucchini or bell peppers for crunch. In fall, roasted sweet potatoes or butternut squash add warmth. Each season brings new flavors and colors to your salad. Use what you have on hand for a fresh twist each time. To store your Mediterranean quinoa salad, let it cool first. Place it in a bowl or container. Cover it tightly with a lid or plastic wrap. This helps keep the salad fresh. You can store it in the fridge for later meals. Use glass or BPA-free plastic containers. Glass containers do not stain and are easy to clean. Plastic containers are lightweight and great for take-out. Choose containers that can be sealed tightly to keep air out. This will help preserve flavors and textures. Your salad will stay fresh for about three to five days in the fridge. If you want to reheat quinoa, do so gently. Place it in a microwave-safe bowl. Add a splash of water to keep it moist. Cover it and heat in short bursts. Check often to avoid drying it out. If you prefer, enjoy the salad cold; it's just as tasty! Yes, you can make this salad ahead of time. It tastes even better after sitting. The flavors blend nicely when you chill it in the fridge for a few hours. Just store it in an airtight container. When you’re ready to eat, give it a gentle stir. If you do not like feta, try using goat cheese or ricotta. For a dairy-free option, use crumbled tofu or avocado. These substitutes add creaminess while keeping the salad fresh and tasty. You can easily adjust this salad. For gluten-free needs, it is already safe with quinoa. If you're vegan, skip the feta or use a plant-based cheese. You can also add nuts or seeds for extra crunch and protein. Yes, you can swap quinoa for other grains. Try brown rice, farro, or bulgur. Each grain brings its own flavor and texture. Just be sure to cook them according to their specific instructions. This blog post covered how to make a tasty Mediterranean Quinoa Salad. We began with key ingredients and their importance to health. I shared clear steps for cooking, preparing veggies, and making dressing. Tips showed how to enhance your dish and variations offered ideas for all diets. Finally, I discussed how to store leftovers properly. These strategies make your salad fresh and fun. Enjoy experimenting and making this meal your own!

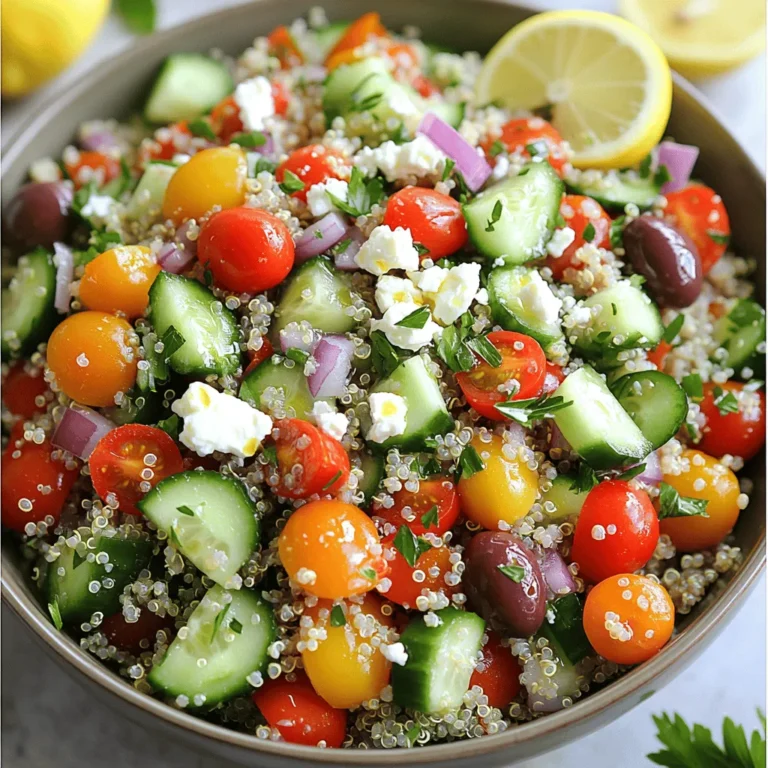
Mediterranean Quinoa Salad Fresh and Healthy Choice

PREV 1 … 8 9 10 … 20 NEXT
purelyyumrecipes

explore

DessertsDinnerAppetizersDrinks

Our Policies

  • Cookie Policy
  • Copyright Policy
  • Disclaimer
  • GDPR Policy
  • Terms Of Use
Back to Top
  • About
  • Contact Us
  • Privacy Policy
© 2025 purelyyumrecipes