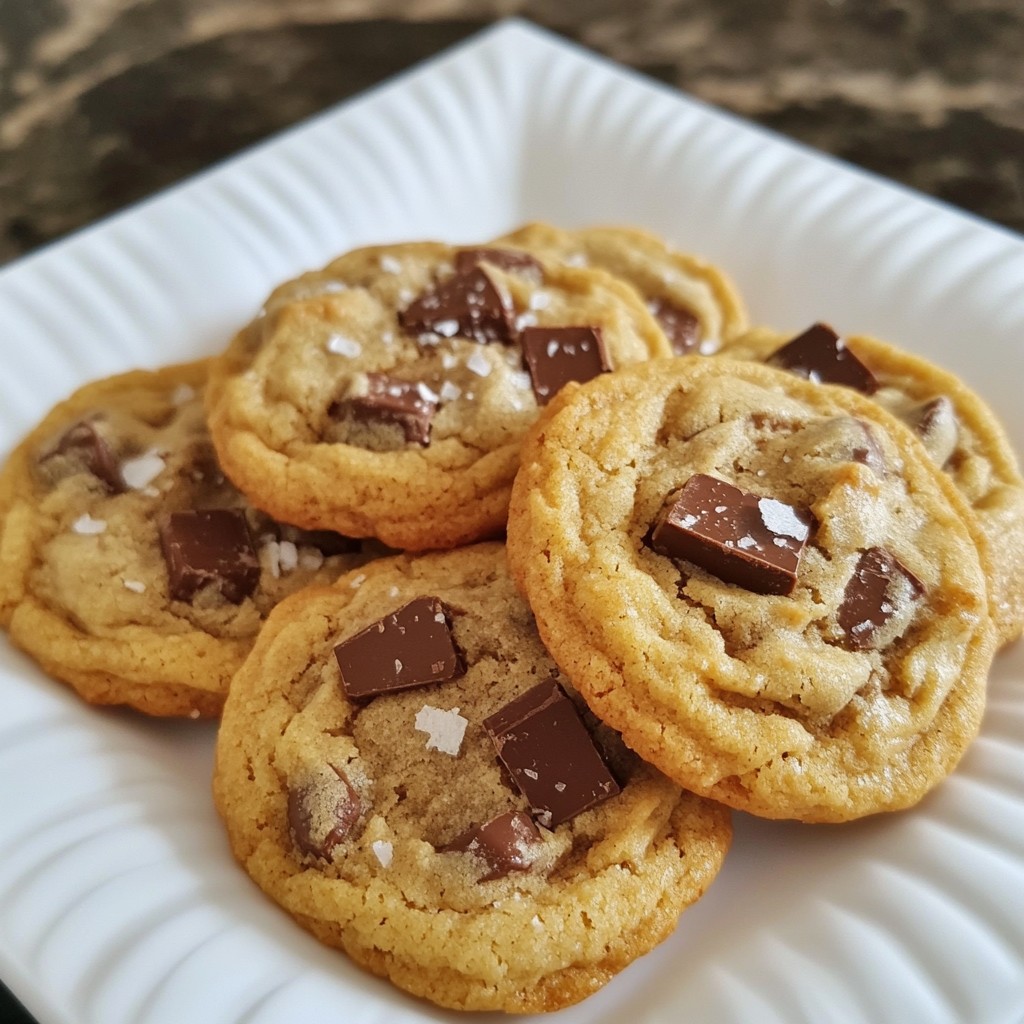
If you're craving a cookie that combines rich flavor with soft, chewy perfection, look no further. Brown Butter Chocolate Chunk Cookies are the answer to your sweet tooth dilemmas. In this guide, I'll walk you through each step to create these irresistible treats, from browning the butter to folding in your favorite chocolate chunks. Get ready to impress your family and friends with cookies that taste as good as they look!
Why I Love This Recipe
- Rich Flavor: The brown butter adds a nutty depth that elevates these cookies beyond the ordinary.
- Perfect Texture: The combination of slightly underbaked centers and crispy edges creates a delightful chewiness.
- Customizable: You can easily switch up the chocolate chunks or add nuts for a personal touch.
- Make Ahead: The dough can be chilled for up to 2 days, allowing for convenient baking whenever you crave fresh cookies.
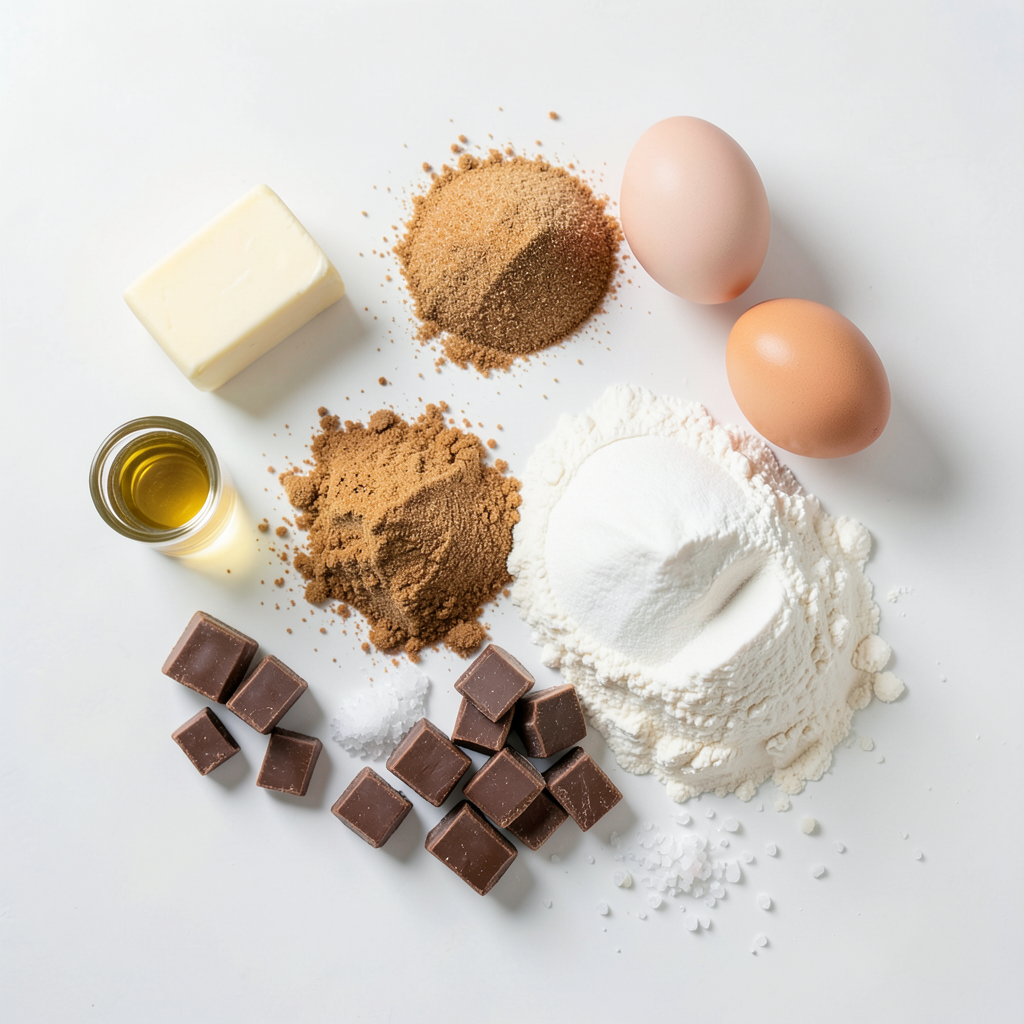
Ingredients
To make Brown Butter Chocolate Chunk Cookies, you need some simple ingredients. Here’s what to gather:
- 1 cup unsalted butter (2 sticks)
- 1 cup packed brown sugar
- ½ cup granulated sugar
- 2 large eggs
- 1 teaspoon pure vanilla extract
- 2 ¼ cups all-purpose flour
- 1 teaspoon baking soda
- ½ teaspoon sea salt
- 1 cup semi-sweet chocolate chunks (or a delightful mix of dark and milk chocolate)
- Flaky sea salt for topping (optional)
Each ingredient plays a key role in making these cookies delicious. The unsalted butter gives a rich flavor, while the brown sugar adds depth and moisture. Eggs help bind everything together, and vanilla brings warmth. Flour and baking soda provide structure, while sea salt enhances the taste. Finally, the chocolate chunks create that gooey center we all love.
Remember, quality matters. Using good chocolate will elevate your cookies. If you want to get creative, try swapping the chocolate for nuts or dried fruit. Enjoy the process of gathering these ingredients!
Step-by-Step Instructions
Step 1: Brown the Butter
To start, melt the unsalted butter in a medium saucepan over medium heat. Stir it often. Watch closely as it foams and changes color. After about 5-7 minutes, it should look golden brown. Remove it from the heat and let it cool slightly.
Step 2: Mix Sugars
In a large mixing bowl, combine the packed brown sugar and granulated sugar. Pour the warm browned butter over this mix. Stir well until the sugars blend smoothly.
Step 3: Add Eggs and Vanilla
Crack the eggs into the bowl, adding them one at a time. Stir well after each egg. Next, pour in the pure vanilla extract. Mix everything until it's smooth and well combined.
Step 4: Combine Dry Ingredients
In a separate bowl, whisk together the all-purpose flour, baking soda, and sea salt. Slowly add this dry mix to the wet ingredients. Stir gently until just combined. Be careful not to overmix; this keeps your cookies tender.
Step 5: Stir in Chocolate
Now, gently fold in the chocolate chunks. Make sure they are evenly spread throughout the dough for delicious bites in every cookie.
Step 6: Chill the Dough
Cover the mixing bowl with plastic wrap. Place it in the refrigerator for at least 30 minutes. For even better flavor, chill the dough for up to 2 days.
Step 7: Preheat Your Oven
While the dough chills, set your oven to preheat at 350°F (175°C). Line a baking sheet with parchment paper to prepare for baking.
Step 8: Shape the Cookies
After chilling, scoop out tablespoon-sized portions of dough. Place them on the prepared baking sheet. Make sure to leave space between each scoop. The cookies will spread as they bake.
Step 9: Bake the Cookies
Put the baking sheet in the preheated oven. Bake for 10-12 minutes. The edges should be golden brown, while the centers stay slightly underbaked for that perfect gooey texture.
Step 10: Cool and Serve
Once the cookies are done, take them out of the oven. Let them cool on the baking sheet for about 5 minutes. Then, transfer them to a wire rack to cool completely. If you like, sprinkle flaky sea salt on top while they're still warm for extra flavor.
Tips & Tricks
Avoiding Overmixing
Do not overmix the dough. Overmixing makes cookies tough. You want a tender bite. Mix just until the flour disappears. This keeps your cookies soft and chewy. Trust me, this small step makes a big difference.
Enhancing Flavor with Chilling
Chilling the dough is key for flavor. Let it chill for at least 30 minutes. For more depth, chill it longer, even up to two days. The flavors meld and improve. This step is worth the wait. You will taste the difference in every bite.
Presentation Tips
Presentation adds joy to your cookies. Use a rustic wooden board or colorful plate. Scatter some extra chocolate chunks on top. A sprig of mint adds a fresh look. Serve with cold milk or a warm drink. Your cookies will shine and impress your guests.
Pro Tips
- Chill for Flavor: Allowing the dough to chill for at least 30 minutes helps the flavors develop and results in a chewier cookie.
- Perfectly Browned Butter: Keep a close eye on the butter while browning; it can go from perfectly golden to burnt very quickly.
- Don't Overmix: Mix the dry ingredients into the wet just until combined to ensure tender cookies, avoiding toughness.
- Flaky Sea Salt Finish: A sprinkle of flaky sea salt on warm cookies enhances the sweetness and adds a delightful crunch.
Variations
Different Chocolate Options
You can choose different types of chocolate for your cookies. Using semi-sweet chocolate is great, but dark or milk chocolate works too. Dark chocolate adds a rich flavor. Milk chocolate brings a sweet, creamy taste. A mix of both creates a fun balance. Try using chocolate chips if you prefer smaller pieces. You can also chop up your favorite chocolate bar for a unique twist.
Add-ins and Flavor Enhancements
Want to make your cookies even better? You can add nuts, fruits, or other mix-ins. Chopped walnuts or pecans give a nice crunch. Dried cherries or cranberries add sweetness and color. Try adding a sprinkle of cinnamon for warmth. You could even toss in some shredded coconut for a tropical flair. Get creative and mix in what you love!
Dietary Modifications
If you want vegan or gluten-free cookies, I have you covered. For vegan cookies, swap the butter with coconut oil or vegan butter. Use flax eggs instead of regular eggs for binding. For gluten-free cookies, replace all-purpose flour with a gluten-free blend. You may need to adjust the liquid to get the right dough texture. These changes keep the cookies tasty and enjoyable for all!
Storage Info
Best Practices for Storing Cookies
To keep your Brown Butter Chocolate Chunk Cookies fresh, store them in an airtight container. This method prevents air from making them hard. Place parchment paper between layers to avoid sticking. You can also add a slice of bread to keep them soft. The moisture from the bread helps maintain the ideal texture.
Freezing Instructions
To freeze the cookie dough, scoop the dough onto a baking sheet. Place the scoops in the freezer until firm, about an hour. Then, transfer the frozen dough balls to a zip-top bag. Label with the date and use within three months. To bake, just add a couple of extra minutes to the baking time. You can also freeze baked cookies. Let them cool fully, then place them in an airtight container or bag.
Shelf Life
These cookies stay fresh for about one week at room temperature. For longer storage, keep them in the fridge for up to two weeks. If frozen, the cookies keep well for three months. Just remember, the flavor is best when enjoyed fresh!
FAQs
Can I use salted butter instead of unsalted?
Yes, you can use salted butter. However, it may change the cookie's flavor. I prefer unsalted butter for better control over salt levels. If you use salted butter, reduce the added sea salt to avoid over-salting your cookies.
How do I know when the cookies are done?
Look for golden edges and a soft center. The cookies should appear slightly underbaked in the middle. They will continue to cook a bit after you take them out. If the edges are golden and the middle is still a bit glossy, they are done!
Can I make the dough ahead of time?
Absolutely! You can make the dough in advance. Chill it in the fridge for up to 2 days. You can also freeze the dough for longer storage. Just scoop the dough into balls, freeze them on a tray, then transfer to a bag. Bake directly from the freezer, adding a minute or two to the baking time.
What can I substitute for chocolate chunks?
If you don’t have chocolate chunks, try using chocolate chips or chopped chocolate bars. You can also use white chocolate, butterscotch chips, or even dried fruit for a different taste. Mix and match to find your favorite combo!
How can I make these cookies more chewy or crispy?
To make cookies chewier, add more brown sugar and reduce the baking time slightly. For crispier cookies, use more granulated sugar and bake them a bit longer. Experiment to find the texture you love best!
Now you have a foolproof cookie recipe that is easy and delicious. We covered ingredients, step-by-step instructions, tips, variations, storage, and answered common questions. Baking these cookies will give you great flavor and fun experiences. Remember, chilling the dough can boost taste and texture. Feel free to customize with your favorite flavors. Enjoy your freshly baked cookies and share them with friends! Happy baking!