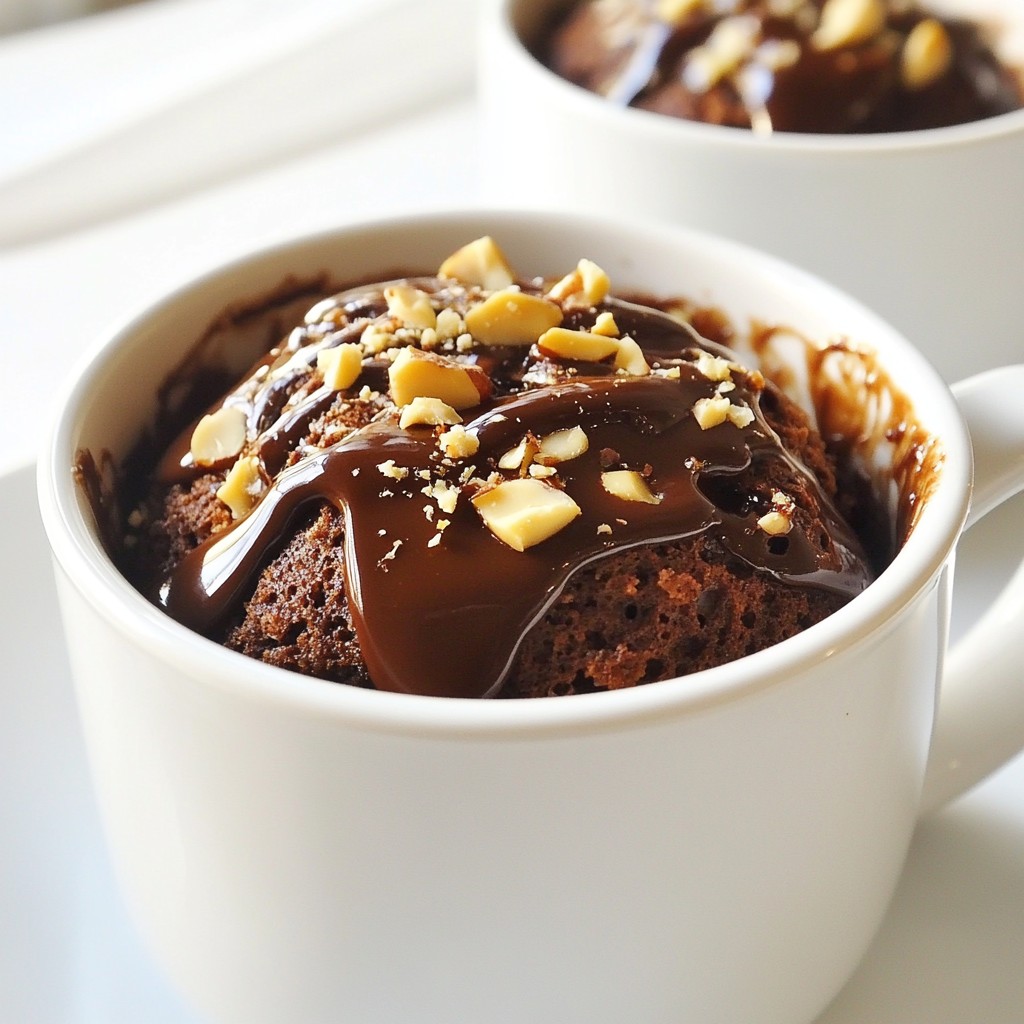
If you crave a quick, tasty treat, you’re in the right place! This Chocolate Hazelnut Mug Cake is simple, satisfying, and you can whip it up in minutes. With just a few ingredients and your microwave, you’ll have a warm dessert ready to enjoy. Let me guide you through each step to make this easy and delicious treat that’s sure to impress anyone. Get ready to indulge in chocolate bliss!
Why I Love This Recipe
- Quick and Easy: This mug cake can be whipped up in just a few minutes, making it the perfect last-minute dessert.
- Decadent Flavor: The combination of chocolate and hazelnut creates a rich and indulgent taste that satisfies any sweet tooth.
- Single Serving: It’s a great option for portion control, allowing you to enjoy a sweet treat without the guilt of leftovers.
- Customizable: You can easily modify this recipe with different add-ins or toppings to suit your preferences.
Ingredients
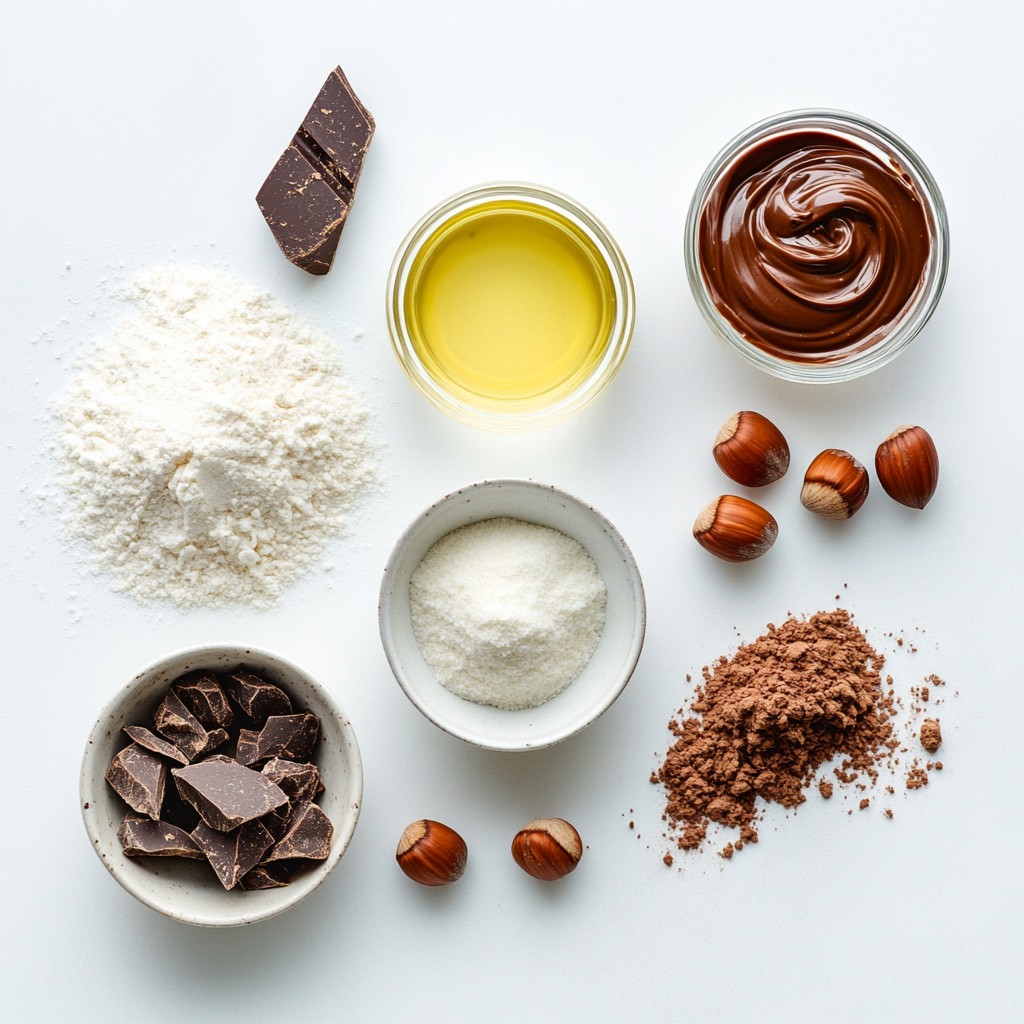
List of Required Ingredients
To make this tasty chocolate hazelnut mug cake, gather these simple items:
- 4 tablespoons all-purpose flour
- 3 tablespoons granulated sugar
- 2 tablespoons unsweetened cocoa powder
- 1/8 teaspoon baking powder
- A generous pinch of salt
- 3 tablespoons milk (or almond or oat milk)
- 2 tablespoons vegetable oil (or melted coconut oil)
- 1 tablespoon chocolate hazelnut spread (like Nutella)
These ingredients come together to create a rich, moist cake in just minutes.
Substitutions for Key Ingredients
If you’re missing something, don’t worry! Here are some easy swaps:
- Flour: You can use whole wheat flour if you prefer a healthier option.
- Sugar: Try brown sugar for a deeper flavor.
- Milk: Any milk will work, including soy or coconut milk.
- Oil: If you don’t have vegetable oil, melted butter works great too.
These substitutions won’t change the taste much, but they can make it fit your needs.
Optional Toppings and Add-ins
Want to make your mug cake even better? Consider these toppings:
- Chopped hazelnuts for crunch
- A drizzle of chocolate hazelnut spread on top
- A scoop of vanilla ice cream for a fun treat
You can mix in chocolate chips or even a dash of vanilla extract to enhance the flavor. Enjoy customizing your mug cake!
Step-by-Step Instructions
Preparation of the Batter
Start by picking a microwave-safe mug. It should hold at least 12 ounces. In your mug, add:
- 4 tablespoons all-purpose flour
- 3 tablespoons granulated sugar
- 2 tablespoons unsweetened cocoa powder
- 1/8 teaspoon baking powder
- A generous pinch of salt
Mix these dry ingredients well with a fork or whisk. Break up any lumps to make a smooth batter. Next, pour in:
- 3 tablespoons milk (or a dairy-free option)
- 2 tablespoons vegetable oil (or melted coconut oil)
Stir until you have a smooth mixture. Now for the fun part! Add:
- 1 tablespoon chocolate hazelnut spread
Use a toothpick or fork to swirl it into the batter. Don’t mix it too much; you want some chunks of spread for a gooey center.
Cooking the Mug Cake in the Microwave
Place the mug in your microwave. Cook it on high power for about 1 minute and 30 seconds. Microwaves vary, so keep an eye on it. You’ll see the cake rise and set around the edges. The center should still look a bit gooey.
Ideal Cooking Time and Testing for Doneness
After cooking, let the mug cake cool for about 1 minute. This helps it firm up a little. To check if it’s done, gently poke the center with a toothpick. If it comes out clean, you’re good to go! If it’s still wet, cook in 10-second bursts until ready. Enjoy your warm chocolate hazelnut mug cake!
Tips & Tricks
Best Practices for Perfect Mug Cake Texture
To make the best chocolate hazelnut mug cake, follow these tips. Use a large mug, at least 12 ounces. This helps the cake rise without spilling. Mix the dry ingredients well before adding wet ones. This step avoids lumps in your batter. Stir until the batter is smooth. A few small lumps are okay, but avoid big ones. When adding the hazelnut spread, swirl it gently. You want pockets of gooey chocolate in your cake.
Common Mistakes to Avoid
Watch out for a few common mistakes. First, don’t overcook your cake. Every microwave is different. Start with 1 minute and 30 seconds, but check it often. If the cake looks wet in the center, it may need more time. Also, avoid using cold milk or oil. Room temperature helps the batter mix better and cook evenly. Lastly, don’t skip the salt. It enhances the flavors and balances the sweetness.
Microwave Power Variations
Microwave power can change cooking times. If your microwave is lower in watts, you may need extra time. Check your cake every 10 seconds after the first minute and 30 seconds. If it looks set at the edges and slightly wet in the middle, it’s done. For high-watt microwaves, reduce the time by about 10-20 seconds. Adjusting time helps you achieve the perfect mug cake without burning it.
Pro Tips
- Use a Larger Mug: To prevent overflow, choose a mug that holds at least 12 ounces, as the cake will rise during cooking.
- Check Microwave Wattage: Cooking times can vary significantly based on microwave wattage; start with 1 minute and add time in 10-second intervals if needed.
- Customize Flavors: Feel free to experiment with different flavored nut butters or chocolate spreads for a unique twist on the classic recipe.
- Garnish Creatively: Enhance your mug cake with toppings like whipped cream, ice cream, or a drizzle of caramel for an extra indulgent dessert.
Variations
Vegan Chocolate Hazelnut Mug Cake
You can make a vegan chocolate hazelnut mug cake easily. Just swap the milk with a dairy-free option like almond or oat milk. Instead of regular oil, use melted coconut oil. This keeps it rich and tasty. Replace the chocolate hazelnut spread with a vegan version. Many brands offer delicious, plant-based alternatives. Your cake will still be soft and full of flavor.
Gluten-Free Version of the Recipe
If you want a gluten-free mug cake, use gluten-free flour instead of all-purpose flour. Look for a blend that works well in baking. The rest of the ingredients stay the same. This keeps the taste and texture close to the original. Your gluten-free cake will still rise well and have that yummy chocolate hazelnut goodness.
Flavor Variations
Want to mix things up? Try adding different flavors! For a minty twist, add a few drops of mint extract to the batter. If you love coffee, mix in a teaspoon of instant coffee granules. You can even swirl in some peanut butter for a nutty surprise. Each variation makes a unique treat you'll love.
Storage Info
How to Store Leftover Mug Cake
If you have leftover mug cake, let it cool first. Cover it with plastic wrap or place it in an airtight container. This keeps it fresh. Store it in the fridge for up to two days. If you want to keep it longer, freeze it. Wrap it tightly in plastic wrap and then in foil. It can last up to a month in the freezer.
Reheating Instructions
To reheat your mug cake, take it out of the fridge or freezer. If frozen, let it thaw in the fridge overnight. Place the mug cake in the microwave. Heat it for about 15-30 seconds. Check to see if it's warm all the way through. If not, heat in small bursts of 10 seconds. Avoid overheating, or it may dry out.
Shelf Life of Ingredients
The ingredients in this mug cake have different shelf lives. Here’s a quick look:
- All-purpose flour: Lasts about 1 year if stored in a cool, dry place.
- Granulated sugar: Never spoils, but best within 2 years.
- Unsweetened cocoa powder: Good for about 2-3 years if sealed.
- Baking powder: Usually lasts 6 months after opening.
- Salt: Indefinite shelf life if kept dry.
- Milk: Check the expiry date; it lasts about a week once opened.
- Vegetable oil: Lasts up to 1 year if stored well.
- Chocolate hazelnut spread: Enjoy within 6 months after opening.
Storing each of these ingredients properly helps keep your mug cake tasty and safe to eat!
FAQs
Can I make multiple mug cakes at once?
Yes, you can make more than one mug cake. Just use more mugs. Each mug needs its own space in the microwave. Cook them one at a time for best results. If you try to cook them all together, they may not cook evenly.
What can I substitute for chocolate hazelnut spread?
You can swap chocolate hazelnut spread with peanut butter or almond butter. These spreads give a different taste but still taste great. You can also use any chocolate spread you like. Just keep in mind that the flavor will change a bit.
How do I prevent my mug cake from overflowing?
To stop the mug cake from overflowing, use a larger mug. A mug that holds 12 ounces or more works best. Also, do not fill the mug all the way to the top. Leave some space for the cake to rise. Cooking it for the right time helps too, so keep an eye on it!
Making a mug cake is simple and fun. You learned the key ingredients, substitutions, and optional add-ins to customize your treat. I shared step-by-step instructions to ensure your cake cooks perfectly. Plus, I highlighted tips to avoid mistakes and adjust for your microwave. Don’t forget to try the variations I covered, like vegan or gluten-free options. Finally, storing and reheating leftover cake is easy. Enjoy your mug cake, and don’t hesitate to experiment with flavors!