Want a quick and tasty meal? Honey Garlic Chicken Stir-Fry is your answer! This easy recipe works for busy nights and impresses guests alike. I’ll guide you through the vibrant ingredients, simple steps, and tips to make it perfect every time. Plus, you’ll learn how to customize it to suit your tastes. Let’s dive in and stir up some flavor!
Why I Love This Recipe
- Quick and Easy: This recipe can be prepared in just 25 minutes, making it perfect for busy weeknights.
- Flavor Explosion: The combination of honey and garlic creates a sweet and savory sauce that is irresistible.
- Healthy Ingredients: Packed with fresh vegetables like broccoli, bell peppers, and carrots, this dish is both nutritious and delicious.
- Customizable: You can easily swap in your favorite vegetables or protein, allowing for endless variations!
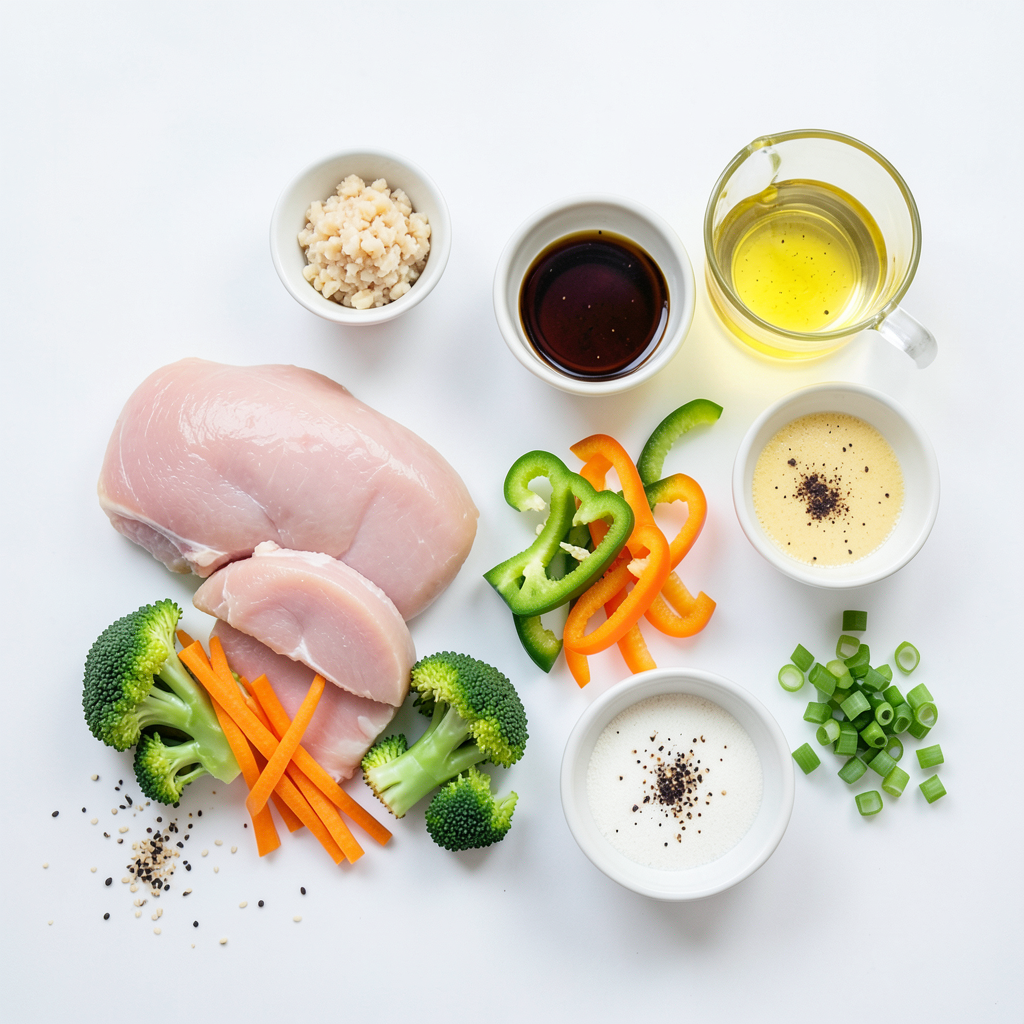
Ingredients
Main Ingredients
- 500g boneless chicken thighs, thinly sliced
- Fresh vegetables:
- 2 cups broccoli florets
- 1 bell pepper, sliced into strips (red or yellow)
- 1 medium carrot, julienned
Sauce Components
- 2 tablespoons honey
- 3 cloves garlic, finely minced
- 2 tablespoons soy sauce
- 1 tablespoon sesame oil
Seasoning and Garnishes
- 1 tablespoon cornstarch mixed with 2 tablespoons water (creating a slurry)
- 2 tablespoons vegetable oil (for stir-frying)
- Salt and freshly ground black pepper to taste
- Sesame seeds for garnish
- Sliced green onions for garnish
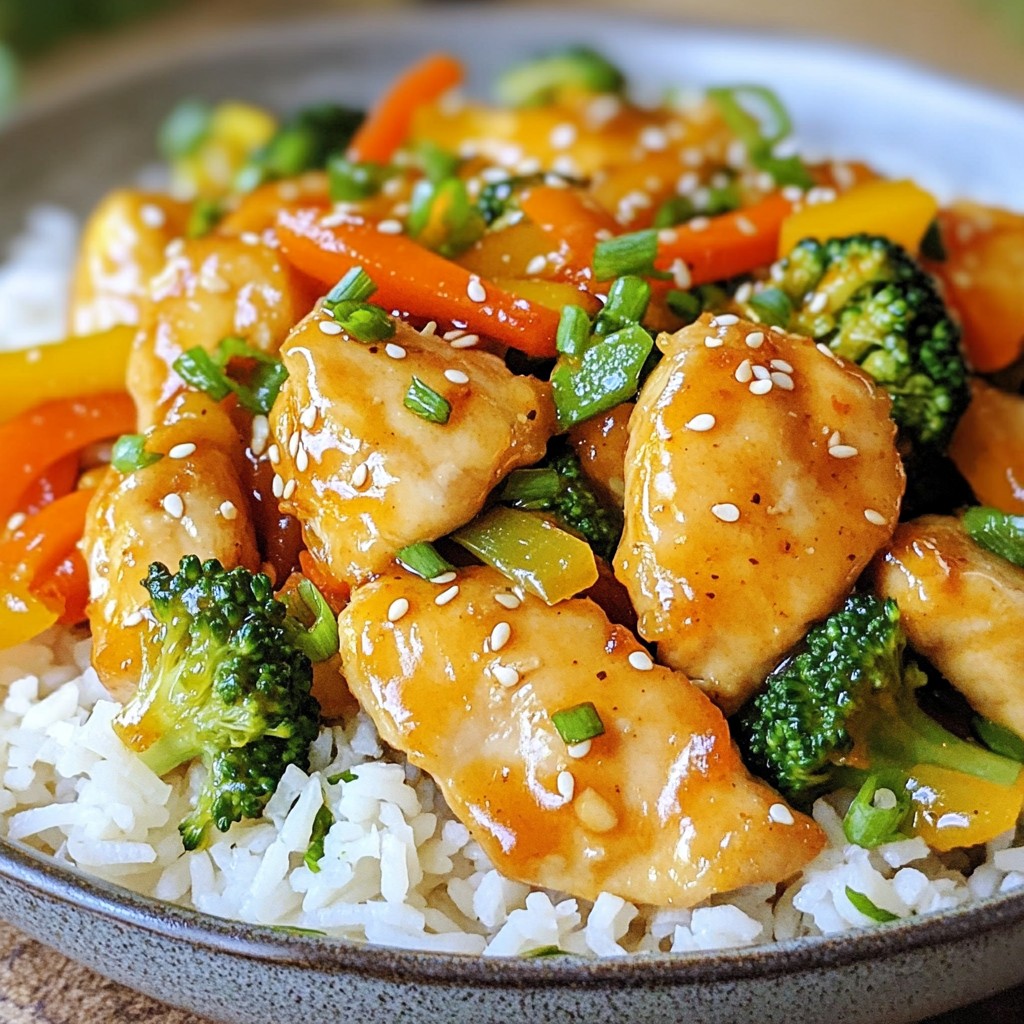
This list gives you all you need. Gather these items to create a tasty dish. The chicken thighs bring richness, while fresh veggies add color and crunch. The sauce blends sweet and savory flavors, making every bite satisfying. The sesame seeds and green onions are the finishing touch, adding a bit of flair.
Step-by-Step Instructions
Preparing the Sauce
To start, take a medium bowl. In this bowl, combine honey, garlic, soy sauce, and sesame oil. Use a whisk to mix them well. Make sure they blend together nicely. Set this sauce aside for later. It will add great flavor.
Cooking the Chicken
Next, heat vegetable oil in a large skillet or wok over medium-high heat. Wait until the oil shimmers. Then, add the thinly sliced chicken thighs. Season them with salt and pepper. Stir-fry the chicken for about 5 to 7 minutes. You want it to turn golden brown and cook through. Once done, take it out and place it on a plate.
Stir-Frying Vegetables
In the same skillet, add the broccoli florets, sliced bell pepper, and julienned carrot. Stir-fry these fresh veggies for about 3 to 4 minutes. You want them tender but still a bit crunchy. This keeps the colors bright and the nutrients intact.
Combining and Thicken Sauce
Now, return the cooked chicken to the skillet. Pour the honey garlic mixture over the chicken and vegetables. Stir gently to coat everything evenly. Next, add the cornstarch slurry. Stir for another 2 minutes. The sauce will thicken and cling to your stir-fry. This makes every bite full of flavor!
Tips & Tricks
Perfecting Your Stir-Fry
To get the best stir-fry, use high heat. This method cooks the food fast and keeps it crispy. Make sure your skillet or wok is very hot before adding the chicken. This helps it brown evenly. Cook in small batches if needed. Overcrowding the pan can lead to steaming, not frying.
Flavor Enhancements
Want to add more flavor? Try adding ginger for a nice kick. You can also use red pepper flakes for some heat. If you enjoy a tangy taste, a splash of rice vinegar works well too. Fresh herbs, like cilantro or basil, can brighten up the dish. Add these at the end for a fresh burst of flavor.
Common Mistakes to Avoid
One big mistake is overcooking the chicken. It can turn tough and dry. Cook the chicken just until it's golden and no longer pink. Remove it from the pan before adding the veggies. This keeps the chicken tender. Also, don't skip the cornstarch slurry. It helps thicken the sauce and makes everything stick together nicely.
Pro Tips
- Marinate for Flavor: Allow the chicken to marinate in the honey garlic mixture for at least 30 minutes before cooking to enhance the flavor.
- High Heat Stir-Fry: Ensure your skillet or wok is hot enough before adding the chicken. This helps achieve a nice sear and keeps the chicken juicy.
- Veggie Variety: Feel free to add other vegetables like snap peas, bell pepper, or zucchini for added color and nutrition.
- Serve with Sides: Pair this stir-fry with steamed jasmine rice or quinoa for a complete meal, and drizzle with extra honey for added sweetness.
Variations
Protein Alternatives
You can switch the chicken for other proteins. Shrimp works well with the honey garlic sauce. Just stir-fry the shrimp until they turn pink. You can also use beef if you prefer. Thinly slice beef and cook it just like the chicken. Tofu is a great choice for a plant-based option. Use firm tofu, press it, and cut it into cubes. Stir-fry until golden for that perfect texture.
Vegetarian and Vegan Substitutes
To make this dish vegan, use tofu instead of chicken. Prepare it the same way. You can also add tempeh, which has a nice texture. For a veggie boost, add chickpeas. They give protein and a delightful crunch. Use a mix of soy sauce and maple syrup as a sweetener. This keeps the flavor while making it plant-based.
Seasonal Vegetable Swaps
Using seasonal veggies makes this dish fresh and exciting. In spring, add snap peas or asparagus for a crisp bite. In summer, zucchini or bell peppers add color and flavor. Fall brings great options like butternut squash or Brussels sprouts. In winter, try kale or cabbage for a hearty touch. Mix and match to keep your stir-fry vibrant and delicious all year round!
Storage Info
Refrigerating Leftovers
Store your Honey Garlic Chicken Stir-Fry in an airtight container. Keep it in the fridge for up to three days. Let the stir-fry cool down before sealing it. This helps to avoid condensation and sogginess.
Freezing Instructions
To freeze, place the cooled stir-fry in a freezer-safe bag or container. Remove as much air as possible to prevent freezer burn. It will stay fresh for up to three months. When you are ready to eat, thaw it in the fridge overnight before reheating.
Reheating Tips
Reheat your stir-fry on the stove for the best taste and texture. Add a splash of water or broth to help steam the dish. Stir it often over medium heat until it is hot. You can also use a microwave. Heat in short bursts, stirring in between to keep it even. This way, you keep all those yummy flavors!
FAQs
What can I serve with Honey Garlic Chicken Stir-Fry?
You can serve this dish with several sides to make it a full meal. Here are some great options:
- Steamed jasmine rice
- Quinoa for a nutty flavor
- Fried rice for extra taste
- Noodles like soba or rice noodles
- A fresh green salad for crunch
- Spring rolls for a fun appetizer
These sides complement the sweet and savory flavors of the stir-fry, creating a balanced meal.
How do I make this recipe gluten-free?
To make Honey Garlic Chicken Stir-Fry gluten-free, follow these tips:
- Use gluten-free soy sauce. Brands like Tamari work well.
- Check that your sesame oil is gluten-free.
- Ensure the cornstarch you use is pure and gluten-free.
These small swaps will help you enjoy the dish without gluten.
Can I use frozen vegetables?
Yes, you can use frozen vegetables for this stir-fry. Here are some points to consider:
- Frozen veggies save time and last longer.
- They may cook faster than fresh ones, so check doneness early.
- Frozen vegetables can have a softer texture once cooked.
Using frozen vegetables is an easy way to enjoy this dish anytime.
This blog covered a tasty honey garlic chicken stir-fry. We explored main ingredients, including chicken and fresh veggies. The recipe included step-by-step cooking instructions and tips for best results. We also discussed variations, storage methods, and answered common questions.
Experiment with flavors and ingredients to make this dish your own. Enjoy cooking and sharing this meal with friends and family!