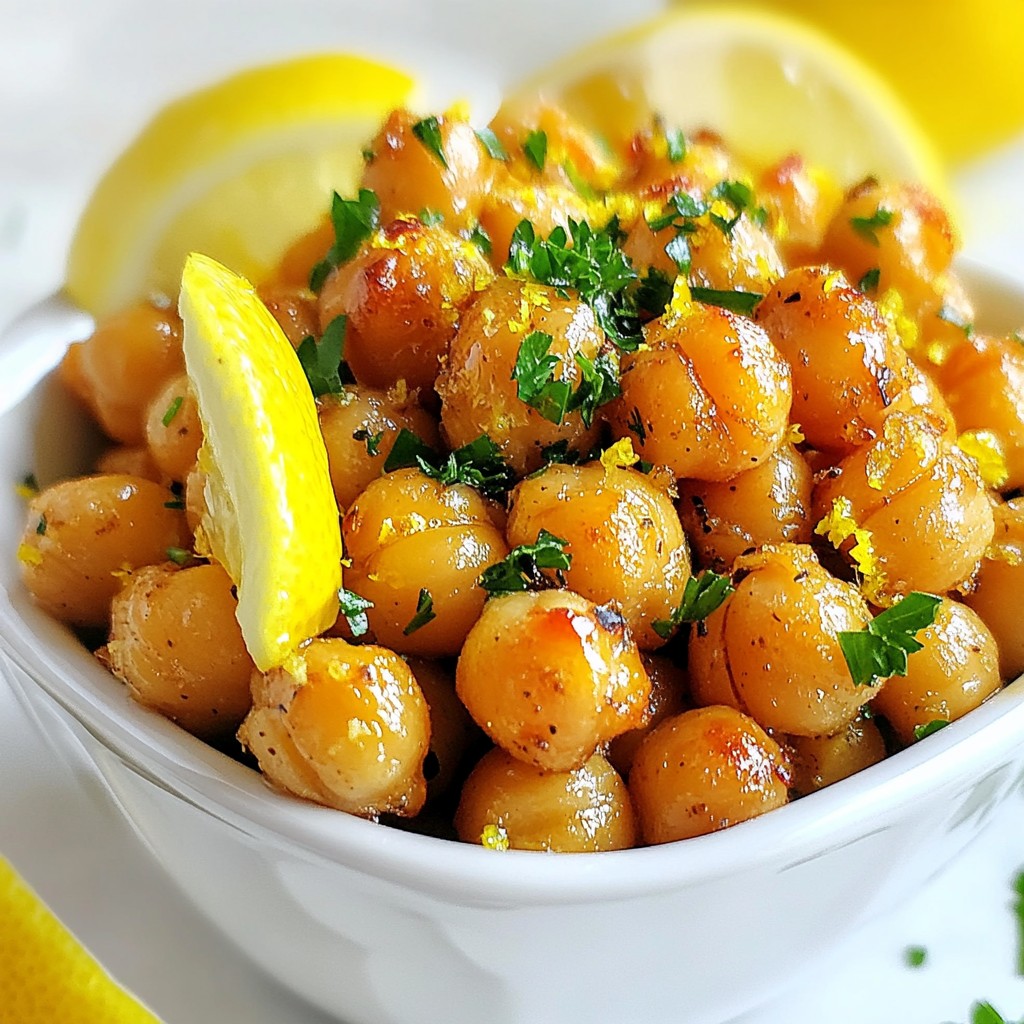
If you're craving a healthy snack that packs a punch in flavor, you need to try Lemon Garlic Roasted Chickpeas! This dish is crispy, zesty, and simple to make, perfect for any occasion. With fresh ingredients and easy steps, you’ll whip up a bowl of goodness in no time. Ready to elevate your snacking game? Let’s dive into this delicious recipe that will keep you coming back for more!
Why I Love This Recipe
- Bold Flavor Profile: The combination of zesty lemon, minced garlic, and spices creates a vibrant and deliciously bold flavor that is hard to resist.
- Healthy Snack Option: These roasted chickpeas are packed with protein and fiber, making them a nutritious alternative to traditional snacks.
- Versatile Uses: Enjoy them on their own, sprinkle them over salads, or use as a crunchy topping for soups—these chickpeas are incredibly versatile!
- Easy to Make: With just a few simple steps and minimal prep time, this recipe is perfect for both beginners and experienced cooks alike.
Ingredients
List of Ingredients
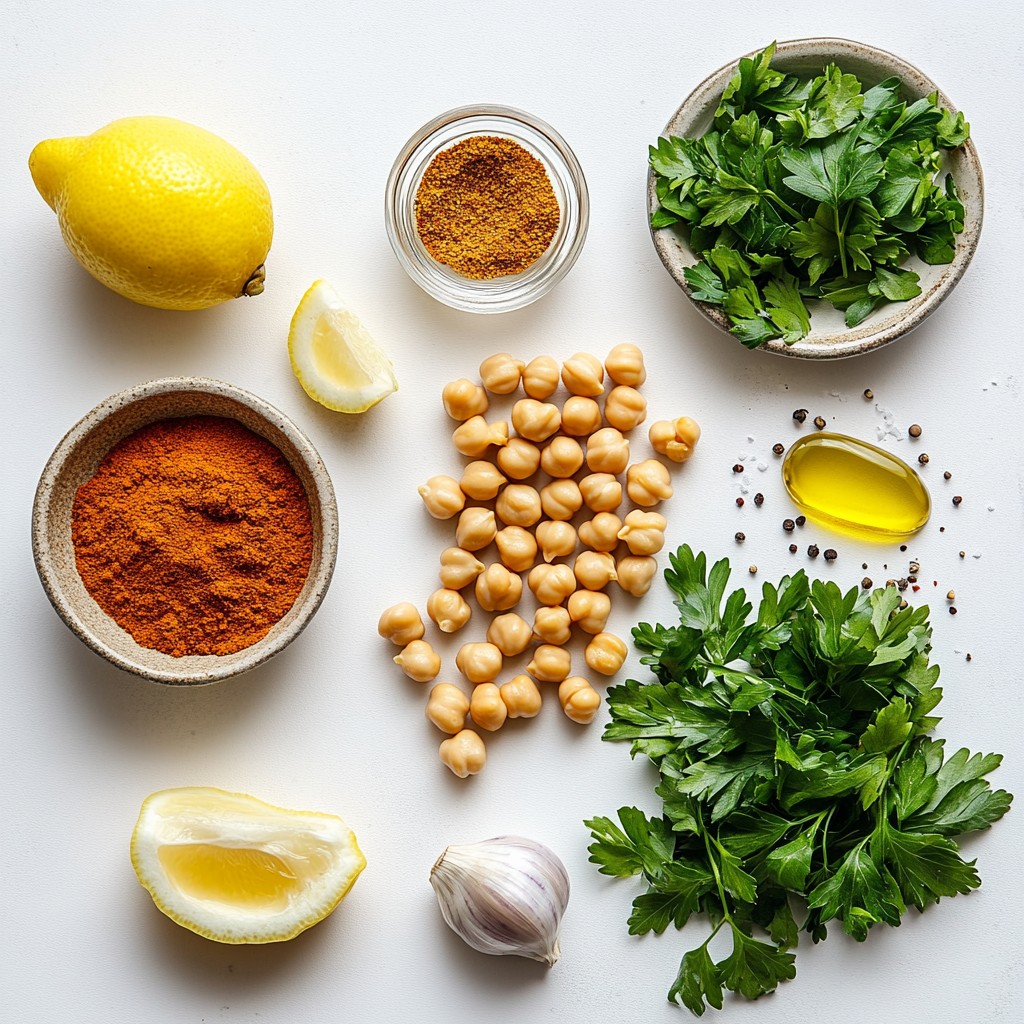
- 2 cups canned chickpeas, thoroughly rinsed and drained
- 3 tablespoons extra virgin olive oil
- 2 tablespoons fresh lemon juice
- 4 cloves garlic, finely minced
- 1 teaspoon smoked paprika
- 1/2 teaspoon ground cumin
- 1/2 teaspoon sea salt, adjust to taste
- 1/4 teaspoon freshly ground black pepper
- Zest of 1 lemon
- Fresh parsley, chopped (optional for garnish)
Fresh ingredients bring out the best flavors in this recipe. Using ripe lemons and fresh garlic makes a big difference. I always choose high-quality olive oil for a richer taste.
If you have dietary restrictions, there are easy swaps. For an oil-free version, try using vegetable broth or water for roasting. If you need it salt-free, simply leave out the sea salt. The spices will still add great flavor!
Step-by-Step Instructions
Preparation Steps
1. Prepping the chickpeas: Start with 2 cups of canned chickpeas. Rinse them well under cold water. This removes the canning liquid. Drain them in a colander for a few minutes. Dry them with paper towels. This step is key for crispiness.
2. Mixing the ingredients in a bowl: In a large bowl, add the drained chickpeas. Pour in 3 tablespoons of extra virgin olive oil. Add 2 tablespoons of fresh lemon juice. Then, add 4 minced garlic cloves, 1 teaspoon of smoked paprika, 1/2 teaspoon of ground cumin, 1/2 teaspoon of sea salt, and 1/4 teaspoon of black pepper.
3. Coating the chickpeas evenly: Use a spatula or your hands to mix everything. Make sure each chickpea is coated well. This helps them absorb all those wonderful flavors.
Roasting Process
1. Preheating the oven: Preheat your oven to 400°F (200°C). This temperature is perfect for roasting. It ensures the chickpeas get crispy without burning.
2. Spreading chickpeas on the baking sheet: Line a baking sheet with parchment paper. This makes cleanup easier. Spread the chickpeas out in a single layer on the sheet. Clumping them together can lead to uneven cooking.
3. Shaking and stirring during roasting: Roast the chickpeas for 25-30 minutes. Halfway through, take them out and shake the pan or stir the chickpeas. This ensures they roast evenly. You want them golden brown and crispy by the end.
Finishing Touches
1. Adding lemon zest after roasting: Once you take the chickpeas out, sprinkle on the zest of 1 lemon. Doing this while they are warm helps the zest stick and enhances the flavor.
2. Cooling and serving suggestions: Let them cool for a few minutes. Then, transfer to a serving dish. If you like, add chopped fresh parsley for color. These roasted chickpeas are perfect as a snack or a crunchy salad topping.
Tips & Tricks
Achieving Perfect Crispiness
To get the best crispiness from your chickpeas, follow these steps:
- Rinse and drain the canned chickpeas well.
- Pat them dry with a paper towel to remove excess moisture.
- Spread them in a single layer on the baking sheet.
- Shake or stir halfway through roasting for even cooking.
Common mistakes include:
- Not drying the chickpeas well, which can lead to sogginess.
- Overcrowding the baking sheet, which traps steam.
- Roasting at too low a temperature, which prevents crispiness.
Flavor Enhancements
You can elevate the flavor with these ideas:
- Try adding smoked paprika or chili powder for extra heat.
- Fresh herbs like rosemary or thyme add a nice touch.
- Experiment with zest from other citrus fruits, like lime or orange.
These variations can make the dish more exciting and tailored to your taste!
Serving Suggestions
Roasted chickpeas are great on their own. You can also pair them with salads for crunch.
- Add them to a green salad for texture.
- Top a grain bowl with chickpeas for added protein.
- Serve them as a snack with dips like hummus or yogurt.
You can place them in a bowl with lemon wedges for a fun serving idea!
Pro Tips
- Use Dry Chickpeas for Extra Crunch: If you have the time, consider using dried chickpeas instead of canned. Soak them overnight, then cook until tender. Dry chickpeas tend to become crunchier when roasted.
- Experiment with Spices: Feel free to add your favorite spices or herbs to the seasoning mix. Cumin, coriander, or even a pinch of cayenne pepper can elevate the flavor profile.
- Check for Doneness: The roasting time may vary depending on your oven and the moisture content of the chickpeas. Keep an eye on them towards the end of the cooking time to prevent burning.
- Store Properly: If you have leftovers, store them in an airtight container at room temperature. They can stay crunchy for a few days, but for optimal freshness, enjoy them within 2-3 days.
Variations
Flavor Profiles
You can change the taste of lemon garlic roasted chickpeas with different spices. Try mixing in Italian herbs like oregano and basil for a Mediterranean twist. If you want something warmer, add curry spices like cumin and turmeric.
You can also create sweet versions. Use cinnamon and a bit of honey for a unique twist. These sweet chickpeas make a great snack.
Cooking Methods
The air fryer gives you a quick, crispy option. Set it to 400°F (200°C). Cook for about 15-20 minutes. Shake the basket halfway for even cooking.
If you need a stovetop method, heat oil in a pan. Add the seasoned chickpeas and sauté for about 10-15 minutes. Stir often until they turn golden and crispy. Both methods keep the flavor bold and fun.
Storage Info
Storing Leftovers
To store your leftover chickpeas, place them in an airtight container. This keeps them fresh. You can store them in the fridge for up to 3 days. To maintain crispness, make sure they cool completely before sealing. If they become soft, you can re-crisp them in the oven.
Reheating Tips
When reheating, avoid the microwave if possible. Instead, preheat your oven to 375°F (190°C). Spread the chickpeas on a baking sheet. Heat them for about 10 minutes. This method helps restore their crunch. If you stored them longer than 3 days, check for signs of spoilage before reheating. Enjoy your roasted chickpeas as a tasty snack!
FAQs
Common Questions
How long do roasted chickpeas last? Roasted chickpeas can last up to five days if stored in an airtight container. They stay crunchy for the first two days. After that, they may soften but will still taste good.
Can I use dried chickpeas instead of canned? Yes, you can use dried chickpeas. Soak them overnight and cook until tender. This may take longer but gives a lovely texture.
What can I do with leftover roasted chickpeas? You can toss them into salads, soups, or grain bowls. They also make a great snack on their own.
Cooking Alternatives
Can I make this recipe oil-free? Yes, you can skip the oil. Use vegetable broth or water to coat the chickpeas. This will change the texture a bit but keeps it tasty.
How to make it gluten-free? This recipe is already gluten-free! Just ensure all your ingredients are certified gluten-free.
Nutritional Information
Health benefits of chickpeas Chickpeas are packed with protein and fiber. They help with digestion and keep you full. They also provide important vitamins and minerals like folate and iron.
Caloric content and serving size recommendations One serving of roasted chickpeas is about 1/2 cup. This has around 150 calories. Keep this in mind when enjoying your tasty snack!
You now have a complete guide to making Lemon Garlic Roasted Chickpeas. We covered the key ingredients, detailed steps, and helpful tips for perfect crispiness. I shared variations to keep things exciting and suggestions for storing leftovers. This snack is not only tasty but also nutritious. Enjoy experimenting with flavors and serving ideas. Roasted chickpeas can be a fun treat for everyone, no matter your dietary needs. Happy cooking!