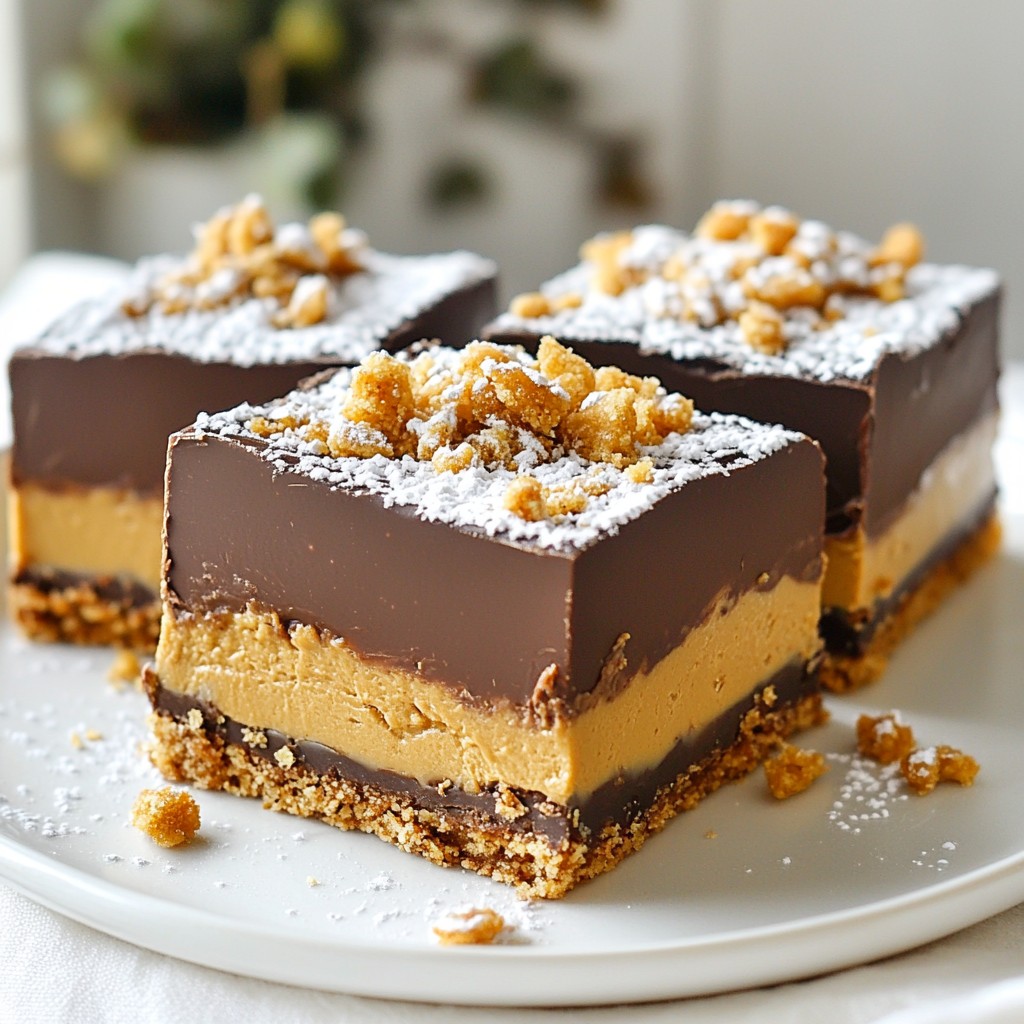
Craving a sweet treat that’s quick, easy, and no-bake? You’re in the right place! These No-Bake Cookie Butter Bars combine creamy cookie butter, oats, and a hint of sweetness for a delightful, chewy dessert. With just a few simple ingredients and easy steps, you can whip up these bars in no time. Let's dive into this crave-worthy recipe that’s perfect for snacks or sharing with friends!
Why I Love This Recipe
- Easy to Make: This no-bake recipe requires no oven and takes just 15 minutes to prepare, making it perfect for busy days.
- Deliciously Indulgent: The combination of cookie butter and chocolate creates a rich, satisfying treat that everyone will love.
- Customizable Toppings: Feel free to personalize these bars with your favorite toppings, such as nuts or crushed cookies, for added texture and flavor.
- Great for Sharing: This recipe yields 12 bars, making it ideal for parties, gatherings, or simply sharing with family and friends.
Ingredients
Main Ingredients
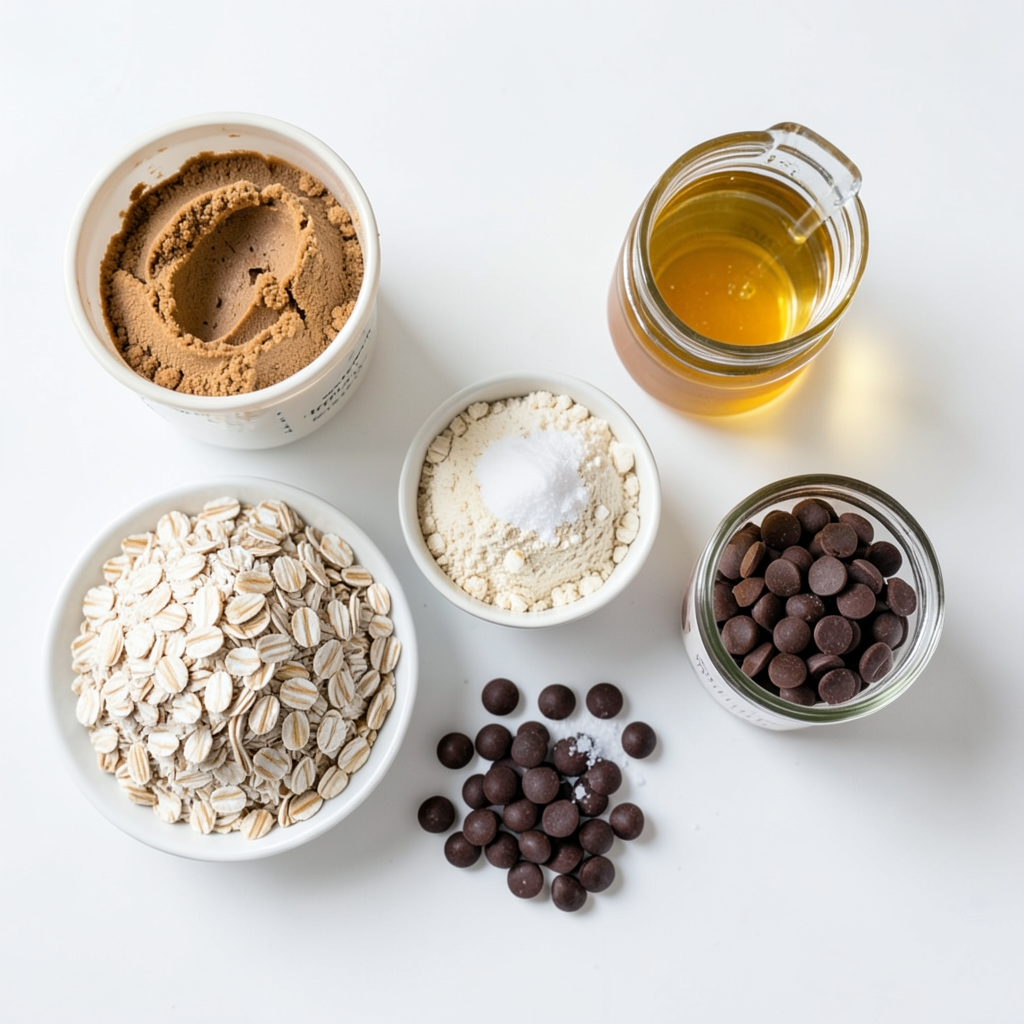
- 1 cup creamy cookie butter
- 1 cup rolled oats
- 1/2 cup almond flour
- 1/2 cup honey or pure maple syrup
- 1/4 cup coconut oil, melted
Optional Ingredients
- 1 cup semi-sweet or dark chocolate chips
- 1/4 teaspoon sea salt
- 1/2 teaspoon pure vanilla extract
- Optional toppings: crushed cookies, chopped nuts, or extra melted chocolate
In this recipe, the main star is the creamy cookie butter. It gives the bars that rich and sweet flavor. The rolled oats add a nice chewy texture. They help bind everything together, making each bite satisfying. Almond flour gives a nutty taste and helps with the bars' structure.
For sweetening, you can use honey or pure maple syrup. Both options work well and add unique flavors. Melted coconut oil helps keep the bars moist and easy to cut.
If you want to get fancy, consider adding chocolate chips. They melt beautifully and create a lovely top layer. Sea salt adds a touch of contrast, enhancing all the flavors. A splash of vanilla extract rounds out the taste and makes it more aromatic.
You can also personalize your bars with toppings. Crushed cookies or chopped nuts make a great finish. Extra melted chocolate drizzled on top adds visual appeal and extra flavor. These ingredients make the bars not only tasty but also fun to make!
Step-by-Step Instructions
Preparation
- In a large bowl, add:
- 1 cup creamy cookie butter
- 1/2 cup honey or pure maple syrup
- 1/4 cup melted coconut oil
- 1/2 teaspoon pure vanilla extract
Mix these until smooth. I use a spatula for this, which works well.
- In another bowl, combine:
- 1 cup rolled oats
- 1/2 cup almond flour
- 1/4 teaspoon sea salt
Stir these dry ingredients well. This step helps ensure that all parts mix evenly later.
Assembling the Bars
- Grab an 8x8 inch baking dish. Line it with parchment paper, letting it hang over the edges. This makes removal easy later.
- Now, transfer the cookie batter into the prepared dish. Press it down firmly with your hands or a spatula. Aim for an even, smooth top.
Melting the Chocolate
- In a microwave-safe bowl, add 1 cup semi-sweet or dark chocolate chips. Melt them in 30-second intervals. Stir well after each interval. Stop when the chocolate is smooth and shiny.
- Pour the melted chocolate over the pressed mixture. Use a spatula to spread it evenly across the top.
Chilling and Serving
- Place the baking dish in the fridge. Let it chill for at least 2 hours. The bars need to be firm and set before serving.
- Once set, lift the bars out using the parchment paper. Cut them into squares or rectangles. Enjoy these tasty treats with friends or family!
Tips & Tricks
Recipe Tips
- Ensuring smooth consistency: Mix the cookie butter, honey, melted coconut oil, and vanilla well. Use a spatula for even blending. This step is key to a smooth base.
- Pressing the mixture evenly: Use clean hands or a spatula. Press firmly into the baking dish. Make sure the mixture is flat and smooth on top. This helps the bars hold their shape.
Serving Suggestions
- Plating ideas: Serve the bars on a nice platter. This makes them look fancy. Arrange them in a neat row for a clean look.
- Garnishing options: Drizzle some melted chocolate on top. Sprinkle crushed cookies or chopped nuts for crunch. A dusting of powdered sugar adds a sweet touch.
Storage Tips
- How to store the bars: Keep them in an airtight container. This helps keep them fresh. You can also wrap them in plastic wrap.
- Shelf life information: These bars last about one week in the fridge. For longer storage, freeze them for up to three months. They taste great even after freezing!
Pro Tips
- Use Room Temperature Ingredients: Allow your cookie butter and coconut oil to reach room temperature before mixing to ensure a smoother batter.
- Chill for Better Texture: Let the bars chill longer than the minimum time suggested for a firmer texture that holds together better when cut.
- Experiment with Flavors: Try adding a pinch of cinnamon or a splash of almond extract to enhance the flavor profile of your bars.
- Storage Tips: Store the bars in an airtight container in the refrigerator for up to a week for best freshness.
Variations
Flavor Variations
You can switch things up with different nut butters. Try almond or cashew butter instead of cookie butter. Each nut butter brings its unique taste. You can also add mix-ins like dried fruit. Chopped dates or cranberries give great flavor and chewiness.
Dietary Considerations
For vegan options, use maple syrup in place of honey. This keeps the bars plant-based. You can also swap almond flour with oat flour for gluten-free bars. Make sure your oats are certified gluten-free to avoid any cross-contamination.
Chocolate Alternatives
If you want to change the chocolate, try white chocolate. It adds a nice sweetness. You can also use dairy-free chocolate chips if needed. This way, everyone can enjoy these tasty bars!
Storage Info
Best Storage Practices
To keep your No-Bake Cookie Butter Bars fresh, seal them well. Use an airtight container. If you have leftovers, store them in the fridge. This keeps them firm and tasty. They can last for about a week when refrigerated. If you prefer, you can store them at room temperature for a day or two. Just make sure they stay in a cool, dry spot. Otherwise, they might get too soft.
Freezing Instructions
You can freeze these bars for longer storage. First, cut them into squares. Then, place them in a single layer on a baking sheet. Freeze them for about an hour. Once they are firm, transfer the bars to a freezer-safe bag. Remove as much air as possible to prevent freezer burn. They can last up to three months in the freezer.
When you want to enjoy them, take out a few bars. Let them thaw at room temperature for about 30 minutes. You can also place them in the fridge overnight for a slower thaw. This keeps them tasty and ready to eat!
FAQs
Common Questions
How long do No-Bake Cookie Butter Bars last? No-Bake Cookie Butter Bars stay fresh for about a week. Store them in an airtight container in the fridge. They may last a bit longer if frozen.
Can I substitute cookie butter with another spread? Yes, you can use nut butter or sunflower seed butter. Each one will change the taste, but they all work well.
What is the best way to cut these bars without them falling apart? Use a sharp knife and cut while the bars are cold. Press down gently to avoid crumbling.
Further Clarifications
Can I make these bars ahead of time? Absolutely! These bars are great for meal prep. Make them a few days in advance and store them in the fridge.
What can I use instead of almond flour? You can use oat flour, coconut flour, or all-purpose flour as a substitute. Each will change the texture slightly.
Serving and Enjoying
What is the best way to serve these bars? Serve them chilled on a pretty plate. You can drizzle extra chocolate on top for a nice touch.
Can I add protein powder to the recipe? Yes, adding protein powder is a great idea! It will boost the nutrition. Just mix it in with the dry ingredients.
These No-Bake Cookie Butter Bars are easy to make and delicious. You mix wet and dry ingredients, then press them into a dish. Melted chocolate on top adds a nice finish. Remember, you can personalize these bars with different flavors or toppings. They store well and can last for weeks in the fridge or even months in the freezer. Enjoy experimenting with the recipe and sharing the final treats with friends and family. This simple snack will keep you coming back for more!