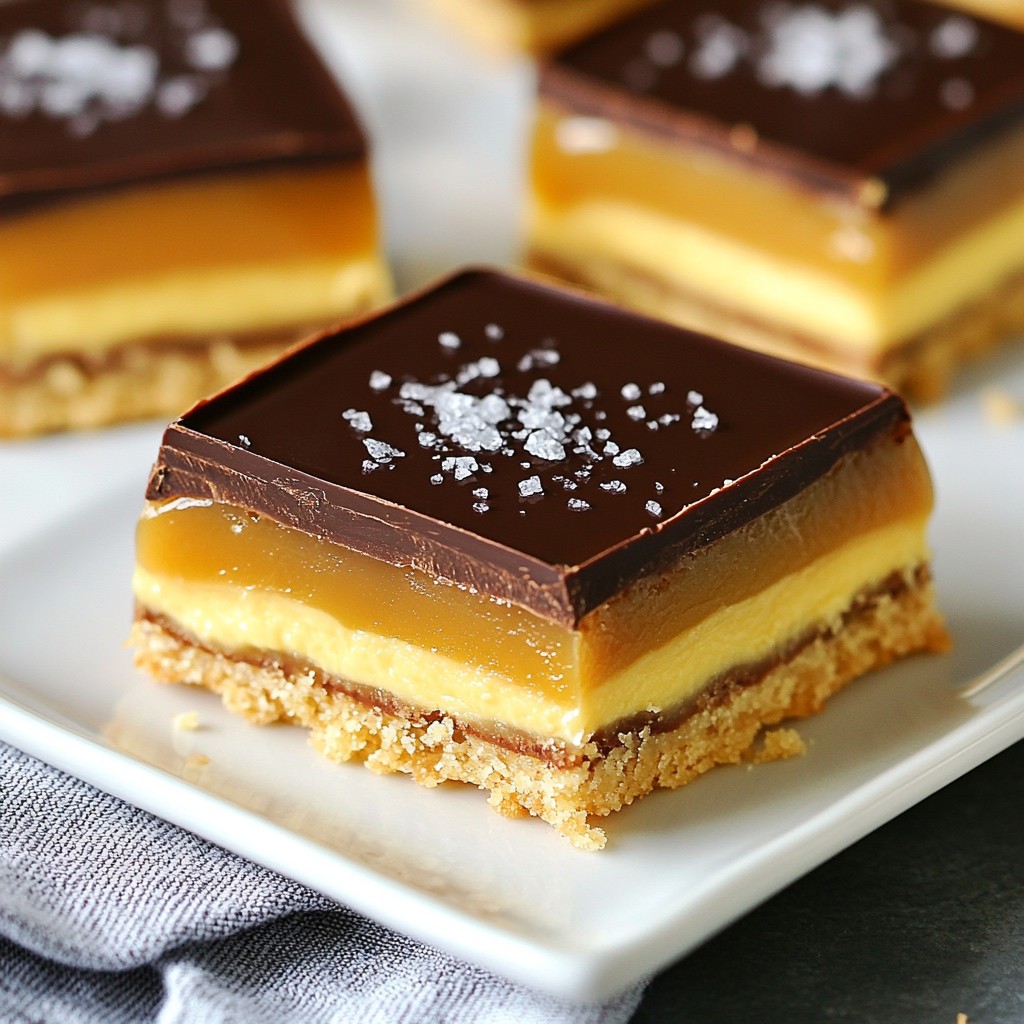
Craving a sweet treat that's easy to make? No-Bake Millionaire Shortbread is the answer! With its rich layers of biscuit, gooey caramel, and smooth chocolate, it's a delight for any occasion. You don't need to be a master baker. I'll share simple steps and tips so you can whip up this yummy dessert effortlessly. Let's dive in and get started on this delightful treat!
Why I Love This Recipe
- Decadent Layers: This dessert has a perfect combination of rich caramel, buttery biscuit, and smooth chocolate, creating a delightful texture and flavor experience.
- No-Bake Convenience: No need to turn on the oven! This recipe is simple and quick, making it ideal for warm days or when you're short on time.
- Customizable Toppings: Feel free to get creative! Add nuts, dried fruit, or different types of chocolate for a personalized touch.
- Impressive Presentation: These bars look stunning on a platter, making them perfect for parties or gatherings, sure to impress your guests!
Ingredients
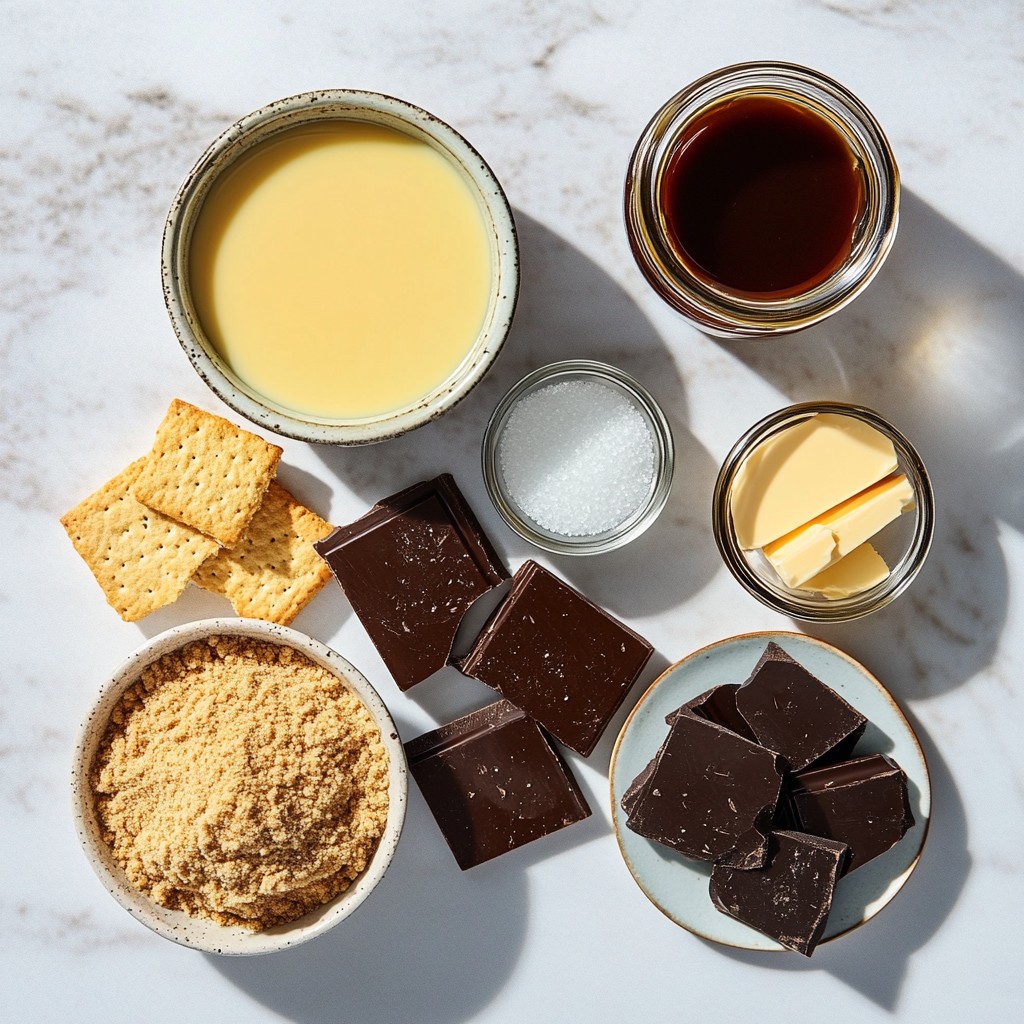
List of Ingredients for No-Bake Millionaire Shortbread
- 200g digestive biscuits, finely crushed
- 100g unsalted butter, melted
- 400g sweetened condensed milk
- 100g brown sugar
- 100g golden syrup (or dark corn syrup)
- 200g dark chocolate, coarsely chopped
- 50g unsalted butter (for chocolate topping)
- Sea salt flakes (for garnish, optional)
Ingredient Notes & Substitutions
You can swap digestive biscuits for graham crackers. They will add a different flavor but still taste great. If you want a gluten-free option, use gluten-free biscuits. For a dairy-free treat, you can find coconut condensed milk. It works well in this recipe. If you can’t find golden syrup, dark corn syrup is a good choice. It has a similar taste. For the chocolate topping, milk chocolate is a nice option if you prefer a sweeter flavor.
Suggested Tools for Preparation
- Medium mixing bowls
- Measuring cups and spoons
- Spatula
- 9x9 inch square baking pan
- Parchment paper for lining the pan
- Medium saucepan
- Heatproof bowl for melting chocolate
- Double boiler or microwave for melting
- Refrigerator for chilling
These tools help make the process smooth and fun. Having them ready makes cooking easier. You will enjoy making this treat!
Step-by-Step Instructions
Preparation of the Biscuit Base
First, gather your ingredients. You need 200g of digestive biscuits and 100g of melted unsalted butter. In a medium bowl, mix the crushed biscuits with the melted butter. Stir well until the crumbs are fully coated. This mixture creates a tasty base. Next, line a 9x9 inch baking pan with parchment paper. Pour the biscuit mix into the pan. Press it down firmly to form a solid layer. Place the pan in the fridge for about 30 minutes to chill.
Making the Caramel Layer
While the biscuit base chills, let’s make the caramel. In a medium saucepan, add 400g of sweetened condensed milk, 100g of brown sugar, and 100g of golden syrup. Heat this on medium, stirring constantly. Watch for it to bubble gently. Keep stirring for about 5 to 7 minutes until it thickens. Once thick, pour the hot caramel over the chilled biscuit base. Spread it evenly with a spatula. Allow this layer to cool. Then, put it back in the fridge for at least 1 hour to set.
Melting the Chocolate Topping
Now, it’s time to melt the chocolate. Use 200g of coarsely chopped dark chocolate and 50g of unsalted butter. You can melt them together in a heatproof bowl. A microwave works well for this. Heat in short bursts of 15 to 20 seconds, stirring in between. Keep going until the mixture is smooth and glossy.
Assembling and Setting the Layers
After the caramel has set, pour the melted chocolate over it. Use a spatula to spread it evenly. Tap the pan gently on the counter to remove any air bubbles. If you like, sprinkle sea salt flakes on top for added flavor. Return the pan to the fridge for 1 to 2 hours until the chocolate is firm. Once set, lift the shortbread out using the parchment paper. Cut into squares or bars for serving. Enjoy your rich, no-bake millionaire shortbread!
Tips & Tricks
Common Mistakes to Avoid
When making No-Bake Millionaire Shortbread, there are simple mistakes to watch for. First, do not skip chilling the biscuit base. This step helps give your shortbread a firm texture. Next, be careful not to overheat the caramel mixture. Stir constantly until it bubbles gently. If you overcook it, the caramel can become too hard. Lastly, let the chocolate cool slightly before pouring it over the caramel. This prevents the layers from mixing.
How to Perfect Your Shortbread
To achieve the best shortbread, use finely crushed biscuits. A food processor works well for this task. Ensure your butter is fully melted and properly mixed in. When pressing the biscuit mixture into the pan, use a flat-bottomed object to create a smooth surface. For the caramel, keep stirring until it thickens but does not boil. This ensures a creamy texture. Lastly, allow each layer to set completely before adding the next. This keeps the layers distinct and beautiful.
Presentation Tips for Serving
Presentation matters! For a great look, slice your shortbread into even squares. Arrange them on a decorative platter. Dust with cocoa powder or add a few sea salt flakes on top for flair. You can also serve with fresh berries or whipped cream. These additions make the dessert even more inviting. Consider using clear dessert cups to showcase the layers. This makes for a stunning visual treat at any gathering.
Pro Tips
- Use High-Quality Chocolate: For the best flavor, choose high-quality dark chocolate with at least 70% cocoa content. This will enhance the richness of your millionaire shortbread.
- Chill Between Layers: Make sure to chill each layer before adding the next. This helps to set the layers properly and prevents them from mixing together.
- Experiment with Toppings: Feel free to get creative with toppings! Try adding crushed nuts, a drizzle of caramel, or even a sprinkle of espresso powder for added flavor.
- Store Properly: Keep your millionaire shortbread in an airtight container in the refrigerator to maintain freshness. They can last up to a week, making them perfect for meal prep or entertaining.
Variations
Flavor Enhancements
You can add nuts or fruit to your Millionaire Shortbread. Chopped nuts like pecans or walnuts add a nice crunch. Dried fruits like cranberries or apricots give a sweet twist. Mix in about 100g of your favorite nuts or fruits into the biscuit base for extra flavor. This small change can take your treat to the next level!
Alternative Chocolate Options
If you prefer a different taste, try using milk chocolate or white chocolate. Milk chocolate adds a creamy sweetness. White chocolate gives a rich and smooth flavor. You can also blend chocolates for a unique topping. Just remember to adjust the butter to keep it smooth. Use 50g of butter for every 200g of chocolate.
Dietary Adjustments
For gluten-free options, use gluten-free biscuits. There are many brands available that taste great. If you want a vegan version, replace the unsalted butter with coconut oil. Use a plant-based condensed milk and dark chocolate, too. These changes keep the flavors while meeting dietary needs. Enjoy your Millionaire Shortbread with these easy swaps!
Storage Info
Best Practices for Storing No-Bake Millionaire Shortbread
To keep your no-bake millionaire shortbread fresh, store it in an airtight container. This helps prevent moisture from making it soggy. If you stack the pieces, place parchment paper between layers. This avoids sticking and makes for easy serving later.
How Long Will It Last?
When stored properly, this treat lasts about 5 to 7 days in the fridge. The chocolate and caramel layers remain tasty and firm. If you notice any change in smell or texture, it's time to toss it out.
Freezing Instructions
You can freeze the shortbread for longer storage. Cut it into squares first and wrap each piece tightly in plastic wrap. Then place them in a freezer bag or container. This way, they keep for up to 3 months. When you want to enjoy a piece, just thaw it in the fridge overnight.
FAQs
Can I use a different type of biscuit?
Yes, you can! If you want a twist, try using graham crackers or shortbread. Both options will give a nice flavor. You can also mix different biscuits for a unique taste. Just ensure they are finely crushed for the best results.
What can I substitute for sweetened condensed milk?
You can use coconut cream for a dairy-free option. Blend it with sugar to mimic the sweetness. Another choice is evaporated milk with added sugar. This gives a similar texture but with a different flavor.
How do I know when the caramel layer is ready?
The caramel is ready when it thickens slightly and bubbles gently. Stir it constantly for about 5 to 7 minutes. It should look glossy and darker in color. If it coats the back of a spoon, it’s perfect!
Can I make this recipe in advance?
Absolutely! You can prepare it a day or two ahead. Just keep it in the fridge until you’re ready to serve. This treat stays fresh and tasty, making it a great choice for parties or gatherings.
You now have all you need to make No-Bake Millionaire Shortbread. We covered ingredients, preparation steps, helpful tips, and tasty variations. Remember, using the right tools will make your work easier. Avoid common mistakes to get the best results. You can even get creative with flavors and dietary needs. Store your treats properly to enjoy them longer. Now, it’s time to bake—or no-bake! Enjoy sharing these sweet treats with friends and family.