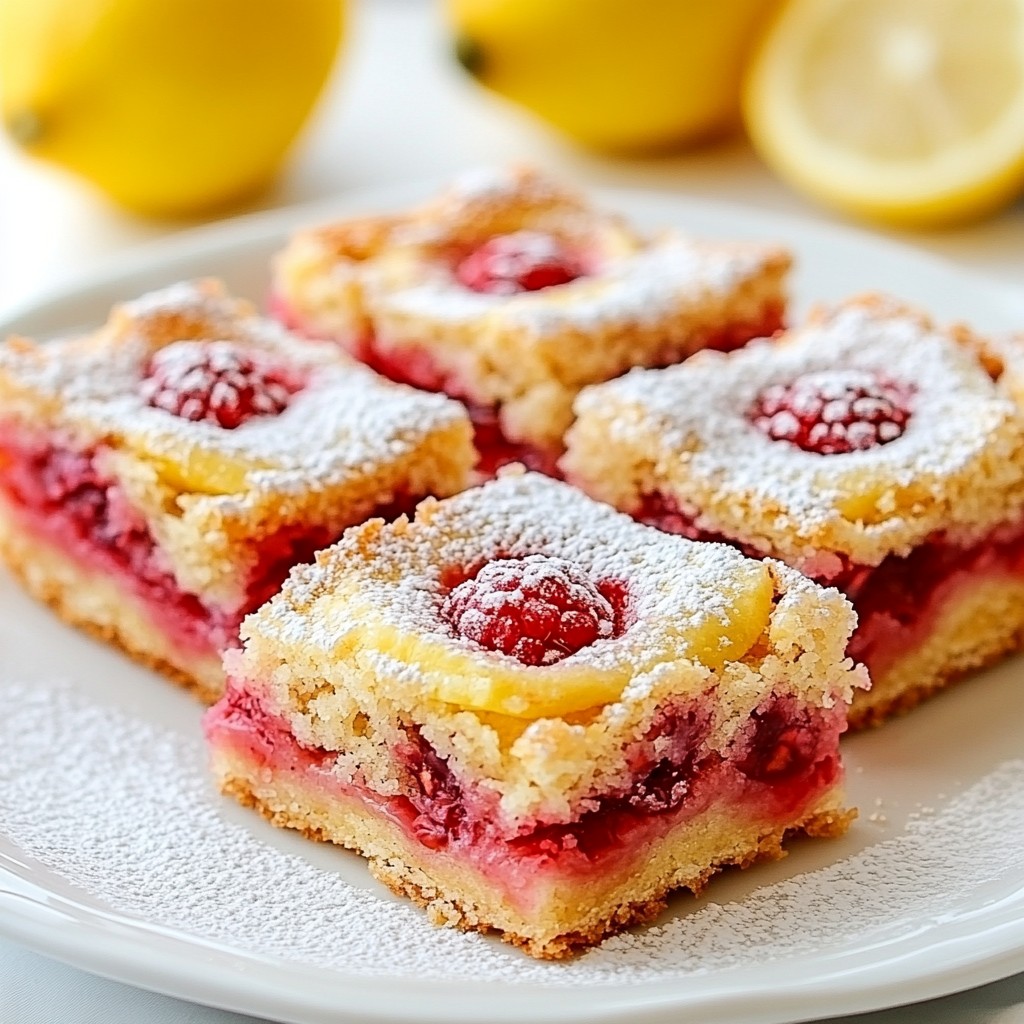
Are you ready to indulge in a sweet and tangy delight? These Raspberry Lemonade Bars are simple to make and bursting with flavor. In this post, I'll guide you through each step of creating these tasty treats, from the perfect crust to the zesty filling. Whether you're hosting a gathering or craving a snack, these bars will satisfy your taste buds. Let’s dive into the delicious world of raspberry lemonade goodness!
Why I Love This Recipe
- Bright and Refreshing Flavor: The combination of tart lemon and sweet raspberries creates a delightful balance that is perfect for any occasion.
- Easy to Make: This recipe requires simple ingredients and straightforward steps, making it accessible even for beginner bakers.
- Perfect for Sharing: These bars can easily be cut into squares, making them ideal for potlucks, picnics, or just sharing with friends and family.
- Charming Presentation: With a dusting of powdered sugar and fresh garnishes, these bars not only taste amazing but also look beautiful on any dessert table.
Ingredients
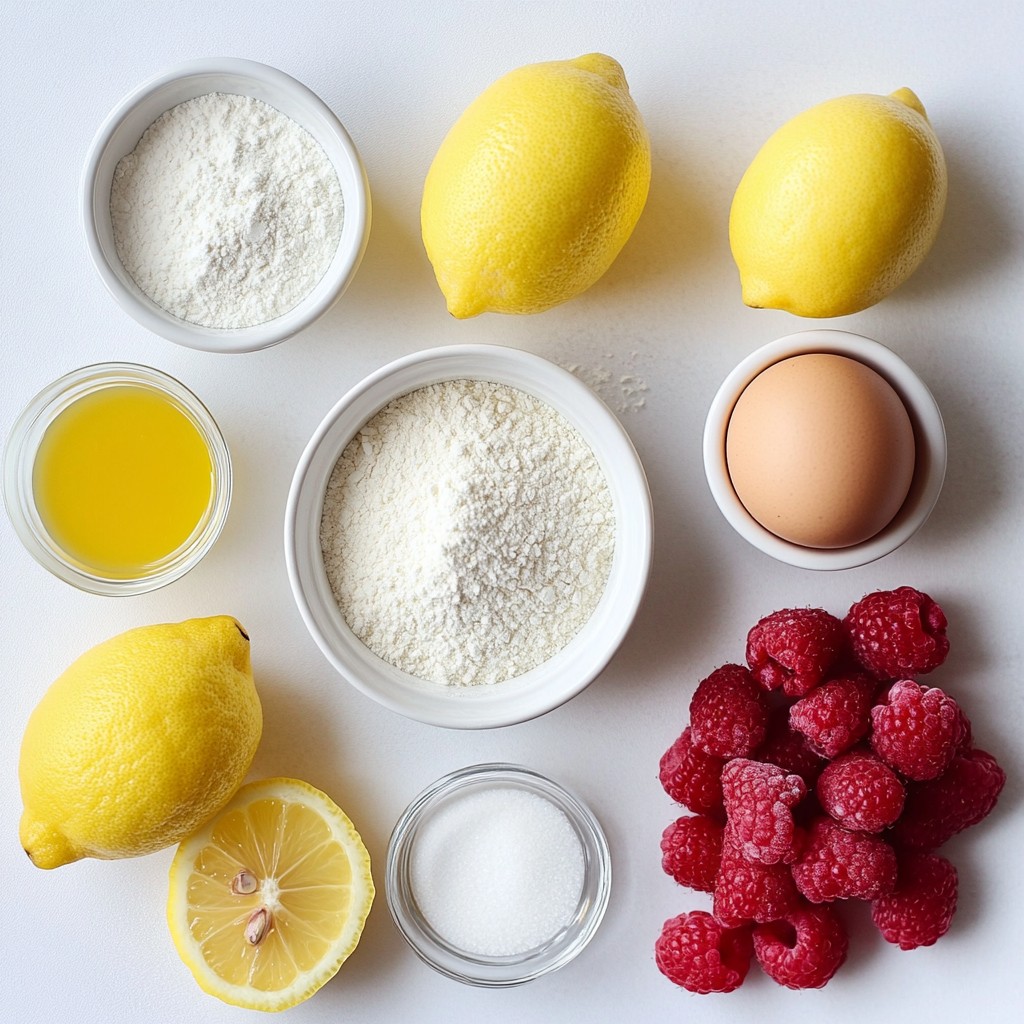
List of Ingredients for Raspberry Lemonade Bars
- 1 cup all-purpose flour
- 1/4 cup powdered sugar
- 1/2 cup unsalted butter, softened at room temperature
- 2 large eggs, at room temperature
- 1 cup granulated sugar
- 1/2 cup freshly squeezed lemon juice (about 2-3 medium-sized lemons)
- 1 teaspoon fresh lemon zest
- 1/2 cup fresh raspberries (or frozen raspberries, thawed)
- 1 tablespoon cornstarch
- 1/4 teaspoon salt
- Additional powdered sugar for dusting
Key Ingredients and Their Roles
Each ingredient plays a special part in making these bars. The all-purpose flour forms the crust. It gives a sturdy base for the bars. Powdered sugar sweetens the crust and helps it crumble nicely. Unsalted butter adds richness and flavor to the crust, making it soft.
Eggs bind the filling. They help it set and add a nice texture. Granulated sugar sweetens the filling. It balances the tartness of the lemon. Fresh lemon juice gives the filling its bright flavor. The lemon zest adds a punch of citrus aroma.
Fresh raspberries bring a juicy burst of flavor. They make the bars colorful and add a tangy twist. Cornstarch thickens the filling, ensuring it sets well. Salt enhances all the flavors, making each bite delicious.
Optional Ingredients for Added Flavor
You can play around with flavors! Adding a splash of vanilla extract can deepen the taste. A bit of almond extract offers a nutty note. You could also mix in other berries, like blueberries or strawberries, for a fun twist. Each option adds a unique touch, so feel free to experiment!
Step-by-Step Instructions
Preparation of the Crust
To start, preheat your oven to 350°F (175°C). Next, grab an 8x8 inch baking dish. Line it with parchment paper, leaving some paper hanging over the sides. This helps you lift the bars out later.
In a medium bowl, mix 1 cup of all-purpose flour and 1/4 cup of powdered sugar. Then, add 1/2 cup of softened unsalted butter. Use a fork or pastry cutter to blend until the mixture looks crumbly, like wet sand.
Now, press this mixture firmly into the bottom of your baking dish. It should form an even layer. Bake for 15-20 minutes, or until the edges turn a light golden color. Once done, take it out and let it cool slightly.
Making the Lemon-Raspberry Filling
While your crust cools, it’s time to make the filling. In a separate bowl, whisk together 2 large eggs, 1 cup of granulated sugar, 1/2 cup of freshly squeezed lemon juice, and 1 teaspoon of lemon zest. Also, add 1 tablespoon of cornstarch and 1/4 teaspoon of salt. Mix until it is smooth.
Now, gently fold in 1/2 cup of fresh (or thawed) raspberries. Be careful not to mash them too much. You want to keep their shape while mixing them into the lemon mixture.
Baking and Cooling Instructions
Pour the lemon-raspberry filling over the cooled crust. Spread it evenly across the top. Then, place the dish back in the oven. Bake for an additional 20-25 minutes. The filling should be set but still jiggle slightly in the center when shaken gently.
After baking, remove the dish from the oven. Let it cool completely at room temperature. Then, refrigerate the bars for at least 2 hours. This helps them firm up.
When the bars are ready, lift them out using the overhanging parchment paper. Cut into neat squares with a sharp knife. Finally, dust the top with extra powdered sugar for a pretty finish before serving.
Tips & Tricks
How to Achieve the Perfect Texture
To get the best texture, focus on the crust first. Use softened butter. This helps the crust blend well. Mix flour and powdered sugar well. When you press the crust into the pan, do it firmly. This makes it hold together. Bake it until golden brown. A firm crust supports the soft filling.
For the filling, whisk the eggs and sugar until smooth. The lemon juice adds a tangy flavor. Lemon zest gives extra freshness. When mixing in raspberries, fold gently. You want them whole, not mushy. This keeps the bars looking pretty. Bake until the filling is set but still has a slight jiggle. This gives a soft, creamy bite.
Common Mistakes to Avoid
One common mistake is overbaking the crust. If it gets too dark, it will taste bitter. Watch it closely; golden edges are key. Another mistake is using too much lemon juice. This can make the filling too runny. Stick to half a cup for the right balance.
Don't skip chilling the bars after baking. This step is crucial for the right texture. Cutting them too soon can make a mess. Lastly, avoid using frozen raspberries without thawing. They can release too much water and ruin the filling.
Serving Suggestions for Raspberry Lemonade Bars
Serve these bars chilled for the best taste. Place them on a colorful platter. Garnish with fresh raspberries and lemon slices for a fun look. This adds color and makes them eye-catching. You can also dust each bar with powdered sugar. This gives a sweet touch and a nice finish.
For a fun twist, pair them with a scoop of vanilla ice cream. The ice cream's creaminess complements the tartness of the bars. Enjoy them at parties, picnics, or as a sweet treat after dinner.
Pro Tips
- Use Fresh Lemons: For the best flavor, always opt for fresh lemons when making the filling. The zest and juice from fresh lemons provide a vibrant taste that enhances the overall flavor of the bars.
- Chill Before Serving: Allowing the bars to chill in the refrigerator for at least 2 hours not only helps them firm up but also allows the flavors to meld together beautifully for a more delicious treat.
- Don’t Overmix the Raspberries: When folding in the raspberries, be gentle to maintain their shape. Overmixing can lead to a mushy filling, which can affect the texture of your bars.
- Perfect Cutting Technique: For clean cuts, use a sharp knife and wipe it with a damp cloth between cuts. This prevents the bars from sticking to the knife, ensuring neat squares every time.
Variations
Gluten-Free Raspberry Lemonade Bars
You can easily make gluten-free raspberry lemonade bars. Just swap the all-purpose flour for a gluten-free blend. Many brands offer good options that mimic regular flour. Make sure to check that your baking powder is gluten-free too. The taste and texture remain delightful, ensuring everyone enjoys this treat.
Using Different Berries
Raspberry lemonade bars are flexible. You can use other berries if you wish. Blueberries, strawberries, or blackberries make great substitutes. They add unique flavors and colors. Just remember to adjust the sugar if your chosen berries are sweeter or tarter than raspberries. This keeps the balance just right.
Incorporating Other Citrus Flavors
Why stop at lemon? You can mix in other citrus flavors. Try lime or orange juice for a twist. They bring a fresh zing to the bars. You can even blend citrus juices for a more complex taste. Just keep the lemon zest for that classic tartness. Experimenting like this makes each batch special.
Storage Info
How to Store Raspberry Lemonade Bars
Store your Raspberry Lemonade Bars in an airtight container. Keep them in the fridge. This helps them stay fresh and tasty. The bars can last up to five days when stored properly. If you notice any moisture, place a paper towel in the container to absorb it. This way, your bars stay firm and flavorful.
Freezing Instructions for Long-Term Storage
To freeze Raspberry Lemonade Bars, first cut them into squares. Wrap each square tightly in plastic wrap. Then place them in a freezer-safe bag or container. Label the bag with the date. These bars can be frozen for up to three months. When you want to enjoy them, simply thaw in the fridge overnight.
Best Ways to Reheat or Refresh the Bars
To refresh your Raspberry Lemonade Bars, remove them from the fridge. Let them sit at room temperature for about 10 minutes. This will bring back their fresh taste. If you prefer, you can warm them slightly in the oven. Preheat the oven to 300°F (150°C) and warm the bars for about five minutes. Dust with powdered sugar again for a nice touch. Enjoy your sweet treat!
FAQs
Can I use bottled lemon juice instead of fresh?
Yes, you can use bottled lemon juice. It works, but fresh juice tastes better. Fresh lemons give your bars a bright, zesty flavor. If you use bottled juice, check for added sugars or preservatives. These can change the taste and sweetness of your bars.
How long do the bars last in the fridge?
These raspberry lemonade bars last about five days in the fridge. Store them in an airtight container. If you want them to stay fresh longer, you can freeze them. They can last up to three months in the freezer. Just thaw them in the fridge before serving.
Can I adjust the sweetness of the filling?
Yes, you can adjust the sweetness. If you like it sweeter, add more granulated sugar. If you prefer less sweetness, reduce the sugar. Taste the filling before baking to find the right balance. Remember, the raspberries also add natural sweetness to the bars.
Raspberry lemonade bars blend sweet and tart flavors in a tasty treat. You learned about the key ingredients, from the crust to the filling. I shared tips for getting the best texture and avoiding common mistakes. Plus, you saw how to store these bars for later use. With variations like gluten-free options and different fruit flavors, you can make this recipe your own. Enjoy creating and sharing these delicious bars with friends and family!