If you’re craving a sweet and salty snack, look no further! Salted Caramel Rice Krispie Treats combine crispy cereal with a rich caramel flavor. This fun recipe is easy to make, and I’m here to guide you through each step. With just a few simple ingredients and the right tips, you’ll create a treat that’s hard to resist. Let’s dive in and make some magic in the kitchen!
Why I Love This Recipe
- Decadent Flavor: The combination of salted caramel and crispy cereal creates an irresistible treat that satisfies sweet cravings.
- Easy to Make: With just a few simple steps and minimal ingredients, these treats can be whipped up in no time.
- Customizable: Feel free to add your favorite toppings or mix-ins, like nuts or different types of chocolate, to make them your own.
- Perfect for Sharing: These treats are great for parties, gatherings, or just as a sweet surprise for friends and family.
Ingredients
Complete List of Ingredients
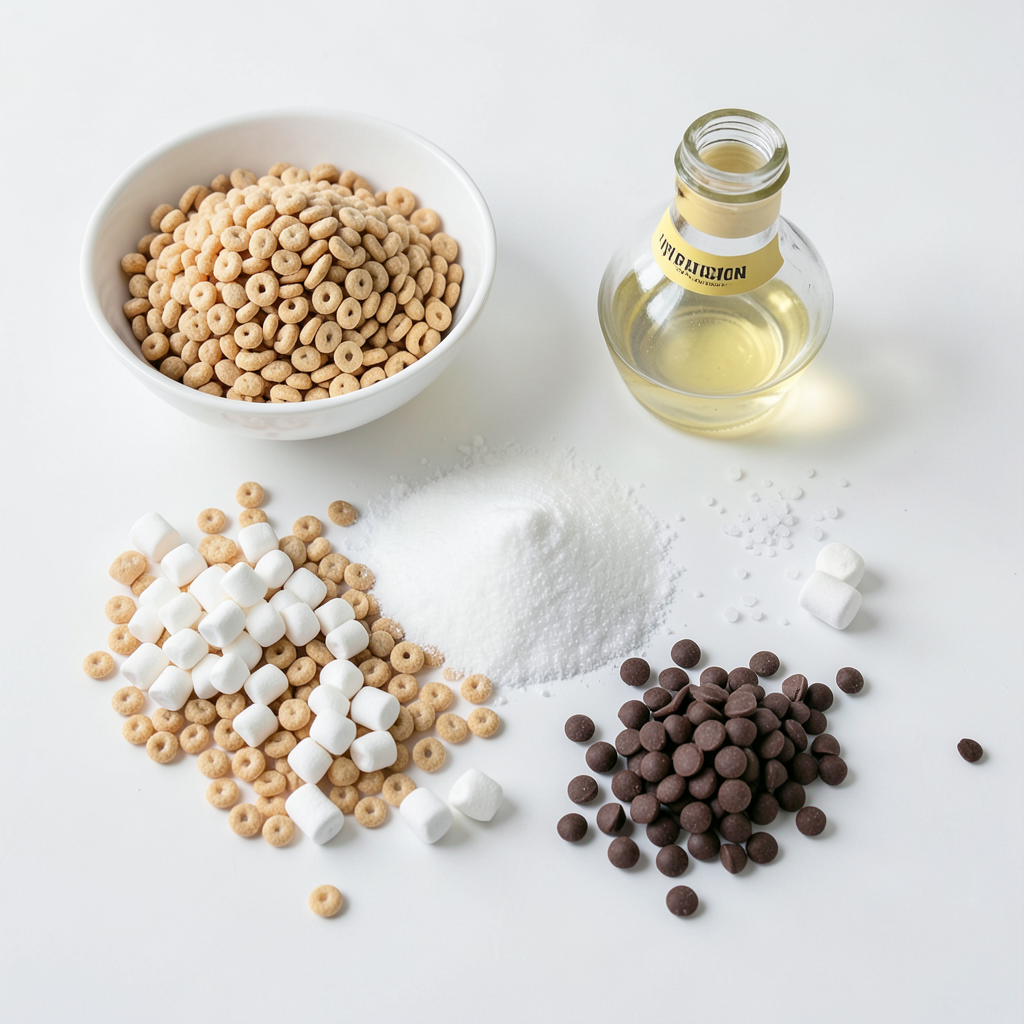
To make Salted Caramel Rice Krispie Treats, you need:
- 6 cups Rice Krispies cereal
- 1 cup mini marshmallows
- 1 cup granulated sugar
- 1/2 cup unsalted butter
- 1/2 cup light corn syrup
- 1 teaspoon vanilla extract
- 1/2 teaspoon sea salt (plus extra for topping)
- 1/2 cup semi-sweet chocolate chips (optional, for drizzling)
Importance of Fresh Ingredients
Using fresh ingredients makes a big difference. Fresh Rice Krispies give the best crunch. Fresh butter and sugar help the caramel taste rich and full. Using good quality sea salt enhances the flavor. Always check your ingredients for the best taste and texture.
Optional Ingredients for Extra Flavor
You can add more fun with optional ingredients. If you love chocolate, melt some semi-sweet chocolate chips for drizzling. This adds a sweet touch. You can also mix in nuts or dried fruits for extra texture. Adding a splash of almond extract can give a nice twist too.
Step-by-Step Instructions
Preparation of the Baking Dish
Start by greasing a 9x13-inch baking dish. Use unsalted butter or cooking spray. This step is key to keep the treats from sticking to the pan. Set the dish aside for now.
Making the Caramel Sauce
In a medium saucepan, combine granulated sugar, light corn syrup, and unsalted butter. Place the saucepan over medium heat. Stir the mixture continuously until it reaches a gentle boil. When it starts boiling, stop stirring. Let it bubble for exactly 2 minutes. Then, take the saucepan off the heat. Carefully mix in mini marshmallows, vanilla extract, and sea salt until it becomes smooth.
Combining the Caramel with Cereal
In a large mixing bowl, pour the warm caramel sauce over the Rice Krispies cereal. Use a spatula to gently fold the cereal into the caramel. Make sure every piece of cereal gets coated. Be gentle to avoid crushing the cereal.
Pressing the Mixture into the Pan
Immediately pour the coated cereal mixture into the greased baking dish. Use a buttered spatula or your hands, lightly greased, to press the mixture evenly into the pan. Do not pack it too tightly; this keeps the treats chewy.
Adding Chocolate Drizzle and Toppings
If you want to add chocolate, melt semi-sweet chocolate chips in the microwave. Heat them in 30-second intervals, stirring after each, until smooth. Drizzle the melted chocolate over the pressed treats. Then, sprinkle a pinch of extra sea salt to enhance the flavor.
Cooling and Cutting the Treats
Let the treats cool completely at room temperature. This should take about 30 to 45 minutes. Once they are set, cut them into squares or rectangles for serving. Enjoy your Salted Caramel Rice Krispie Treats as a snack or dessert!
Tips & Tricks
How to Ensure Perfectly Chewy Treats
To keep your treats chewy, do not pack them tightly in the pan. Use a buttered spatula to gently press the mixture. This helps the treats hold their shape but not become hard.
Best Practices for Melting Chocolate
When melting chocolate, use a microwave-safe bowl. Heat the chocolate chips in 30-second bursts. Stir after each interval until smooth. This method prevents burning and helps maintain a nice shine.
Preventing the Mixture from Sticking
Greasing your baking dish is key. Use unsalted butter or cooking spray. Make sure all sides are well-coated. You can also grease your hands when pressing the mixture into the pan. This helps avoid sticky fingers.
Presentation Tips for Serving
For a beautiful presentation, cut the treats into even squares. Place them on a colorful platter. You can garnish with mini marshmallows and a sprinkle of sea salt. This adds flair and makes them look appetizing.
Pro Tips
- Use Fresh Ingredients: Always opt for fresh marshmallows and butter for the best flavor and texture. Stale ingredients can lead to a less satisfying treat.
- Control the Heat: When making the caramel, ensure the heat is at medium to avoid burning the sugar. Stirring continuously can help prevent it from sticking to the bottom of the pan.
- Customize Your Treats: Feel free to mix in additional ingredients like nuts, pretzels, or dried fruits to add variety and texture to your Rice Krispie treats.
- Storage Tips: Store your treats in an airtight container at room temperature to maintain their freshness. If they become too hard, gently warm them in the microwave for a few seconds before serving.
Variations
Nutty Twist: Adding Nuts or Peanut Butter
You can change your Rice Krispie treats by adding nuts or peanut butter. Chopped nuts like almonds or pecans add a crunchy texture. If you love peanut butter, mix in half a cup of smooth peanut butter with the caramel. This adds a rich flavor that pairs well with the salted caramel.
Flavor Infusions: Using Different Extracts
You can also change the taste by using different extracts. Instead of vanilla, try almond or coconut extract. These flavors can give your treats a new twist. Just add one teaspoon of your chosen extract to the caramel mixture for a fun surprise.
Seasonal Variations: Adding Dried Fruits or Sprinkles
Seasonal changes can inspire fun mix-ins. You might add dried cranberries or chopped apricots for a fruity touch. For holidays, colorful sprinkles can brighten your treats. These small changes can make your Salted Caramel Rice Krispie Treats stand out at any gathering.
Storage Info
Best Practices for Storing Leftovers
To keep your Salted Caramel Rice Krispie Treats fresh, store them in an airtight container. This helps keep them from drying out. Layer parchment paper between the treats to prevent sticking. Make sure to keep them at room temperature for the best taste.
How to Keep Treats Fresh for Longer
If you want your treats to last longer, store them away from heat and moisture. A cool, dry place works best. Avoid the fridge, as it can make them hard. Instead, place them in a cupboard or pantry where they can stay soft and chewy.
Freezing Options for Extended Shelf Life
You can freeze these treats for up to three months. Wrap them tightly in plastic wrap, then place them in a freezer-safe bag. When you're ready to eat, thaw them at room temperature. They will taste just as good as fresh!
FAQs
Can I make these Salted Caramel Rice Krispie Treats ahead of time?
Yes, you can make these treats a day in advance. Just store them in an airtight container at room temperature. This keeps them fresh and tasty. The flavors might even deepen overnight!
Can I substitute other cereals?
Absolutely! You can use any puffed cereal. Cheerios or Corn Pops work well too. Just remember that the texture and taste may change a bit. Experiment and find your favorite mix!
How do I make these treats gluten-free?
To make these treats gluten-free, use gluten-free Rice Krispies. They are widely available in most grocery stores. Just check the label to be sure. This way, everyone can enjoy these delicious snacks!
What can I use instead of semi-sweet chocolate chips?
If you want a different flavor, try white chocolate chips or butterscotch chips. You could even skip the chocolate altogether! The salted caramel flavor alone is still amazing.
This post covered the key parts of making Salted Caramel Rice Krispie Treats. We talked about the best fresh ingredients and optional flavors to enhance taste. The step-by-step guide ensured you can make these treats easily. I shared tips for chewy texture, chocolate melting, and presentation. Don't forget the fun variations to keep things interesting. Lastly, I provided storage advice so your treats stay fresh longer. Enjoy making and sharing these delicious treats!